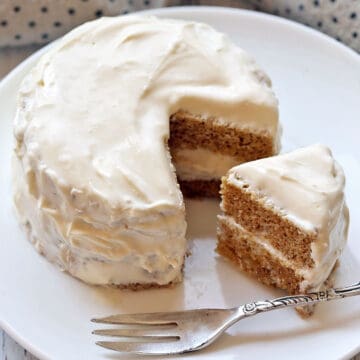
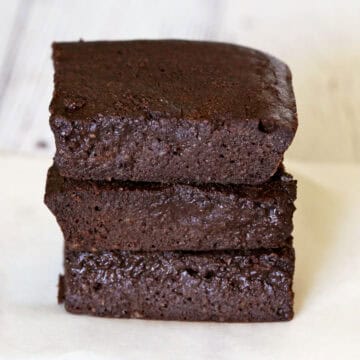
This homemade frozen yogurt is creamy, tangy, and honey-sweetened - a refreshing treat you can feel good about. Serve it as soft-serve or freeze it until it's scoopable.
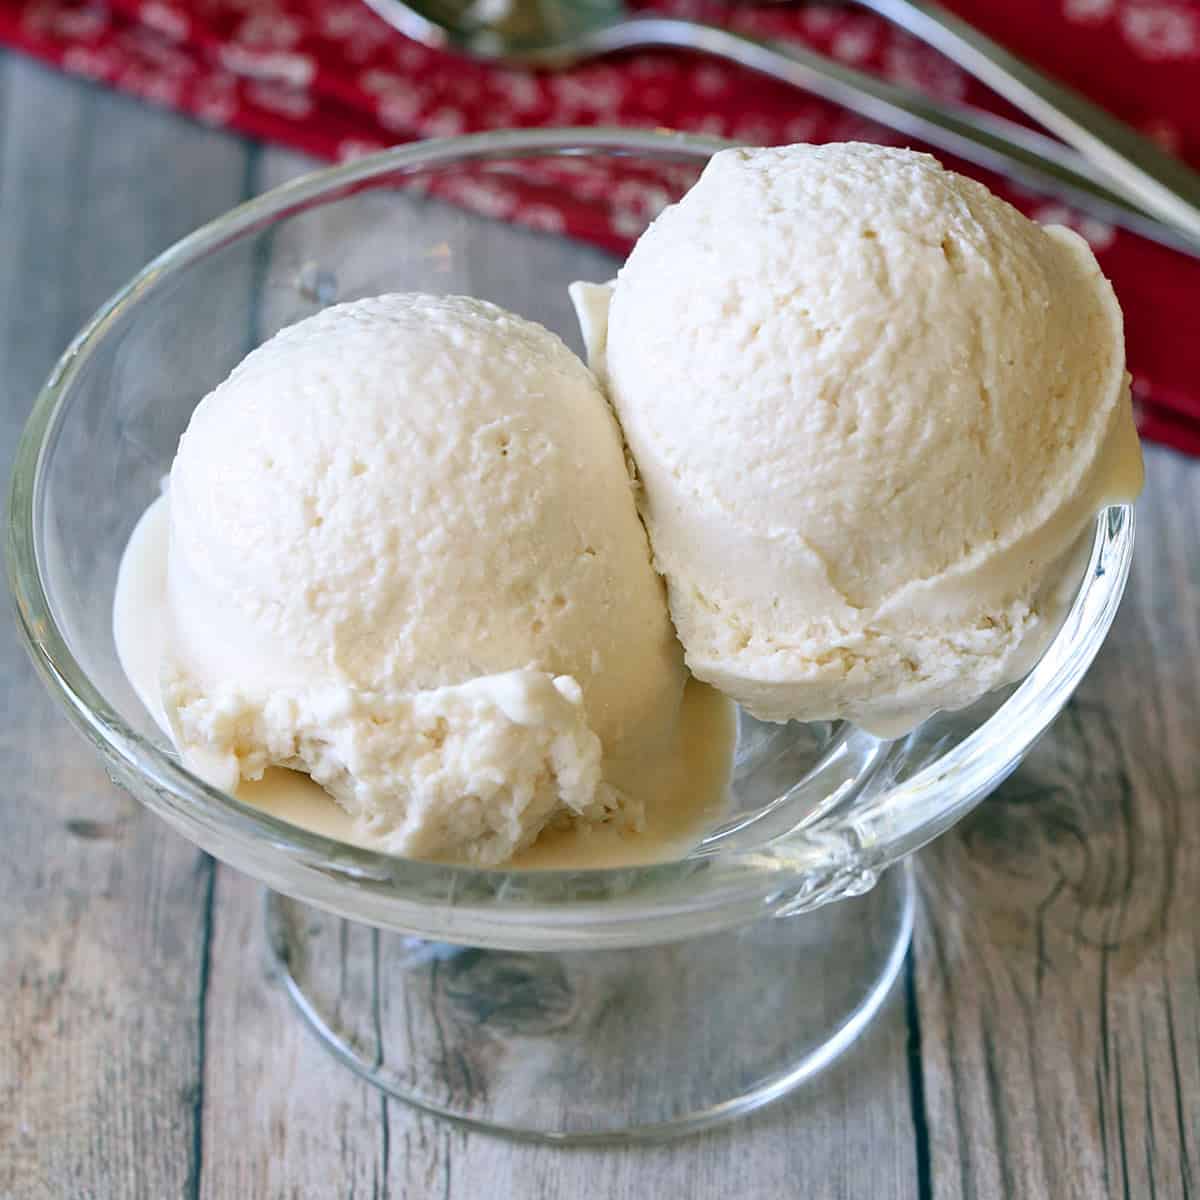
Making frozen yogurt at home is surprisingly easy. With just a few simple ingredients and no ice cream maker, you can create a cool, creamy dessert. Unlike store-bought versions that often contain added sugars and fillers, this recipe uses Greek yogurt, honey, and vanilla. It's the perfect way to satisfy your sweet tooth!
Ingredients
See the recipe card for exact measurements. Here are my comments on the ingredients.
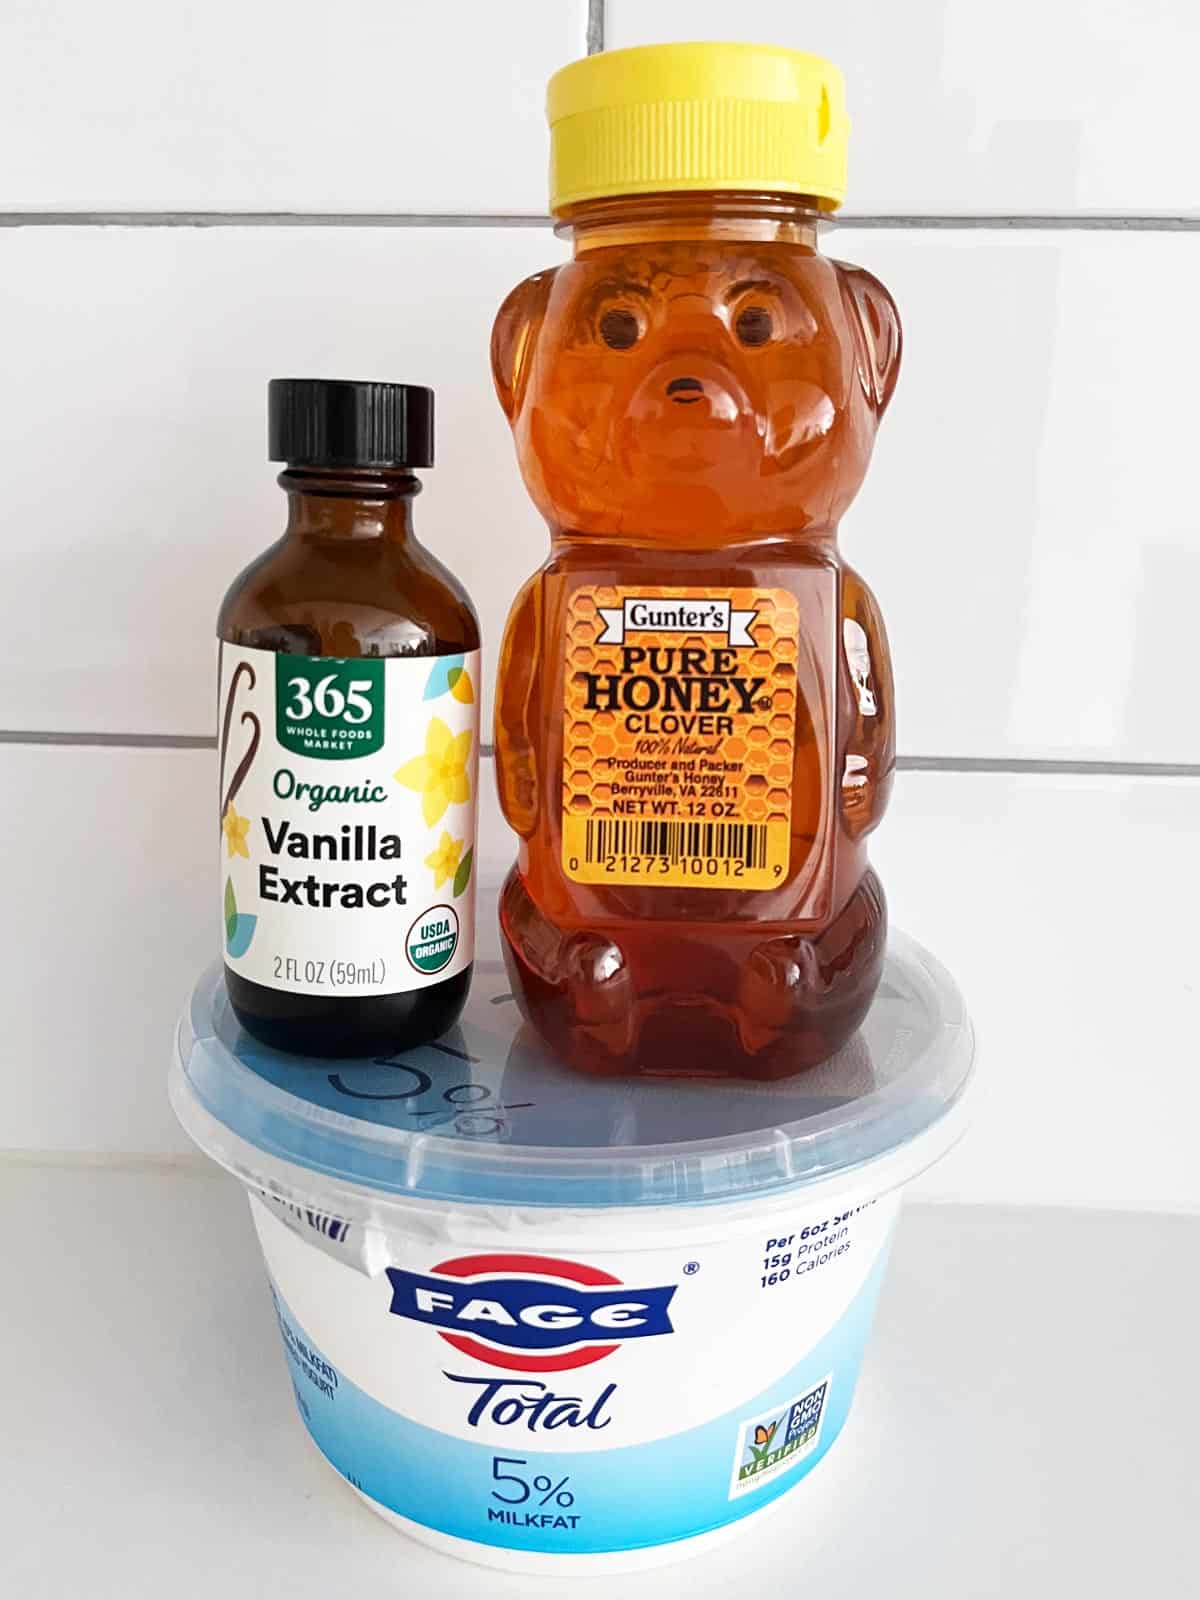
- Greek yogurt: I use plain whole-milk yogurt. While regular yogurt is delicious, you should definitely use Greek yogurt in this recipe. Plain, full-fat skyr will also work.
- Sweetener: I like to use honey because I love its flavor. You can use a granulated sweetener if you prefer - sugar or a sugar-free alternative.
- Vanilla extract: Use high-quality pure vanilla for the best results.
Flavor Variations
The basic recipe is simple: it contains yogurt, honey, and vanilla extract. You can add fruit-fresh or frozen, pureed or chunky. I like to completely puree the fruit in the food processor with the yogurt, honey, and vanilla. But you can blend the yogurt and honey first, then add the fruit and process briefly, leaving fruit chunks in your yogurt.
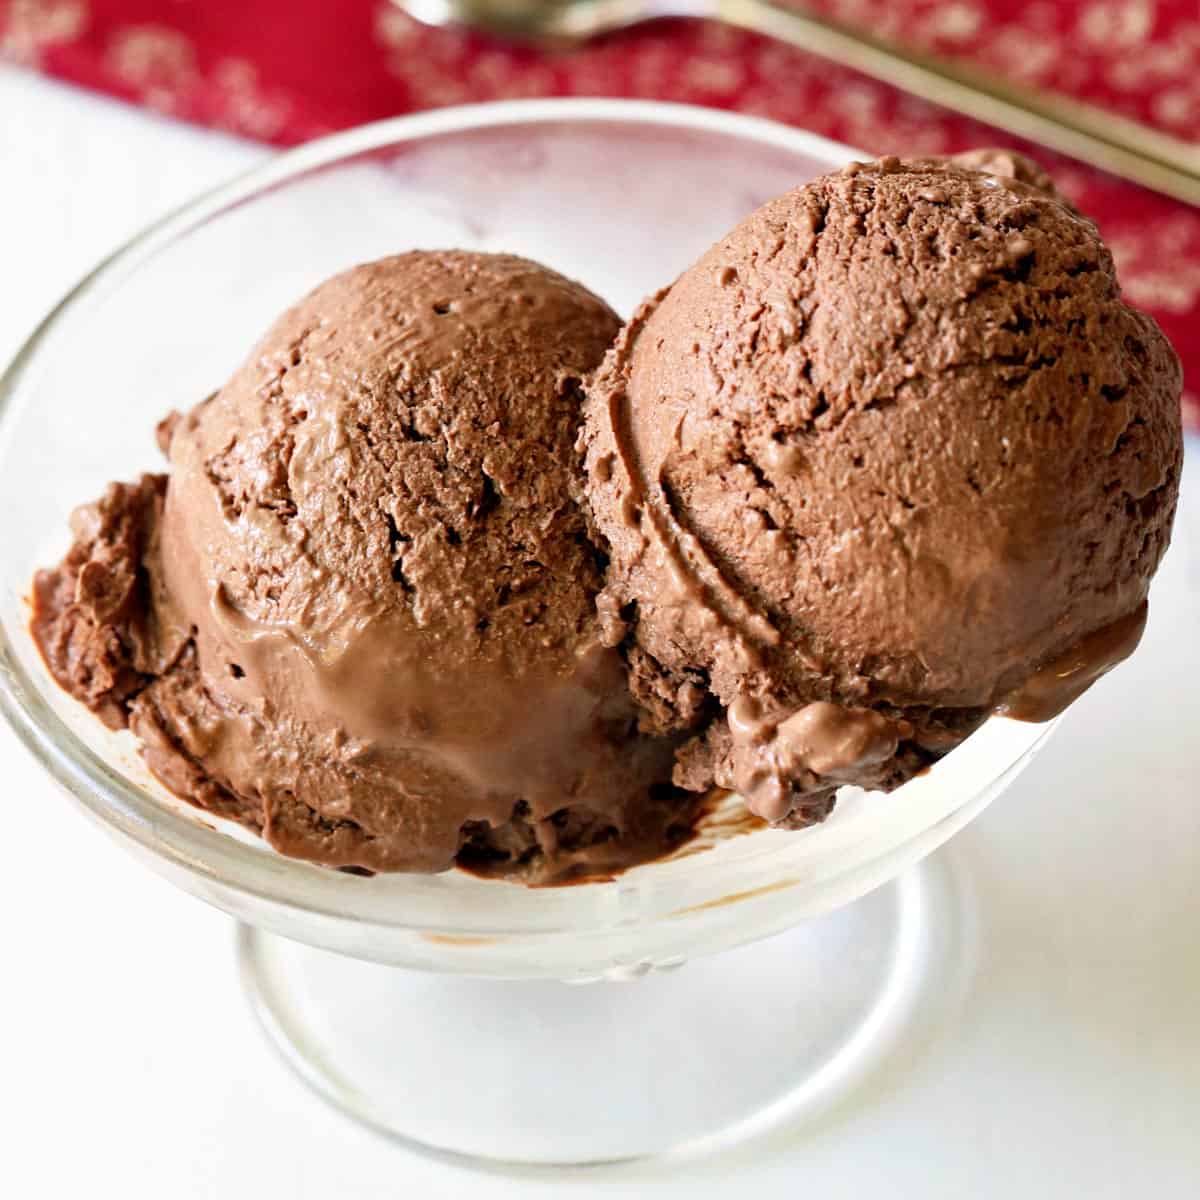
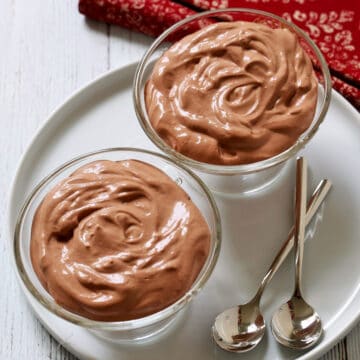
The possibilities are endless, but the flavors I make most often, in addition to this one, are mango, raspberry, and chocolate. The photos below show all four flavors I make, and the recipe card's notes section includes the instructions for the variations.


Instructions
Making frozen yogurt without an ice cream maker is easy, although it's a bit time-consuming. The detailed instructions and step-by-step photos are included in the recipe card. Here's a quick overview.
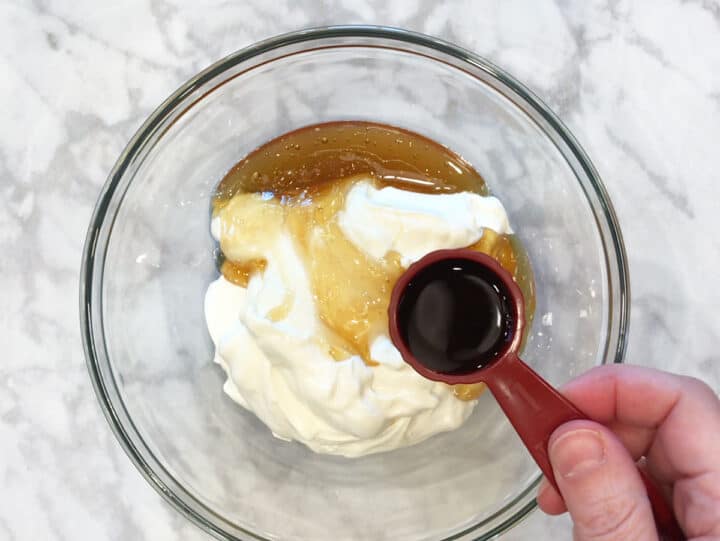
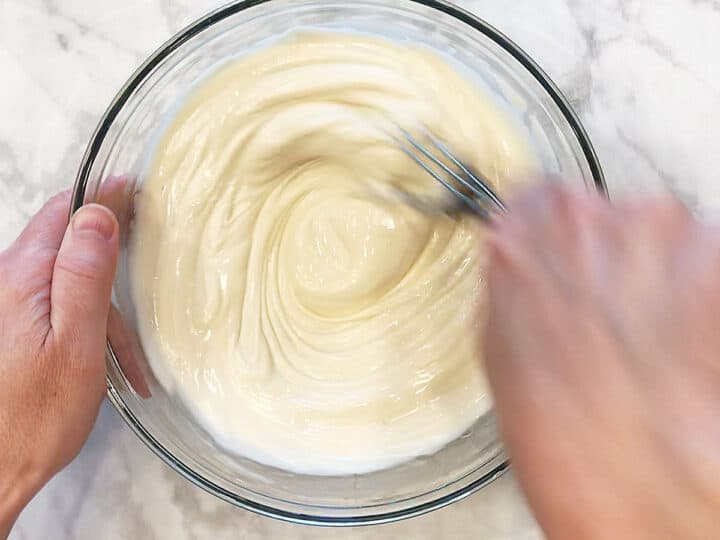
Combine the ingredients. You can use a food processor or simply place the ingredients in a bowl and use a hand whisk. You'll need to whisk for about three minutes to get the mixture to be fluffy.

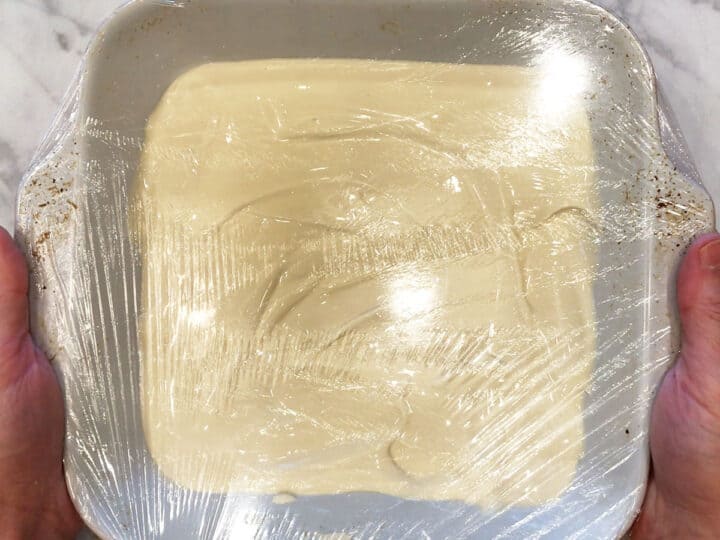
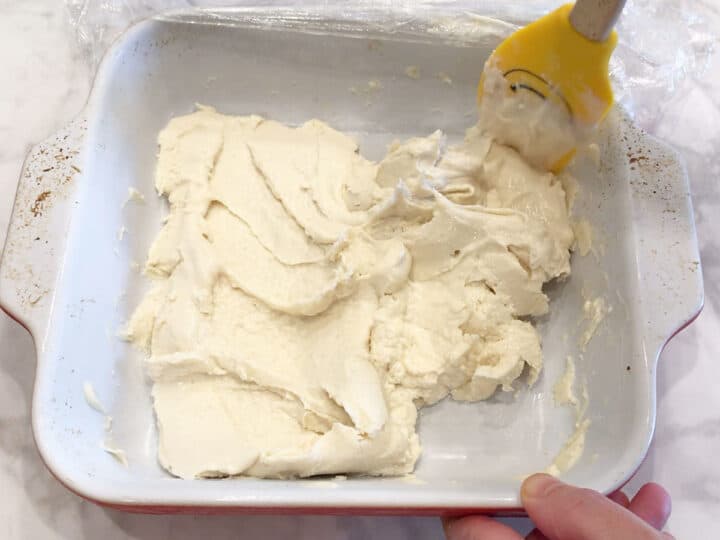
Transfer the mixture to a baking dish, cover, and freeze for 45 minutes. Remove the pan from the freezer and use a rubber spatula to give the mixture a good stir. Cover again and continue freezing for 2 more hours, stirring every 30 minutes.

The yogurt should now have a soft-serve consistency. You can go ahead and enjoy it. At this point, I usually transfer it to a smaller container (this makes scooping easier), cover it, and freeze it for one more hour to achieve a scoopable consistency.

This is a great recipe that I can modify with frozen strawberries or other ingredients. Because I have to watch my glucose levels, I added ⅓ cup of monkfruit sweetener, though honey sounds very good.
Kristin
Read more comments
Recipe Tips
- Sweetness is very personal. If you like things a little sweeter, don't hesitate to increase the honey (or your preferred sweetener) by 1-2 tablespoons. Taste the mixture before freezing and adjust according to your taste.
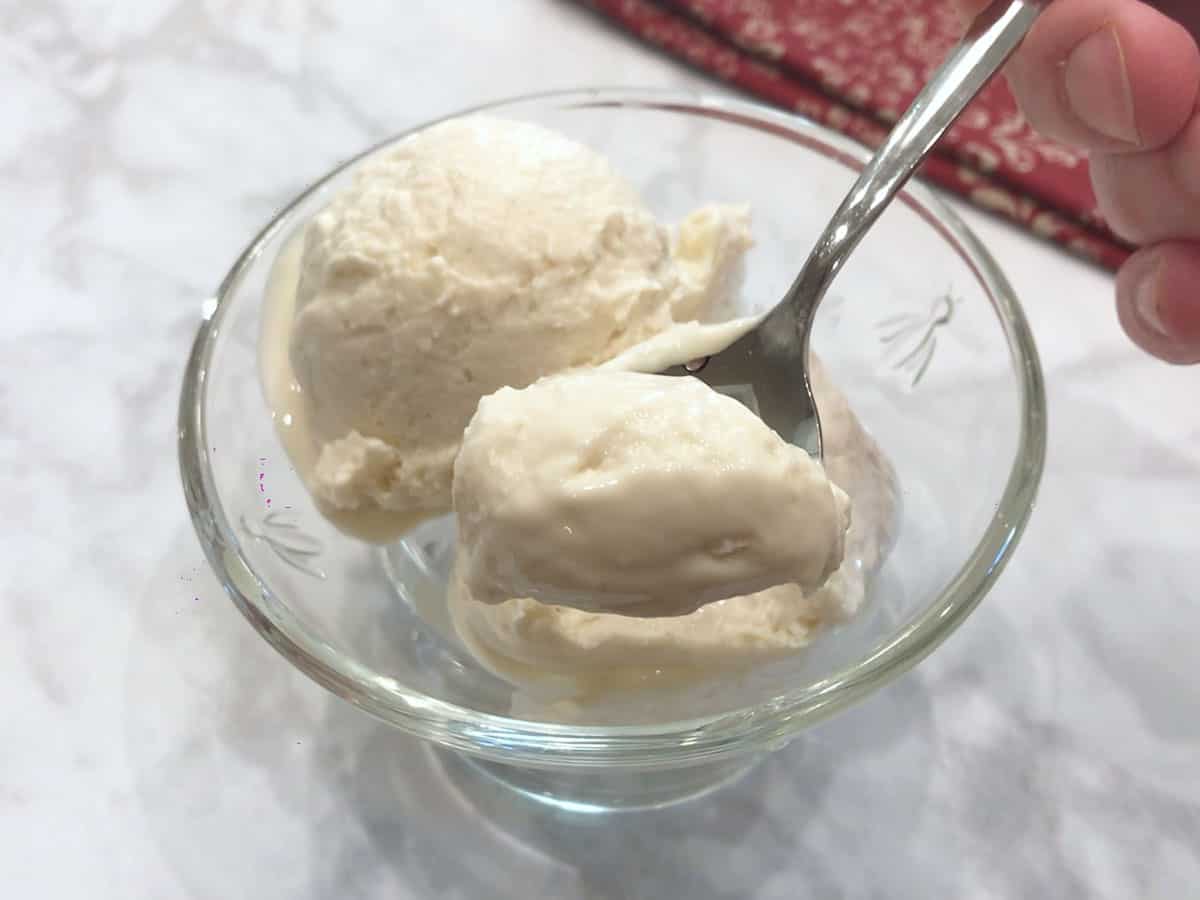
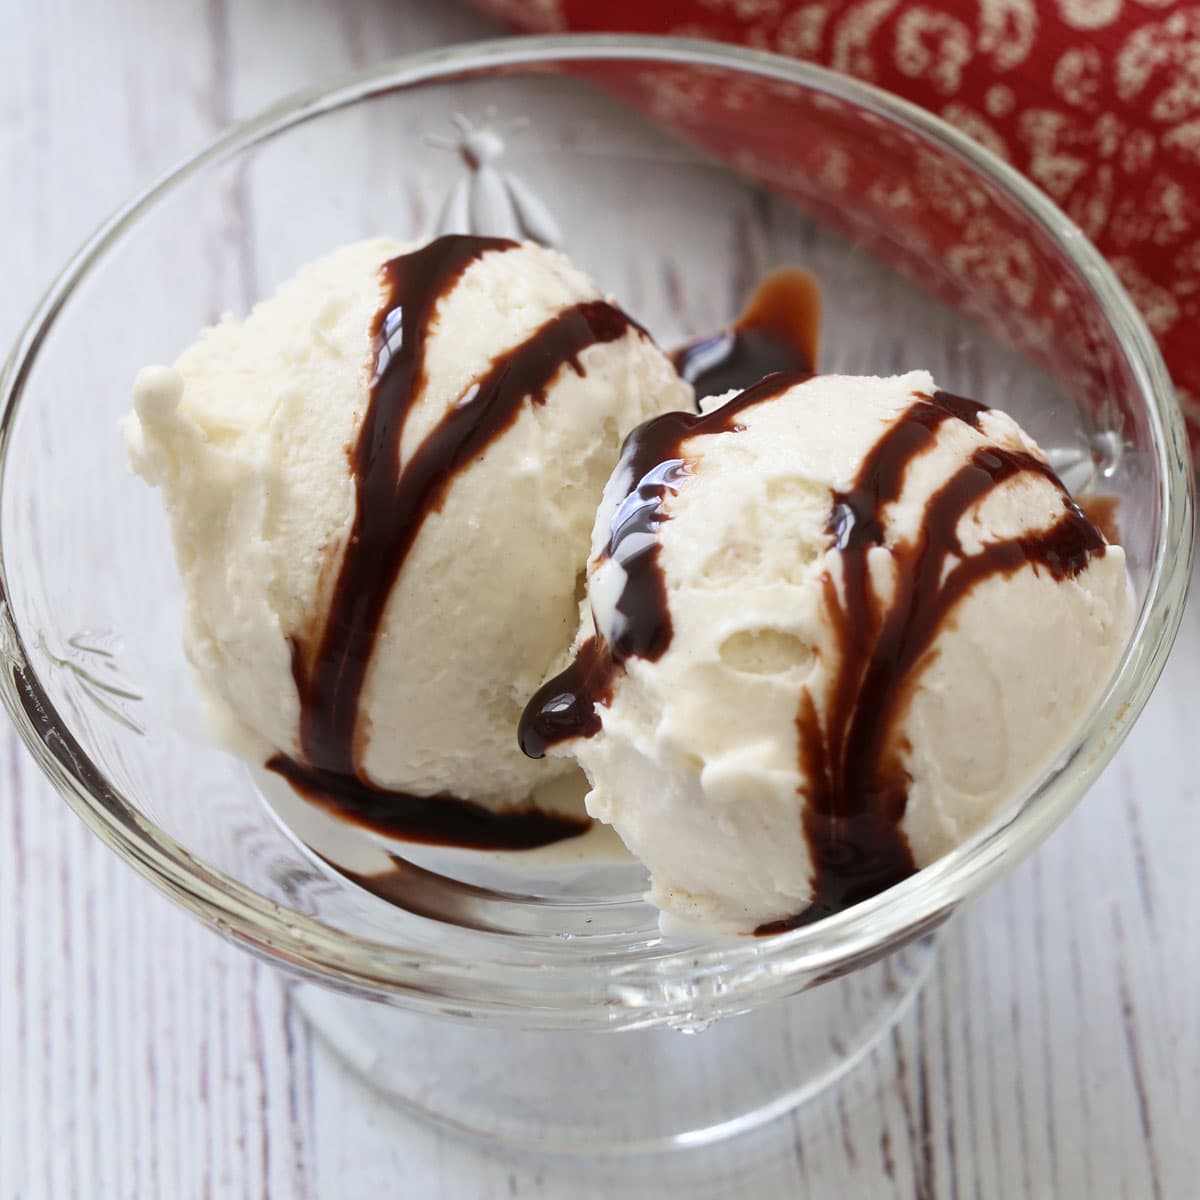
- I'm often asked if one can simply mix the ingredients and freeze them without stirring every 30 minutes. The answer is no. To achieve the creamy consistency shown in the photo below without an ice cream maker, you need to stir the yogurt often during the freezing process to prevent large ice crystals from forming. This is not difficult to do on a day when you're home anyway.
Recipe FAQs
This homemade yogurt is made without texture-enhancing additives, so nonfat yogurt won't work. You really want the fat from whole-milk Greek yogurt to give it a smooth, creamy texture. Nonfat yogurt will be icy, and it also won't be as flavorful.
Unlike commercial brands, this recipe contains no thickeners and is lower in sugar than many brands. So don't expect the "perfect" texture and intense sweetness you get when you add thickeners, stabilizers, emulsifiers, and lots of sugar.
But this homemade version is wonderful! You can taste the yogurt's tang and the honey's sweetness. It's simple, delicious, and fresh.
Since we use Greek yogurt, which has already been strained to remove whey, there's no need to strain it any further.
You can freeze the leftovers in a sealed container for up to a month. However, the longer they stay in the freezer, the less creamy and icier they will become. If the yogurt has been in your freezer for over a day, remove it to the counter about 30 minutes before enjoying it.
Serving Suggestions
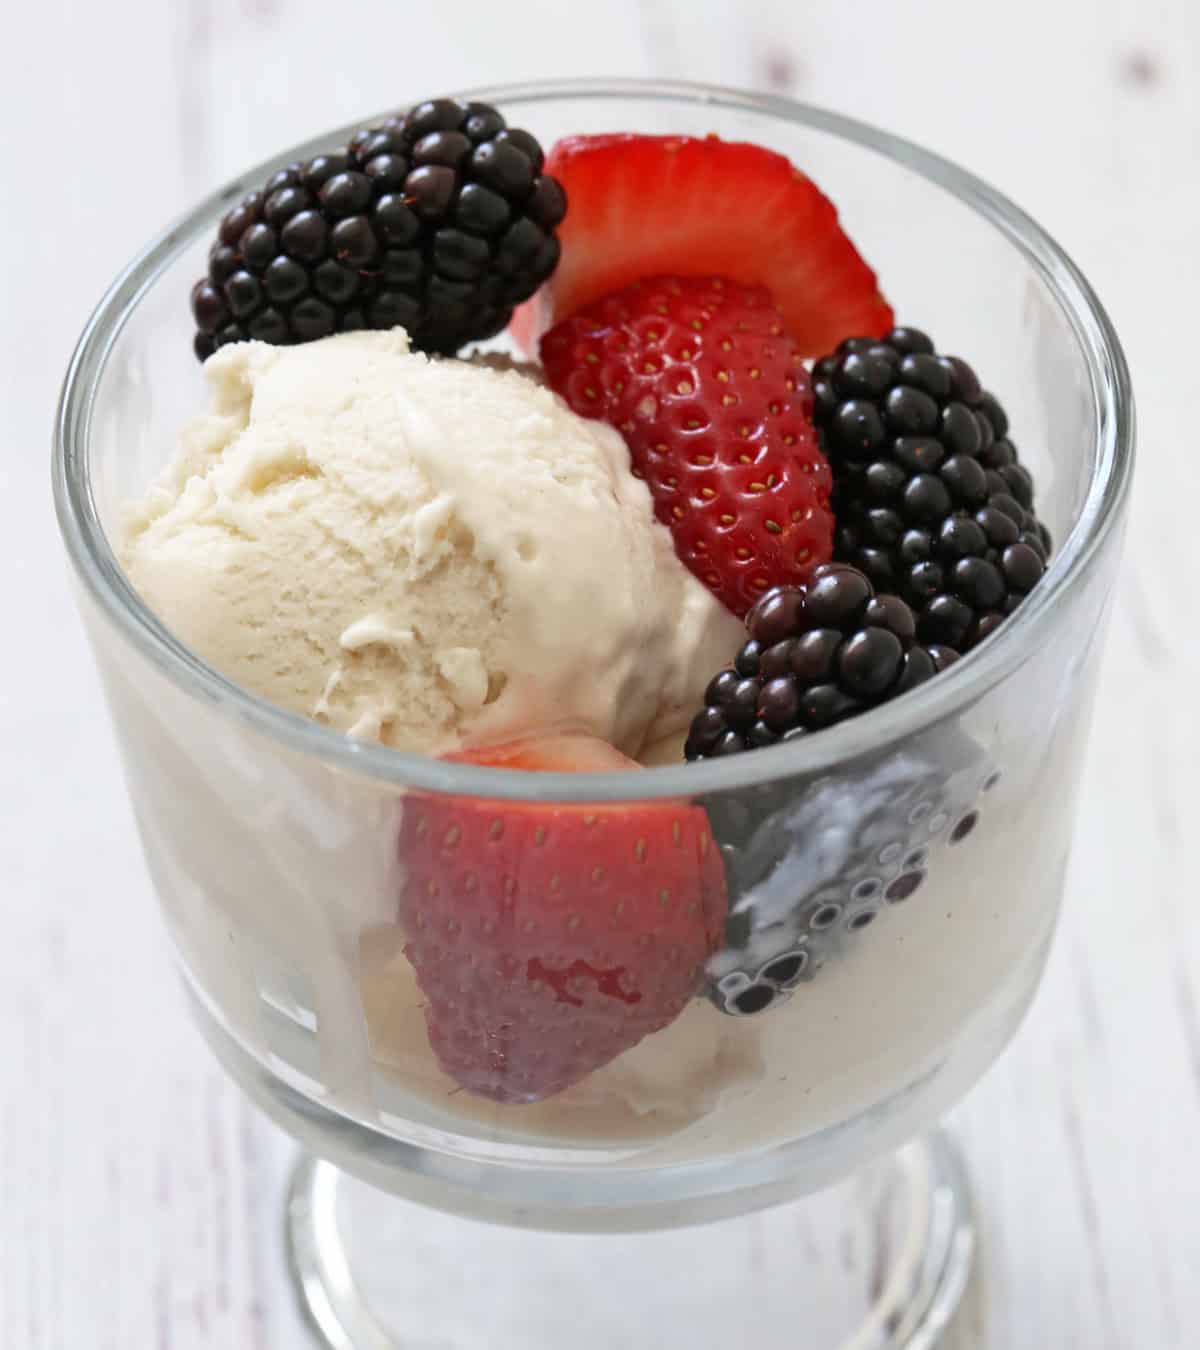
This dessert is delicious on its own. It also pairs well with fruit, including fresh berries (as shown in the photo below), grilled peaches, apple crisp, baked apple slices, or fried bananas.
Sometimes, I serve it topped with stewed prunes, blueberry compote, or strawberry compote.
You can also drizzle it with melted dark chocolate (as shown in the photo below) or melted peanut butter. And for a special treat, serve it with crumbled chocolate chip cookies.
Recipe Card

Homemade Frozen Yogurt (Four Flavors)
Video
Ingredients
- 2 cups Greek yogurt - plain, full-fat
- ¼ cup honey - see notes below
- 1 tablespoon pure vanilla extract
Instructions
- Place the yogurt, honey, and vanilla in your food processor's bowl or in a medium mixing bowl.2 cups Greek yogurt, ¼ cup honey, 1 tablespoon pure vanilla extract

- Process the ingredients to incorporate, stopping once to scrape the sides of the bowl, then process for 1 more minute until light and fluffy. If mixing by hand, mix for 2-3 minutes until smooth and fluffy.

- Using a spatula, transfer the mixture to a square 9-inch glass or ceramic baking dish. Cover with cling wrap and freeze for 45 minutes.
- Remove the pan from the freezer. Use a rubber spatula to stir the already-frozen edges into the still-soft center, then spread evenly again.
- Cover again, and place in the freezer for 2 more hours, repeating the process of stirring the yogurt every 30 minutes.
- When the entire mixture is frozen, serve immediately as a soft-serve yogurt (use chilled bowls), or freeze it for 1-2 more hours for a firmer consistency that you can scoop out with an ice cream scoop.


Notes
Texture Tips
- Because Greek yogurt is leaner than heavy cream, it can freeze quite hard. For better texture, and if you don't mind the extra sugar, you can increase the honey to ⅓ cup, as the sugar acts as a natural anti-freeze.
- To keep this yogurt low-carb, you can use a sugar-free sweetener. To prevent it from freezing too hard without sugar, consider adding a tablespoon of vodka.
- While regular yogurt is delicious, you should definitely use full-fat Greek yogurt in this recipe.
Flavor Tips
- Sweetness is very personal. If you like things a little sweeter, don't hesitate to increase the honey (or your preferred sweetener) by 1-2 tablespoons, keeping in mind that the nutrition info will change. Taste the mixture before freezing and adjust according to your taste.
- Use high-quality pure vanilla extract for the best results.
Flavor Variations
- Chocolate flavor: add ¼ cup of unsweetened cocoa powder and increase the honey to ½ cup.
- Raspberry flavor: Add 6 ounces of frozen raspberries and increase the honey to ½ cup.
- Mango flavor: Add 6 ounces of frozen mango chunks and increase the honey to ½ cup. Partially thaw the mango chunks in the microwave to make them easier to process.
Ice Cream Maker Instructions
An ice cream maker will yield a smoother, creamier result. Simply mix the full-fat Greek yogurt, honey, and vanilla as directed, then skip the instructions regarding the baking dish and the manual stirring. Instead, pour the chilled mixture directly into your chilled ice cream maker bowl and churn for about 20 minutes or until it reaches a soft-serve consistency. Because Greek yogurt has a lower water content than traditional ice cream base, it freezes quickly, so be careful not to over-churn, or the texture may become grainy. If you want to include mix-ins like fruit or chocolate, add them during the final two minutes of the churning process. Once the churning is complete, you can serve it immediately or transfer it to an airtight container and place it in the freezer for an hour or two for a firmer, scoopable consistency.Storage Tips
You can keep this yogurt in a sealed container in the freezer for up to a month. The longer it stays in the freezer, the less creamy and icier it will become. If it's spent longer than a day in your freezer, remove it from the freezer about 30 minutes before enjoying it.Nutrition per Serving
Save this Recipe!
We will also add you to our weekly newsletter. Unsubscribe anytime. See healthyrecipesblogs.com/privacy/ to learn how we use your email.
Disclaimers
Most recipes are low-carb and gluten-free, but some are not. Recommended products are not guaranteed to be gluten-free. Nutrition info is approximate - please verify it. The carb count excludes non-nutritive sweeteners. Please read these Terms of Use before using any of my recipes.
Audrey says
Could real maple syrup be used in place of the honey?
Vered DeLeeuw says
Hi Audrey,
Yes! Taste the mixture before freezing. Maple syrup is a bit less sweet than honey and has a milder flavor, so you might want to add an extra tablespoon if you prefer a sweeter frozen yogurt.
Tammy says
This recipe is awesome. I added about 1/3 cup of cream, used frozen strawberries and stirred it a few extra times, so yummy!
I wonder about using stevia?
Vered DeLeeuw says
Glad you enjoyed it, Tammy!
You can use stevia to equal 1/3 cup of granulated sugar. To prevent the yogurt from freezing too hard without the softening effects of sugar, consider adding a tablespoon of vodka.
Angel says
I made this yesterday and added some of my flourishes (lion's mane powder, pumpkin seeds etc) + I did ½ whole greek yogurt & ½ nonfat (was on hand) ... this came out so fantastic that I gave you a shout out on a Youtube short AND am making cookies now for ice cream sandwiches lol. An amazing easy recipe.
Vered DeLeeuw says
Thank you so much, Angel! I'm so glad this was a success and LOVE your yummy additions.
trog says
Can you use this recipe in an ice cream maker? Thanks!
Vered DeLeeuw says
Yes! An ice cream maker will yield a smoother, creamier result. Simply mix the full-fat Greek yogurt, honey, and vanilla as directed, then skip the instructions regarding the baking dish and the manual stirring. Instead, pour the chilled mixture directly into your chilled ice cream maker bowl and churn for about 20 minutes or until it reaches a soft-serve consistency.
Because Greek yogurt has a lower water content than traditional ice cream base, it freezes quickly, so be careful not to over-churn or the texture may become grainy.
If you want to include mix-ins like fruit or chocolate chunks, add them during the final two minutes of the churning process.
Once the churning is complete, you can serve it immediately or transfer it to an airtight container and place it in the freezer for an hour or two for a firmer, scoopable consistency.
I'll go ahead and add this info to the recipe, as it seems to be a recurring question. Thanks for asking!
Debra Stoud says
Awesome! Extra creamy.
Vered DeLeeuw says
I'm really glad you enjoyed it, Debra! Thank you so much for the review.
Beck says
Hi! I don't have a food processor but I have a blender! Will I be able to use that instead?
Vered DeLeeuw says
Hi Beck,
Yes, absolutely! A blender works. You can even mix it by hand.
Barb says
Can you use non fat yogurt? It seems all recipes I see call for full fat yogurt.
Vered DeLeeuw says
Hi Barb,
Great question! This homemade yogurt is made without texture-enhancing additives, so nonfat yogurt won't work. You really want the fat from whole-milk Greek yogurt to give it a smooth, creamy texture. Nonfat yogurt will be icy, and it also won't be as flavorful.
Dani says
FRO-YUM!
Vered DeLeeuw says
Haha glad you liked it, Dani! Thanks for the review.
Julie says
Can you use less honey? Does effect recipe at all, other than sweetness?
Vered DeLeeuw says
Hi Julie,
Yes, you can use less honey if you don't mind a tangy flavor. However, the sugar in the honey acts as an anti-freeze that prevents the yogurt from freezing too hard. If you reduce the honey, consider adding a tablespoon of flavorless vodka, as the alcohol also acts as an anti-freeze.