This crispy crustless pizza is ready fast. It's the perfect low-carb snack, or you can pair it with vegetables for lunch or even a light dinner.
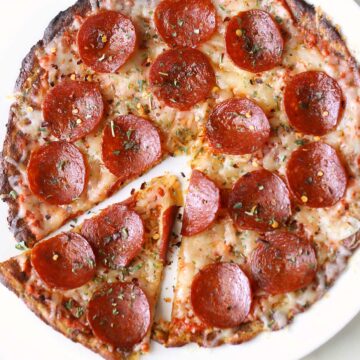
It's no secret I'm obsessed with pizza. I consider it a perfect food, which explains my insistence on creating low-carb pizza recipes so that I don't have to give it up. This crustless pizza is perfect if you like crispy thin-crust pizza. It's amazing how pizza-like it is without any pizza sauce. It's easy, too: You simply add cheese and toppings to your nonstick skillet and cook them until the cheese crisps up. Then, cut the pizza into wedges and enjoy.
Ingredients and Variations

See the recipe card for exact measurements. Here are my comments on the ingredients.
- Shredded cheese: I usually use mozzarella. You can also use a shredded Italian cheese mix or provolone.
- Spices: I use garlic powder, dried oregano, and red pepper flakes.
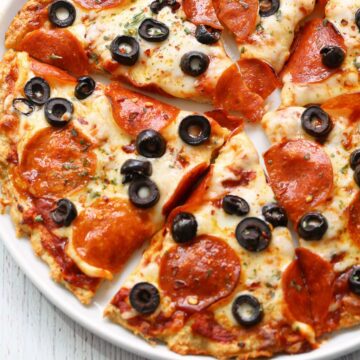
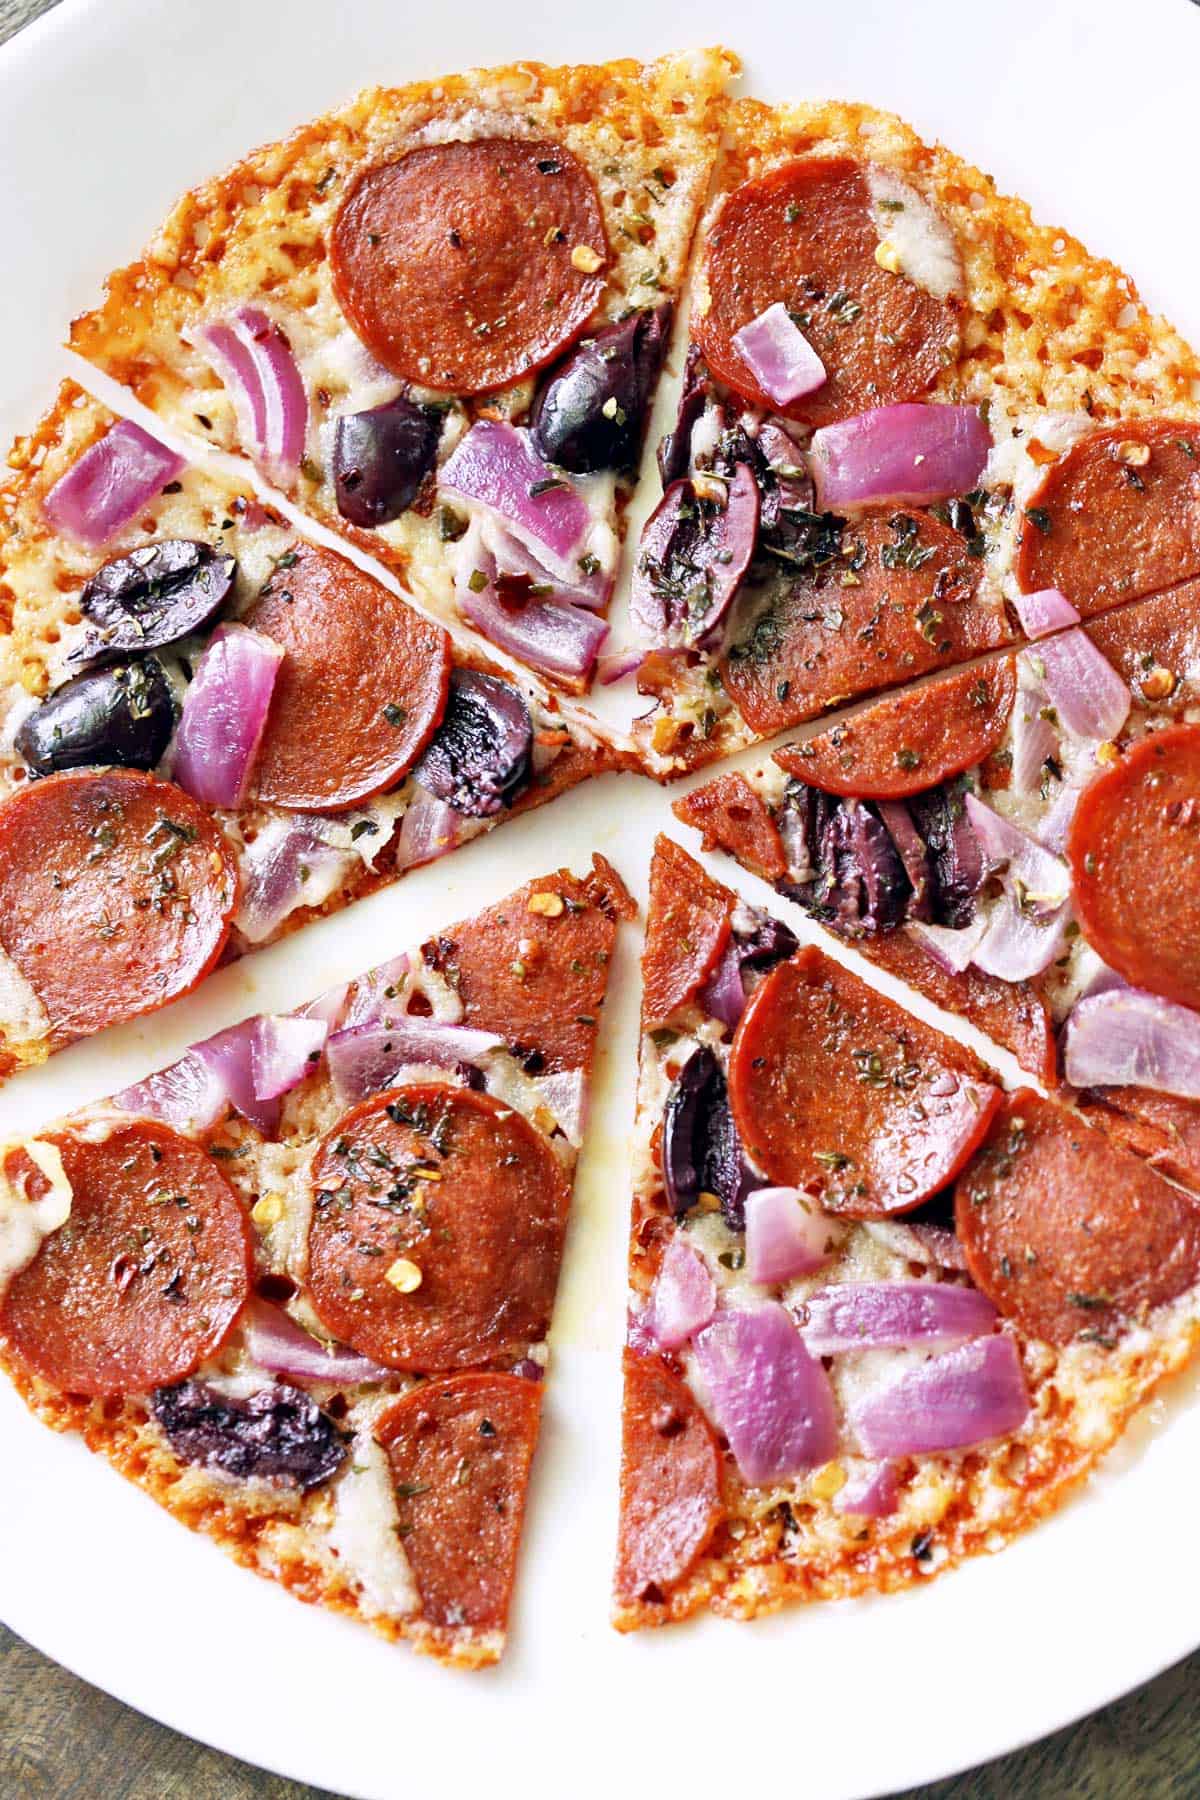
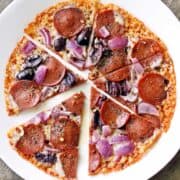
- Toppings: I like to use red onion, black olives, and pepperoni.
Variations
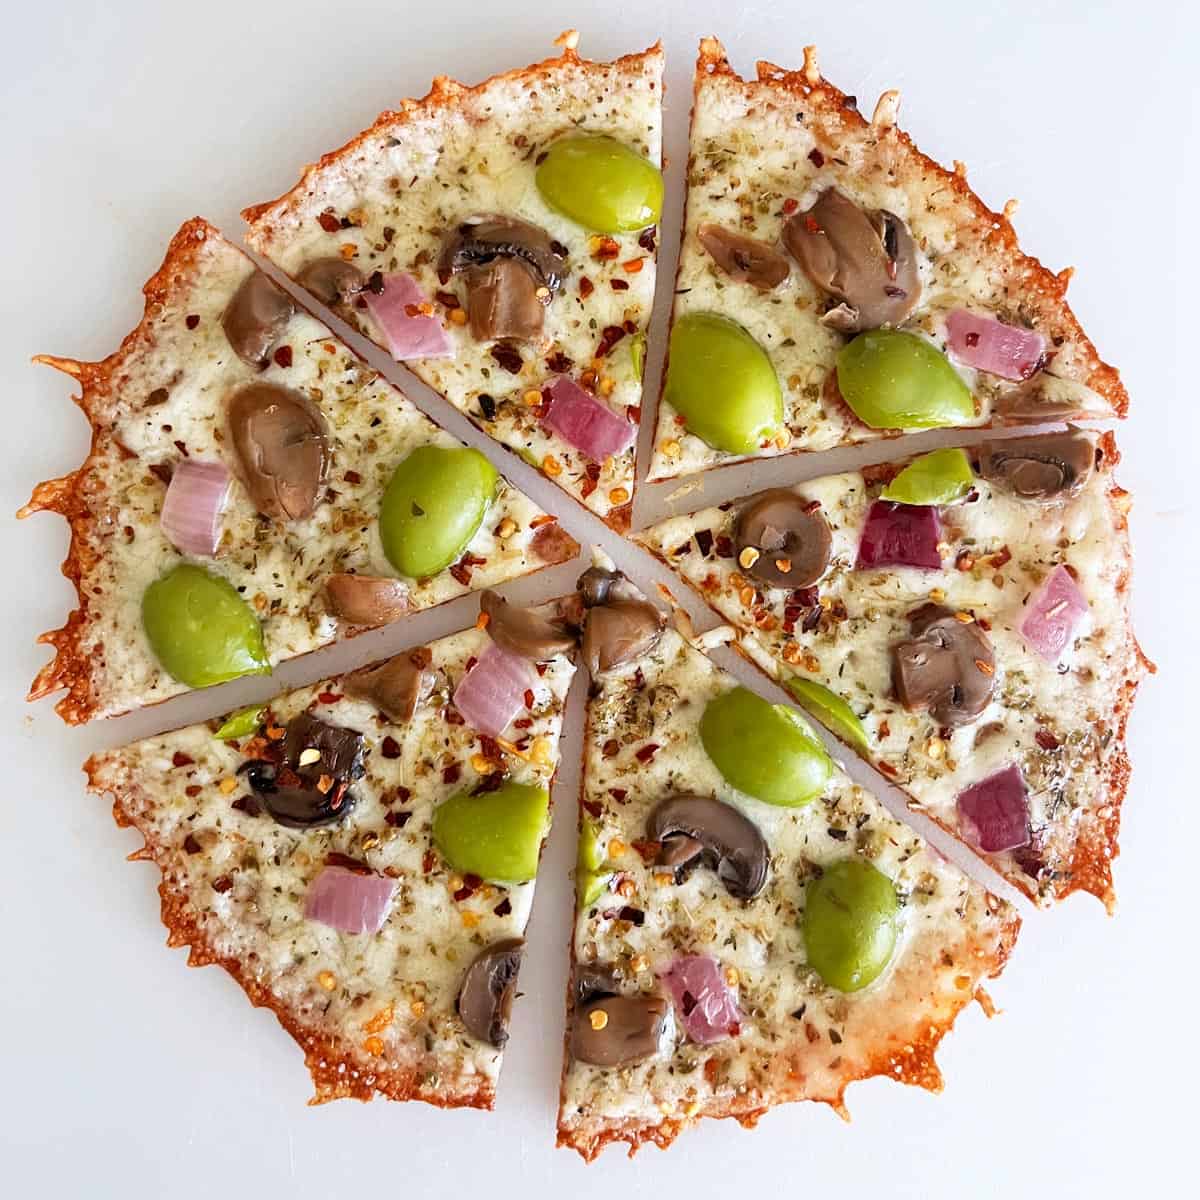
It's fun to use different toppings, including slices of roasted peppers, sautéed mushrooms, green olives, and cooked crumbled sausage.
The photo below shows a recent pizza I made with sauteed mushrooms, red onions, and green olives. Instead of the aforementioned spices, I sprinkled it generously with Italian seasoning. It's not as browned as usual because I had four ounces of cheese and wanted to use them all up, so it's a bit thicker. It was marvelous!
Instructions
The detailed instructions and step-by-step photos are included in the recipe card. Here's a quick overview.
Sprinkle the cheese in a thin layer in a 10-inch nonstick skillet. Place the skillet on a burner and heat the cheese over medium heat.

When the cheese starts to melt, sprinkle it with garlic powder, oregano, and red pepper flakes. Top it with onions, olives, and pepperoni. Continue cooking the pizza over medium heat until the bottom and edges are browned, 8-10 minutes.

Remove the skillet from the heat. Allow the pizza to crisp up for about 30 seconds, then use a spatula and carefully slide it onto a cutting board. Immediately cut the pizza into 6 wedges and serve.

Recipe Tips
- As soon as the pizza is on the cutting board, cut it. Don't wait. It will continue to crisp as it cools, so if you wait too long, it will be brittle and impossible to cut.
- Don't add too many toppings, or the ultra-thin crust will have a hard time supporting them.
- Wet toppings like mushrooms can release water and make the crust less crisp. If you use them, sauté them first to cook out excess moisture.
- Medium heat is usually best. Too low, and the cheese won't crisp. Too high, and it can burn before it melts evenly. Adjust as needed based on your stove and skillet type.
Recipe FAQs
I use a 10-inch nonstick skillet. Many skillet pizza recipes use a cast-iron skillet, but those typically have a doughy base. Since we're using shredded cheese as our base, it's best to use a nonstick skillet.
I don't recommend it - adding sauce can introduce moisture and prevent the base from crisping properly. If you want a saucy flavor, drizzle a small amount of sauce on top after the pizza is ready.
This pizza is definitely crispy. If you like chewy pizza, I suggest you try this coconut flour pizza or this meat crust pizza. Chicken crust pizza is another good option.
This pizza is best enjoyed freshly made, so I suggest you only make as much as you anticipate eating right away. If you do have leftovers, you can keep them in an airtight container in the fridge for up to four days. They're best eaten cold or briefly reheated in a skillet over medium heat. I don't recommend reheating the leftovers in the microwave.
Serving Suggestions
You can serve this pizza on its own as a tasty snack. That's how I usually serve it. But sometimes (when my family begs me to...) I make it into a full dinner by serving a steamed veggie or a salad on the side. It goes particularly well with Caesar salad, tomato salad, and steamed broccoli, as shown in the image below.

Recipe Card
Crispy Crustless Pizza
Video
Ingredients
- ¾ cup shredded mozzarella - 3 ounces; can go up to 4 ounces
- ¼ teaspoon garlic powder
- ¼ teaspoon dried oregano
- ⅛ teaspoon red pepper flakes
Toppings:
- 2 tablespoons red onion - chopped
- 2 tablespoons olives - sliced
- 1 ounce pepperoni - thin slices
Instructions
- Evenly sprinkle the cheese in a 10-inch nonstick skillet in a thin layer.¾ cup shredded mozzarella

- Place the skillet on the burner and heat the cheese over medium heat.
- When the cheese starts to melt, sprinkle it with garlic powder, oregano, and red pepper flakes. Top it with the onions, olives, and pepperoni.¼ teaspoon garlic powder, ¼ teaspoon dried oregano, ⅛ teaspoon red pepper flakes, 2 tablespoons red onion, 2 tablespoons olives, 1 ounce pepperoni
- Continue cooking the pizza over medium heat until the bottom and edges are browned. The total cooking time will depend on your stove and should be about 8-10 minutes. Lower the heat to medium-low if needed.
- Remove the skillet from the heat. At this point, the pizza will be too soft for you to lift it up from the skillet. Allow it to crisp up a bit, about 30 seconds, then use a spatula and carefully slide it onto a cutting board.

- Immediately cut the pizza into 6 wedges. Don't wait - the pizza will continue to crisp as it cools, so if you wait too long, it will be impossible to cut.

- Briefly place the pizza wedges on paper towels to soak up extra grease, then serve.


Notes
- Seasonings are guidelines. Adjust to taste.
- As soon as the pizza is on the cutting board, cut it. Don't wait. The pizza will continue to crisp as it cools, so if you wait too long, it will be brittle and impossible to cut.
- For the toppings, I like to use pepperoni, red onions, and black olives, but you can use other toppings, including sauteed mushrooms and cooked crumbled sausage.
- Don't add too many toppings, or the ultra-thin crust will have a hard time supporting them.
- Wet toppings like mushrooms can release water and make the crust less crisp. If you use them, sauté them first to cook out excess moisture.
- Medium heat is best. Too low, and the cheese won't crisp. Too high, and it can burn before it melts evenly. Adjust as needed based on your stove and skillet type.
- This pizza is best enjoyed freshly made, so I suggest you only make as much as you anticipate eating right away. If you do have leftovers, you can keep them in an airtight container in the fridge for up to four days. They're best eaten cold or briefly reheated in a skillet over medium heat. I don't recommend reheating the leftovers in the microwave.
Nutrition per Serving
Save this Recipe!
We will also add you to our weekly newsletter. Unsubscribe anytime. See healthyrecipesblogs.com/privacy/ to learn how we use your email.
Disclaimers
Most recipes are low-carb and gluten-free, but some are not. Recommended products are not guaranteed to be gluten-free. Nutrition info is approximate - please verify it. The carb count excludes non-nutritive sweeteners. Please read these Terms of Use before using any of my recipes.