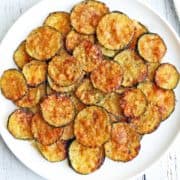
Coated with olive oil, spices, and Parmesan, then baked to crispy perfection, zucchini chips are one of my favorite ways of serving zucchini to my family.
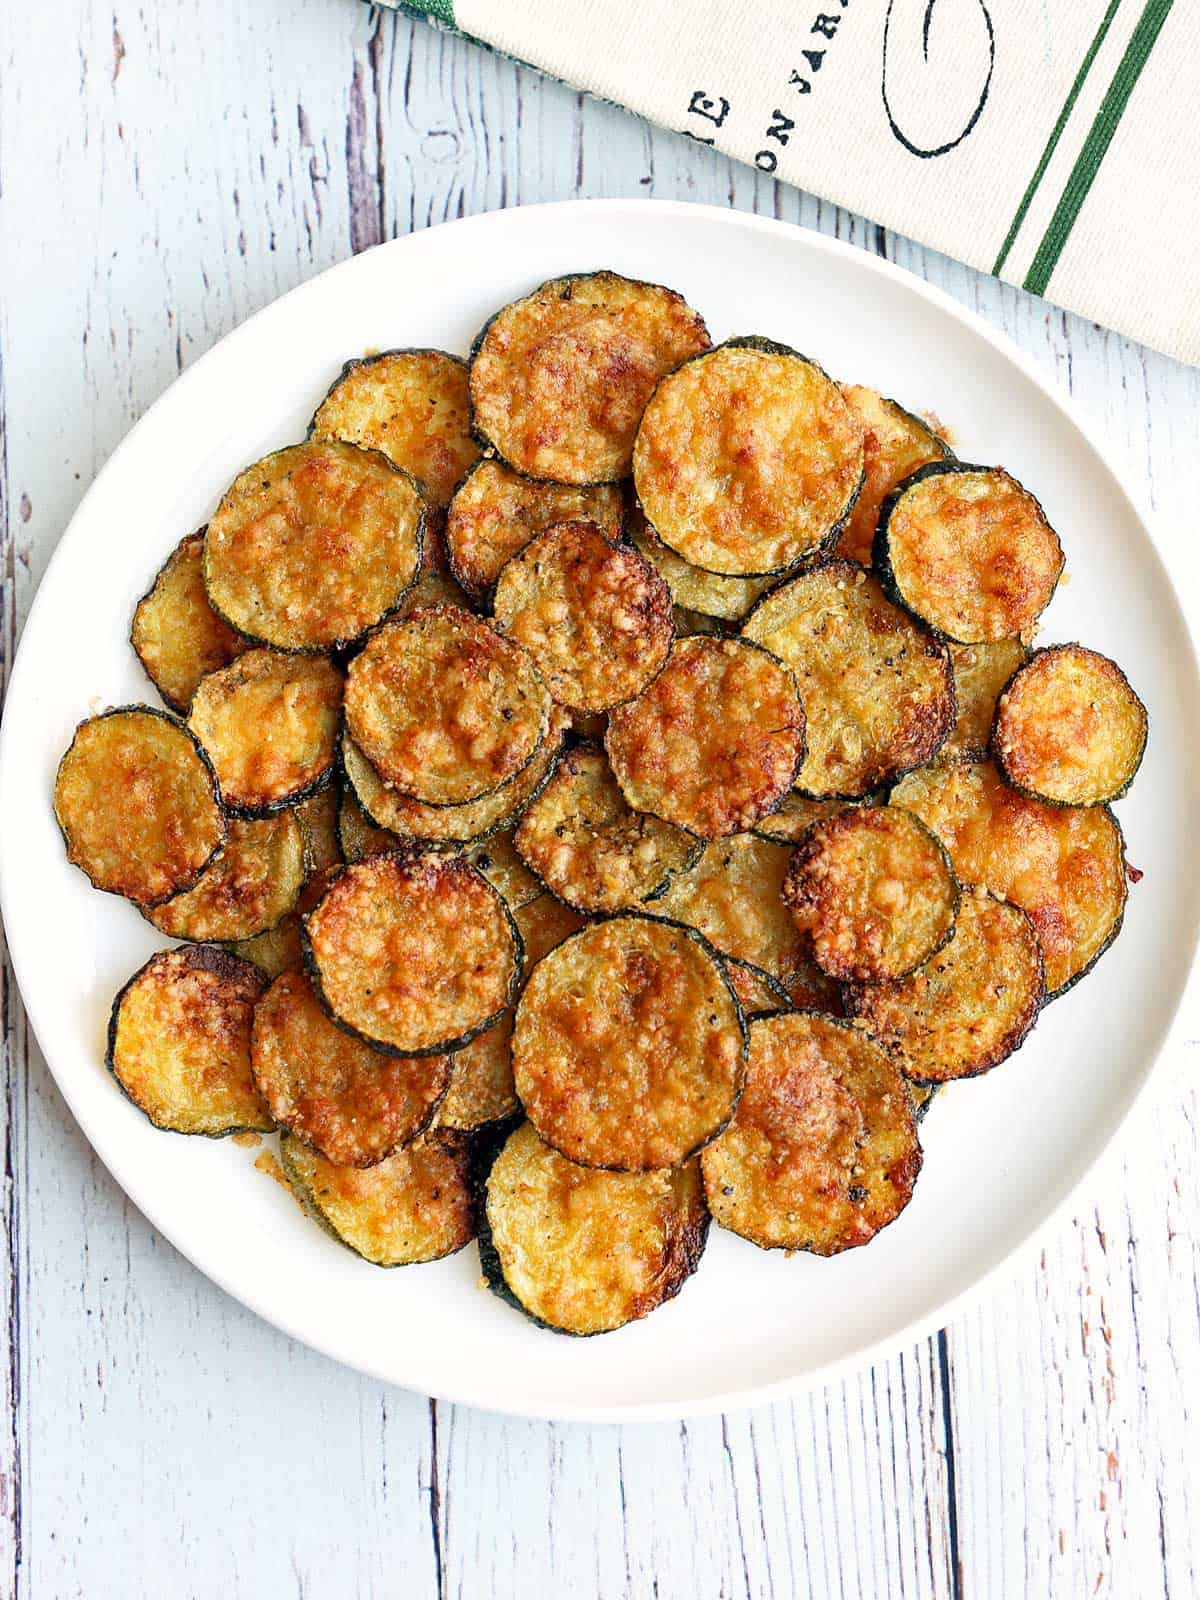
These zucchini chips are crispy and flavorful. They are one of my favorite side dishes when zucchini is in season, and they can also serve as a delicious homemade snack that you can feel good about eating. The secret to making them crispy: Salt them to draw water out and then bake them in a hot 425°F oven.
Ingredients and Variations

See the recipe card for exact measurements. Here are my comments on some of the ingredients.
- Olive oil spray: I love cooking with this delicious oil. Avocado oil and melted butter are good alternatives.
- Fresh zucchini: Using small, firm zucchini is best. You don't want them large and watery.
- To season: Kosher salt, black pepper, and garlic powder.
- Grated Parmesan: Use finely grated Parmesan, not coarsely shredded.
Instructions
The detailed instructions and step-by-step photos are included in the recipe card. Here's a quick overview.
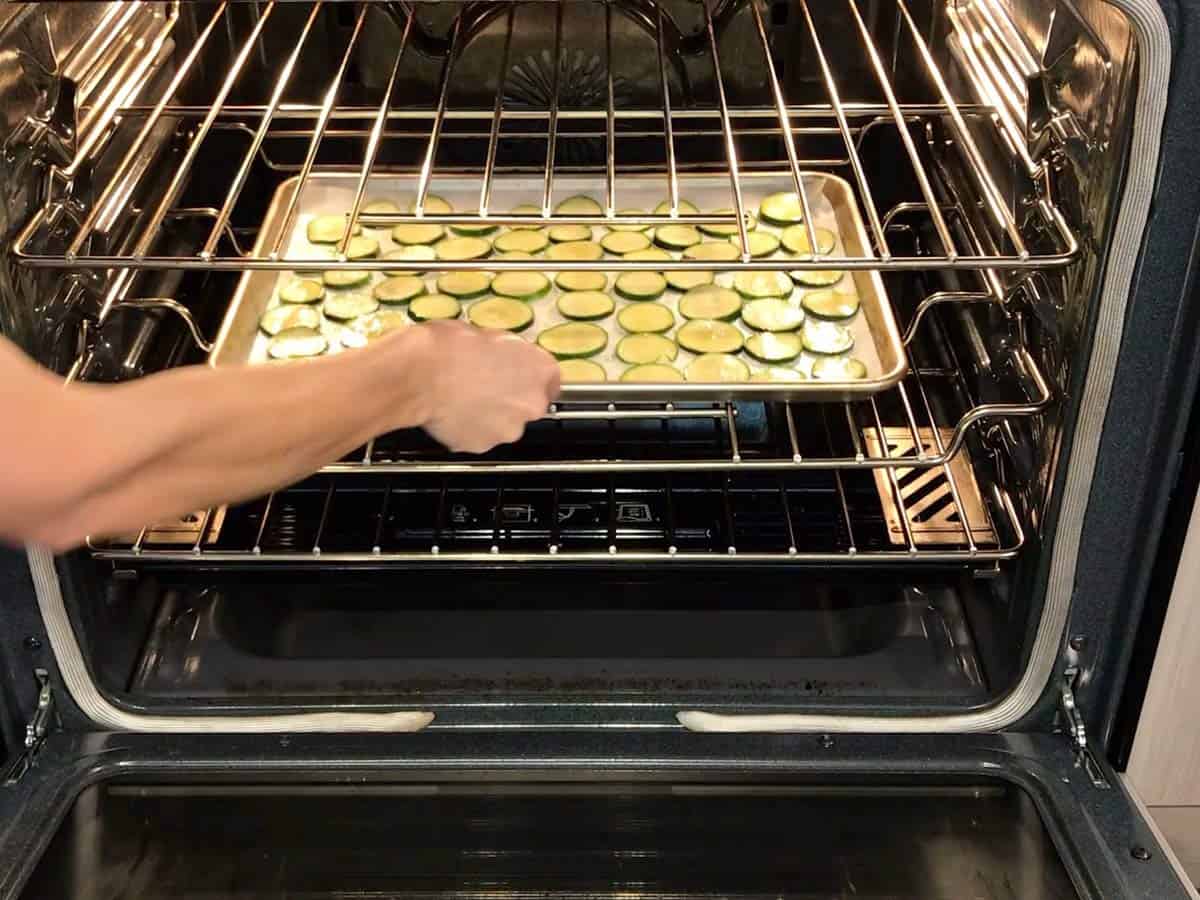
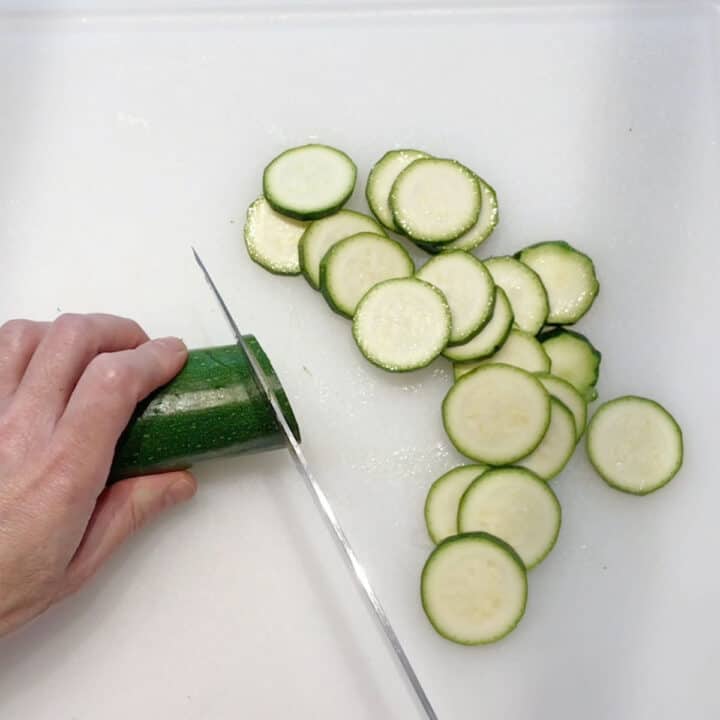
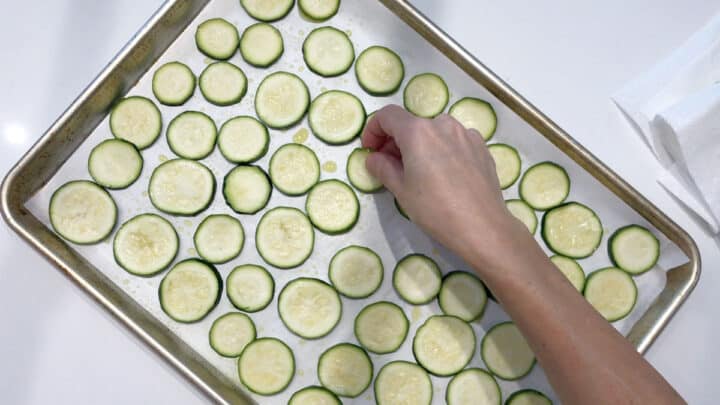
Slice the zucchini thinly, salt the slices, and then rinse and dry them. Arrange the zucchini slices on a rimmed, parchment-lined baking sheet. Spray the zucchini slices with olive oil, then bake them in a 425°F oven for 15 minutes.
Remove the baking sheet from the oven, keeping the oven on. Season the zucchini with salt, pepper, garlic powder, and parmesan.

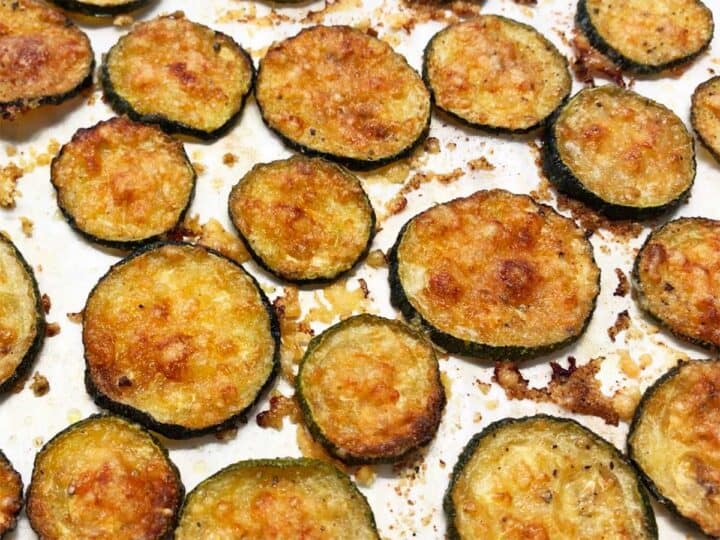
Bake the zucchini chips until browned and crispy, for 15-20 more minutes. Serve immediately.

Wow! These are really good (and I'm not a big zucchini fan, I just had a bunch I was trying to get rid of before they went bad.) Yum, they are so nice and crispy and delicious! Thanks for the recipe!
E Johnsen
Read more comments
Recipe Tips
- Oven temperatures vary. I suggest you start with ten minutes, then check the zucchini slices. If they're already browning, sprinkle them with the cheese and seasoning and place them in the oven for just five more minutes or until crispy. If they are still wet and soggy after 10 minutes, keep baking them for the full 15 minutes or even 20 minutes, then sprinkle them with cheese and seasonings and bake until they are crispy.
- Some of the zucchini slices will be ready before the others. Remove them to a plate and keep baking the ones that have not crisped up yet.
- A few readers commented over the years that they had success baking the zucchini slices for 20 minutes per side in a 350°F oven.
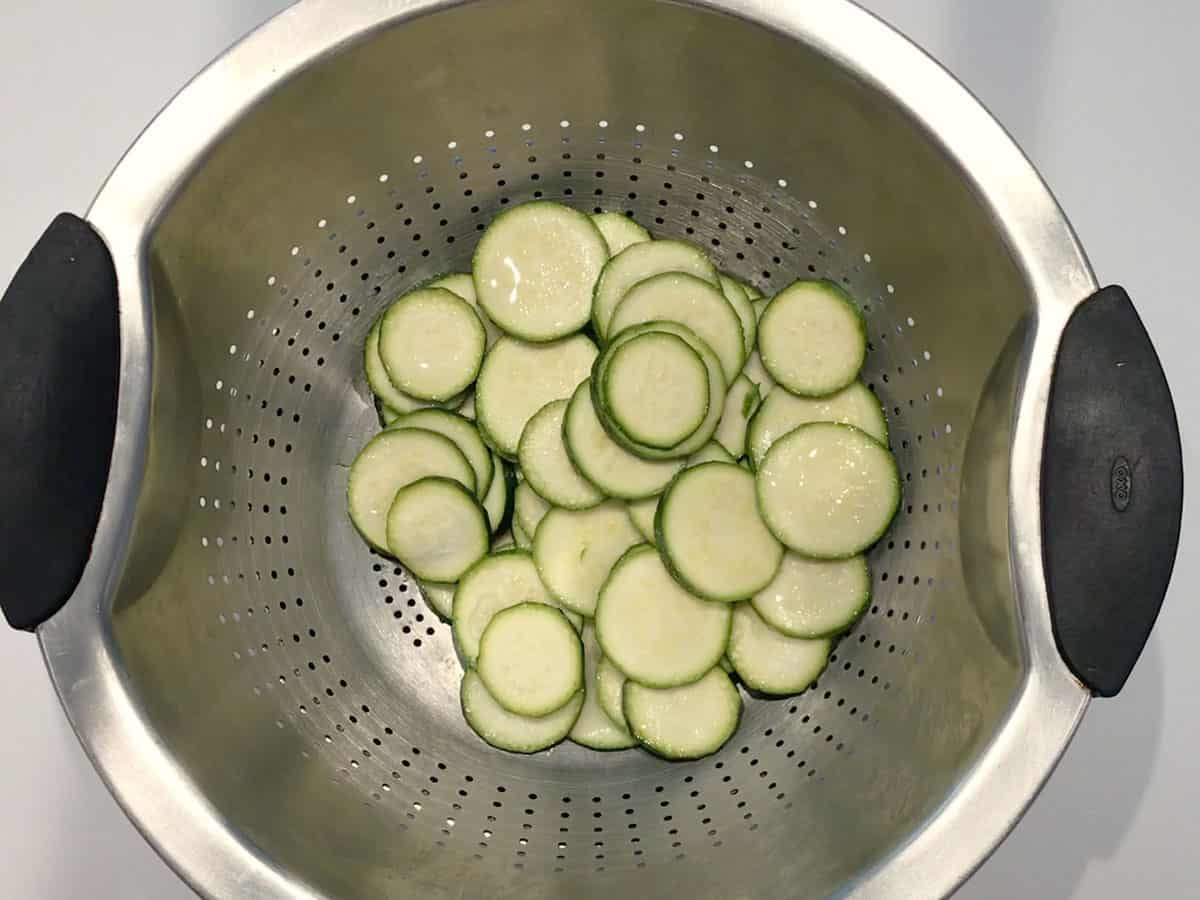
- Salting the zucchini slices before baking them is an annoying extra step, but it removes water from the zucchini, which helps achieve crispiness. So, I don't recommend skipping this step. I tried, and the chips were still delicious, but they were definitely not crispy. In the photo below, you can see the water drops on the surface of the zucchini slices. This is the water we want to eliminate.
- Storage: The leftovers keep okay in an airtight container in the fridge for 2-3 days, but they lose their crispiness. You can get some of the crispiness back by baking them uncovered in a 350°F oven for 10 minutes.
Serving Suggestions
I usually serve zucchini chips as a side dish. But sometimes my kids ask me to make them as a snack, and I am thrilled to oblige! They eat them on their own or dip them in unsweetened ketchup.
Dips that go well with these chips include ranch dip, blue cheese dressing, Greek yogurt dip, guacamole, salsa, sour cream dip, cream cheese dip, tahini sauce, or a keto cheese sauce.
When I make them as a side dish, I like to serve these chips with a main dish I can bake in the same 425°F oven. So, I often serve them with one of the following:
Recipe Card
Crispy Baked Zucchini Chips
Video
Ingredients
- Olive oil spray
- 2 medium zucchini - about 1 pound total weight
- ¾ teaspoon kosher salt - divided
- ½ teaspoon garlic powder
- ¼ teaspoon black pepper
- ¼ cup parmesan - grated, not shredded
Instructions
- Preheat the oven to 425°F. Line a rimmed baking sheet with high-heat-resistant parchment paper and coat it with olive oil spray.

- Slice the zucchini into ⅛-inch-thick rounds.

- Sprinkle the slices with ½ teaspoon of kosher salt. Place the salted zucchini in a colander in the sink and let them stand for 30 minutes at room temperature. This should draw some of the water out. After 30 minutes, rinse and blot dry the zucchini slices using paper towels.
- Arrange the zucchini slices in a single layer on the prepared baking sheet. Spray them with olive oil. Bake them for 15 minutes. Please see the notes below for tips on how long to bake the chips.

- Remove the baking sheet from the oven. Sprinkle the zucchini slices with the remaining ¼ teaspoon of kosher salt, black pepper, garlic powder, and grated parmesan. There's no need to flip the zucchini.

- Return the pan to the oven and continue baking until the zucchini slices are browned and crisp, 15-20 more minutes. Please see the notes below for tips on how long to bake the chips.


Notes
Salting the Zucchini
Salting the zucchini slices before baking removes water from the zucchini, which helps achieve crispiness. Please don't skip this step.How Long to Bake
This is one of my more controversial recipes. While many love it, others struggle with the chips either burning or remaining soggy. If you run into trouble, I'd love the opportunity to troubleshoot before you rate the recipe. In the meantime, here are some suggestions. Oven temperatures vary. I suggest you start with ten minutes, then check the zucchini slices. If they're already browning, sprinkle them with the cheese and seasoning and place them in the oven for just five more minutes or until crispy. On the flip side, if they are still wet and soggy after 10 minutes, keep baking them for the full 15 minutes or even 20 minutes, then sprinkle them with cheese and seasonings and bake until they are crispy. Some of the zucchini slices will be ready before the others. Remove them to a plate and keep baking the ones that have not crisped up yet. A few readers commented over the years that they had success baking the zucchini slices for 20 minutes per side in a 350°F oven.Storing Leftovers
The leftovers keep okay in an airtight container in the fridge for 2-3 days, but they lose their crispiness. You can get some of the crispiness back by baking them uncovered in a 350°F oven for 10 minutes.Nutrition per Serving
Save this Recipe!
We will also add you to our weekly newsletter. Unsubscribe anytime. See healthyrecipesblogs.com/privacy/ to learn how we use your email.
Disclaimers
Most recipes are low-carb and gluten-free, but some are not. Recommended and linked products are not guaranteed to be gluten-free. Nutrition info is approximate. Please verify it independently. The carb count excludes non-nutritive sweeteners. Please read these Terms of Use before using any of my recipes.
Pamela Patton says
Delicious and so easy.
Kyle says
A had a few burn (maybe like 6?), can adjust oven temp next time. Overall decent.
Vered DeLeeuw says
Thanks for the feedback, Kyle!
elaine says
hello do they crisp on cooling
Vered DeLeeuw says
Hi Elaine,
Not really. The ones that aren't crisp at the end of baking will remain that way, so I remove the others to a plate and keep them in the oven for a little longer.
Mindy says
Perfect snack! I bake them at 350 for 20 minutes per side. If I bake them at 425, some of them burn.
Vered DeLeeuw says
Thank you for the feedback, Mindy! I'm glad you like these chips.
Y. Byrd says
I tried it as written and it was good. Next time I will try to put them in the air fryer to see how that goes. Thanks for the recipe!
becky says
They would have been delish, but they mostly burned on the first baking! I used a mandolin so I guess I cut them too thin. How thin are yours, and do you use a mandolin? However---I ate the all anyway!!! They will be much better next time, I'm sure.
Vered DeLeeuw says
Hi Becky,
I slice them by hand into 1/8-inch thick rounds. I added a photo to the recipe card that shows how I slice them. The recipe video also shows me slicing them.
Did you follow the tip to check after 10 minutes? Were they already burned after 10 minutes? That would be unusual.
Becky says
I am just starting a ketogenic diet, and am so glad I found your site!
Vered DeLeeuw says
Good luck with the diet, Becky! I'm glad you enjoyed these chips and hope you'll try more of my recipes.
Carol says
Made these for the first time today I didn't have parmesan cheese on hand but and I burned them. I will try again and let you know what happens.. Laugh out loud.... I guess I was not watching the over, I did have on the time.
E Johnsen says
Wow! These are really good (and I'm not a big zucchini fan, I just had a bunch I was trying to get rid of before they went bad.) Yum, they are so nice and crispy and delicious! Thanks for the recipe!
Vered DeLeeuw says
You're very welcome! Glad you liked them.
Piper says
These chips are amazing. Av few always burn, and some remain soggy, but most of them are so delicious, it's worth it.
Vered DeLeeuw says
Yay! Glad you like them, Piper!