A good omelette is simple, quick, and easy to customize. I love making it for a hearty weekend breakfast, but it also works well as a light dinner.
This easy recipe walks you through the technique for making a perfectly tender omelette and adding your favorite fillings. Whether you prefer a creamy plain omelette or hearty fillings like mushrooms and onions or ham and cheese, the method stays the same. Here's a guide to making a reliably good omelette, no flipping required.
Ingredients
See the recipe card for exact measurements. Here are my comments on the ingredients.
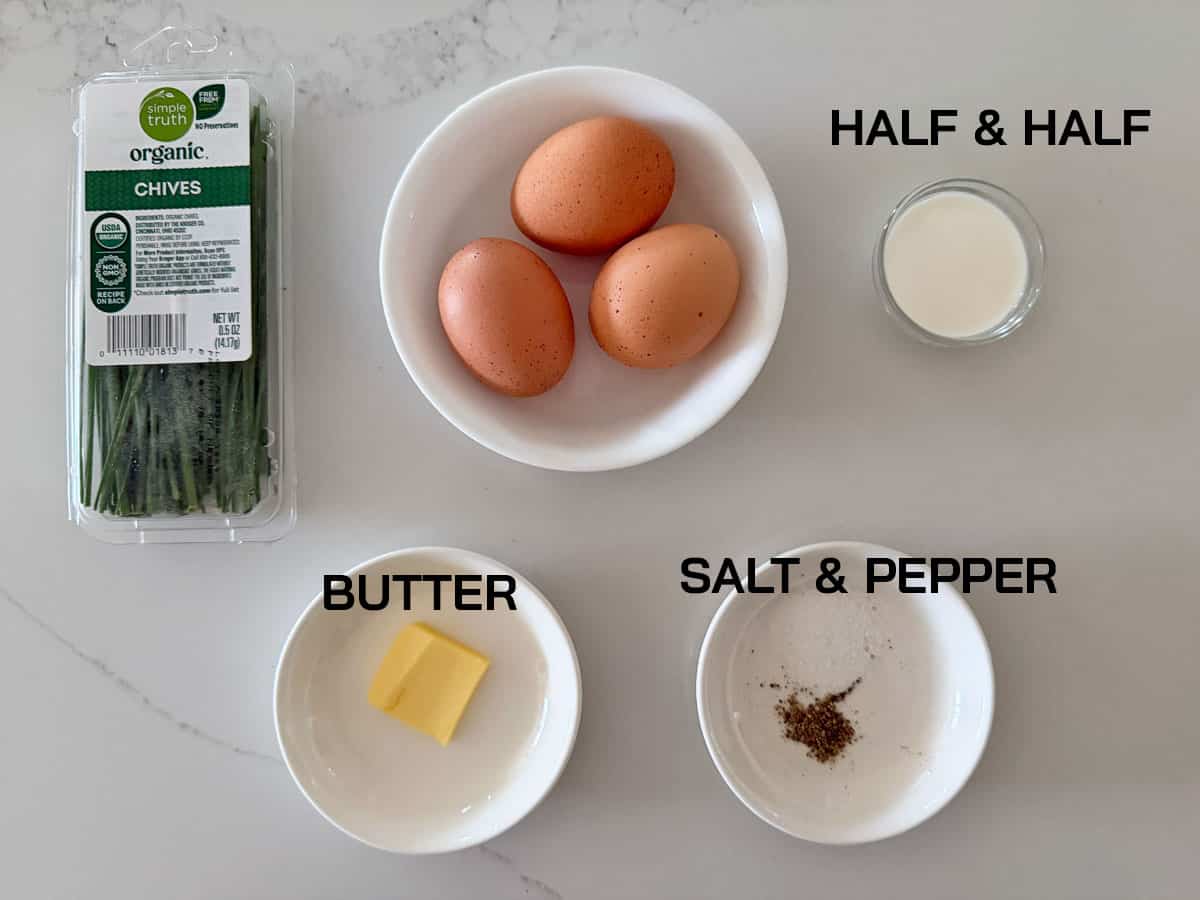
- Eggs: We will use three large eggs in this recipe.
- Half-and-half: Adds moisture and fat, creating an extra-creamy texture. It's not mandatory, but I like using it.
- Salt and pepper: A pinch of both. I typically use black pepper, but it does leave dark specks on the golden omelette. You can use white pepper if you wish.
- Butter: I use salted butter for extra flavor.
- Chives: They don't just make the omelette prettier - they also add a layer of mild onion flavor. If you can't find chives, you can use chopped parsley.
Instructions
The detailed instructions and step-by-step photos are included in the recipe card. Here's a quick overview.
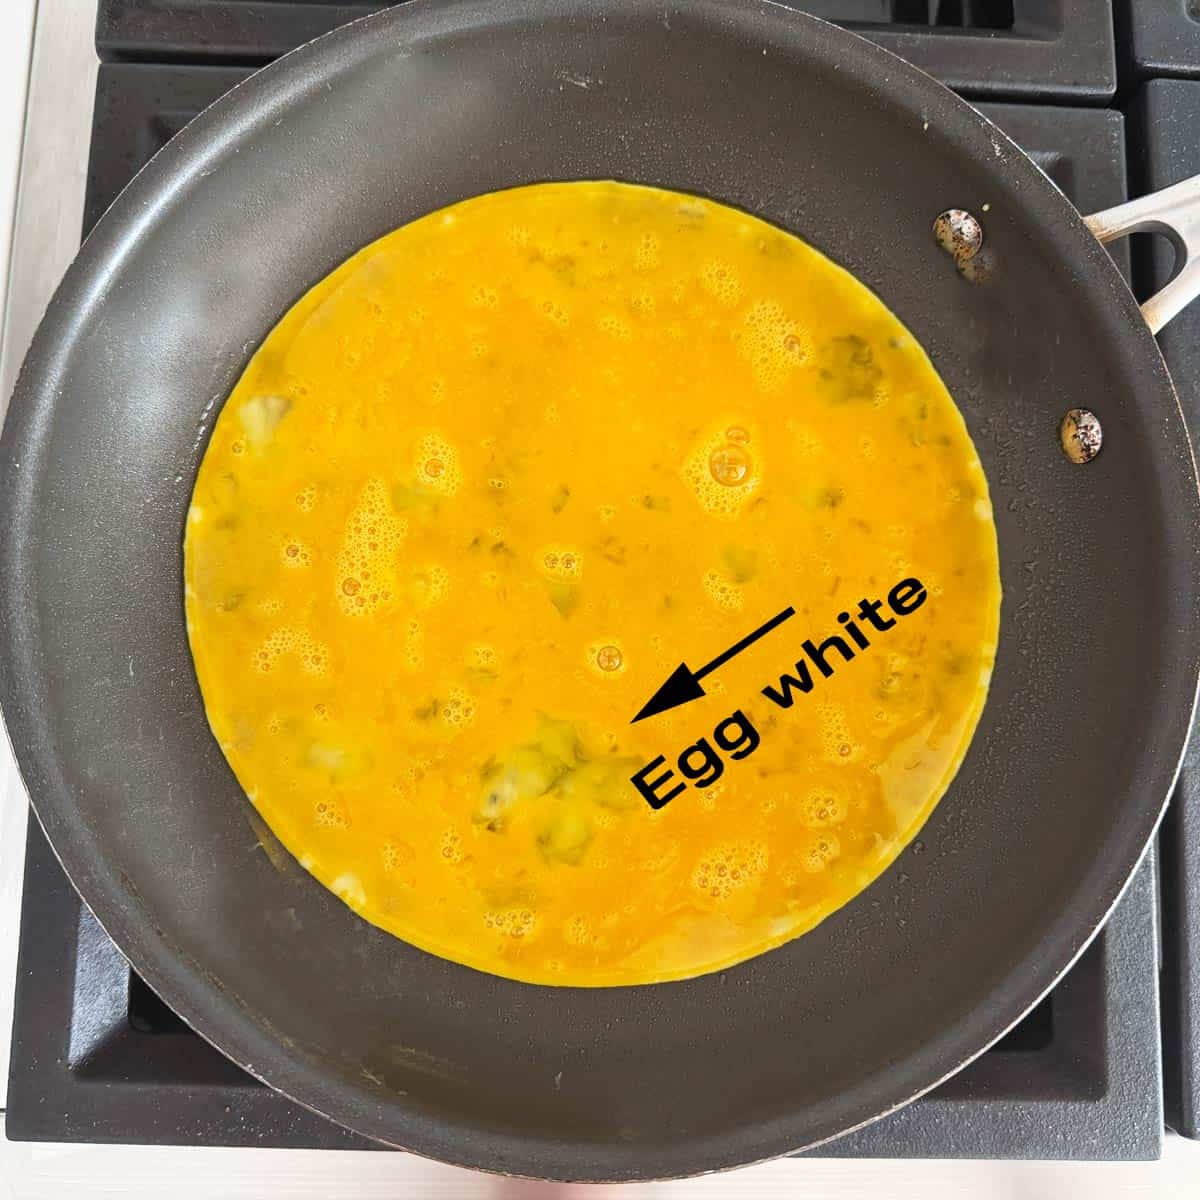
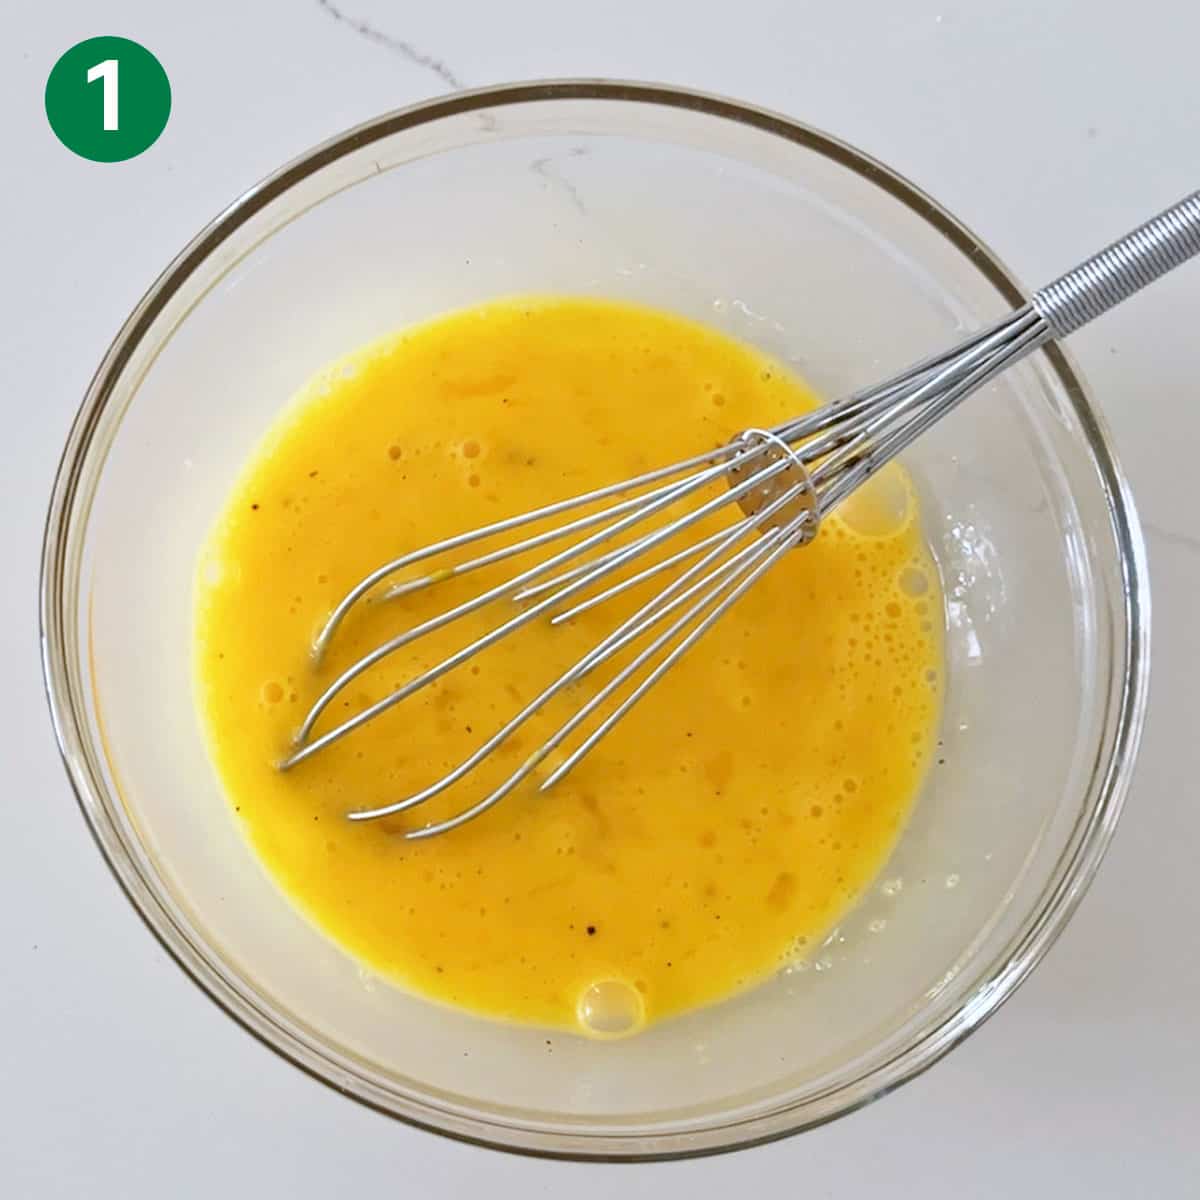
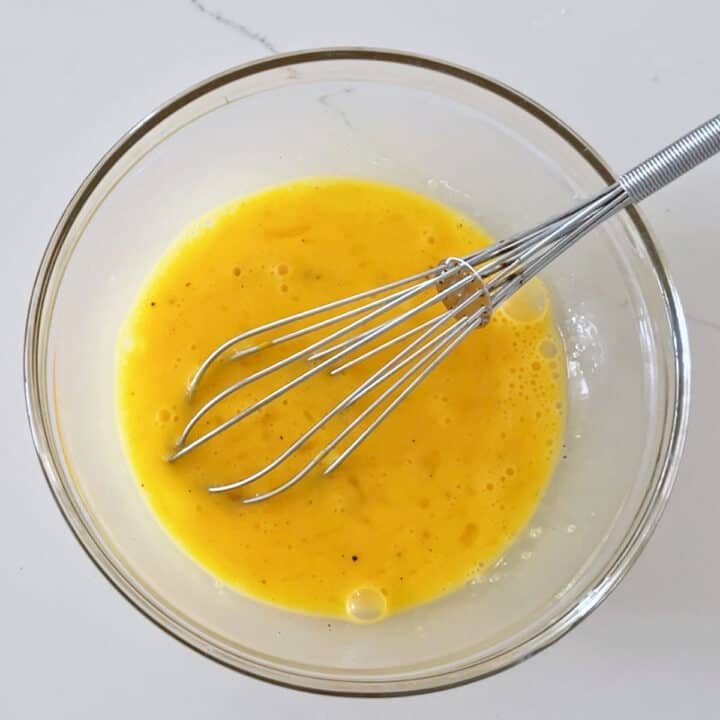
- Whisk the eggs, half-and-half, salt, and pepper in a medium bowl. Try to whisk so no traces of egg white remain, but don't go nuts about it. We're home cooks - we're not aiming for perfection. The photo below shows eggs with a few deposits of egg white. That's OK! Don't worry about it too much.
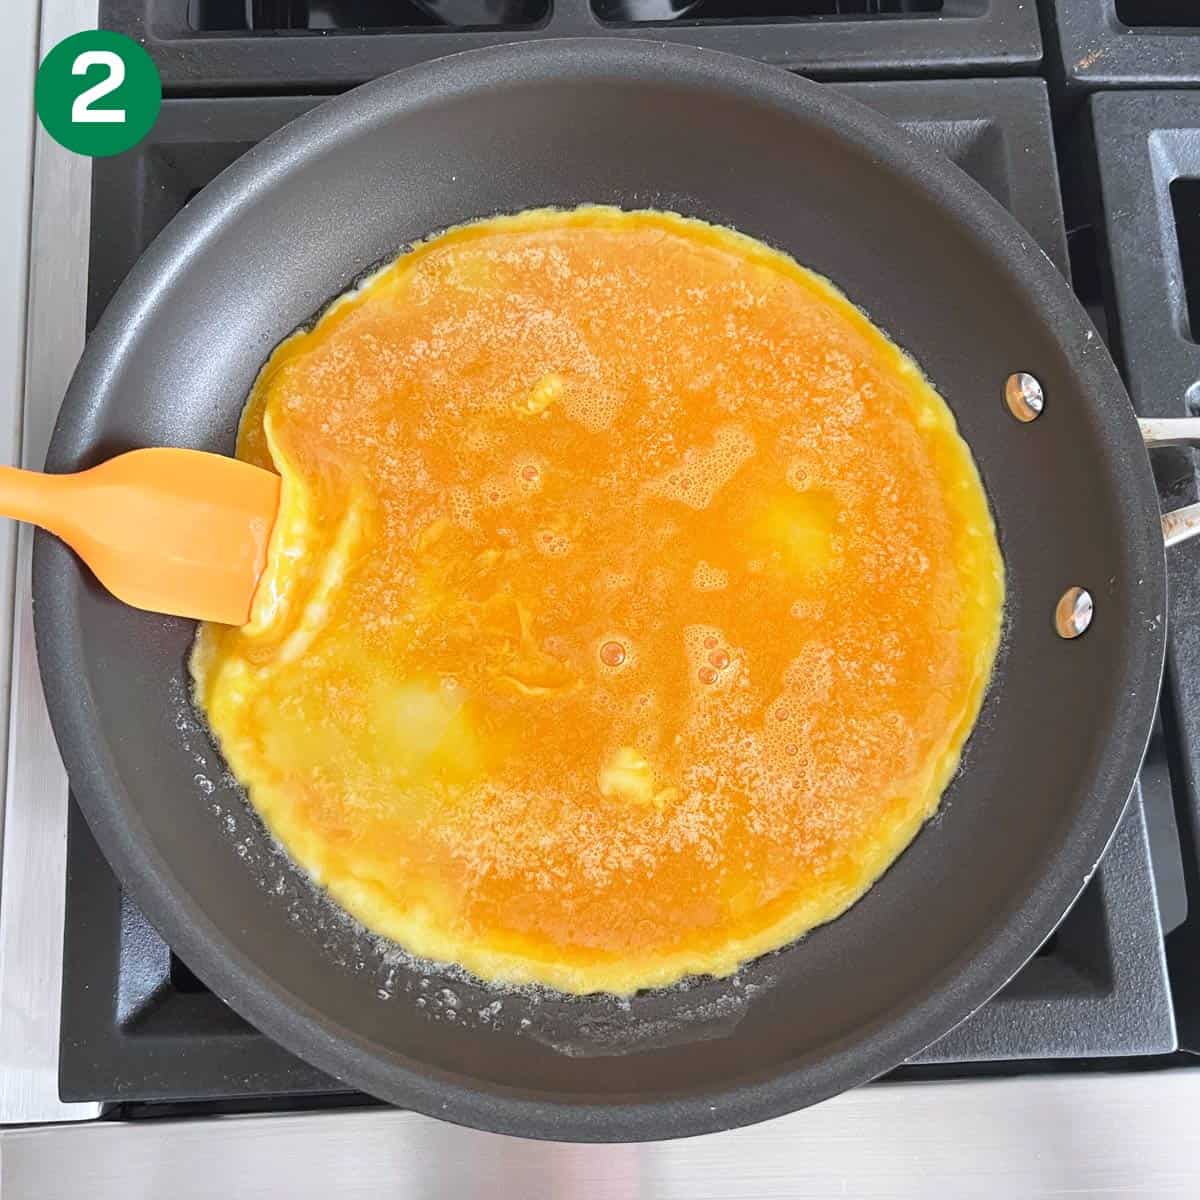
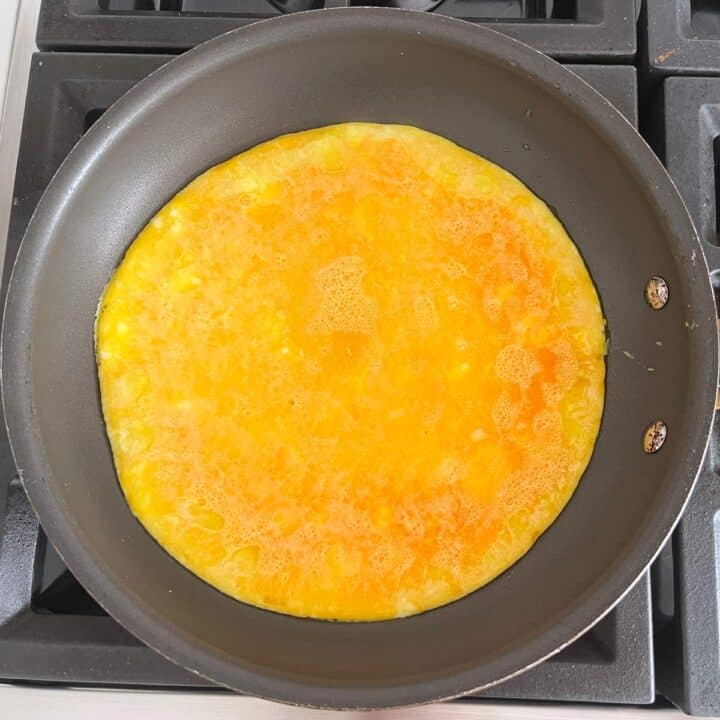
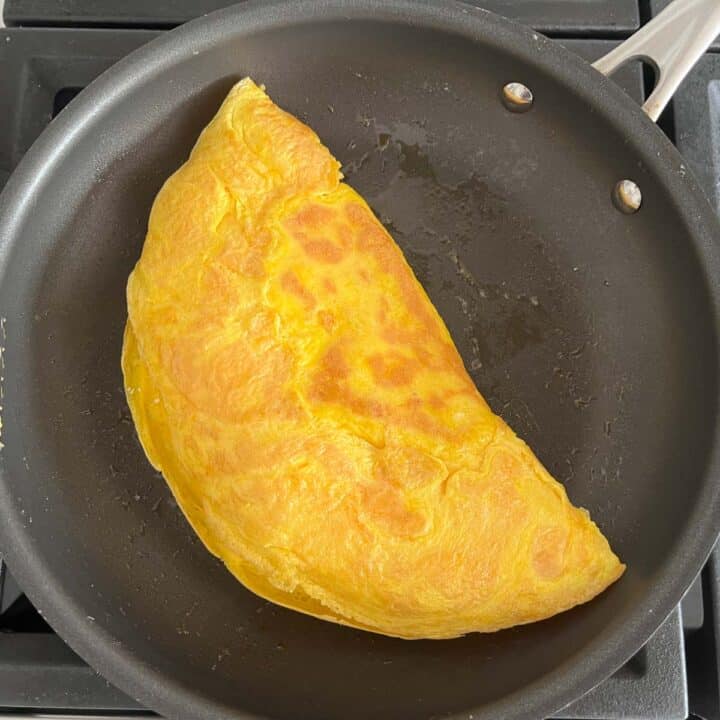
- Melt the butter over medium heat, then add the eggs. Lower the heat to medium-low. Let the eggs cook undisturbed until the edges are set, then use a rubber spatula to gently lift the edges and tilt the skillet so the runny eggs on top slide under the omelette and cook.
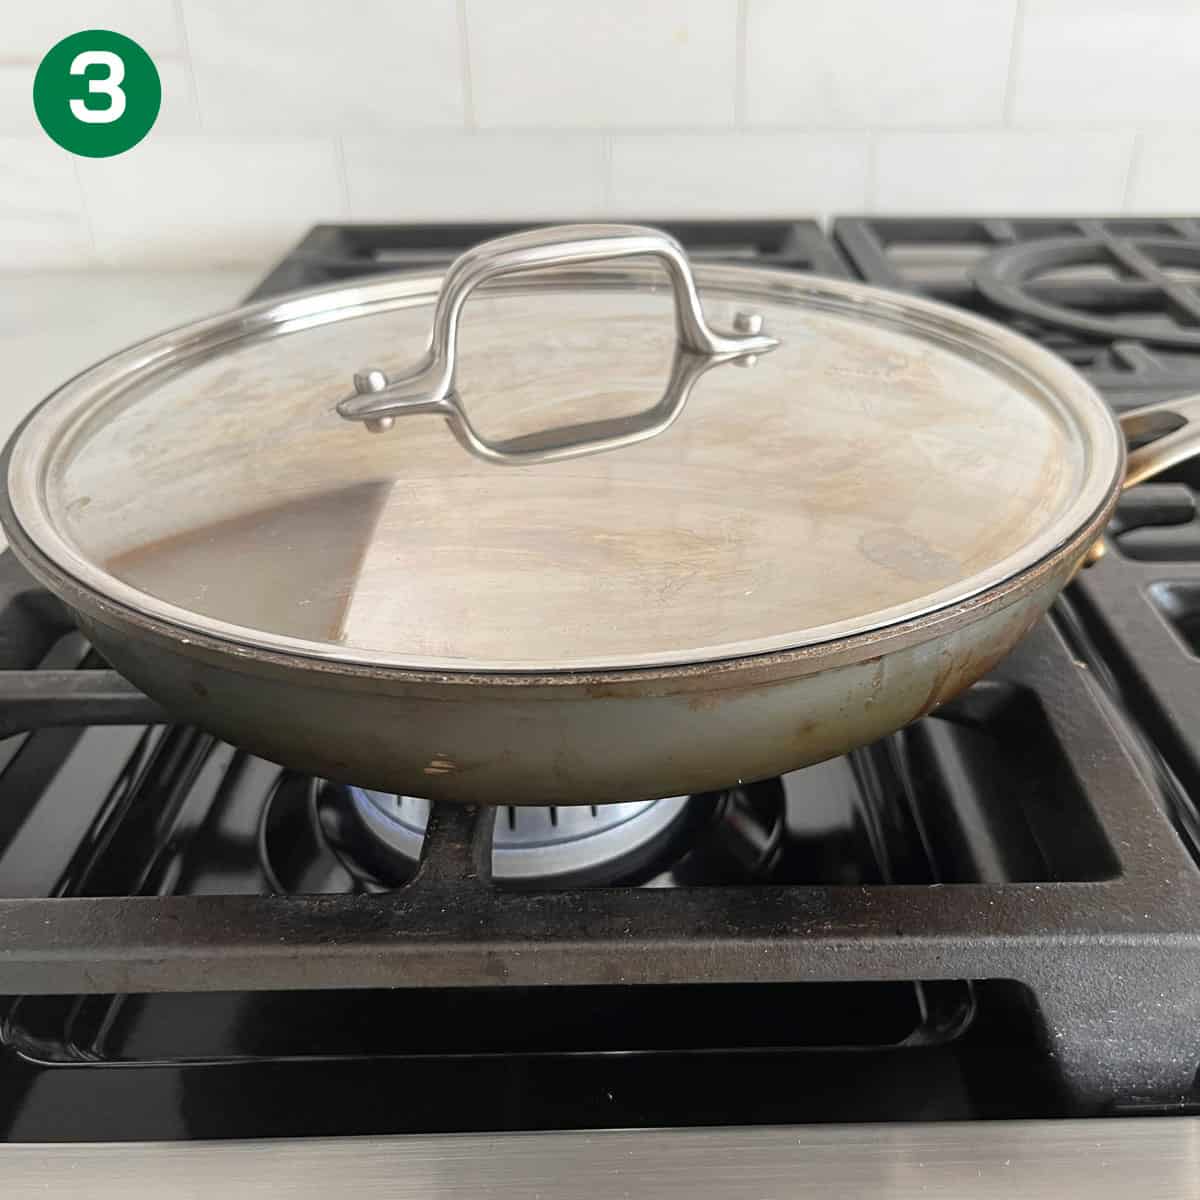
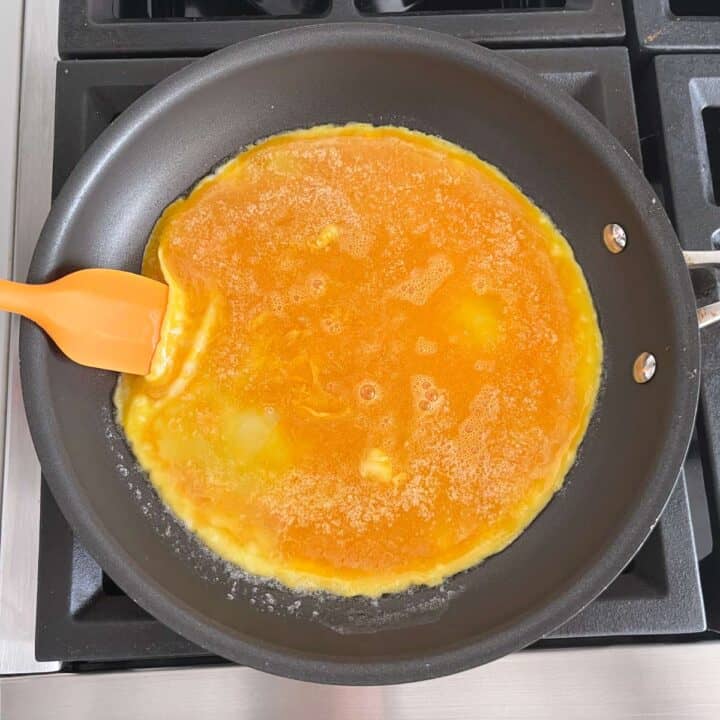
- Lower the heat to low. Cover the skillet with a lid and cook the omelette until the top is nearly set - it should be creamy and glossy but not liquid.
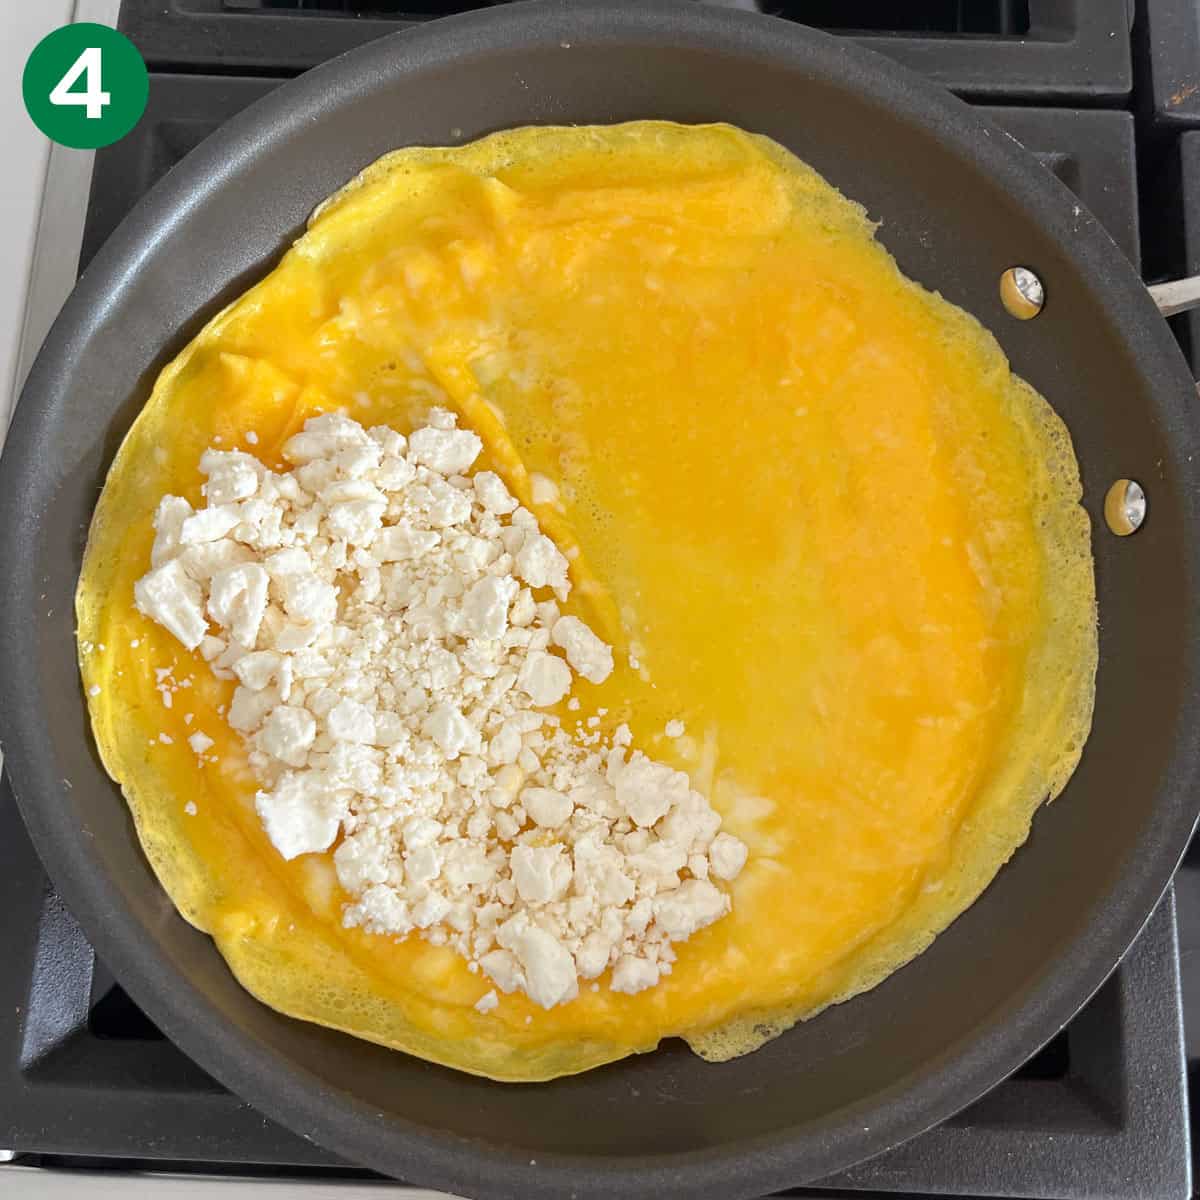
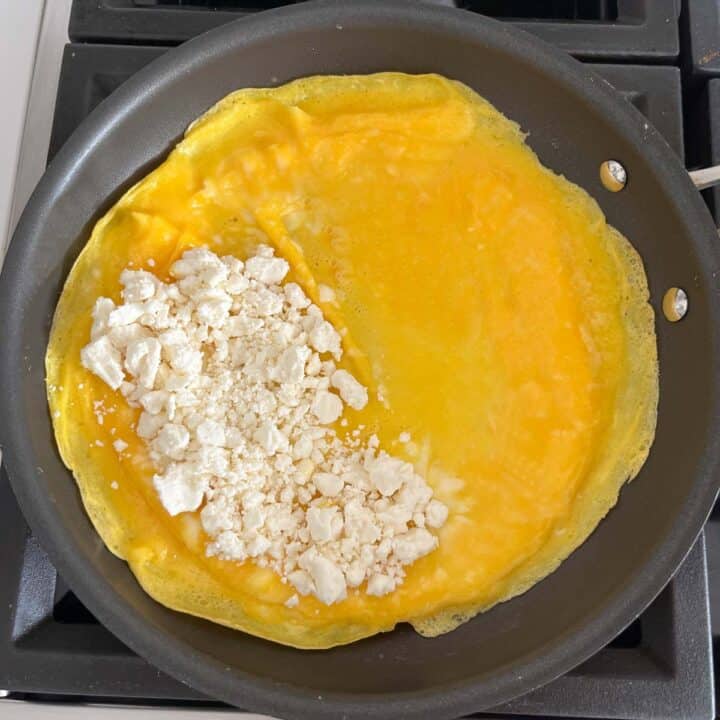
- If adding toppings, now is the time to add them. You will add them to half of the omelette.
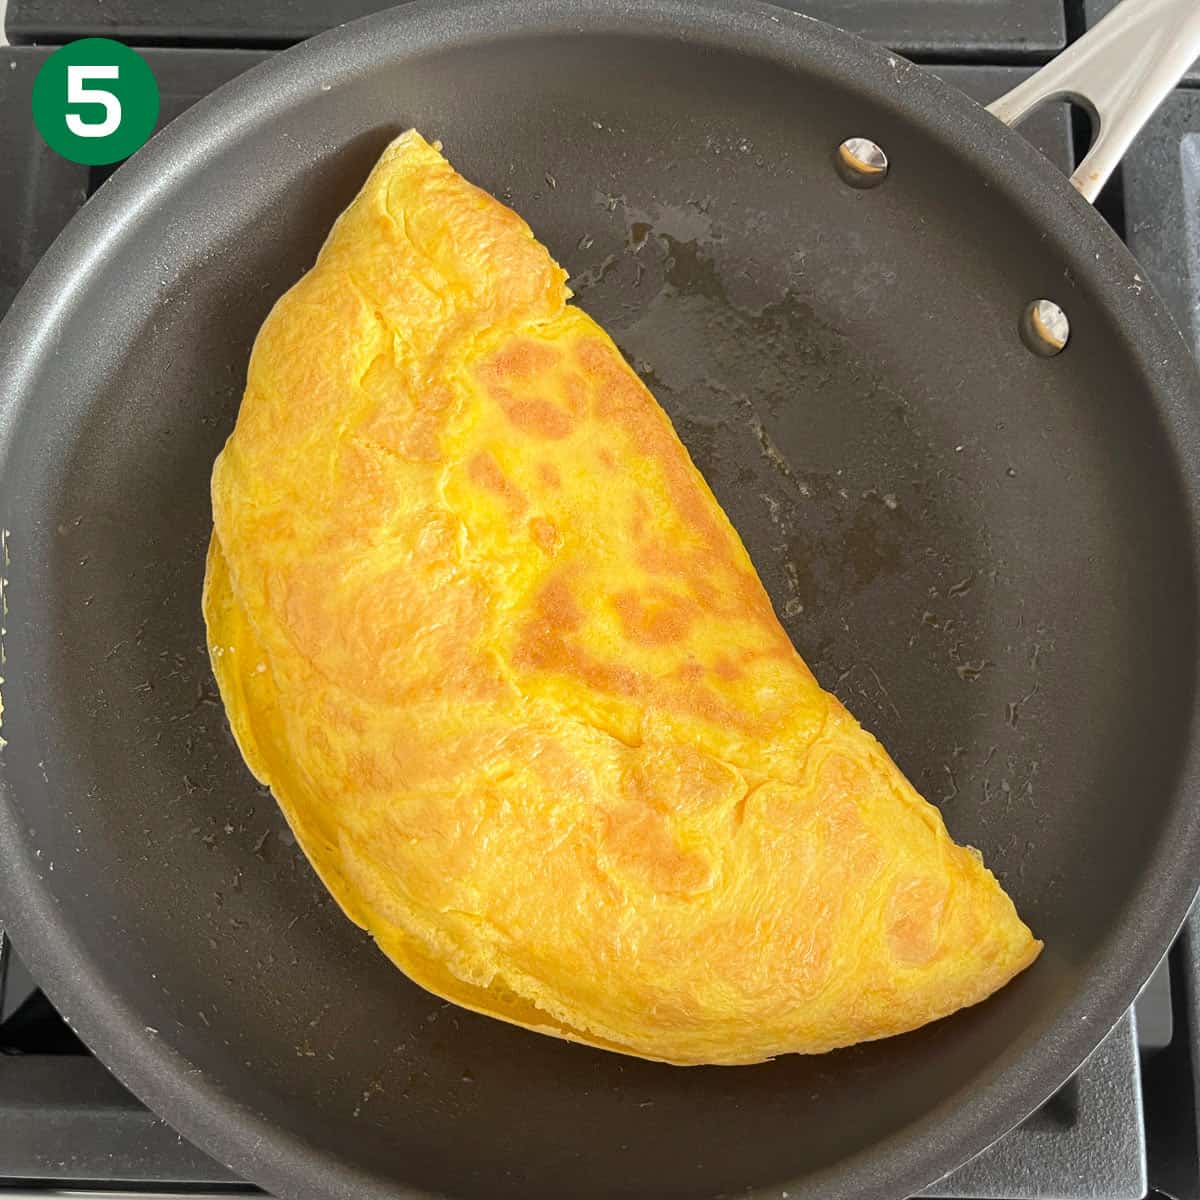
- Carefully fold the omelette in half with two wide spatulas.
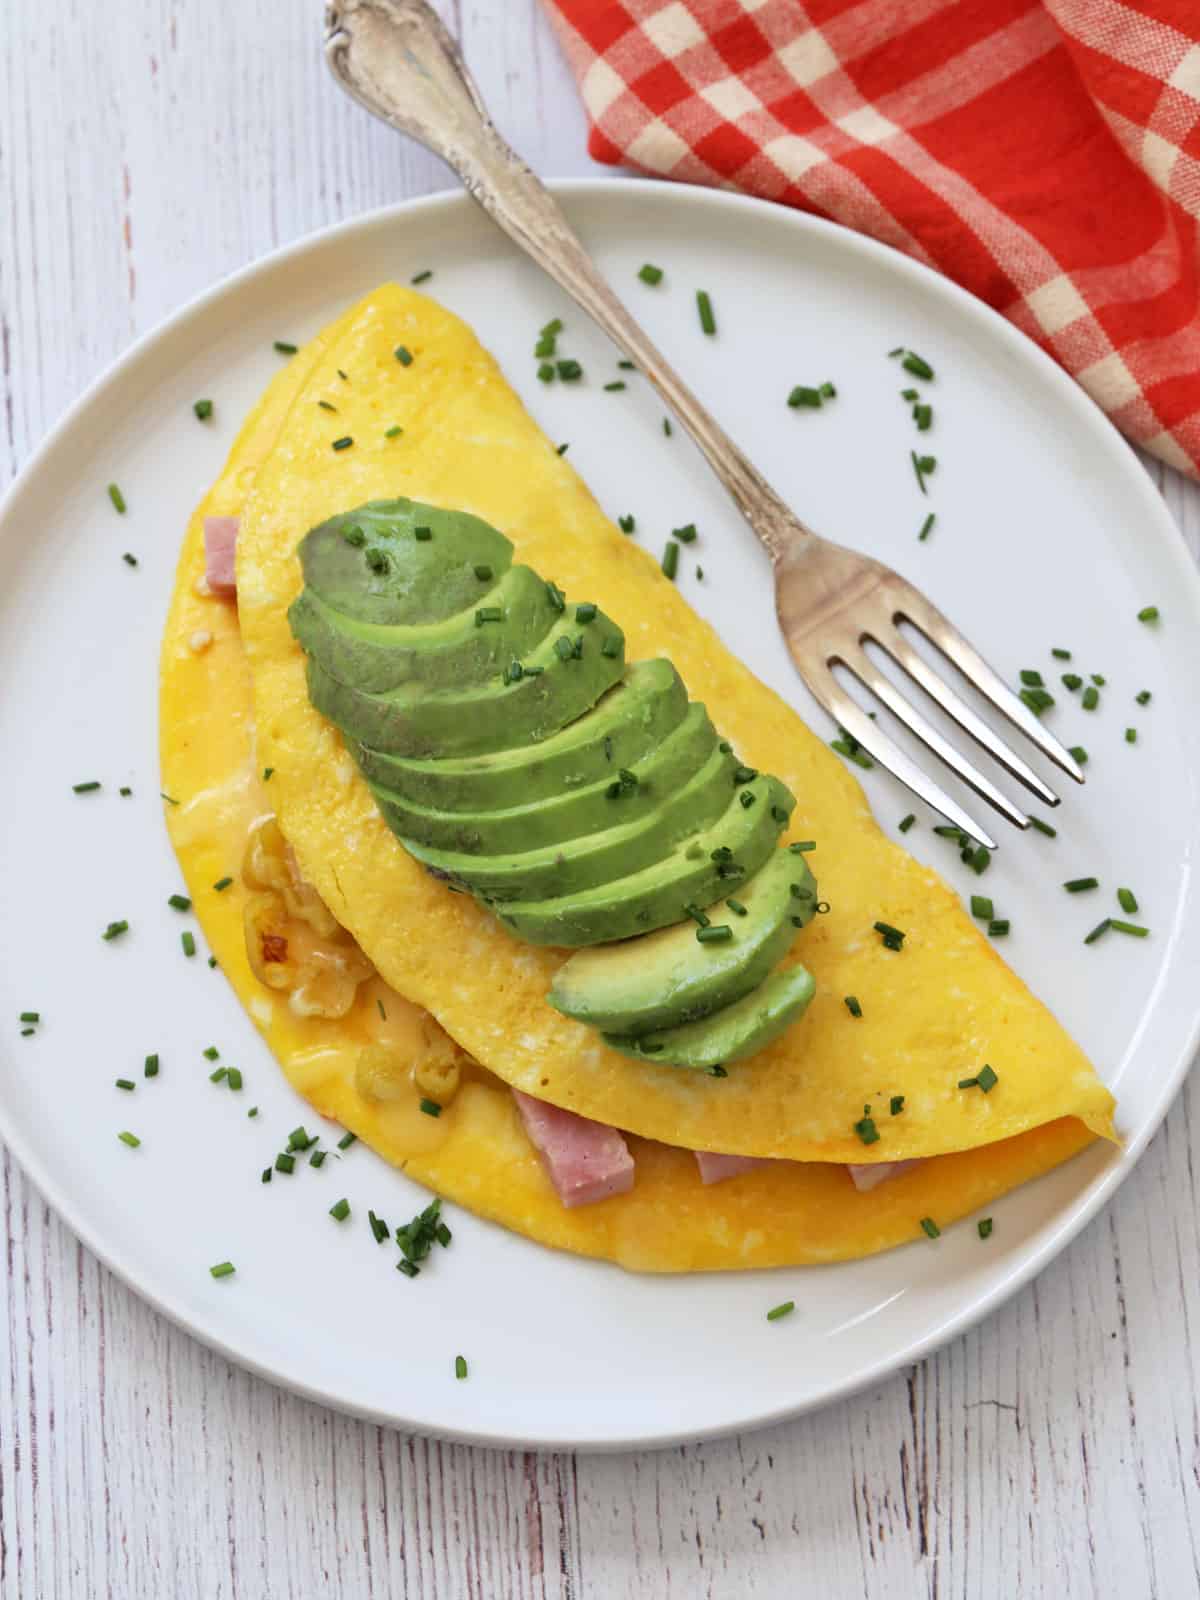
- Transfer the omelette to a serving plate, top it with chopped chives, and serve.
Endless Filling Options!
Much like fried eggs, the best thing about omelettes is that they are highly customizable and can be filled with lots of yummy fillings. Dry fillings, such as cheese, herbs, ham, bacon, and smoked salmon, work best. Vegetables like onions, mushrooms, and peppers work if they are well-cooked until their moisture has evaporated. Moist fillings, such as tomatoes or spinach, are not ideal, as they can make the omelette soggy, even when well-cooked and patted dry.
The image below shows the four versions I make most often. Here's a brief overview of how to make them.
Ham and cheese omelette: ¼ cup chopped ham and ¼ cup shredded melty cheese (cheddar, Swiss, gruyere). Remove them to the counter before you start cooking so that they are not refrigerator-cold. Scatter them on half of the omelette right before folding.
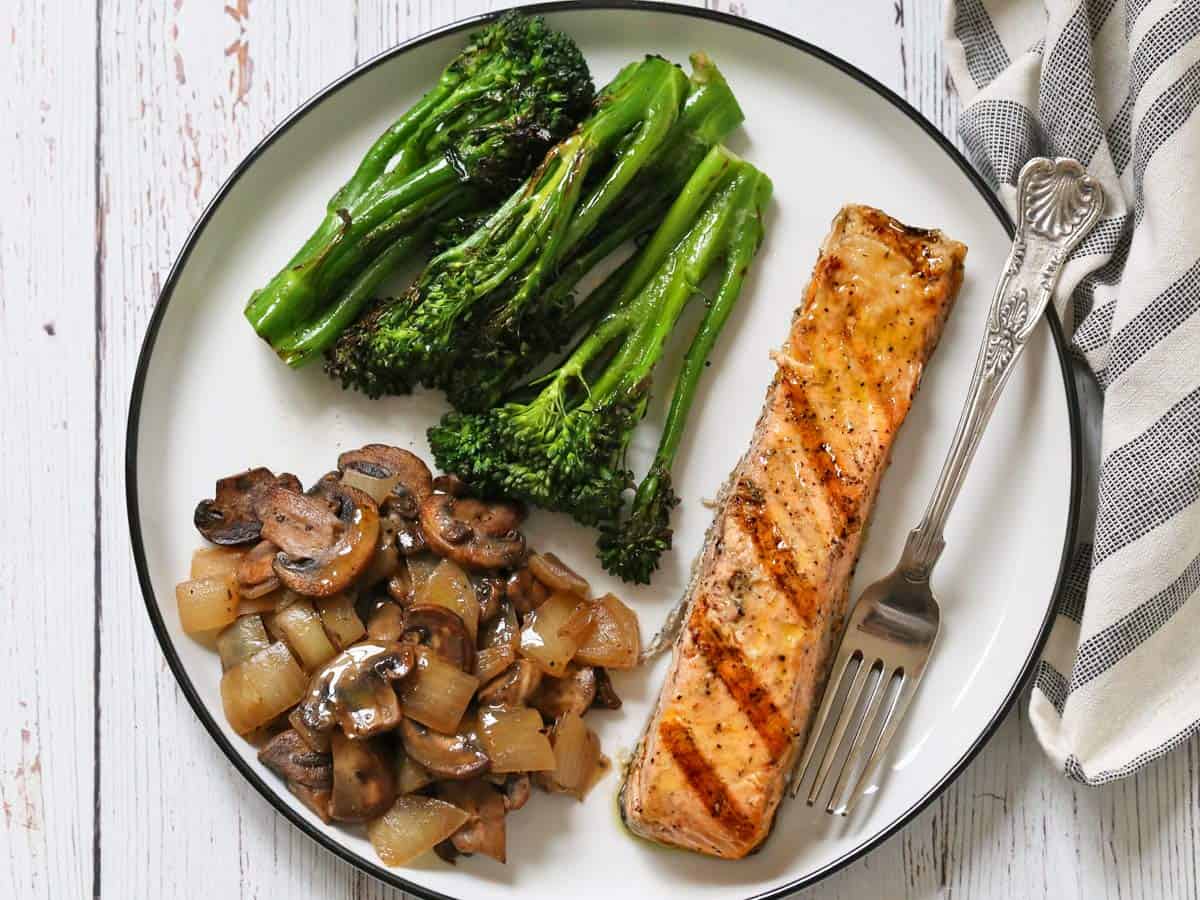
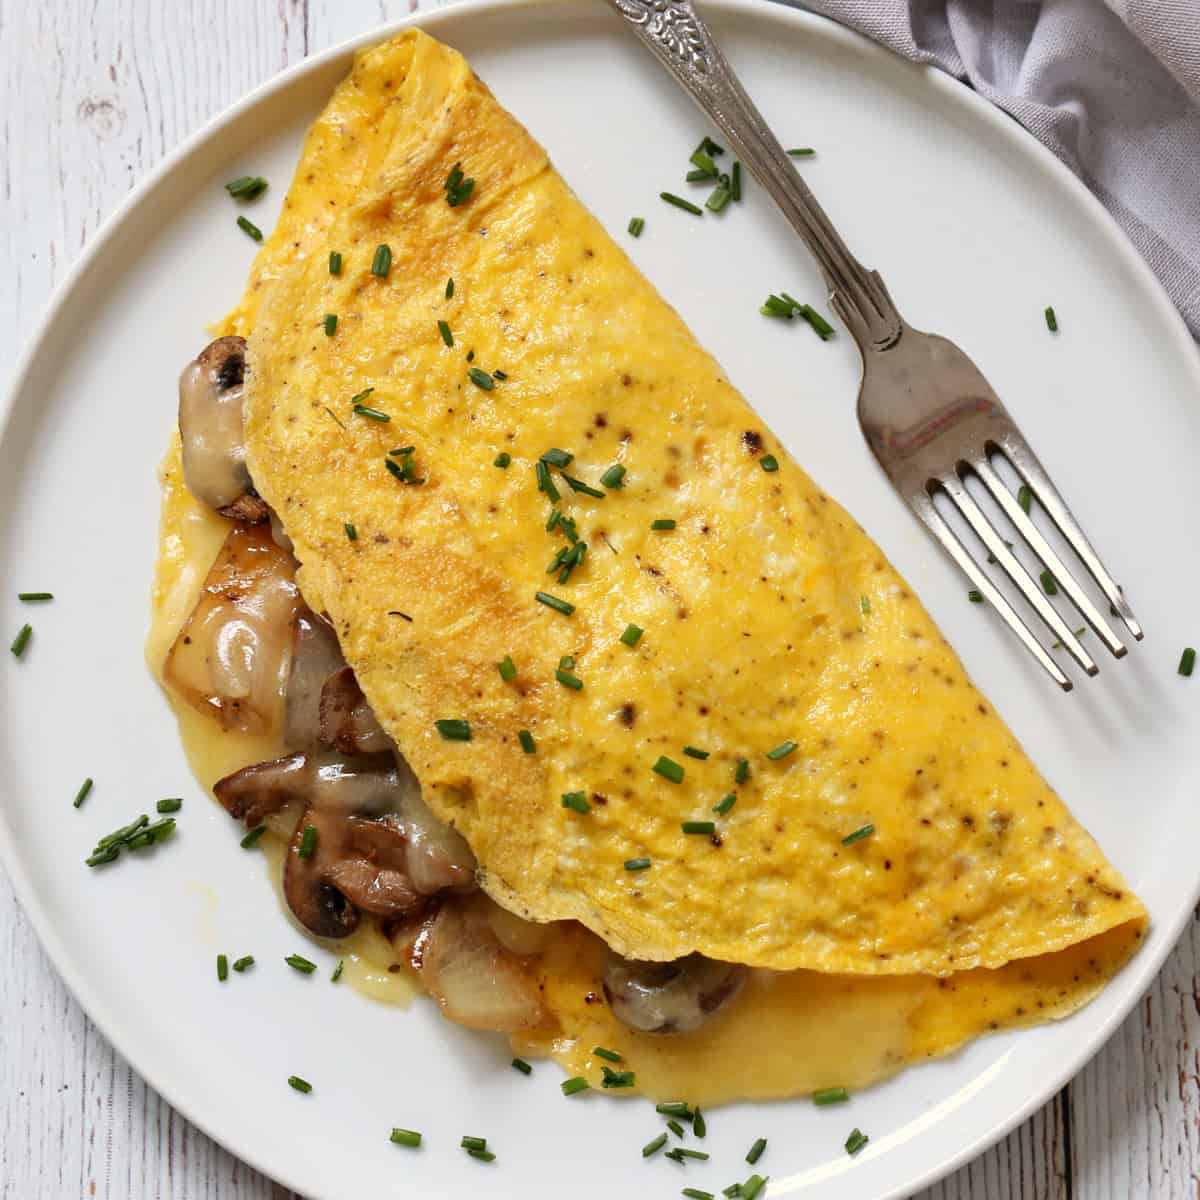
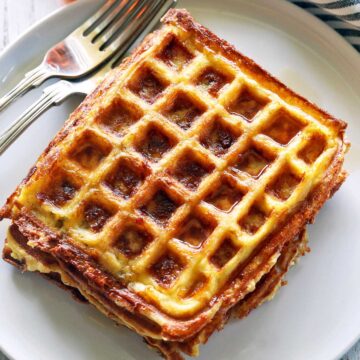
Mushroom omelette: I like to sauté 8 ounces of sliced mushrooms with 8 ounces of chopped onions in olive oil before making the omelette, seasoning them with salt, pepper, and dried thyme, and adding a splash of water if the pan gets too dry. I cook until the vegetables are browned and all liquid has evaporated. This makes about 2 cups of filling, enough for 4 omelettes. If I have leftovers, I save them and serve them later as a delicious side dish (shown in the photo below with grilled salmon and grilled broccolini). I also add ¼ cup of shredded cheese before folding the omelette.
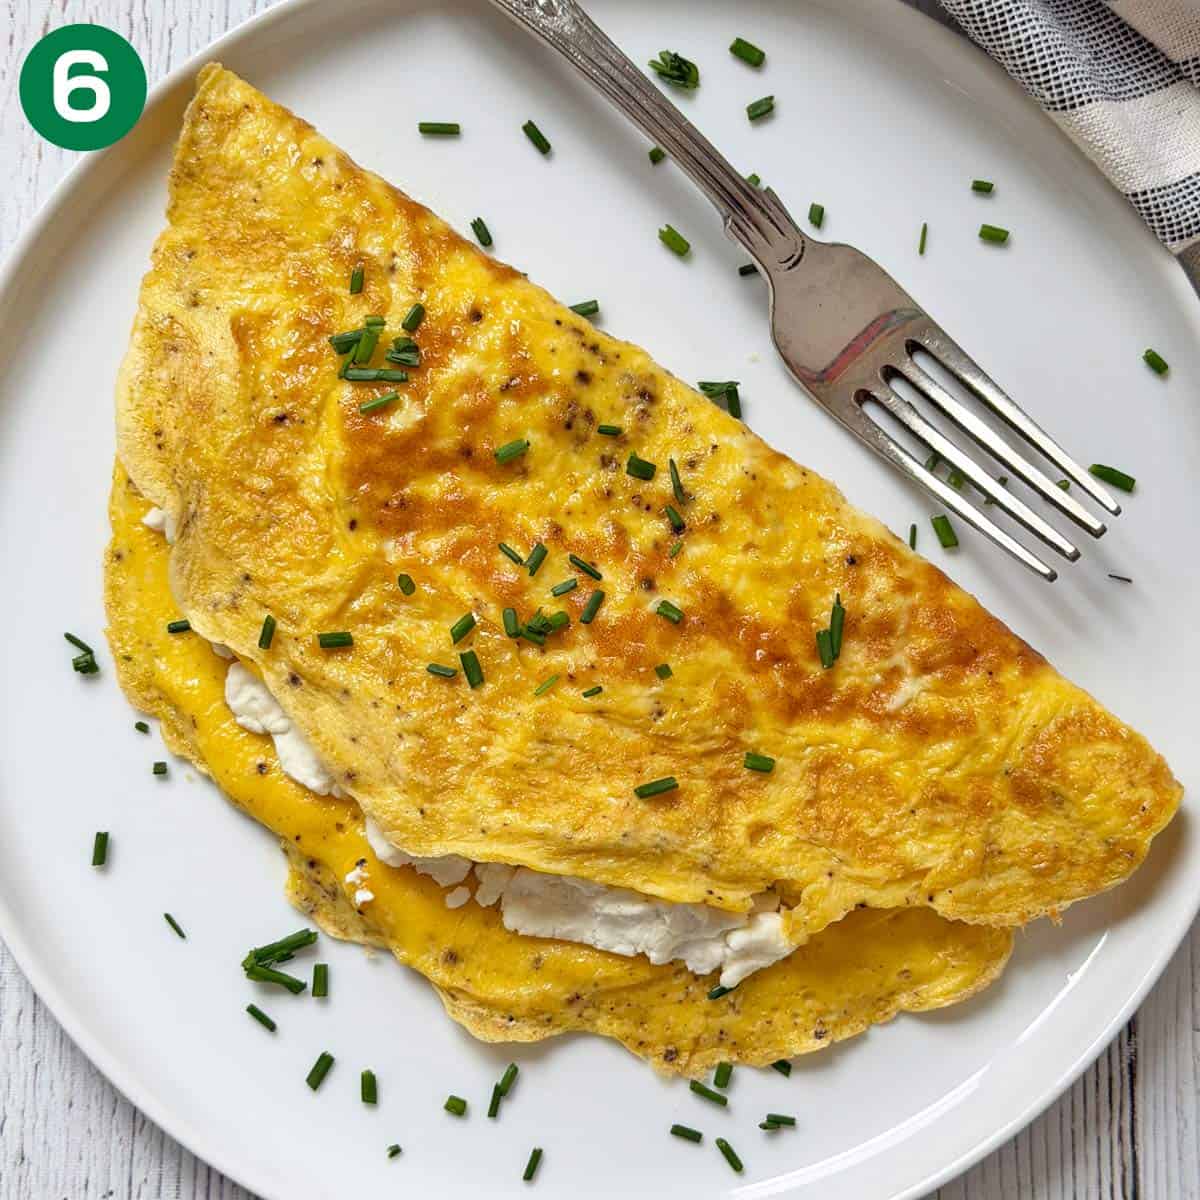
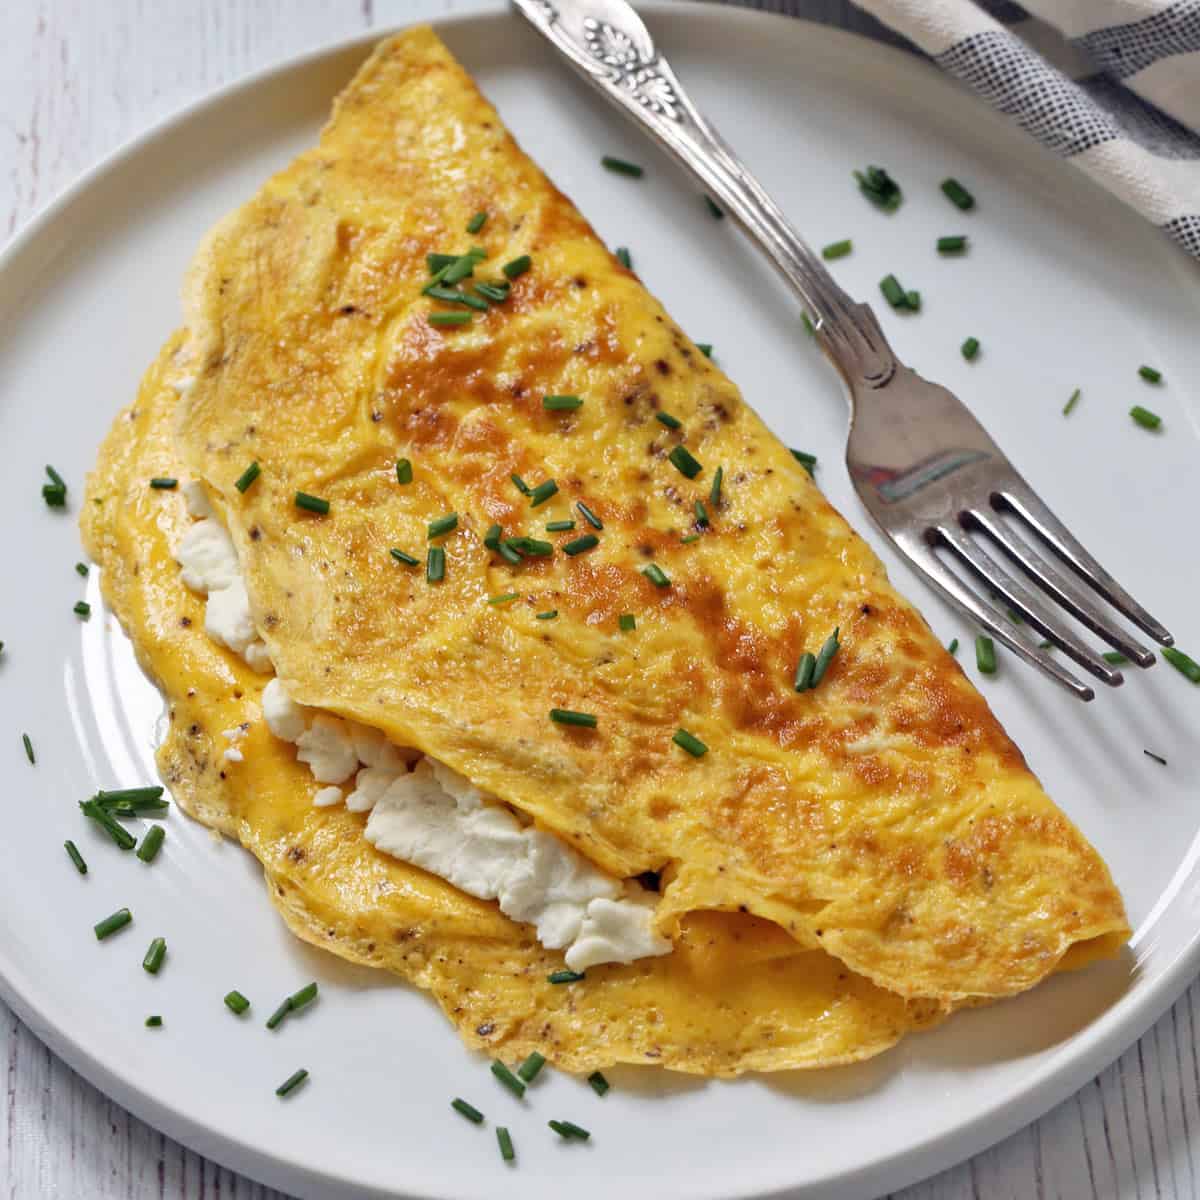
Goat cheese omelette: The simplest one! Add ¼ cup of goat cheese crumbles to half of the cooked omelette, fold, and top with chives.
Plain omelette: Surprisingly delicious! When I keep my omelette plain without any fillings, I prefer to cook it slowly and patiently over low heat, leaving it glossy and creamy, almost like a classic French omelette. This plain version can be topped with sour cream, guacamole, or salsa for extra flavor.


Tip: Skip Flipping the Omelette!
Cooking an omelette all the way through can seem challenging, but there are several ways to get it done. Here are the four methods:
- Lower heat and cover: The simplest, most dependable method and the one I usually prefer. No flipping needed! Lowering the heat and covering the skillet traps steam, which gently cooks the top of the omelette without needing to turn it.
- Plate flip: Place a large plate over the skillet, invert the whole thing, then slide the omelette back into the skillet. I use this method when making this egg-white omelette.
- Two wide spatulas: You support the omelette on both sides with two wide spatulas, then lift and turn it. The challenge here is that the omelette can tear.
- Pan flip: A quick toss using the pan's curve to turn the omelette in the air. Most home cooks, myself included, don't even attempt this one!
More Recipe Tips
- The most important part of making a great omelette is using a skillet with a truly nonstick surface. That's why pricey nonstick pans aren't always worth the investment - even the best ones lose their coating over time. For best results, choose a nonstick pan that's in new or like-new condition.
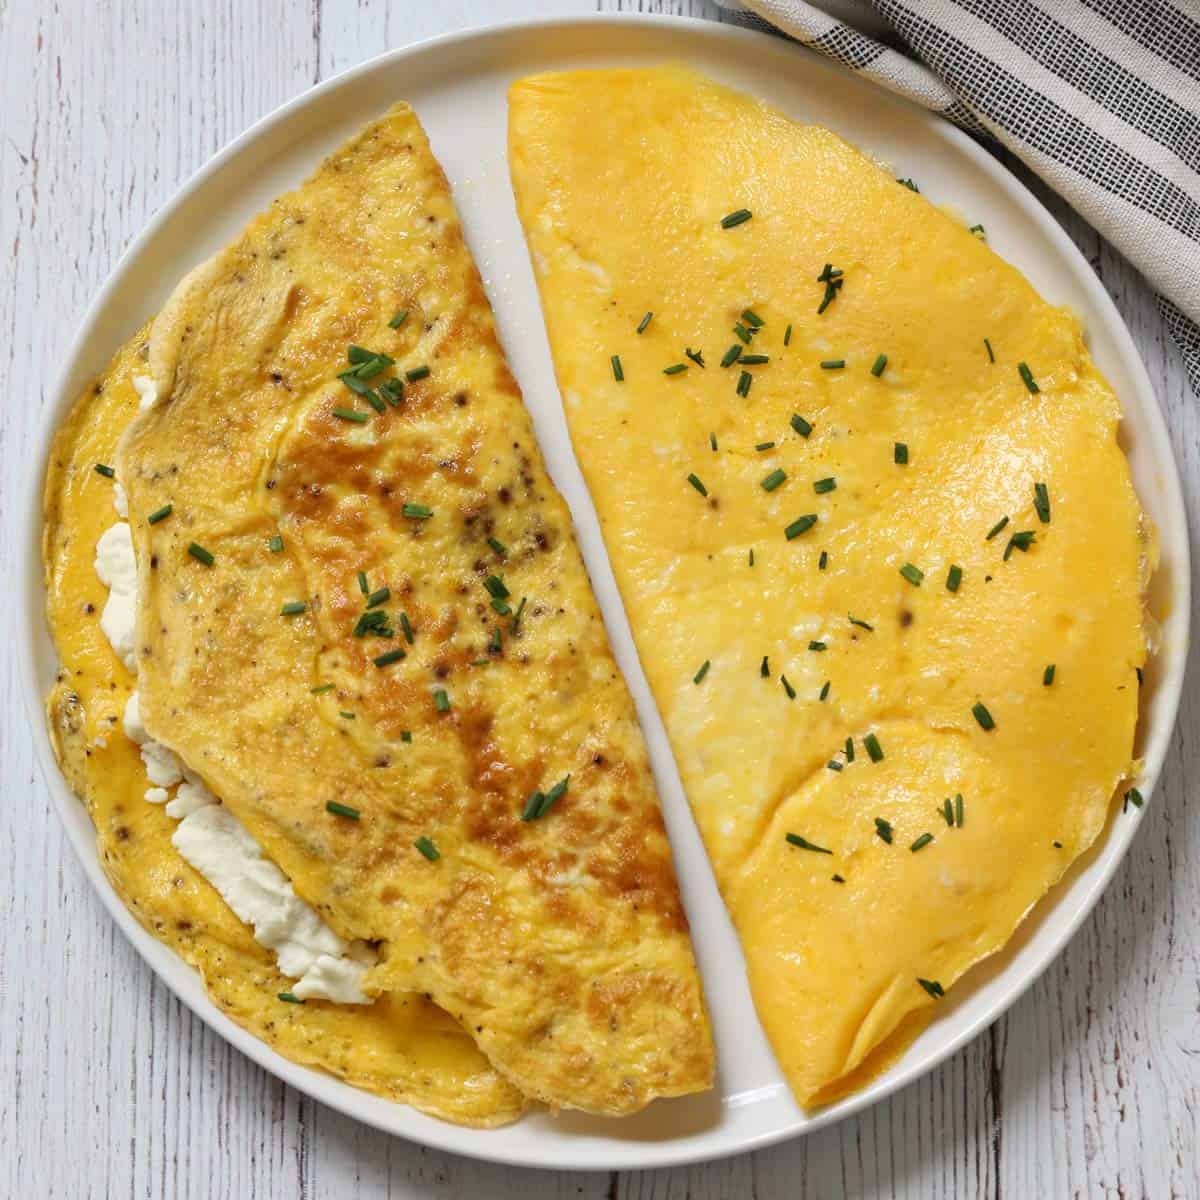
- While the classic French omelette is pale and custardy, a browned one has a richer, nuttier flavor, and many people like it that way. It's a matter of preference - there's no right or wrong way!
If you don't want your omelette to brown, lower the heat to low immediately after adding the eggs to the skillet. The entire process will take several minutes longer, but your omelette should remain creamy and pale. The photo below shows the contrast between a creamy plain omelette and a well-browned goat cheese omelette.
Recipe FAQs
Sure! Use two large eggs, but keep the other ingredients the same - a pinch of salt and pepper, a tablespoon of half-and-half, and half a tablespoon of butter for frying.
For a three-egg omelette, use a nonstick 10-inch skillet. For a two-egg omelette, use a nonstick 8-inch skillet. The photo below shows the noticeable difference between these two sizes. 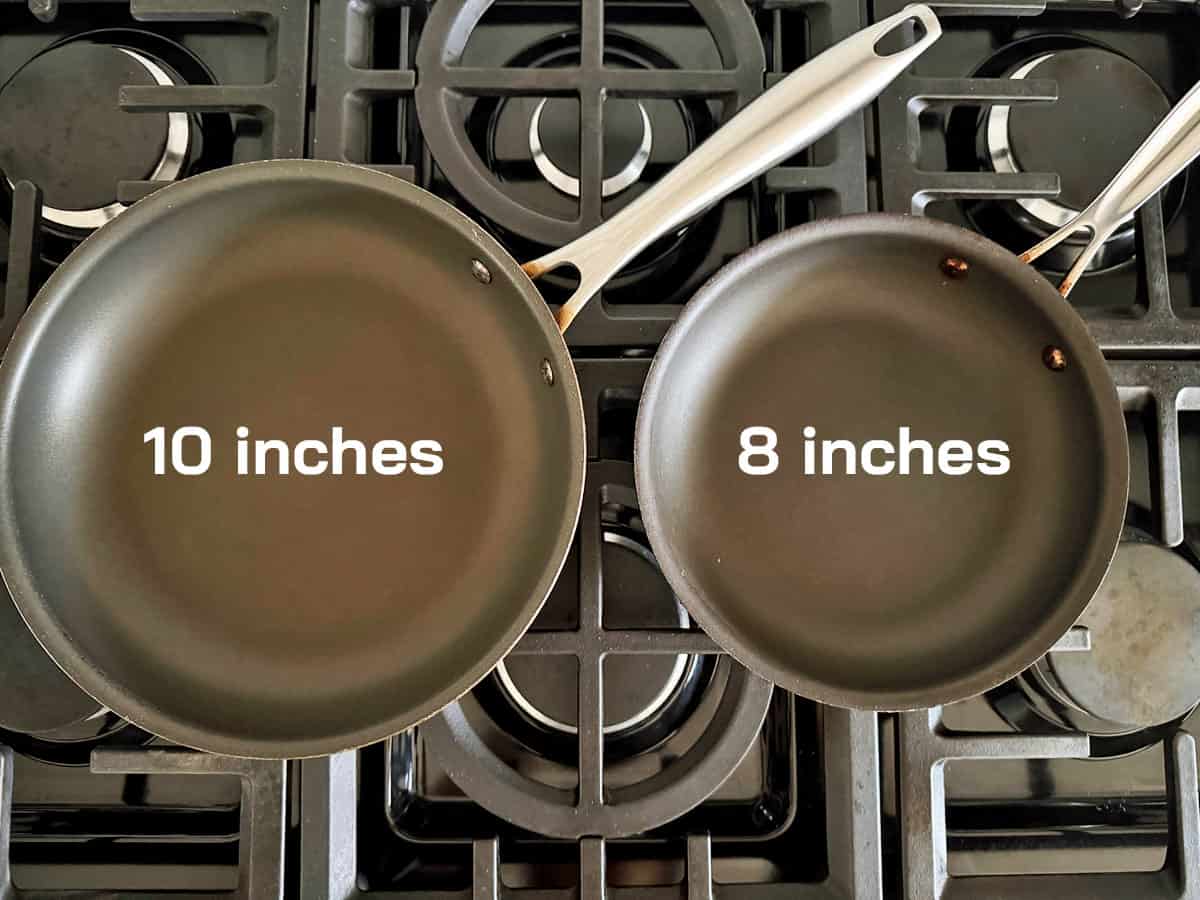
I usually cook them one at a time, placing each cooked omelette in a 170°F oven and moving on to the next. On occasion, to speed things up, I use two skillets at once.
Whatever method you choose, have your fillings prepared in advance. Sauté the mushrooms and onions before you start cooking the eggs, grate the cheese, and chop the ham and chives.
Omelettes are best eaten right after cooking, when they're soft and tender. You can prepare your fillings and whisk the eggs up to a day ahead, keeping them covered in the fridge (as shown in the photo below), but do the actual cooking just before serving.
As for leftovers, they can be kept in an airtight container in the fridge for up to two days. Reheat them on both sides in a buttered skillet on low heat until heated through. They won't be as tender and creamy as a freshly cooked omelette, but they should still taste pretty good. 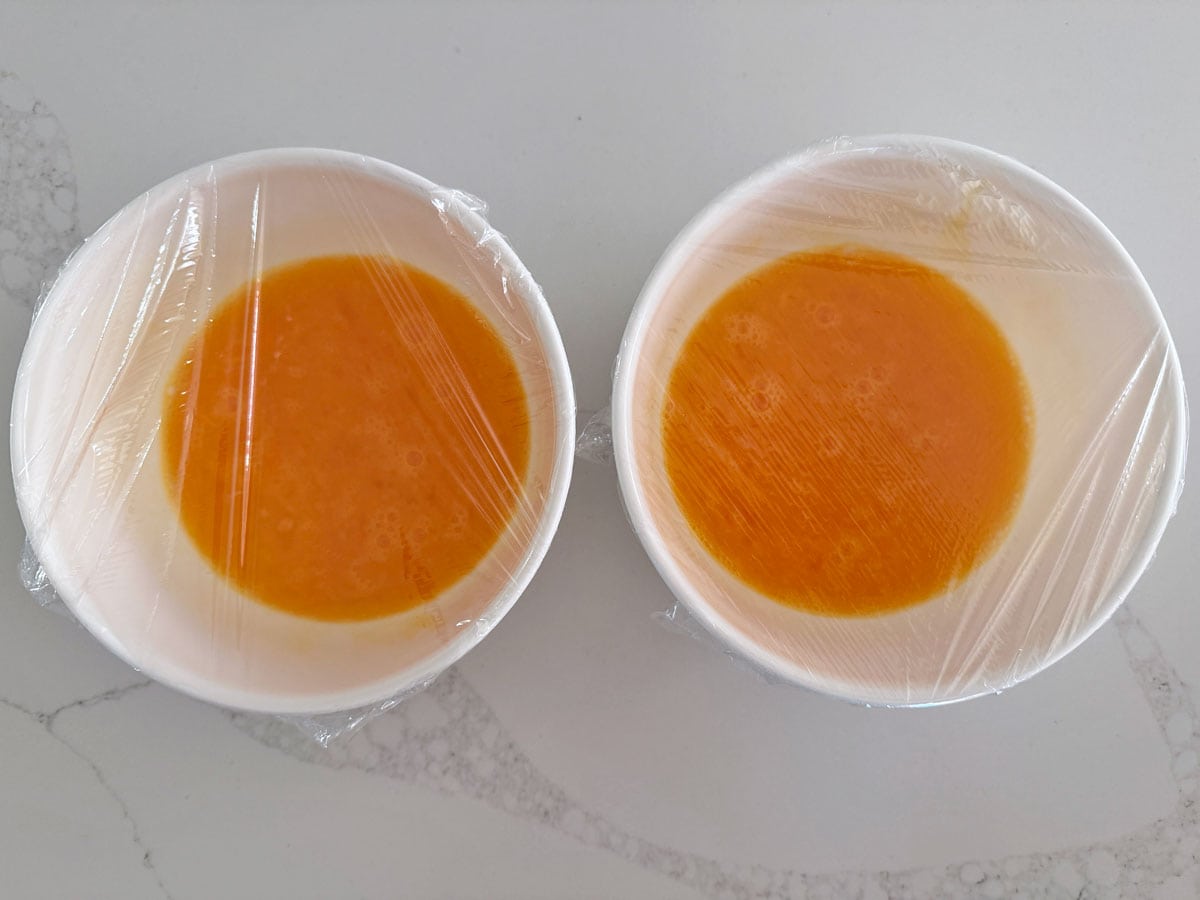
Serving Suggestions
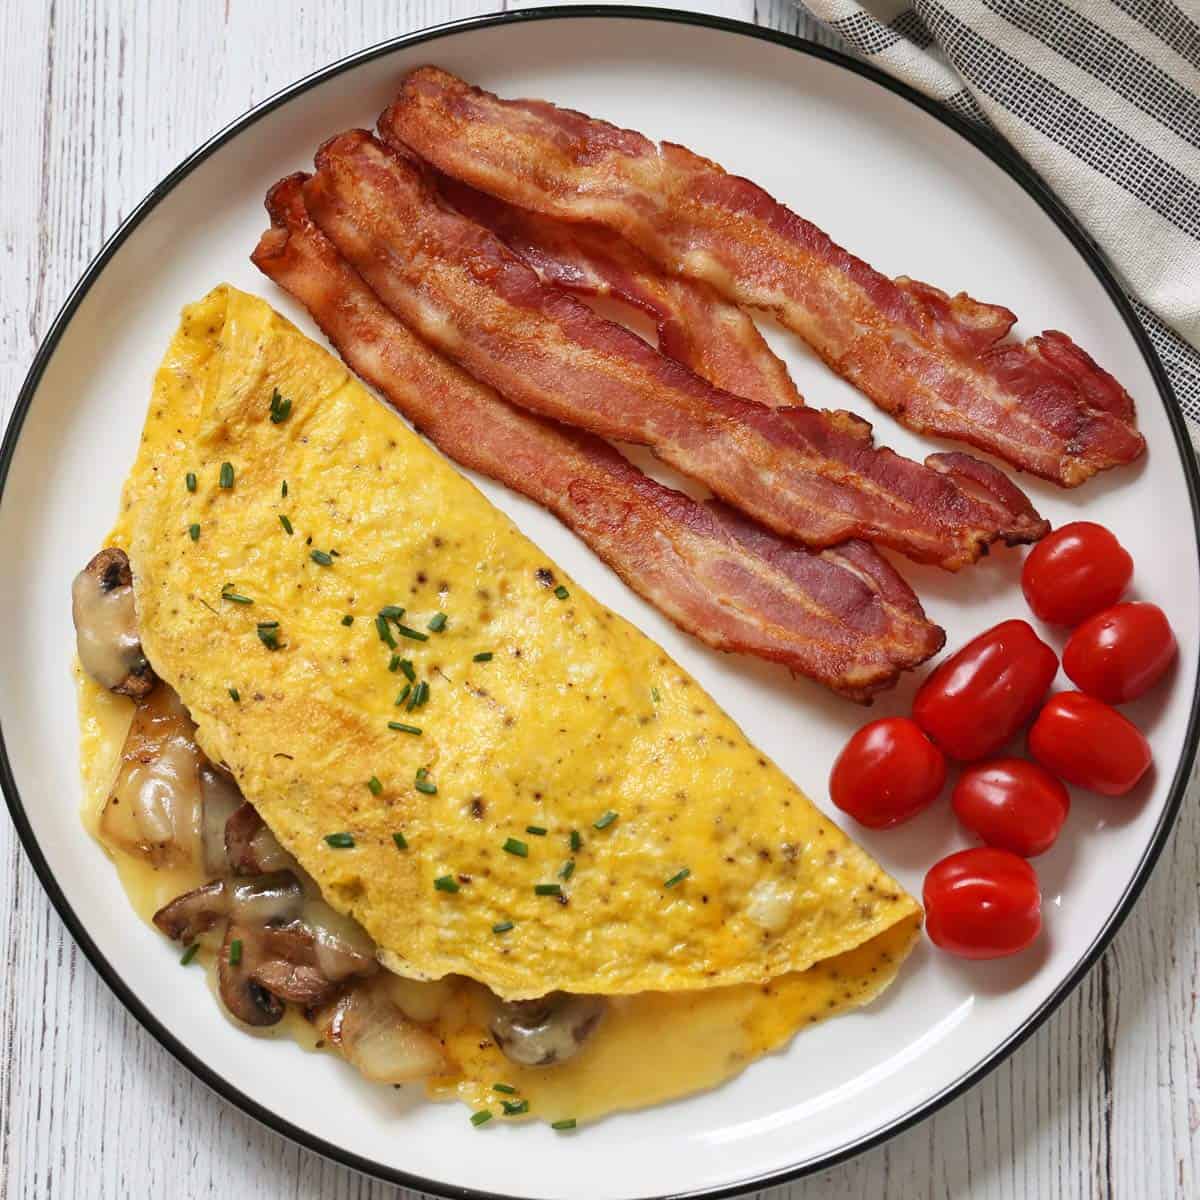
A three-egg omelette with a hearty filling is a big, satisfying breakfast that can be served alone, but I sometimes add oven-baked bacon (as shown in the photo below), biscuits, or almond flour bread.
When I serve an omelette for dinner, I like to add a salad (as shown in the image below) or a simple steamed vegetable like steamed broccoli, steamed asparagus, or steamed spinach.

Recipe Card

Easy Omelette Recipe (Four Variations)
Video
Ingredients
- 3 large eggs
- 1 tablespoon half-and-half
- ⅛ teaspoon sea salt
- ⅛ teaspoon black pepper - or white pepper
- ½ tablespoon butter
- 1 tablespoon chives - chopped
Instructions
- Whisk the eggs, half-and-half, salt, and pepper in a medium bowl.3 large eggs, 1 tablespoon half-and-half, ⅛ teaspoon sea salt, ⅛ teaspoon black pepper

- Melt the butter in a 10-inch lidded nonstick skillet over medium heat. When the butter foams, add the eggs, tilting the skillet to spread them so that they cover the bottom of the skillet. Lower the heat to medium-low.½ tablespoon butter
- Let the eggs cook undisturbed until the edges are set, for about a minute, then use a rubber spatula to gently lift the edges and tilt the skillet so that the runny eggs on top slide under the omelette and cook.
- Lower the heat to low. Cover the skillet with a lid and cook the omelette until the top is nearly set - it should be creamy and glossy but not liquid. This should take 2-3 minutes over low heat.
- If adding fillings, now is the time to add them. You will add them to half of the omelette. See the Notes section below for a few options.
- Fold the omelette in half and transfer it to a serving plate.
- Top with chopped chives and serve.1 tablespoon chives


Notes
Flavor Variations
Ham and cheese omelette: ¼ cup chopped ham and ¼ cup shredded melty cheese (cheddar, Swiss, gruyere). Remove them to the counter before you start cooking so that they are not refrigerator-cold. Scatter them on half of the omelette right before folding. Mushroom omelette: I like to sauté 8 ounces of sliced mushrooms with 8 ounces of chopped onions in olive oil before making the omelette, seasoning them with salt, pepper, and dried thyme, and adding a splash of water if the pan gets too dry. I cook until the vegetables are browned and all liquid has evaporated. This makes about 2 cups of filling, enough for 4 omelettes. If I have leftovers, I save them and serve them later as a delicious side dish. I also add ¼ cup of shredded cheese before folding the omelette. Goat cheese omelette: The simplest one! Add ¼ cup of goat cheese crumbles to half of the cooked omelette, fold, and top with chives. Plain omelette: Surprisingly delicious! When I keep my omelette plain without any fillings, I prefer to cook it slowly and patiently over low heat, leaving it glossy and creamy, almost like a classic French omelette. This plain version can be topped with sour cream, guacamole, or salsa for extra flavor.Helpful Tips
- Seasonings, especially salt, are guidelines - adjust to taste.
- The most important part of making a great omelette is using a skillet with a truly nonstick surface. For best results, choose a nonstick pan that's in excellent, new, or like-new condition.
- While the classic French omelette is pale and custardy, a browned one has a richer, nuttier flavor, and many people like it that way. It's simply a matter of preference - there's no right or wrong way! If you don't want your omelette to brown, lower the heat to low immediately after adding the eggs to the skillet. The entire process will take several minutes longer, but your omelette should remain creamy and pale.
- To make omelettes for more than one person, cook them one at a time, placing each cooked omelette in a 170°F oven and moving on to the next.
- Have your fillings prepared in advance. Sauté the mushrooms and onions before you start cooking the eggs, grate the cheese, and chop the ham and chives.
- Omelettes are best eaten right after cooking, when they're soft and tender, so storing leftovers isn't ideal. However, if needed, they can be kept in an airtight container in the fridge for up to two days. Reheat them on both sides in a buttered skillet on low heat until heated through.
Nutrition per Serving
Save this Recipe!
We will also add you to our weekly newsletter. Unsubscribe anytime. See healthyrecipesblogs.com/privacy/ to learn how we use your email.
Disclaimers
Most recipes are low-carb and gluten-free, but some are not. Recommended products are not guaranteed to be gluten-free. Nutrition info is approximate - please verify it. The carb count excludes non-nutritive sweeteners. Please read these Terms of Use before using any of my recipes.


George says
Great detailed recipe, great results. I never quite got the hang of flipping an omelet without it turning into scrambled eggs. 🙂 Now, I can finally make a decent omelet! Thanks, Vered!
Vered DeLeeuw says
Glad this was helpful, George! I know exactly what you mean about flipping an omelette. 🙂