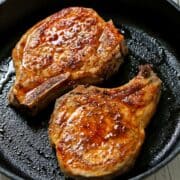
These baked pork chops are the perfect weeknight dinner. A quick sear, then finishing them in a 400°F oven for ten minutes, produces juicy, flavorful chops.
These baked pork chops are delicious, affordable, and easy. The seasoning - garlic and paprika - adds so much flavor. The secret to their juiciness is searing them without moving to create a crust and then placing them in the oven to finish cooking. The reliably juicy result has made them one of my family's favorite meals, and this recipe works with bone-in or boneless chops.
Ingredients and Variations
See the recipe card for exact measurements. Here are my comments on some of the ingredients.
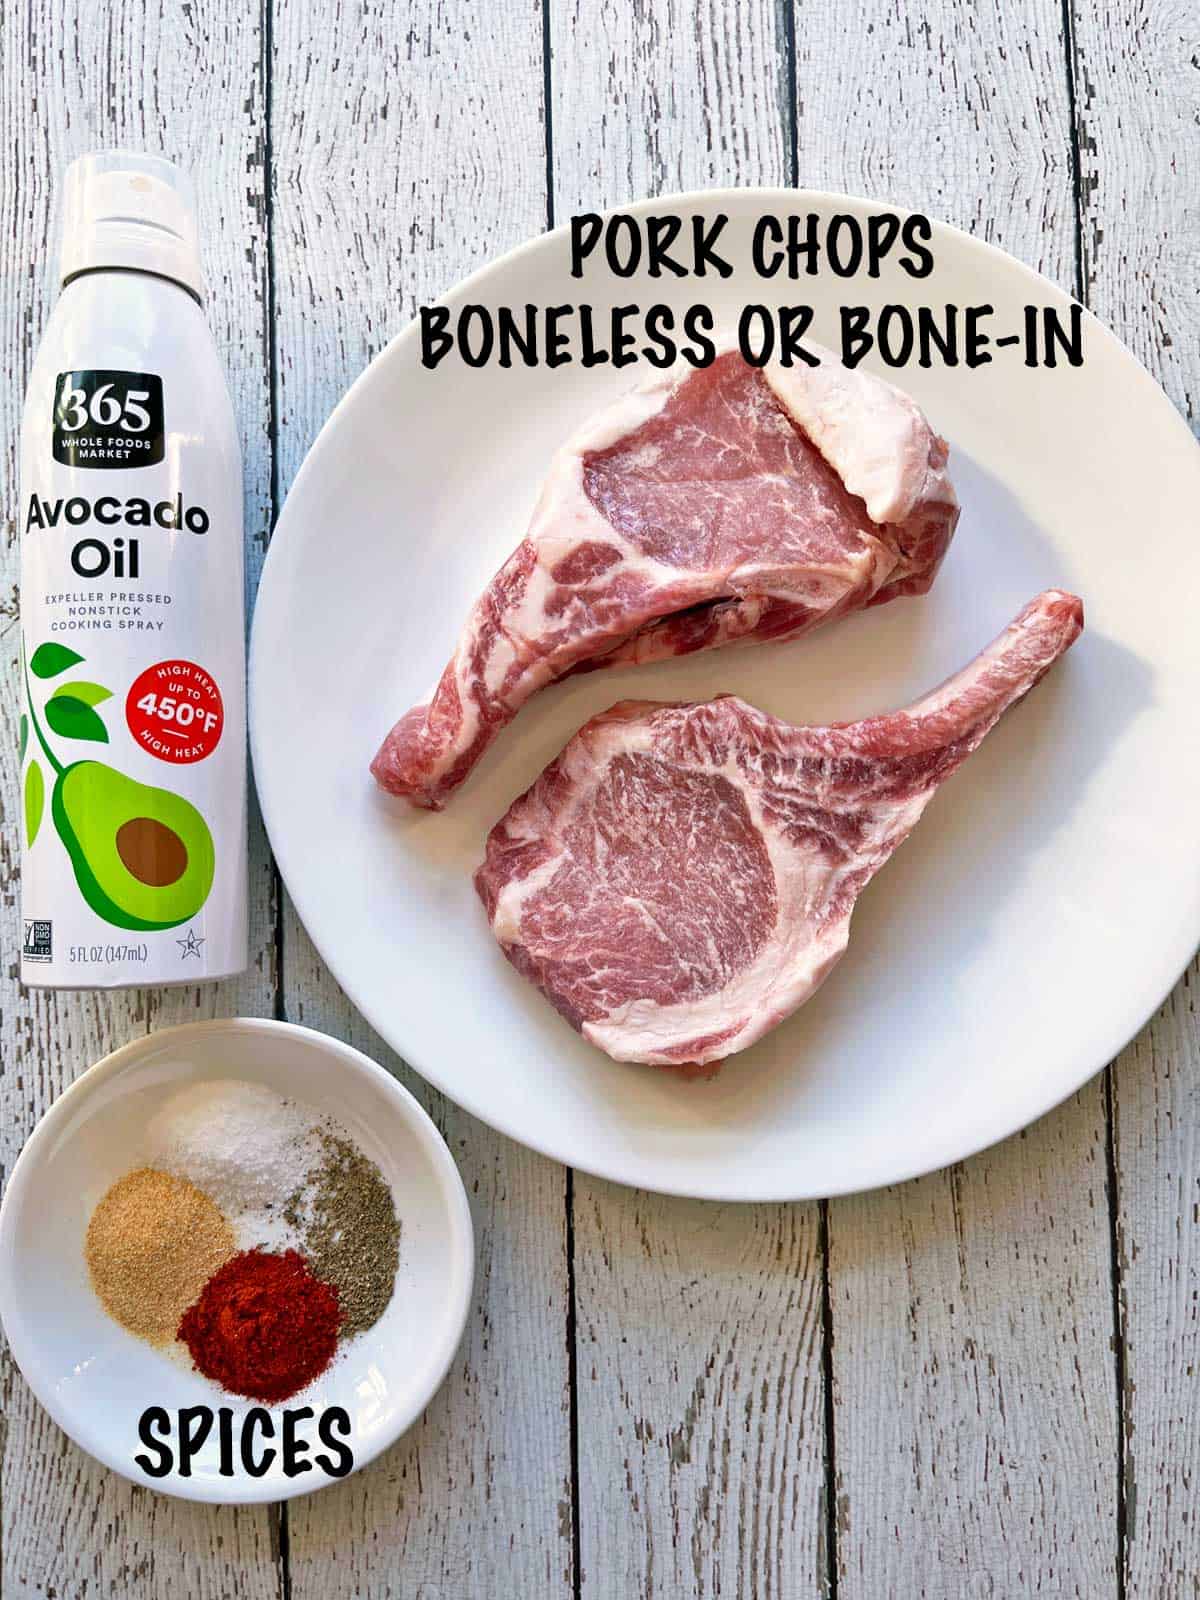
- To season: Kosher salt, black pepper, paprika, and garlic powder. Smoked paprika is a good substitute for regular paprika. I enjoy the smoky flavor it adds. You can also add a pinch of dried thyme.
- Pork chops: They can be boneless or bone-in. Bone-in chops are juicier, but I often use boneless, especially when they go on sale, and they are delicious. Both work equally well in this recipe.
- Cooking spray: Avocado oil has a neutral flavor and a high smoke point, making it an ideal oil for this recipe. Ghee is another good option.
Instructions
The detailed instructions and step-by-step photos are included in the recipe card. Here's a quick overview.
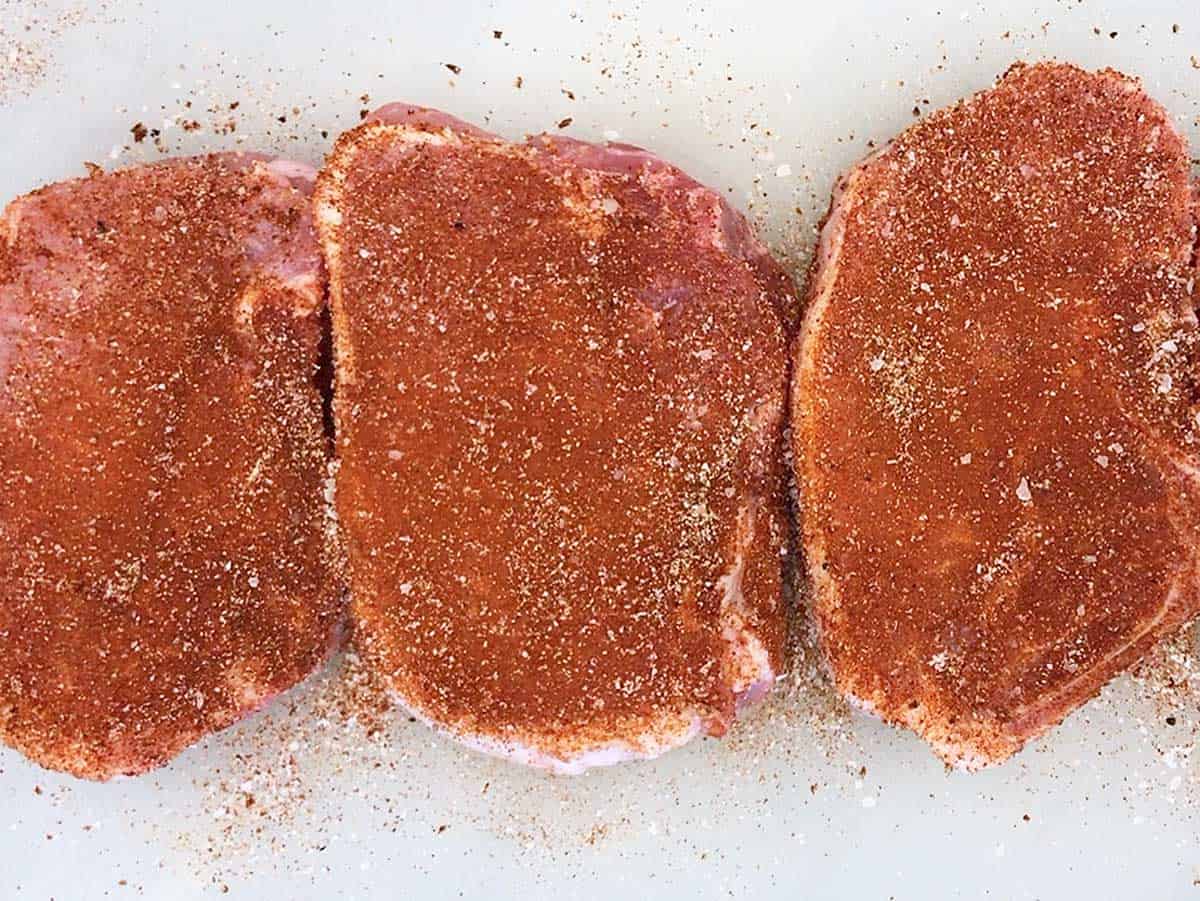
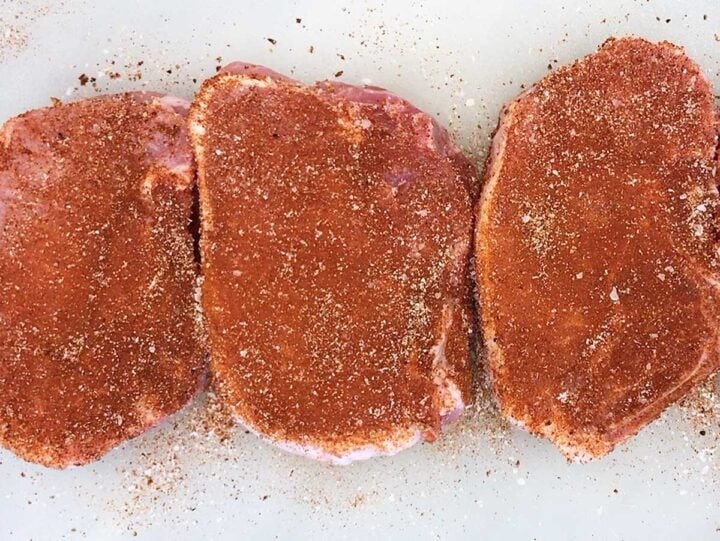
Combine the kosher salt, black pepper, paprika, and garlic powder. Rub the mixture on both sides of the chops.
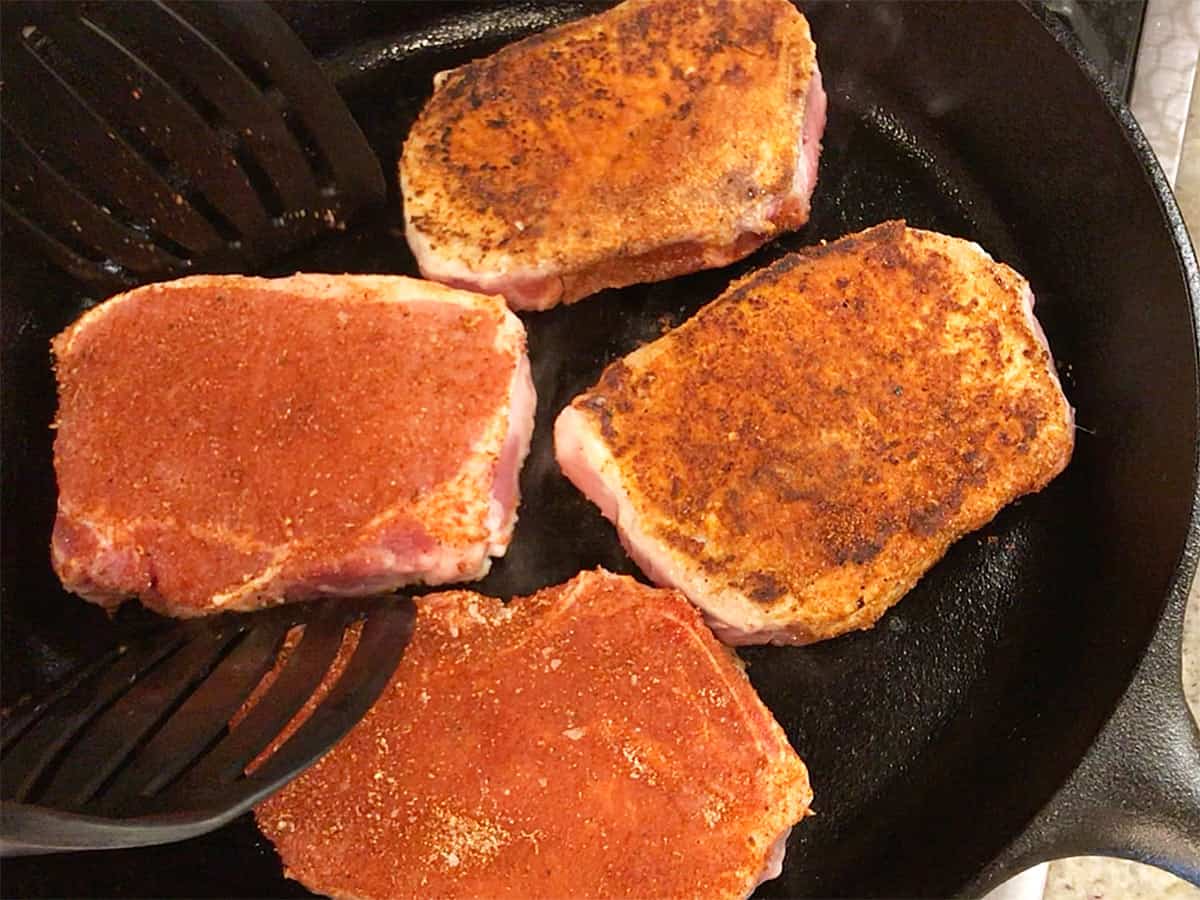
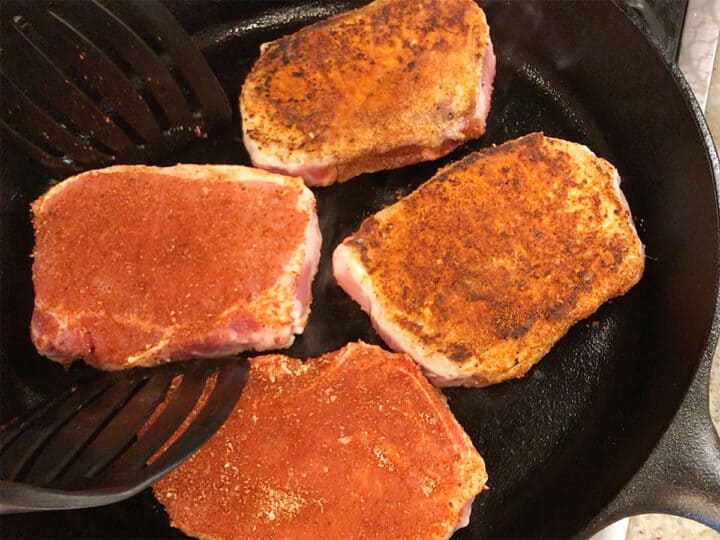
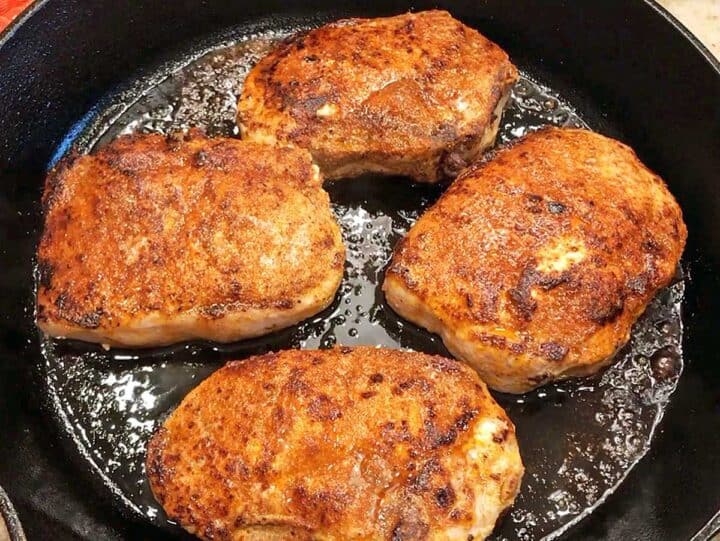
Sear the chops in a cast-iron skillet for two minutes per side, without moving them, until they are browned.
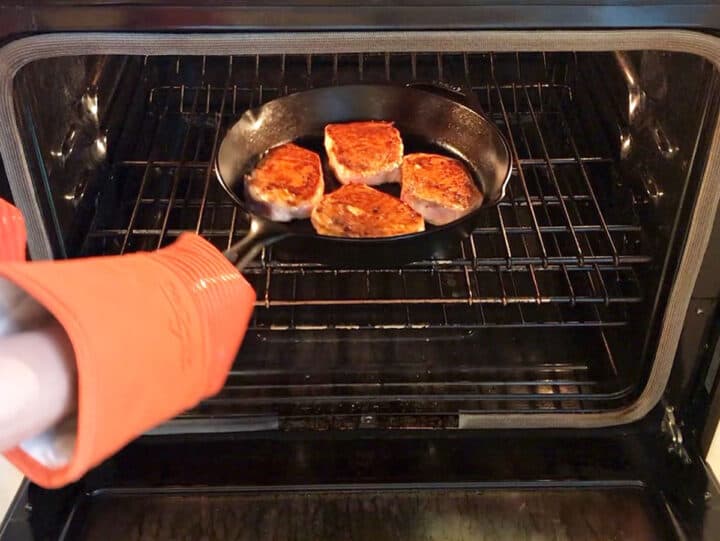
Place the skillet in an oven preheated to 400°F and bake the chops for 8-10 minutes to an internal temperature of 145°F. Allow them to rest for five minutes before serving.

I am not great in the kitchen...I need simple. This recipe is easy & was the best tasting, juicy pork chops I have ever had. I don't have a skillet to cook on stove then go directly to the oven, so I seared them in a skillet on the stove top & then put the chops in a 9x13 glass dish and placed in the oven and it worked great. I was so excited how easy it was and so delicious and juicy!
Kathy
Read more comments
Recipe Tips
Avoid Overcooking the Chops
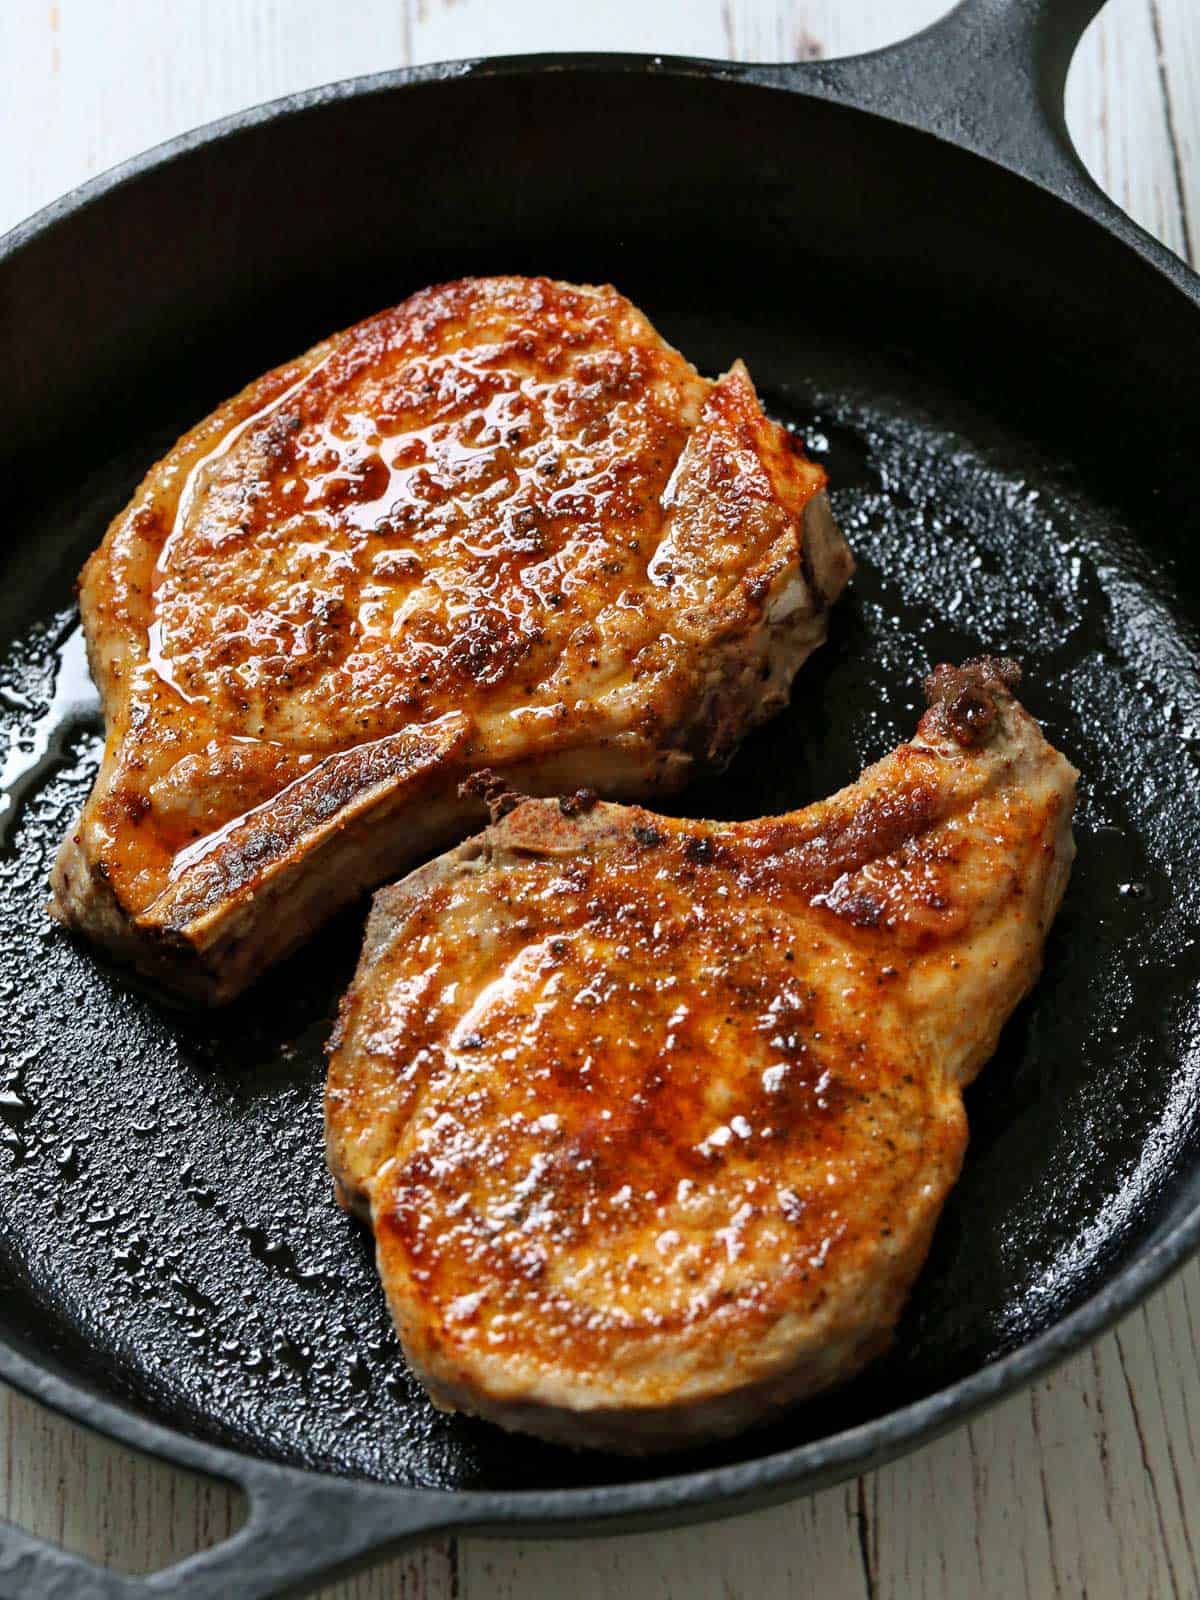
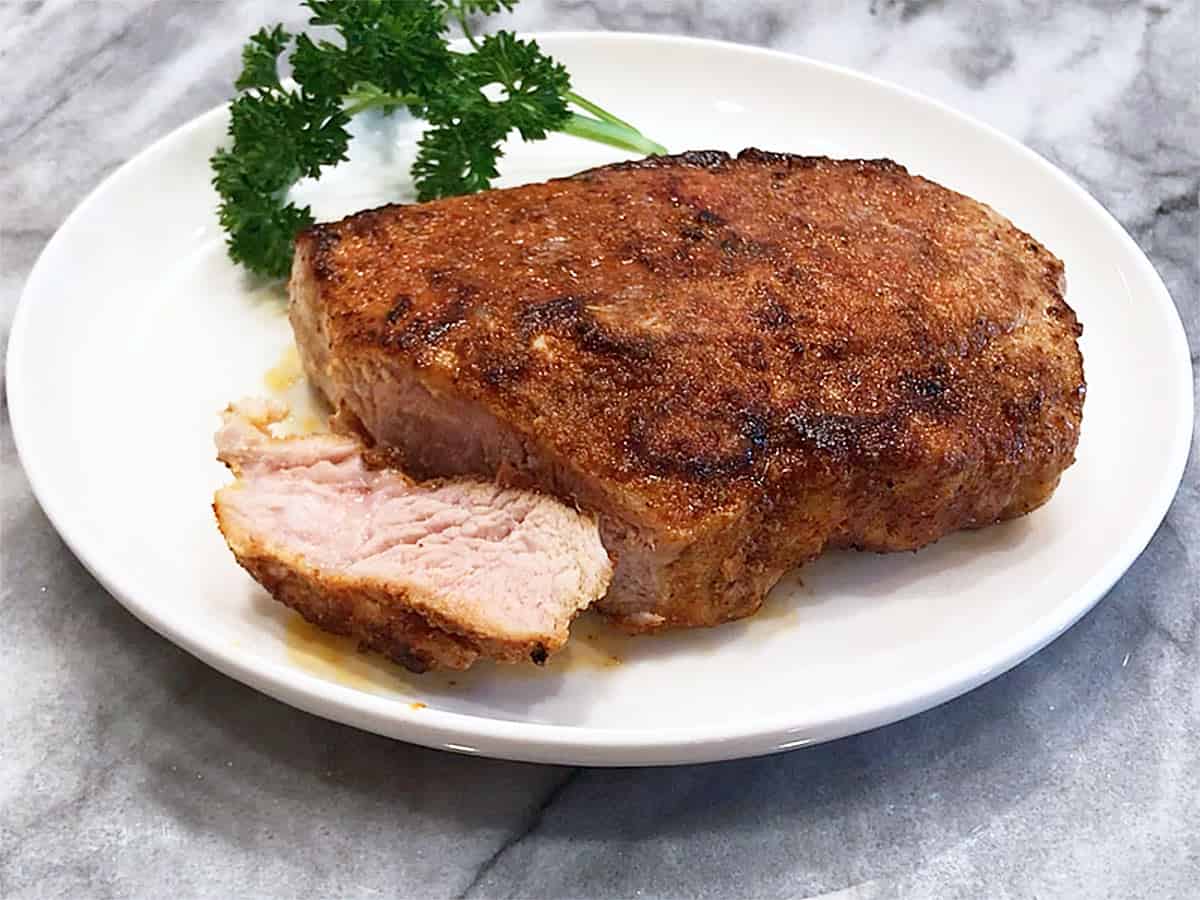
When overcooked, pork chops can become dry and tough. Ten minutes in a 400°F oven, after a quick sear on both sides, should be perfect for a standard, 1-inch thick chop like the one shown in the photo below:

According to the USDA, whole cuts of pork can be cooked to medium doneness (145°F with a 3-minute rest period), meaning they can be slightly pink, as shown in the photo below.
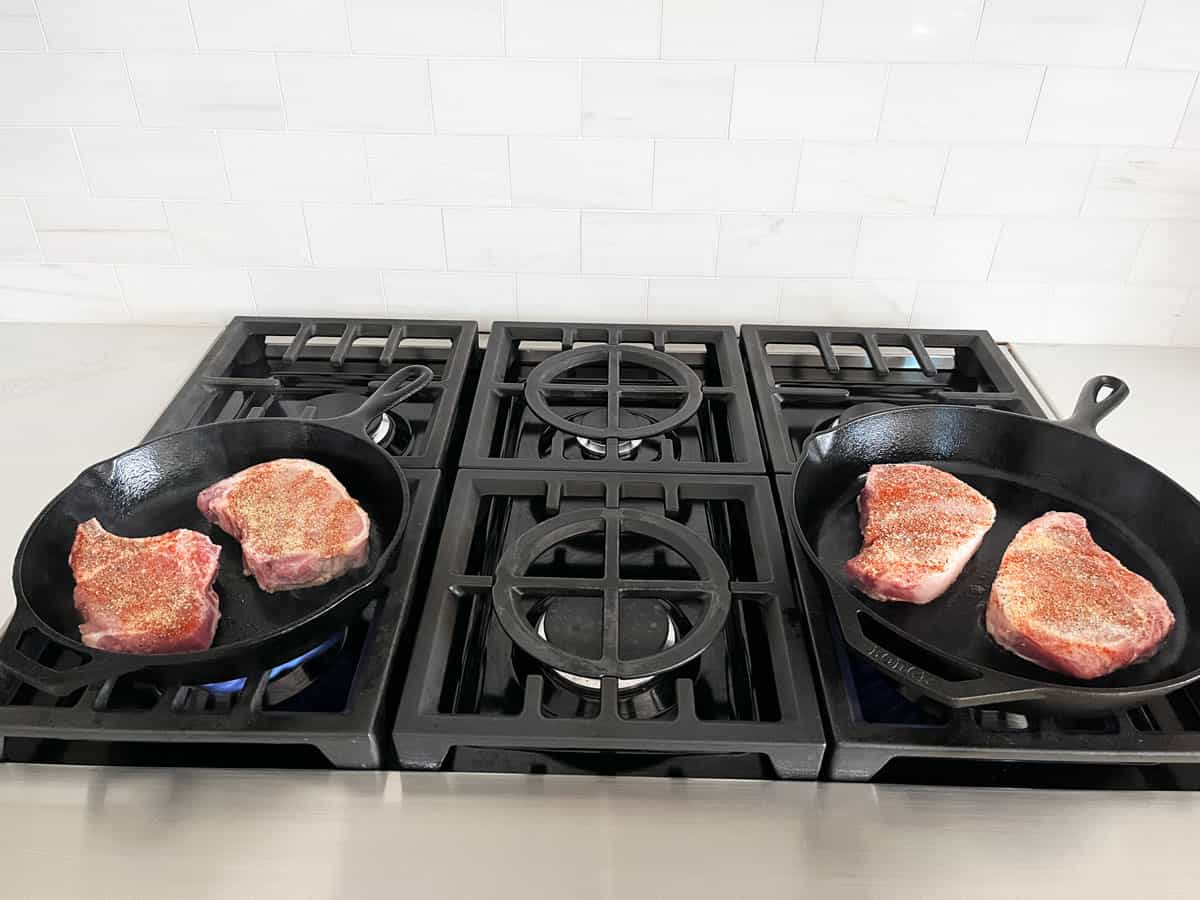
Use Two Skillets
For optimal searing, you want to space the chops in the skillet. You don't want them crowded. If your skillet isn't large enough, you can use two skillets, as I do in the photo below.
Recipe FAQs
Yes! If your nonstick skillet is oven-safe, you can use it in this recipe. I sometimes do, as shown in the photo below. A cast-iron skillet is better at sealing in juices, but a high-quality, oven-safe nonstick skillet also produces good results.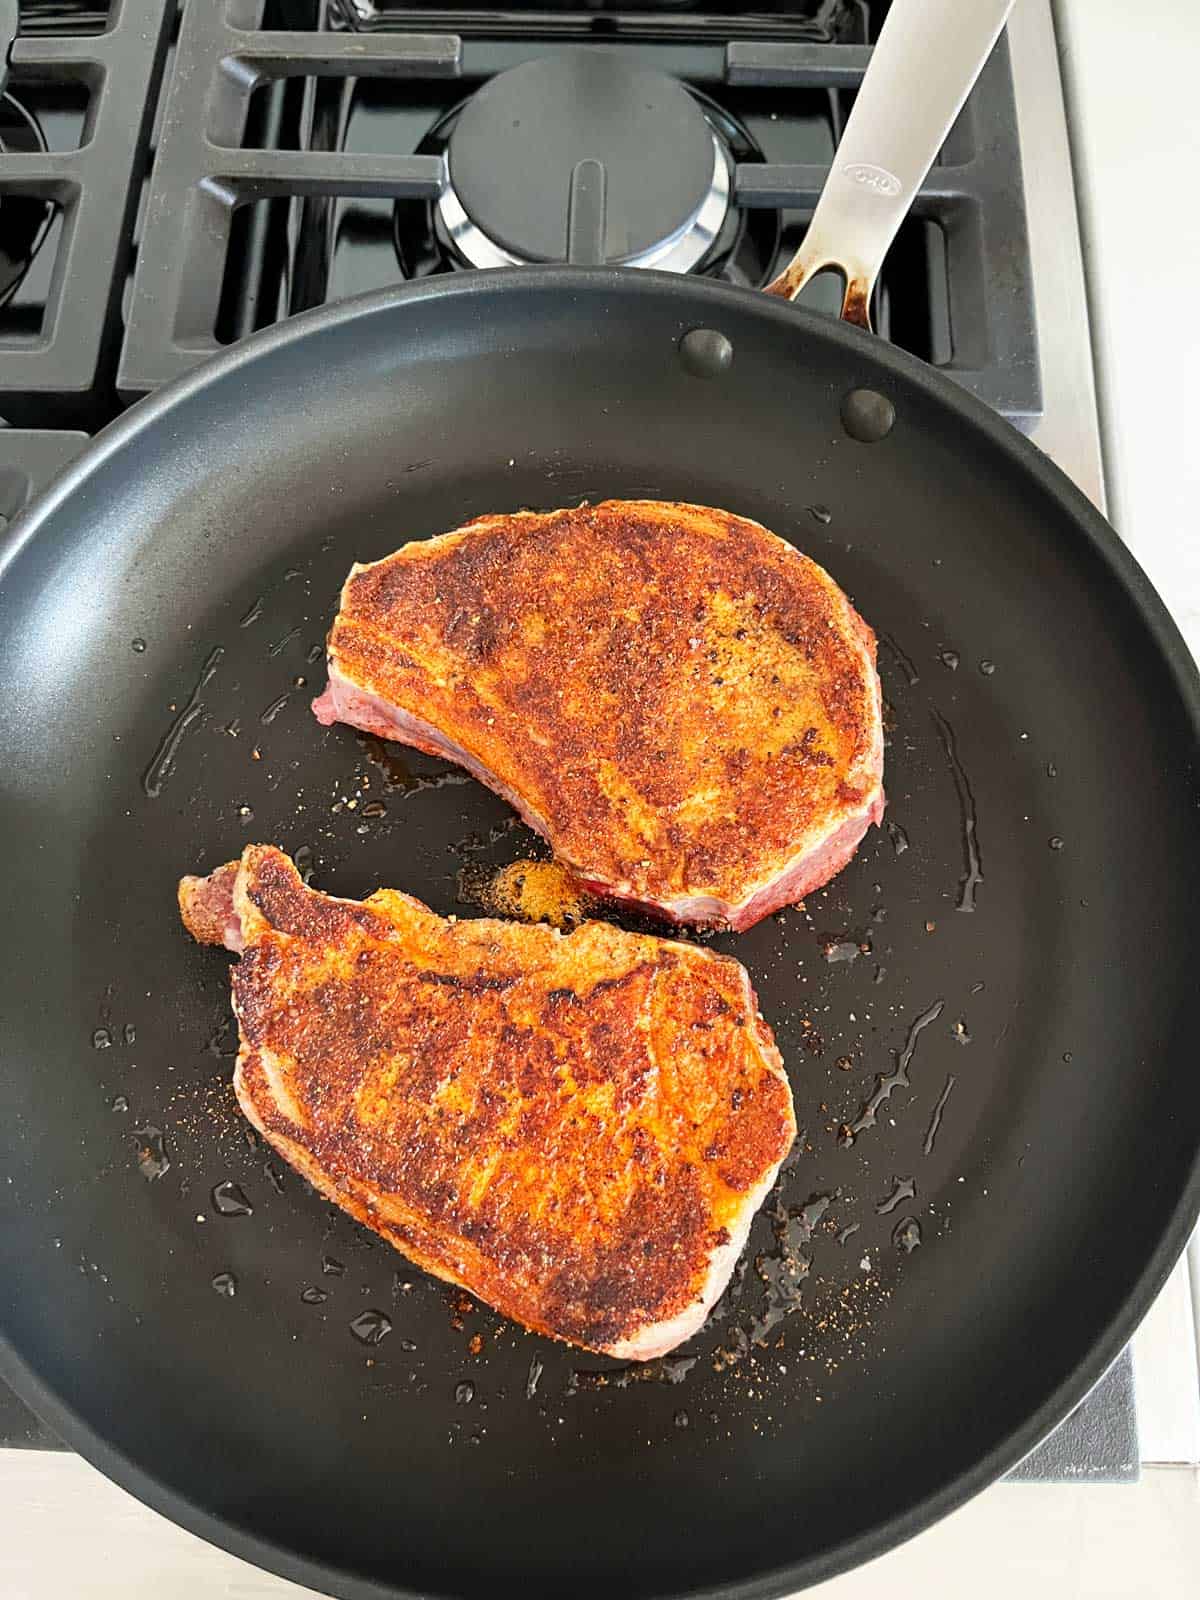
There's no need to trim the fat. It's the best part! Look at the chops in the photo below. Three of them have a gorgeous fat cap, while the fourth was sadly over-trimmed by the butcher. When I select pork chops at the butcher's or grocery store, I try to pick ones with a nice, thick fat cap.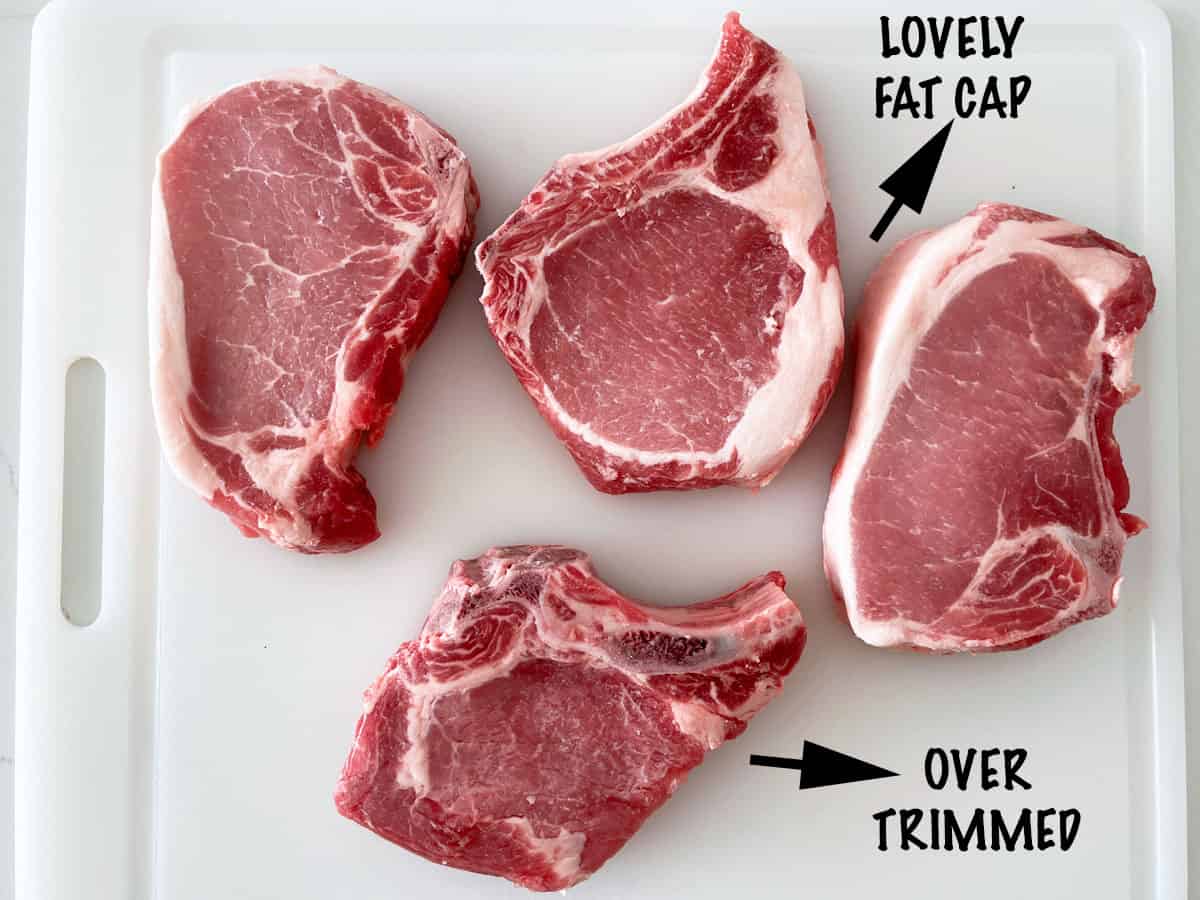
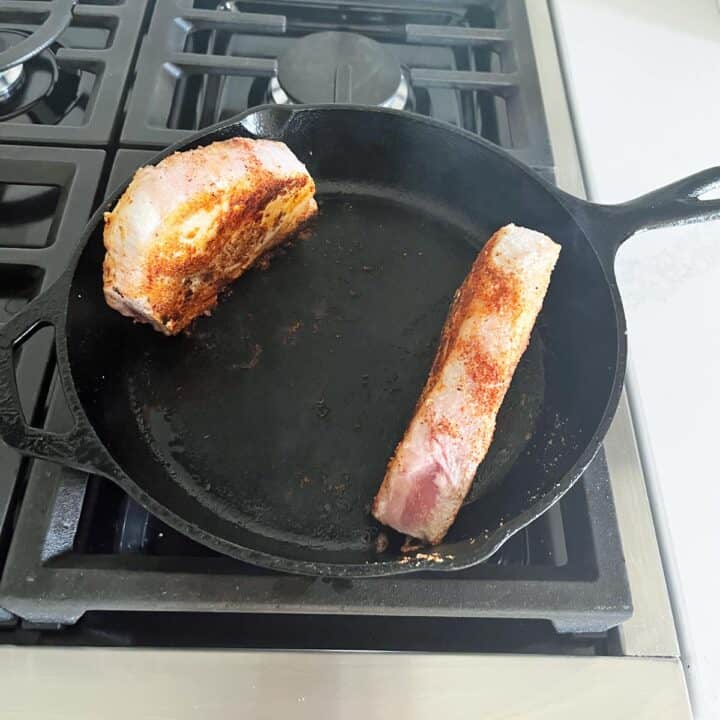
If your chops are thin, around ½ inch, like the ones shown in the photo below, there's no need to finish them in the oven. A quick sear on both sides should do it. Verify with an instant-read thermometer that they have reached an internal temperature of 145°F and let them rest for 3-5 minutes before serving.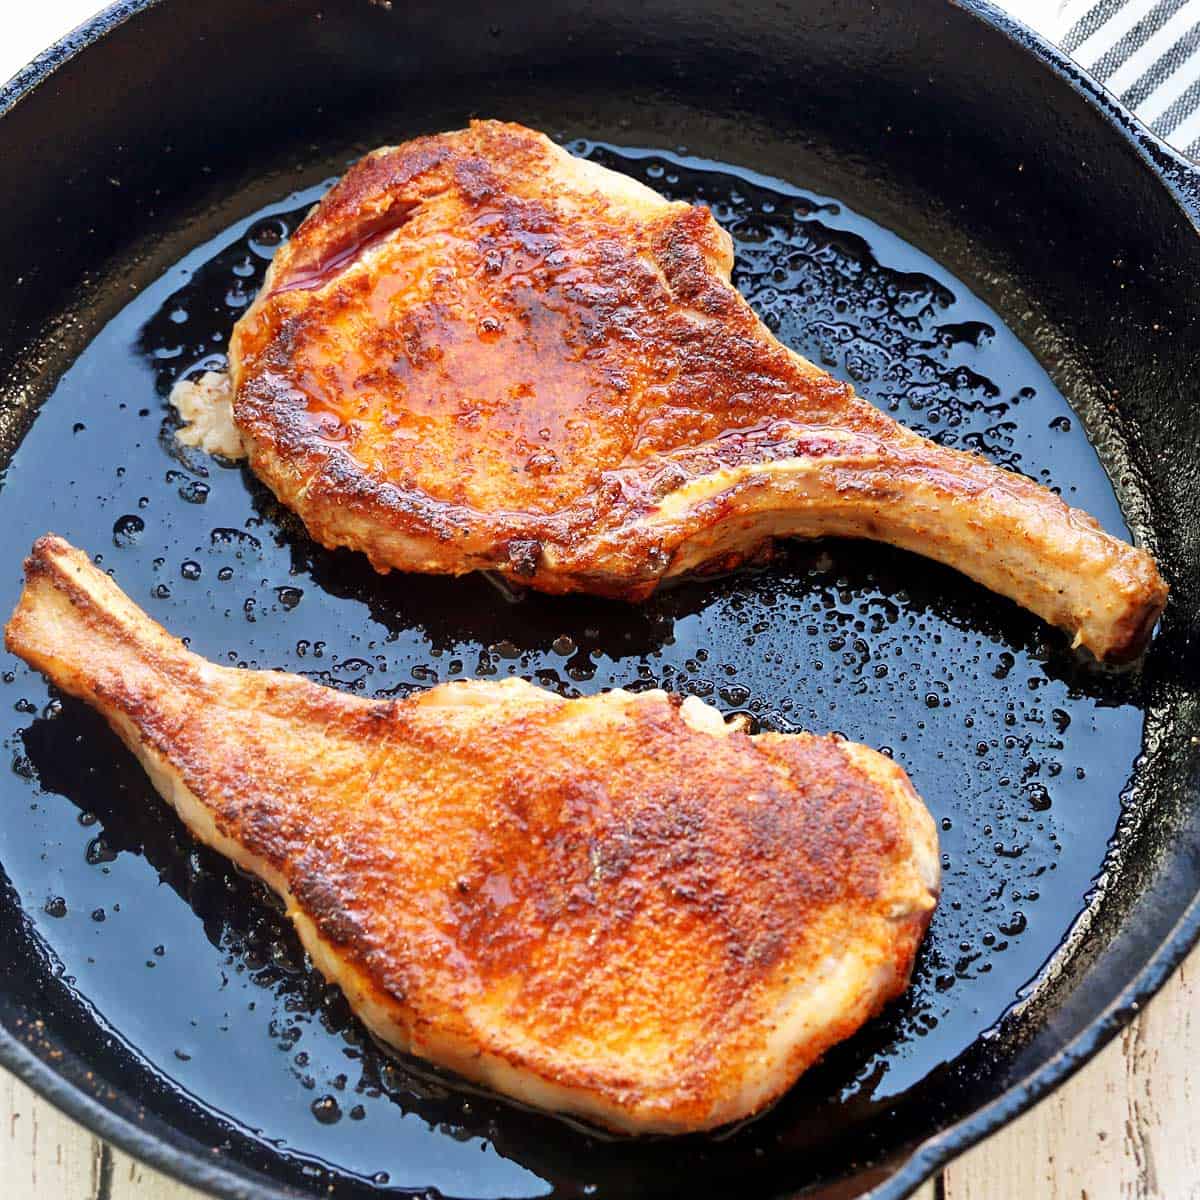
The rest period allows the internal temperature to climb up some more and also allows the juices to settle and redistribute, preventing them from bursting out of the meat when you cut it and keeping it juicy.
Serving Suggestions
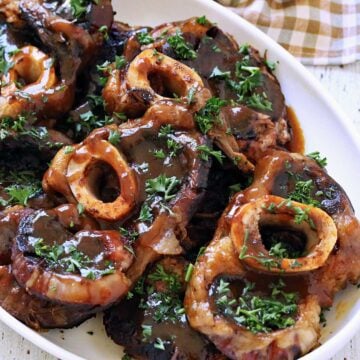
One of my favorite sides to serve with these chops is roasted red onions. The two dishes complement each other beautifully. Apart from that, I like to serve them with a wide variety of vegetable recipes, including:
- Brussels sprouts casserole
- Roasted pumpkin
- Roasted cabbage
- Cabbage stir-fry
- Shiitake mushrooms
- Honey-glazed carrots
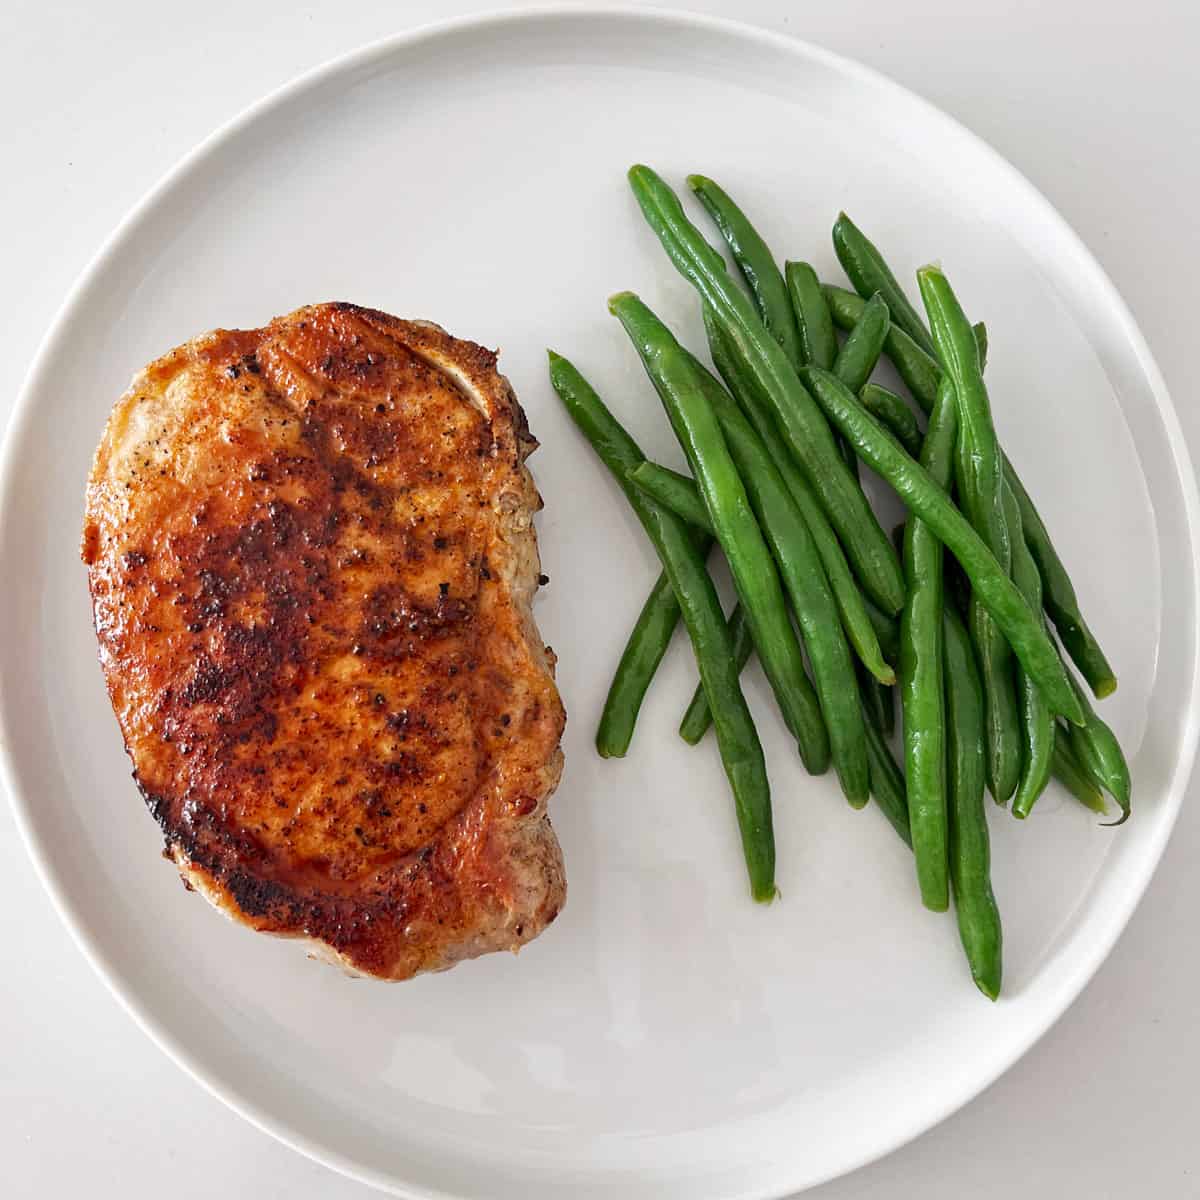
- Boiled green beans, as shown in the photo below:
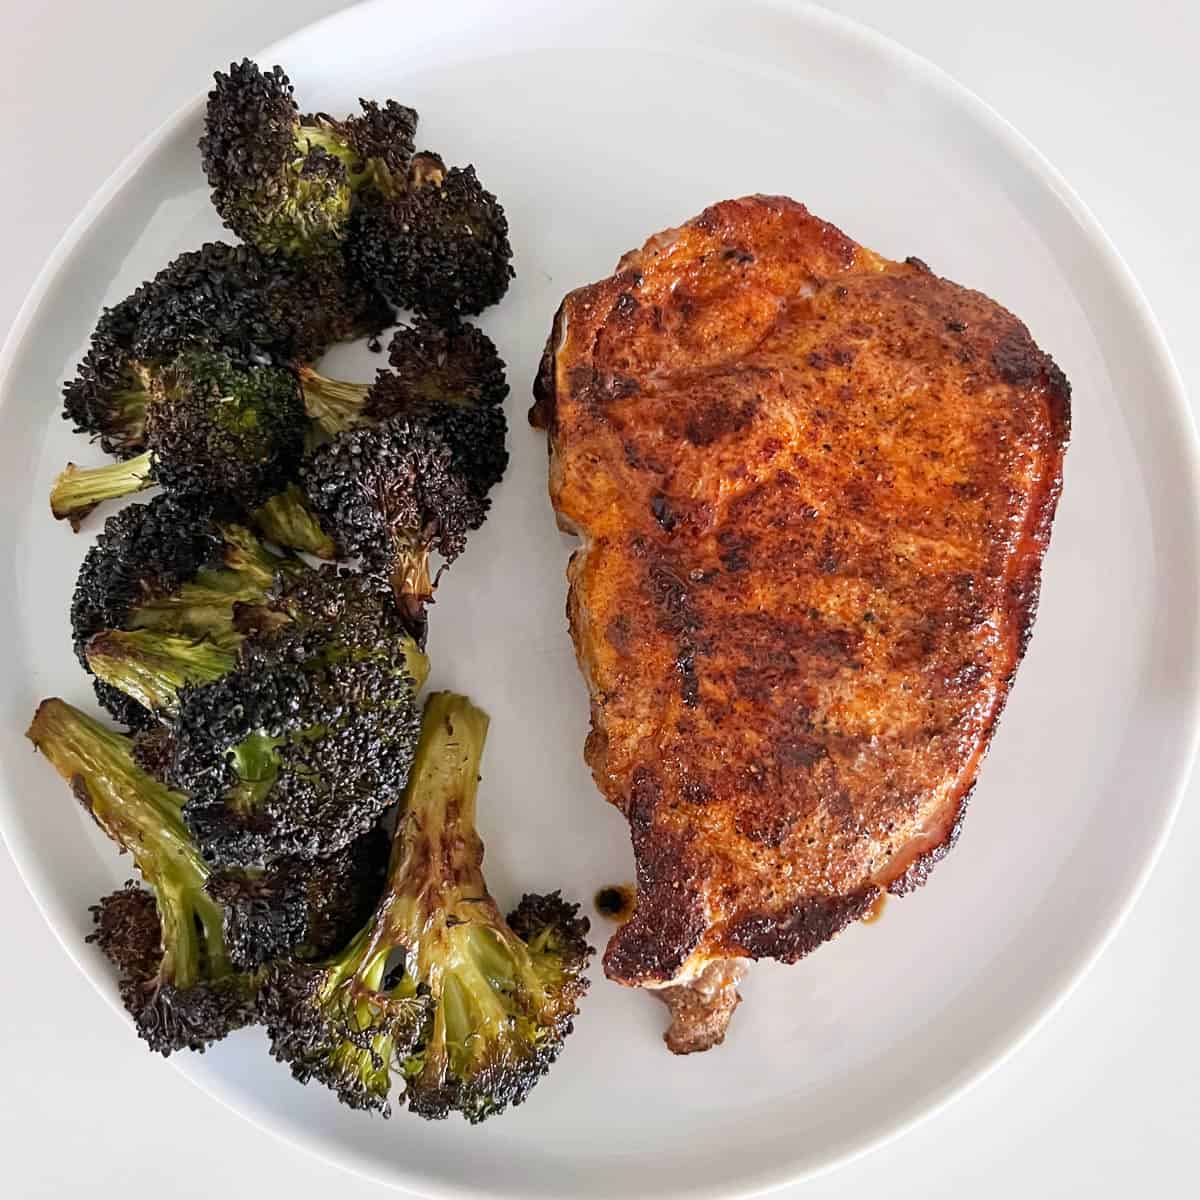
Sometimes, as shown in the photo below, I serve them with roasted broccoli, roasting the broccoli in a 400°F oven for 25 minutes.
Storing and Using the Leftovers
You can keep the leftovers in an airtight container in the fridge for 3-4 days. They can become dry when reheated, so reheat them gently, covered, in the microwave at 50% power. Start with 30 seconds per chop on each side, and continue until they are heated through.
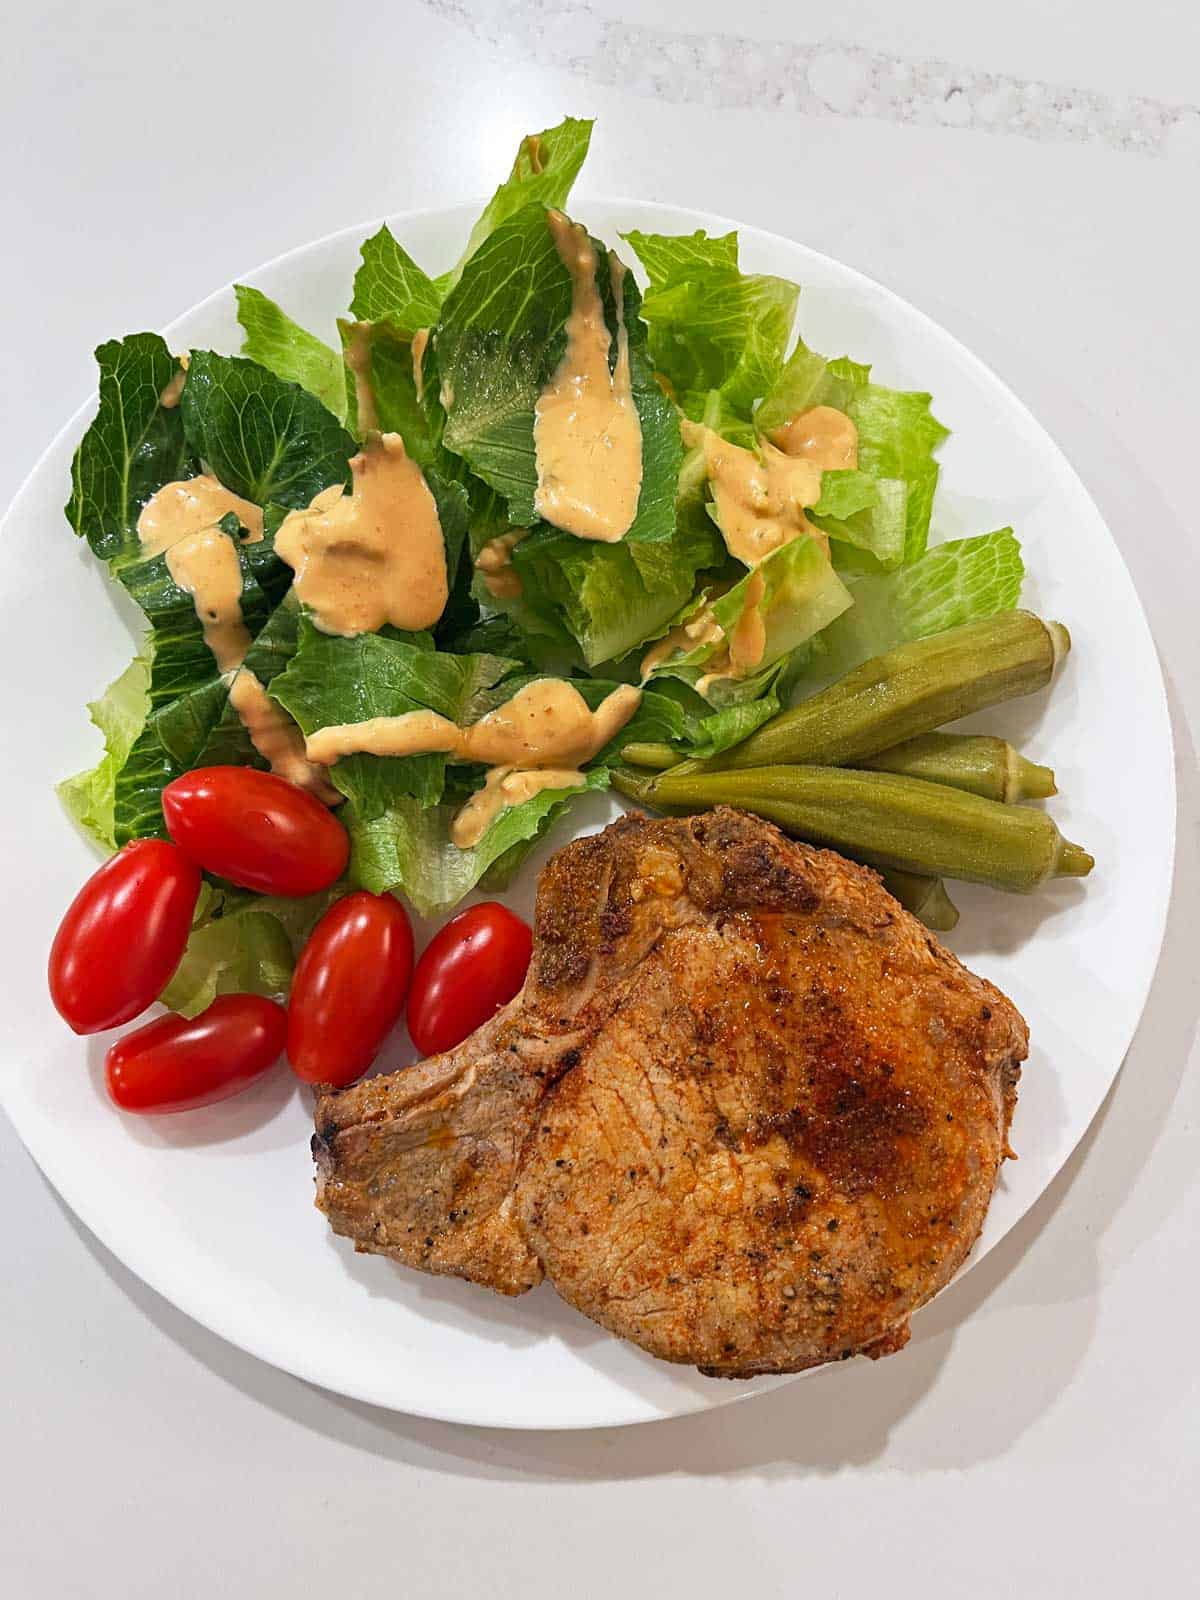
One of my favorite meals is a reheated pork chop served with a simple side salad of lettuce and tomatoes (plus pickled okra), as shown in the photo below:
Recipe Card
Juicy Baked Pork Chops
Video
Ingredients
- 1 teaspoon Diamond Crystal kosher salt - or ½ teaspoon of any other salt, including Morton kosher salt
- ¼ teaspoon black pepper
- ½ tablespoon paprika - or smoked paprika
- 1 teaspoon garlic powder
- 4 pork chops - ½ to 1 inch thick, 6-8 ounces each
- Avocado oil spray
Instructions
- If your chops are around 1 inch thick, preheat the oven to 400°F. If they are thin (½ inch), they can simply be seared.

- In a small bowl, mix the kosher salt, black pepper, paprika, and garlic powder. Rub the mixture on both sides of the chops.

- When your oven has reached 400℉, sear the chops: Heat a large, oven-safe, heavy-bottomed skillet (such as a cast-iron skillet) over high heat for about 3 minutes. Spray it with cooking spray. Add the chops and sear them for 2 minutes per side, without moving them, until well browned. If the skillet becomes too hot, lower the heat to medium-high.

- You can also sear the fat strip briefly - for about 30 seconds - although that's not mandatory.

- If your chops are ½-inch thick, they should be ready now (check with a thermometer - their internal temperature should reach 145°F). Transfer them to a platter, loosely cover them with foil, and allow them to rest for 3 minutes before serving.
- If your chops are ¾ to 1 inch thick, place them in the oven and bake to an internal temperature of 145°F. This should take between 8 and 10 minutes, depending on your oven and the thickness of the chops.
- Transfer the chops to a platter, tent them with foil, and allow them to rest for 5 minutes before serving.

Notes
- Bone-in chops are juicier, but I often use boneless ones, especially when they go on sale, and they are delicious, too. This recipe works equally well with both.
- Don't overcook the chops. Ten minutes at 400°F, after a quick sear on both sides, should be perfect for a 1-inch-thick chop. When overcooked, they can become dry and tough. The two-step method of searing them first and then finishing them in the oven works well to keep them juicy. According to the USDA, whole cuts of pork can be cooked to medium doneness (145°F with a 3-minute rest period), meaning they can be slightly pink.
- Having said that, oven temperatures vary, so your chops could need slightly shorter or longer time in the oven. The best way to know for sure is to check with a thermometer.
- You can keep the leftovers in an airtight container in the fridge for 3-4 days. They quickly dry out when reheated, so reheat them gently, covered, in the microwave at 50% power. Start with 30 seconds per chop on each side, and continue until they are heated through.
Nutrition per Serving
Save this Recipe!
We will also add you to our weekly newsletter. Unsubscribe anytime. See healthyrecipesblogs.com/privacy/ to learn how we use your email.
Disclaimers
Most recipes are low-carb and gluten-free, but some are not. Recommended and linked products are not guaranteed to be gluten-free. Nutrition info is approximate. Please verify it independently. The carb count excludes non-nutritive sweeteners. Please read these Terms of Use before using any of my recipes.


Rosemary Johnson says
I give it a ten!
Vered DeLeeuw says
Wonderful, Rosemary! I'm so glad you enjoyed this recipe.
Nancy says
Will these dry out when I finish baking in a glass dish?
Vered DeLeeuw says
Hi Nancy,
It should be fine to finish baking them in an oven-safe glass baking dish.
Travis says
It was great - will definitely make again.
Vered DeLeeuw says
Wonderful, Travis! Thank you very much for the review.
Martha Princi says
Delicious and easy recipe. I brined beforehand. I didn't even have to put them in the oven since they got to 145 degrees without it. I guess I had pork chops that were thinner than the recipe called for.
This is a keeper! Than you
Vered DeLeeuw says
You're very welcome, Martha! Thank you very much for the review.
Pat Hartwell says
Awesome!
Vered DeLeeuw says
Glad you enjoyed this recipe, Pat! Thanks for the review.
John Martinez says
Thanks for the recipe
Vered DeLeeuw says
You're very welcome, John! Glad you liked it.
M says
Are they shoulder or loin chops?
Vered DeLeeuw says
Hi,
Loin chops. Here's a recipe for shoulder chops (aka pork shoulder steak):
https://healthyrecipesblogs.com/pork-shoulder-steak/
AUDREY says
Best pork chops I've ever made in 60 years of cooking!!! This is a winner.
Vered DeLeeuw says
Wonderful, Audrey! I'm so glad this was a success.
Peggy Schreiner says
This is awesome & easy. thank you.