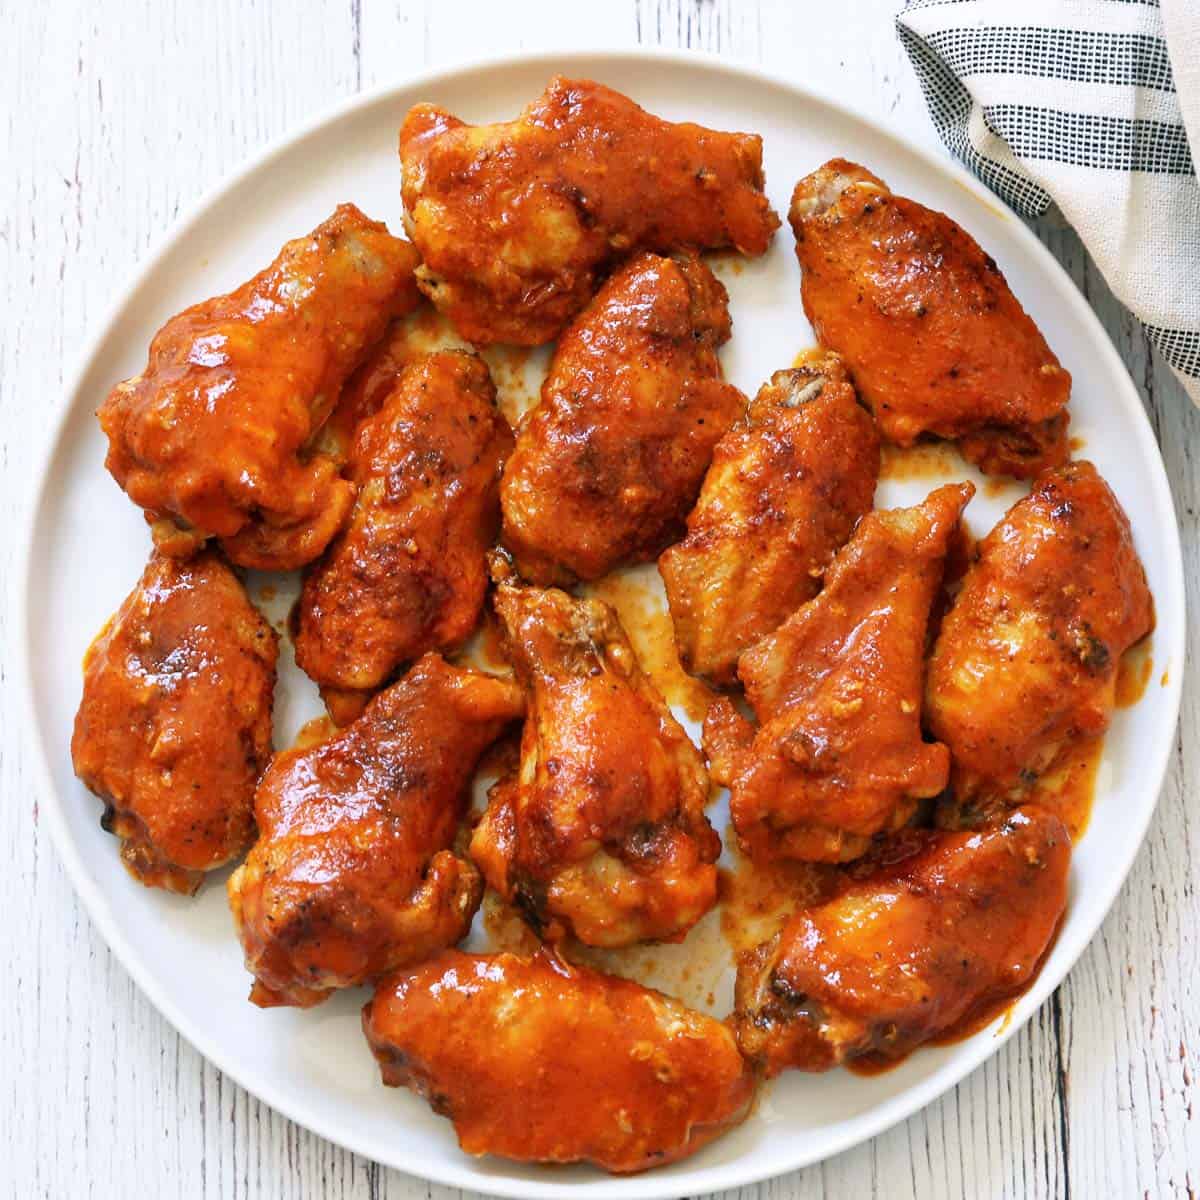
These baked buffalo wings are so easy to make! They come out of the oven hot, crispy, and delicious. They are perfect when served with a creamy blue cheese dip and fresh, crisp celery sticks.

My entire family loves these delicious buffalo wings! It's a simple recipe: you bake chicken wings in the oven and then dip them in a hot, buttery sauce. A classic game-day recipe, these are also good as a main course, accompanied by fresh veggies or coleslaw. Other wing recipes to check out include garlic parmesan wings and teriyaki wings.
Ingredients
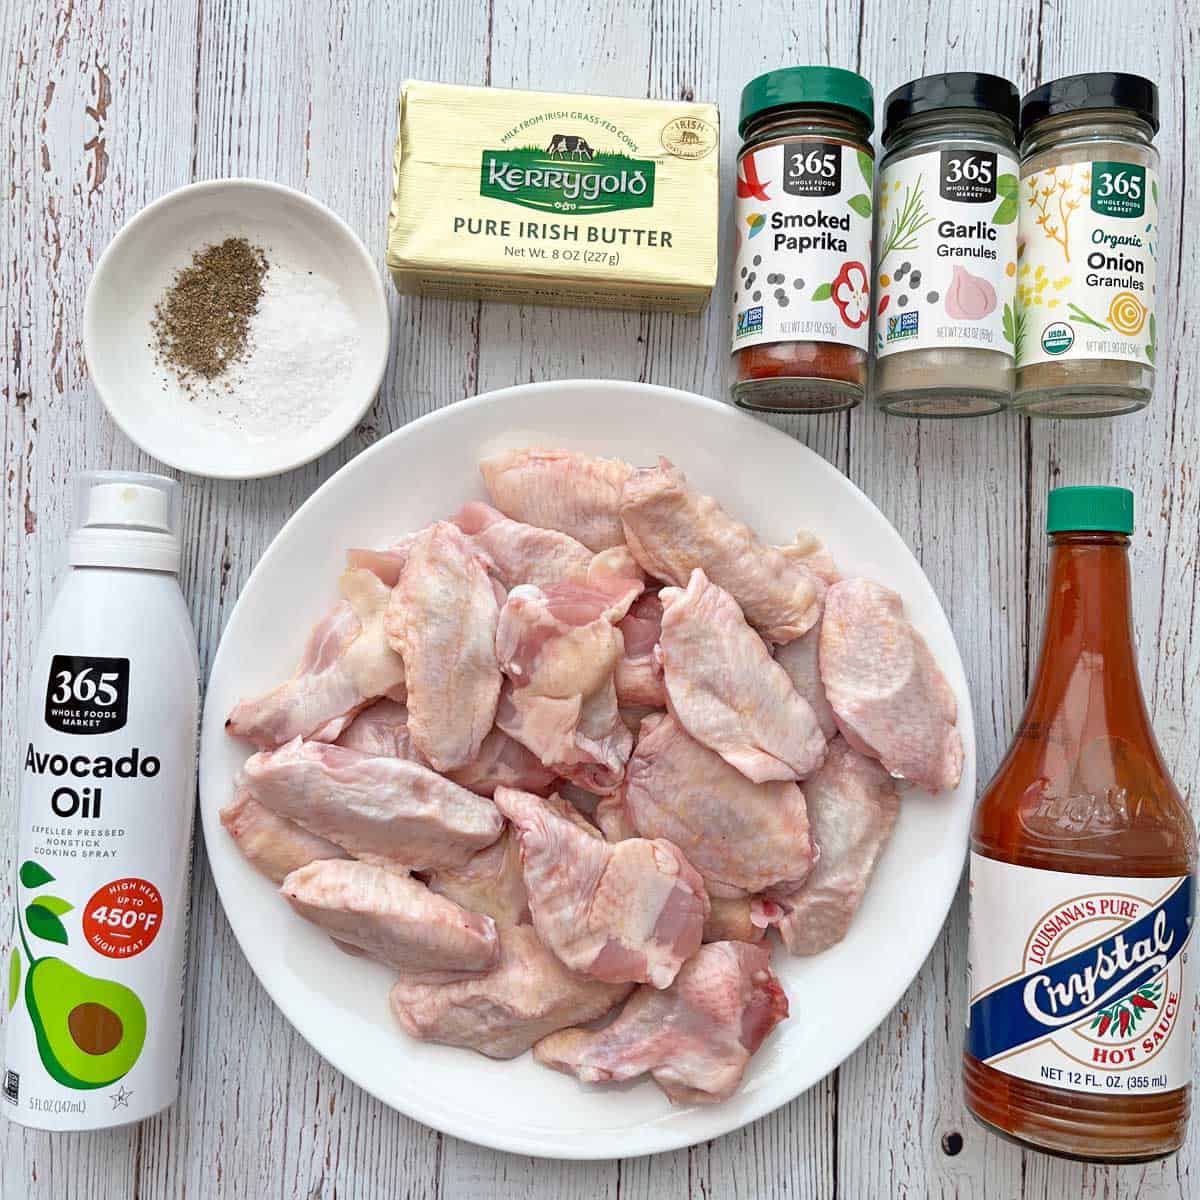
See the recipe card for exact measurements. Here are my comments on the ingredients.
- Fresh chicken wings: I buy the trays labeled "party wings," in which whole wings are split into flats and drumettes. This saves me the trouble of cutting the wings.
- Avocado oil spray: Avocado oil is a neutral-tasting oil with a high smoke point, making it suitable for high-heat cooking and baking.
- To season: Kosher salt, black pepper, garlic powder, onion powder, and smoked paprika.
- For the sauce: Melted butter and hot pepper sauce.
Instructions
The detailed instructions and step-by-step photos are included in the recipe card. Here's a quick overview.
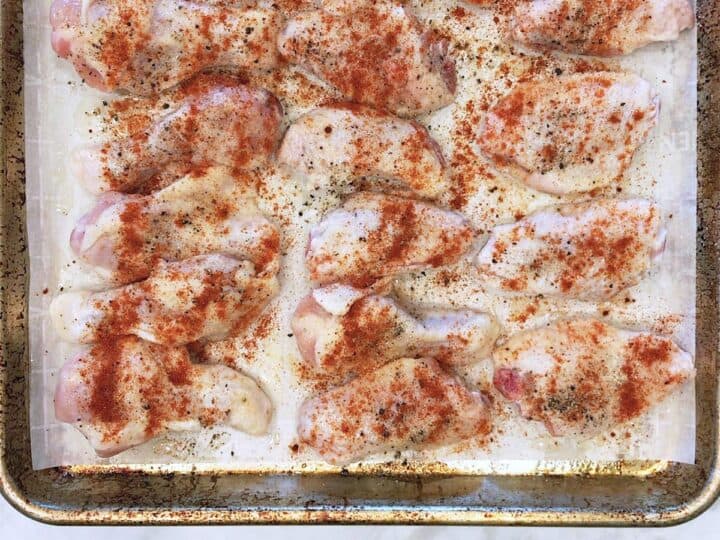
Season the wings, spray them with oil, and bake them until fully cooked, about 30 minutes at 400°F. Lower the oven to the "keep warm" setting (170°F) and keep the wings in the oven for 30 more minutes. This helps crisp up the skin.
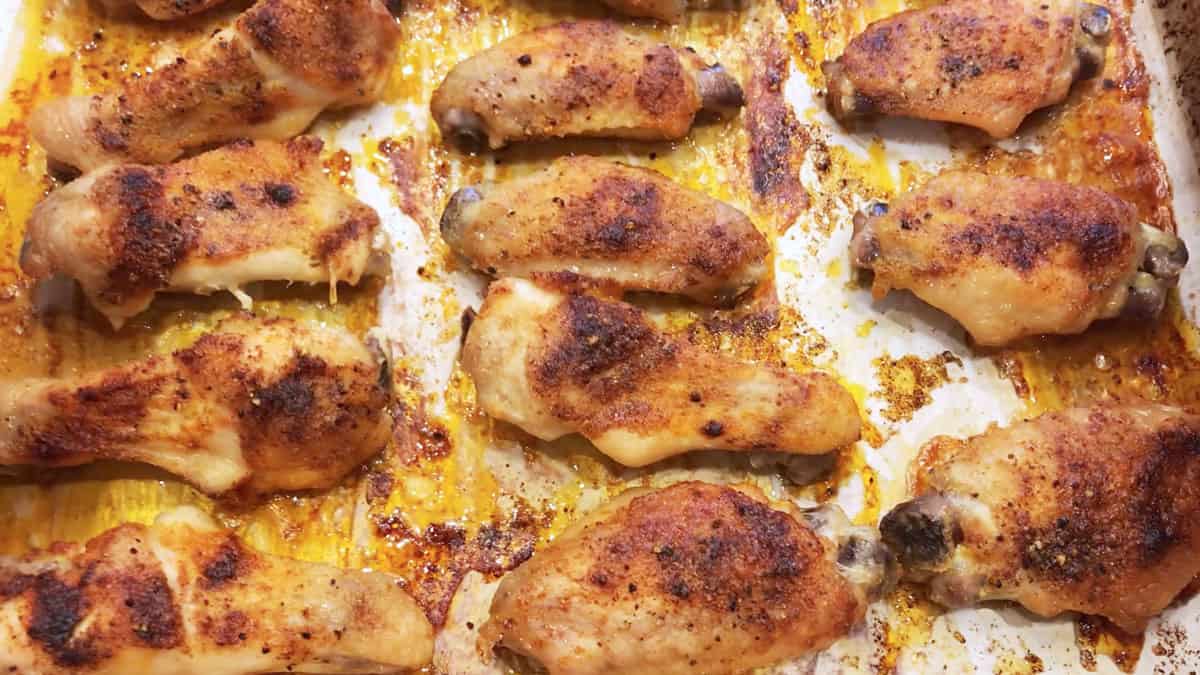
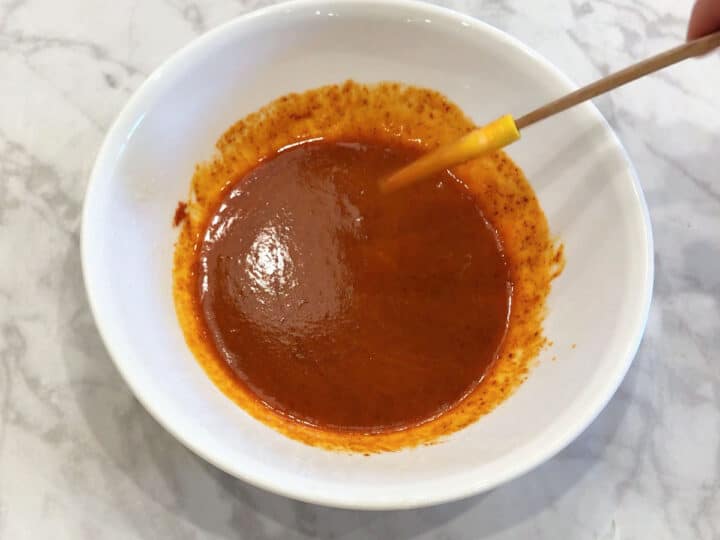
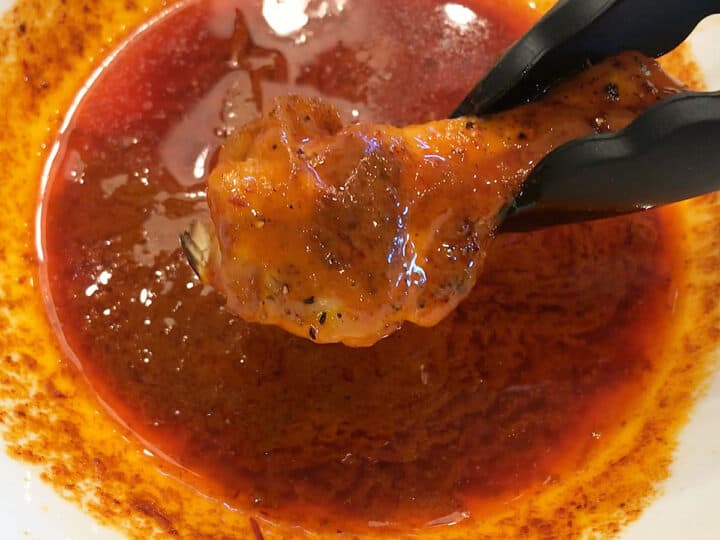
Ten minutes before pulling the wings out of the oven, mix the melted butter and hot sauce. When the wings are ready, dip them in the sauce. I use tongs and dip them one by one.

Serve the wings with blue cheese dressing and celery sticks.

Wow these turned out so good! This will be in my regular rotation, the meat was so tender and flavorful. The only thing I did differently was baking on a rack above a baking sheet. Thanks for the great recipe!
Amanda
Read more comments
Recipe Tips
Making Them Crispy
- The wings will be fully cooked after about 30 minutes in a 400°F oven. But keeping them in the oven (on the "keep warm" setting) for 30 more minutes makes them wonderfully crispy.
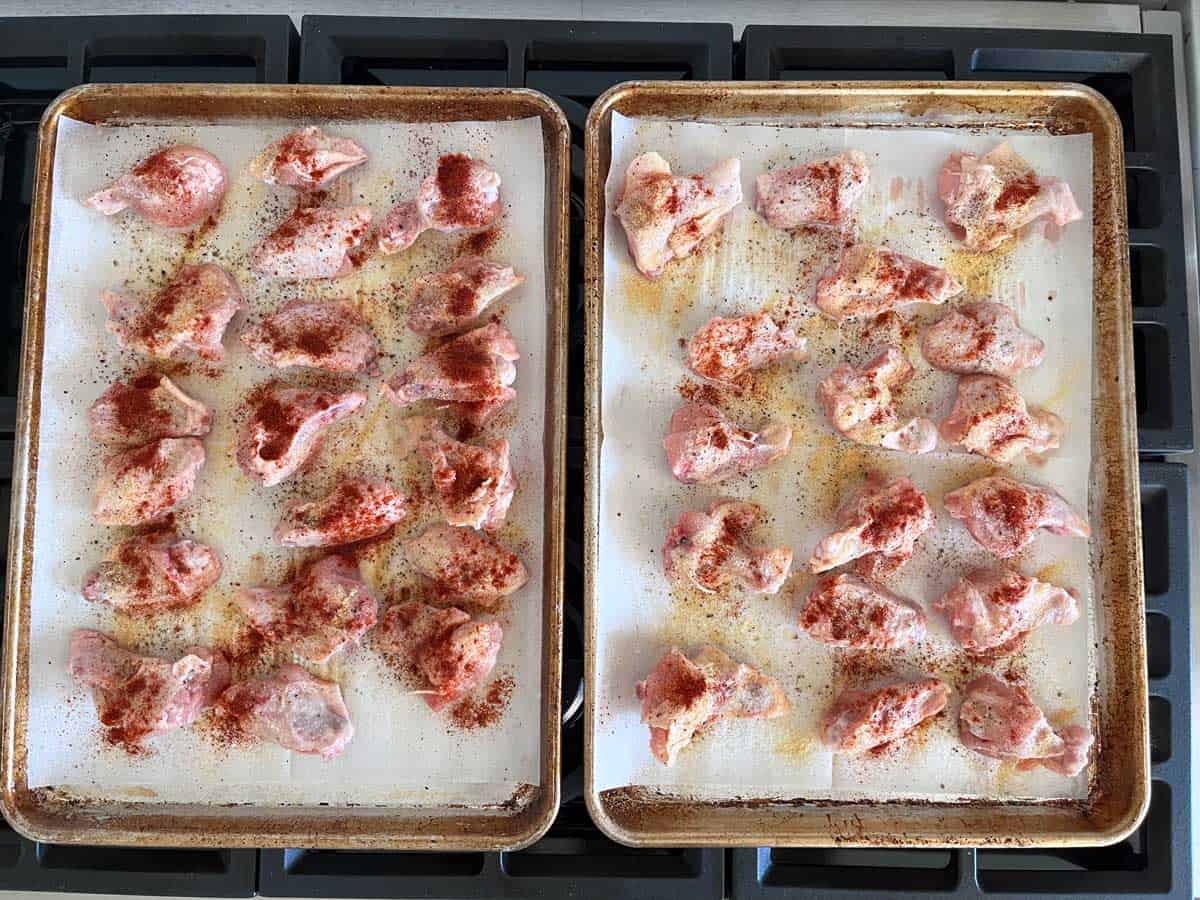
- You can divide the wings between two baking sheets, as shown in the photo below. This will ensure they are spaced apart and will promote even baking and crispiness.
Ensuring Thick Buffalo Sauce
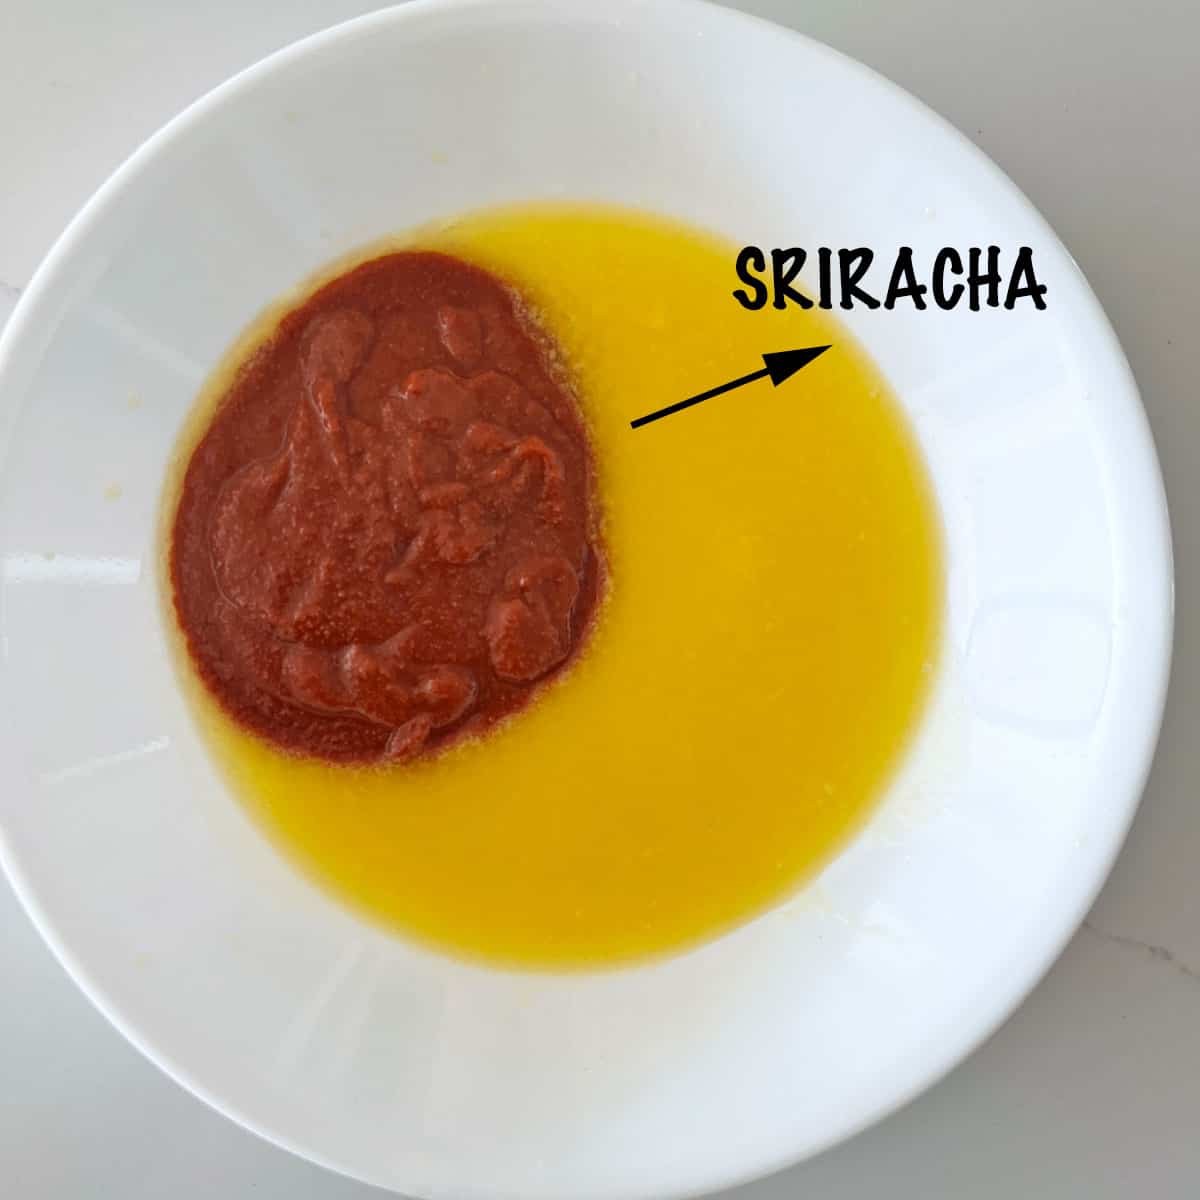
- It's important to mix the sauce ten minutes before using it. If you mix it right before using it, it will be too thin. Mixing it ahead of time allows it to rest and thicken so that it coats the wings better.
- Since sriracha is typically thicker than other types of hot sauce, as shown in the photo below, using it will result in a thicker buffalo sauce that better coats the wings.
Recipe FAQs
You can use your favorite brand of hot sauce. I typically use Frank's Red Hot Sauce, Crystal Hot Sauce, or Sriracha. The advantage of sriracha is that it's thick and helps thicken the dipping sauce.
I prefer baking because it's easier than deep-frying. While deep-frying does make for extra crispy skin, my method of baking the wings and then leaving them in a warm oven for 30 minutes achieves a similar result.
There's no need to use flour. The skin comes out wonderfully crispy thanks to the hot oven temperature and those extra 30 minutes in a warm oven.
You can try, but I recommend butter for the best flavor and a thicker texture.
You can keep the leftovers in an airtight container in the fridge for 3-4 days. I like to keep them in a glass food storage container, as shown in the photo below. Reheat them gently in the microwave, covered, at 50% power, or (uncovered) in a 350°F oven. You can also freeze the cooled leftovers in freezer bags for up to three months.
Serving Suggestions
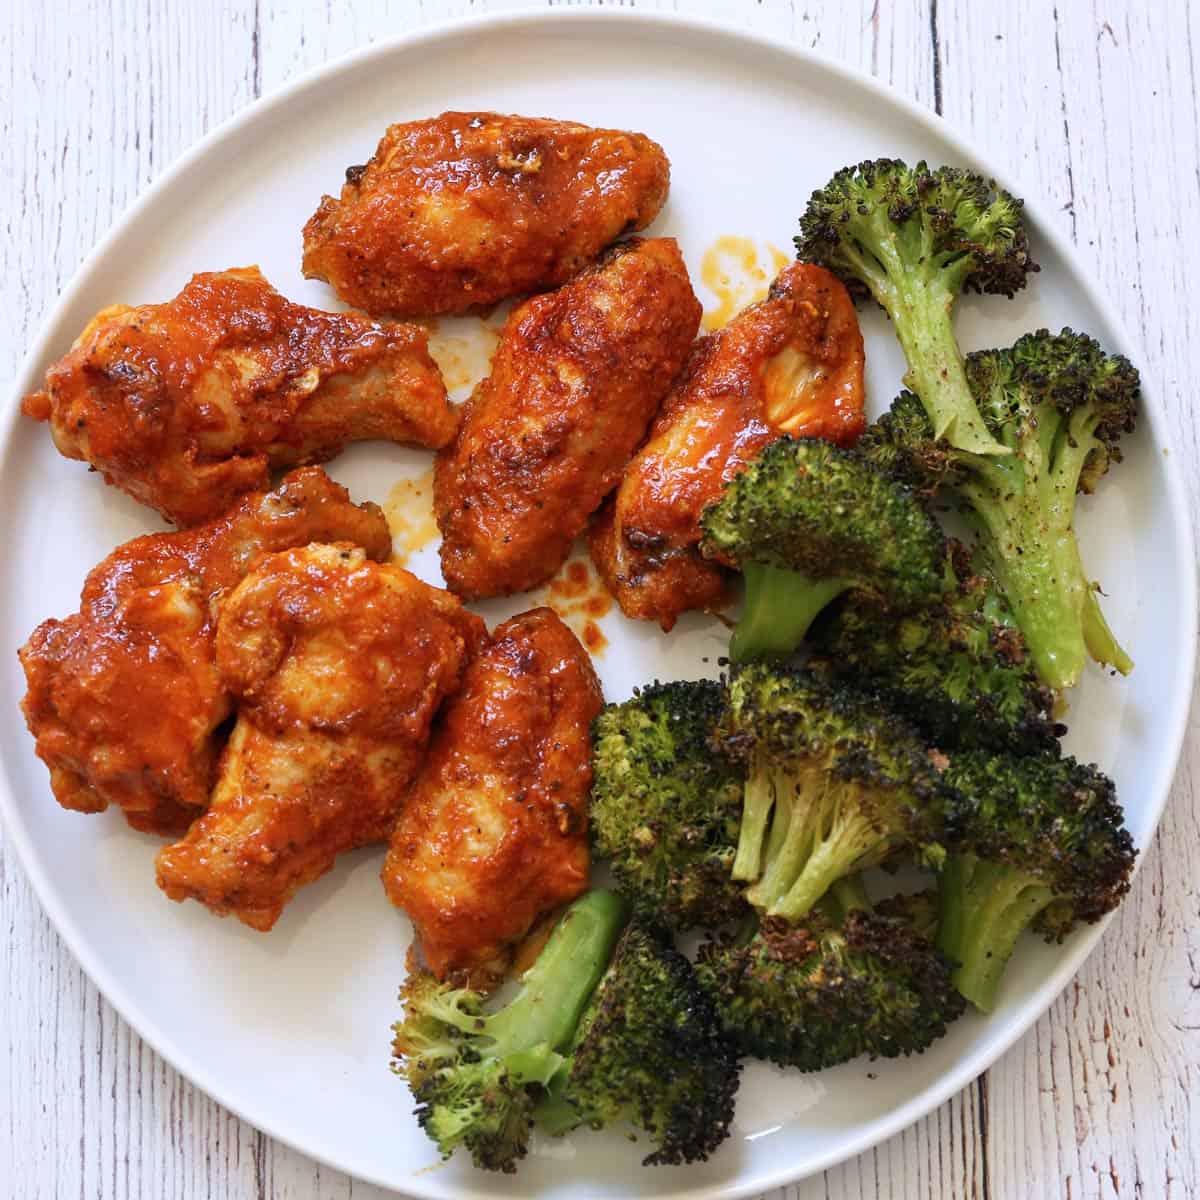
As shown in the image below, you can serve buffalo wings like their inventor did, with fresh veggies and blue cheese dressing (or ranch dressing).

I sometimes make them for dinner as a main course and serve them with a side dish I can bake in the same 400°F oven, like any of the following:
I also like them with roasted broccoli, as shown in the photo below, roasting the broccoli for 20-25 minutes.
Recipe Card

Baked Buffalo Wings
Video
Ingredients
- 3 pounds chicken wings - split, tips removed
- Avocado oil spray
- 2 teaspoons Diamond Crystal kosher salt - or 1 teaspoon of any other salt, including Morton kosher salt
- ½ teaspoon black pepper
- 1 teaspoon garlic powder
- 1 teaspoon onion powder
- 1 teaspoon smoked paprika
Buffalo Sauce:
- 4 tablespoons butter - melted
- 4 tablespoons hot pepper sauce
Instructions
- Preheat the oven to 400°F. Line a rimmed baking sheet with high-heat-resistant parchment paper.

- Arrange the chicken wings on the prepared baking sheet. Spray them with oil, then sprinkle them with kosher salt, black pepper, garlic powder, onion powder, and smoked paprika. Give them another quick spray of oil.3 pounds chicken wings, Avocado oil spray, 2 teaspoons Diamond Crystal kosher salt, ½ teaspoon black pepper, 1 teaspoon garlic powder, 1 teaspoon onion powder, 1 teaspoon smoked paprika
- Bake the wings until the skin is browned and crispy, about 30 minutes. Lower the oven to "keep warm" (170°F) and keep the wings in the oven for 30 more minutes to crisp the skin.

- Ten minutes before the wings are ready, prepare the Buffalo sauce: Place the butter in a microwave-safe bowl. Cover it. Microwave until the butter is melted, about 20 seconds. Add the hot sauce and whisk to combine.4 tablespoons butter, 4 tablespoons hot pepper sauce
- Using tongs, toss the wings in the Buffalo sauce.
- Serve with blue cheese dip and celery sticks.


Notes
- Seasonings, especially salt, are guidelines. Adjust to taste.
- You can divide the wings between two baking sheets. This will ensure they are spaced apart and will promote even baking and crispiness.
- The wings will be fully cooked after about 30 minutes in a 400°F oven. But keeping them in the oven (on the "keep warm" setting) for 30 more minutes makes them wonderfully crispy.
- It's important to mix the buffalo sauce ten minutes before using it. If you mix it right before you use it, it will be too thin. Mixing it ahead of time lets it rest and thicken, allowing it to better coat the wings.
- Since sriracha is typically thicker than other types of hot sauce, using it will result in a thicker buffalo sauce that better coats the wings.
- There's no need to use flour in this recipe. The skin comes out wonderfully crispy thanks to the hot oven temperature and those extra 30 minutes in a warm oven.
- You can keep the leftovers in an airtight container in the fridge for 3-4 days. Reheat them gently in the microwave, covered, at 50% power, or uncovered in a 350°F oven. You can also freeze the cooled leftovers in freezer bags for up to three months.
Nutrition per Serving
Save this Recipe!
We will also add you to our weekly newsletter. Unsubscribe anytime. See healthyrecipesblogs.com/privacy/ to learn how we use your email.
Disclaimers
Most recipes are low-carb and gluten-free, but some are not. Recommended products are not guaranteed to be gluten-free. Nutrition info is approximate - please verify it. The carb count excludes non-nutritive sweeteners. Please read these Terms of Use before using any of my recipes.


Anonymous says
Awesome recipe! 5 stars.
Vered DeLeeuw says
So glad you liked it! Thank you very much for the review.
Nahla says
It was great - will definitely make again.
Vered DeLeeuw says
Wonderful, Nahla! Thank you very much for the review.
Joanie says
Can you air fry? If so, how would you alter the cooking time, etc.?
Vered DeLeeuw says
Hi Joanie,
I only tested this recipe in an oven. I don't own an air fryer.
Val says
This recipe is SO easy and so good for the upcoming Super Bowl weekend. I'll be hosting a Super Bowl party this year so have been trying a few recipes, and this has that classic tried and true wing flavor that's a party-pleaser. Love the tip to keep the wings on keep warm for 30 min for crispiness.
Vered DeLeeuw says
Glad you liked these wings, Val! Thank you very much for the review.
Nancy says
Can you use packaged frozen wings in this recipe? If so, do I need to thaw first?
Vered DeLeeuw says
Hi Nancy,
Yes, you can, and you do need to thaw them completely first. I would also pat them dry with paper towels before baking.
MICHELE B says
Hey Vered! Love your lo-carb recipes!! How many degrees is the "keep warm" setting on an oven??
Vered DeLeeuw says
Hi Michelle,
It's usually 170°F.
Amanda says
Wow these turned out so good! This will be in my regular rotation, the meat was so tender and flavorful. The only thing I did differently was baking on a rack above a baking sheet. Thanks for the great recipe!
Vered DeLeeuw says
You're very welcome, Amanda! I'm so glad you enjoyed these wings. Thank you for taking the time to write a comment.
Jim says
I have tried many recipes for baked wings and this recipe is by far the best. They turned out just like fried wings, this will be my way to cook wings for now on. Thank You.
Vered DeLeeuw says
Yay! I'm so glad you enjoyed this recipe, Jim. Thank you for taking the time to review it!