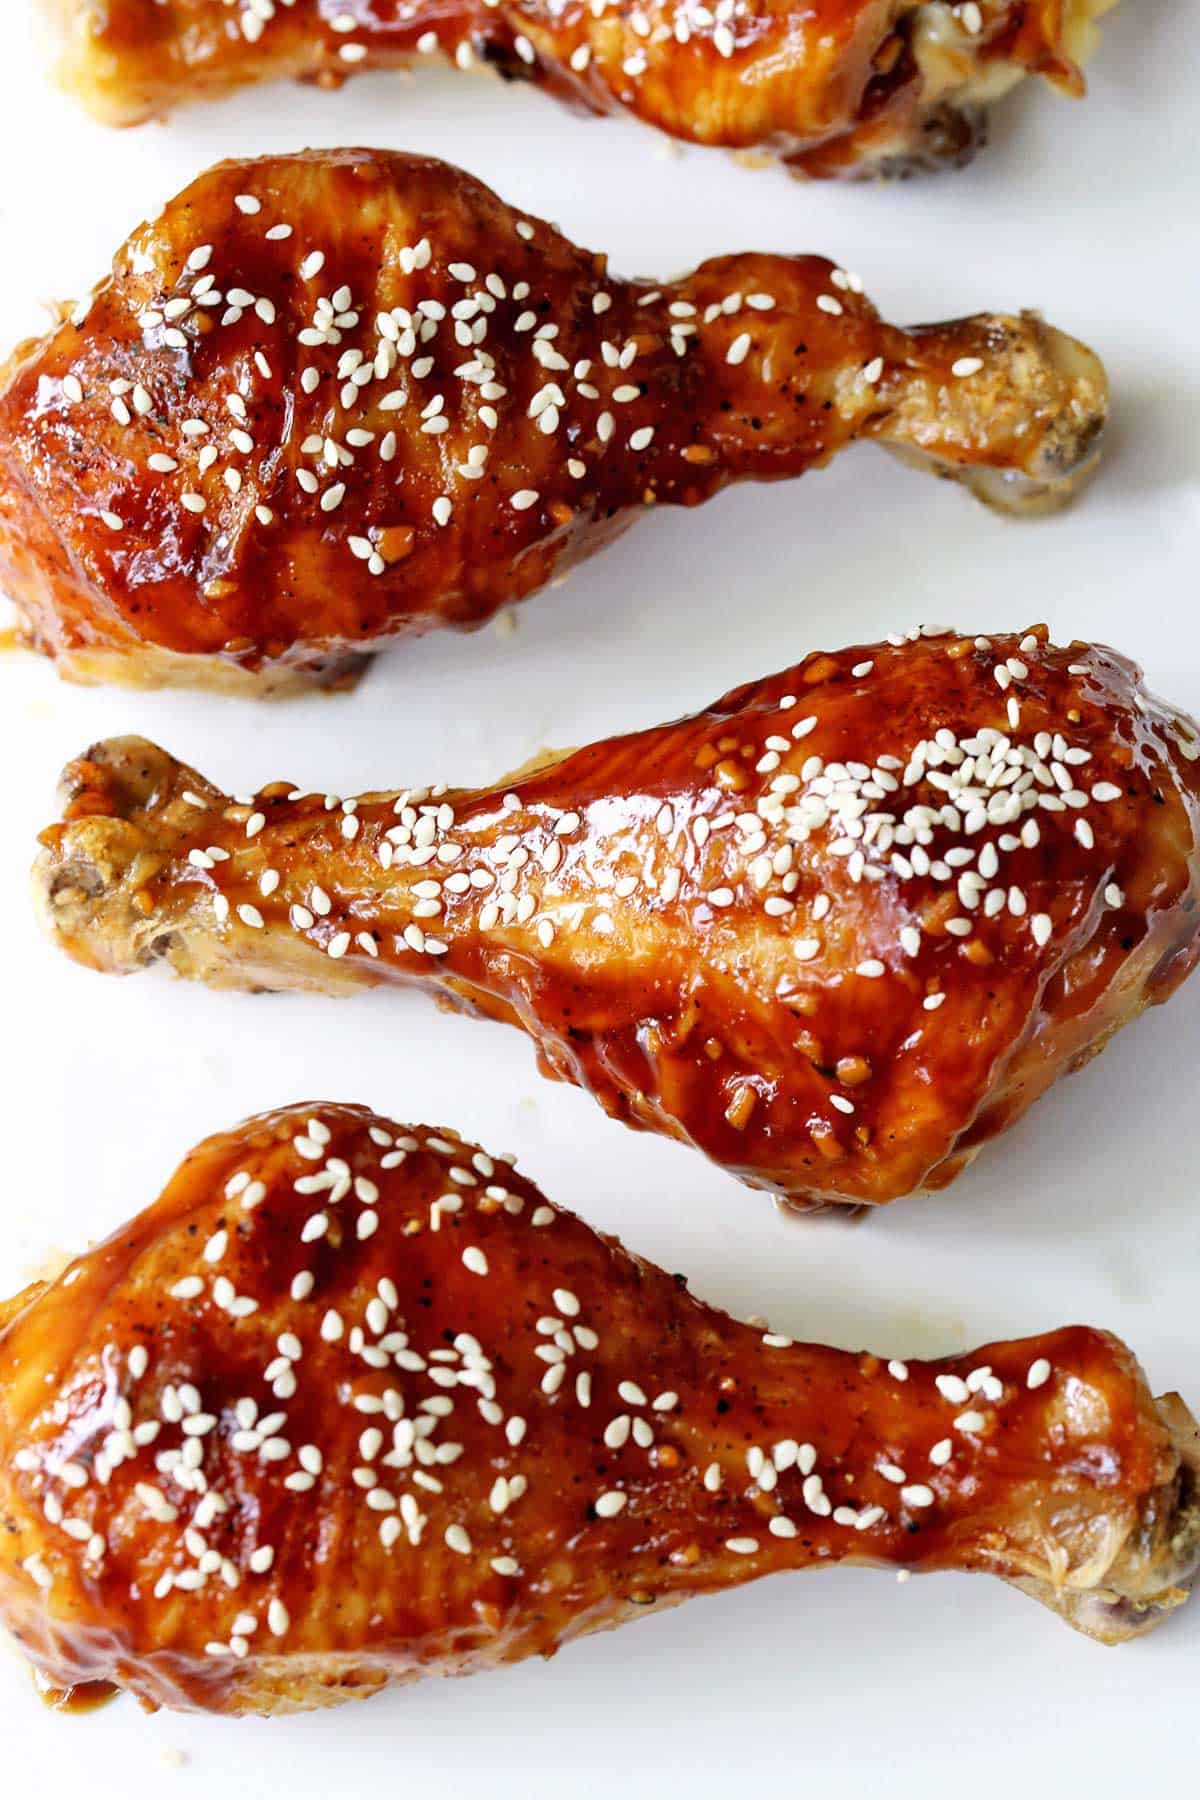
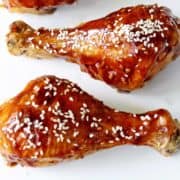
These teriyaki chicken drumsticks are sticky, saucy, and delicious! Simply bake the drumsticks in the oven, quickly make the sauce, and brush it on the chicken. Easy!
Simply baked chicken drumsticks are great, but sometimes you want variety! This recipe fits the bill. Teriyaki sauce is amazingly flavorful, and adding it to chicken greatly elevates it. That's why I make this recipe so often. While it looks impressive when served, it's truly easy to make, and everyone likes it - kids and adults.
Ingredients and Substitutions
See the recipe card for exact measurements. Here are my comments on some of the ingredients.
- Chicken drumsticks: I like to keep the skin on.
- Cornstarch: Just a little to thicken the sauce.
- Dry white wine: I like sauvignon blanc, which also goes nicely with this dish! You can substitute sake for the white wine. This is actually the ingredient in the classic teriyaki sauce.
- Honey: I use it in the sauce instead of sugar. You can also use real maple syrup.
- Aromatics: Minced garlic and ginger.
- Sesame seeds: Used for garnish. Sometimes, I add chopped chives.
Instructions
The detailed instructions and step-by-step photos are included in the recipe card. Here's a quick overview.
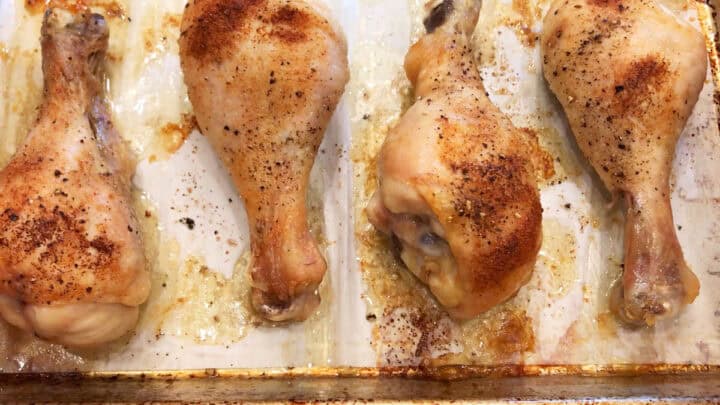
Coat the chicken with oil and bake it for 30-45 minutes in a 400°F oven. You can sprinkle the chicken with salt and pepper before baking, but it's not mandatory.

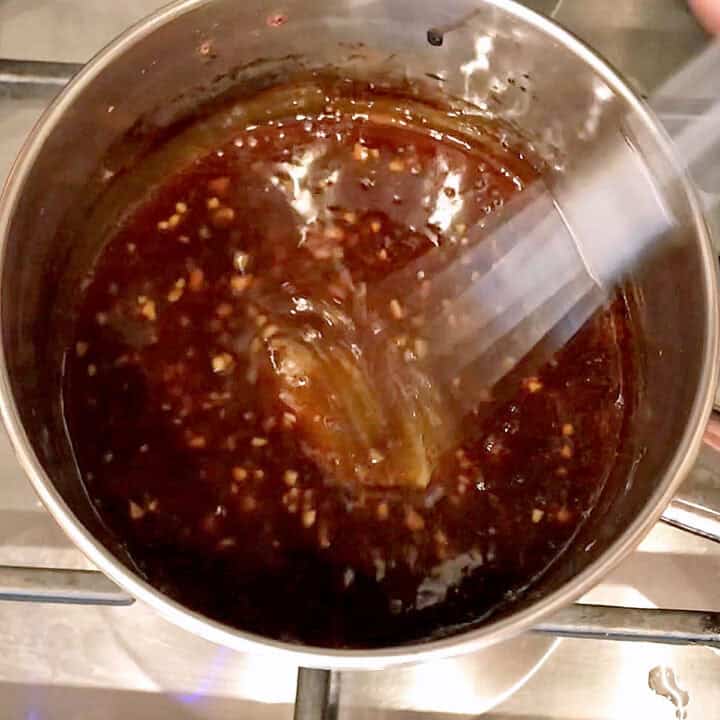
Just before the chicken is done, quickly make the teriyaki sauce. It takes about 10 minutes on the stove.

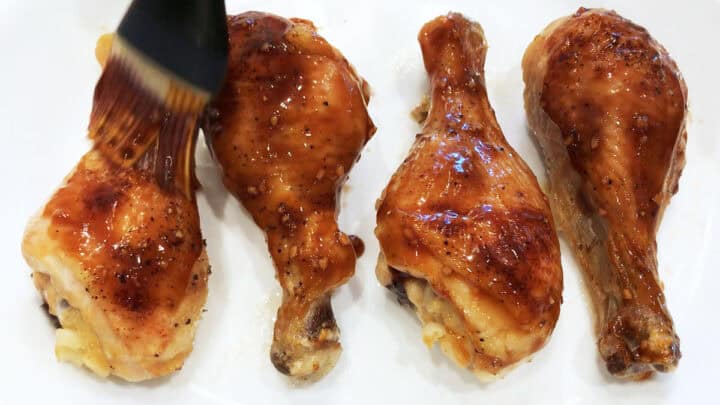
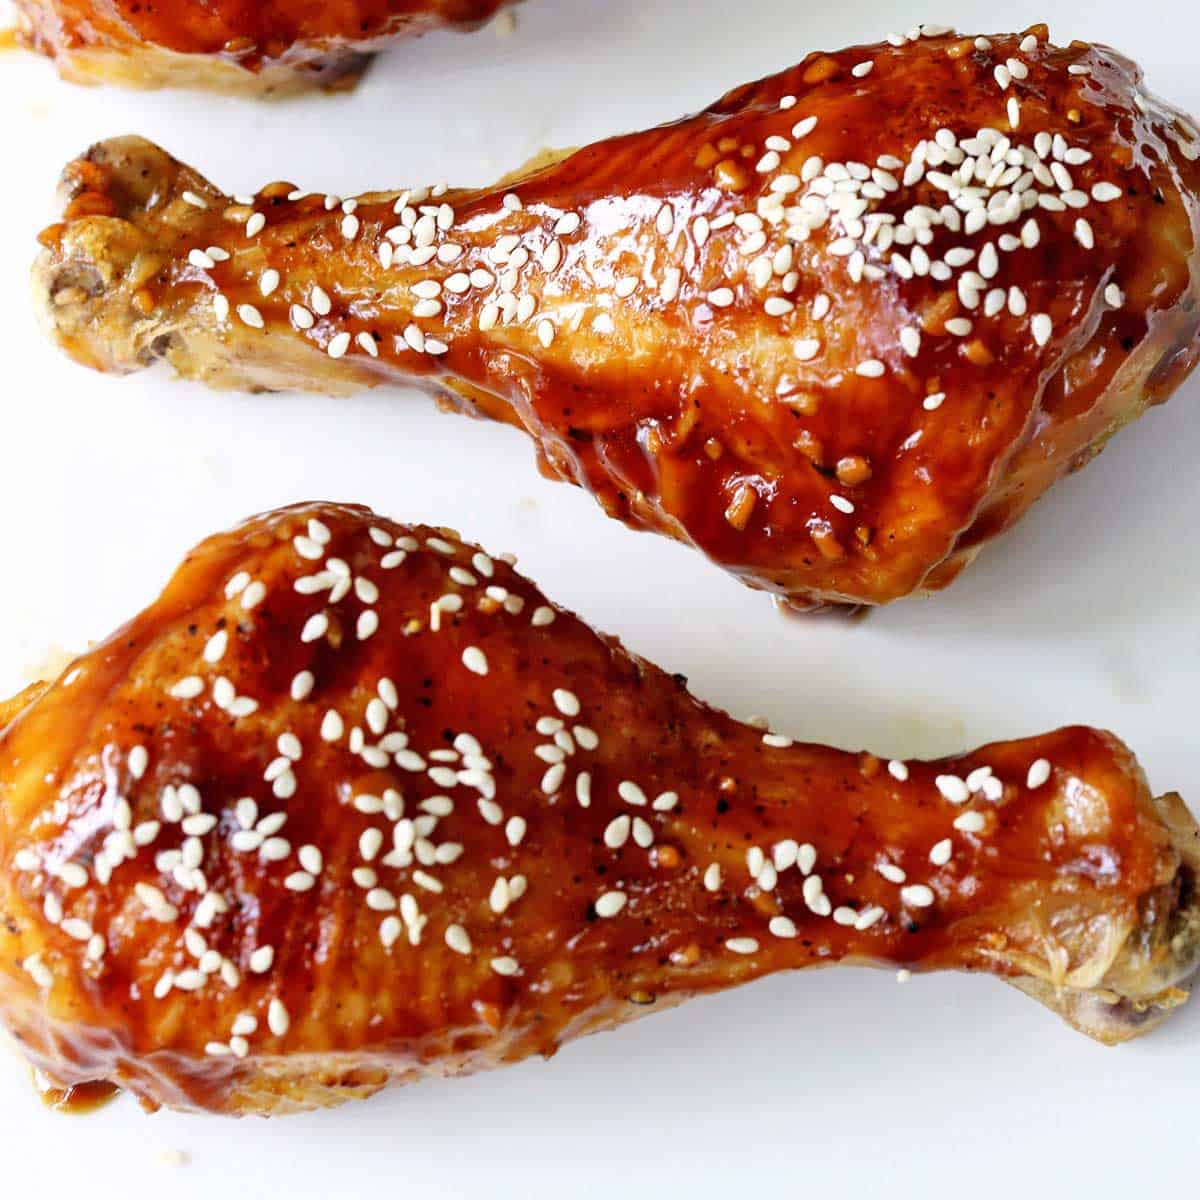
Brush the cooked chicken with the sauce, garnish it with sesame seeds, and serve.

Recipe Tips
- The time it takes to bake the chicken depends on the size of the drumsticks and how hot your oven runs. Use an instant-read thermometer, and aim for an internal temperature of 165ºF when not touching the bone.
- You can successfully make this recipe with chicken thighs. Bone-in thighs will need about 45 minutes in the oven, while boneless thighs will need about 30 minutes. Always check with a food thermometer to ensure the internal temperature, when not touching a bone, has reached 165°F.
Recipe FAQs
I like to keep the skin on, but you can remove it if you wish. Both versions are very good. If you remove the skin, be generous when coating the chicken pieces with oil to prevent them from drying out. The photo below shows skinless drumsticks that I used in this recipe back in 2019. They were just as good as they look! Juicy and flavorful. 
Yes! Teriyaki sauce is amazing, but it's very sweet. My low-sugar version used here is just as good and is not overly sweet. Give it a try! I use it in several recipes, including teriyaki salmon and teriyaki chicken wings.
I don't recommend that. A small amount is needed to thicken the sauce.
You can keep the leftovers in an airtight container in the fridge for 3-4 days. They are delicious when served cold! Alternatively, reheat them uncovered in a 350°F oven until heated through.
Serving Suggestions
I usually serve this saucy dish on a bed of something that would absorb the sauce, such as any of the following:
It also goes well with vegetable sides that can be cooked in the same 400°F oven, including Asian Brussels sprouts, roasted cabbage, and roasted carrots.
When I want to make life extra easy, I serve the chicken with an Asian-style salad, either Asian cucumber salad or Asian cabbage salad.
Recipe Card
Teriyaki Chicken Drumsticks
Video
Ingredients
Chicken:
- 8 chicken drumsticks - 4 ounces each
- Avocado oil spray
Teriyaki Sauce:
- 2 tablespoons reduced-sodium soy sauce - or a gluten-free alternative
- 1 teaspoon cornstarch
- 2 tablespoons dry white wine
- 1 tablespoon honey
- 1 teaspoon fresh garlic - minced
- 1 teaspoon fresh ginger root - grated
Garnish:
- 1 teaspoon sesame seeds
Instructions
- Preheat the oven to 400°F. Line a large, rimmed baking sheet with foil for easy cleanup.

- Spray the drumsticks all over with oil. Place them on the prepared baking sheet and bake them until cooked through, for 30-45 minutes, depending on their size and how hot your oven runs. Aim for an internal temperature of 165°F when not touching the bone.8 chicken drumsticks, Avocado oil spray

- 10 minutes before the drumsticks should be done, prepare the teriyaki sauce. In a small saucepan, whisk together the soy sauce and cornstarch. Add the white wine, honey, minced garlic, and grated ginger, whisking to combine. Heat the sauce over medium-low heat (not higher), whisking often, until it thickens into a syrup. This should take 3-4 minutes. Remove from heat.2 tablespoons reduced-sodium soy sauce, 1 teaspoon cornstarch , 2 tablespoons dry white wine, 1 tablespoon honey, 1 teaspoon fresh garlic, 1 teaspoon fresh ginger root

- Remove the baked chicken pieces onto a serving platter. Brush them with the teriyaki sauce, sprinkle with sesame seeds, and serve.1 teaspoon sesame seeds

Notes
- Saltiness and sweetness preferences are highly personal. Adjust to taste.
- You can replace the drumsticks with chicken thighs. If you use boneless chicken thighs, you'll need to bake them for about 30 minutes. Bone-in thighs will need around 45 minutes. The internal temperature of fully cooked chicken should be 165°F.
- I keep the skin on, but you can remove it if you wish. Both versions are very good. If you remove the skin, be generous when coating the chicken pieces with oil to help prevent them from drying out.
- You can sprinkle the chicken with salt and pepper before baking, but it's not mandatory.
- The time it takes to bake the chicken depends on the size of the drumsticks and how hot your oven runs. Use an instant-read thermometer, and aim for an internal temperature of 165ºF when not touching the bone.
- You can keep the leftovers in an airtight container in the fridge for 3-4 days. They are delicious when served cold. Alternatively, reheat them uncovered in a 350°F oven until heated through.
Nutrition per Serving
Save this Recipe!
We will also add you to our weekly newsletter. Unsubscribe anytime. See healthyrecipesblogs.com/privacy/ to learn how we use your email.
Disclaimers
Most recipes are low-carb and gluten-free, but some are not. Recommended products are not guaranteed to be gluten-free. Nutrition info is approximate - please verify it. The carb count excludes non-nutritive sweeteners. Please read these Terms of Use before using any of my recipes.


Lorinda C Willis says
Is there a way to save this recipe on Pinterest?
Vered DeLeeuw says
Hi Lorinda,
Yes. The recipe card has a "Share Recipe" link you can use.
Indira says
Yummy!
Janet says
Can I use the teriyaki sauce recipe as a marinade? Thank you
Vered DeLeeuw says
Hi Janet,
Yes. You can skip the cornstarch, which is used to thicken the sauce and won't be needed for a marinade.