Reverse searing is a cooking method that produces juicy and evenly cooked steaks. It takes longer, but the delicious results are well worth it!
I usually cook steaks in a hot cast-iron skillet until a beautiful brown crust is formed on the outside and the middle is medium-rare. But whenever I have extra time, I use the reverse searing method. It requires more time commitment, but I love the reliably juicy steaks it produces.
Ingredients
Here's an overview of the ingredients needed for this recipe. The exact measurements are included in the recipe card below.
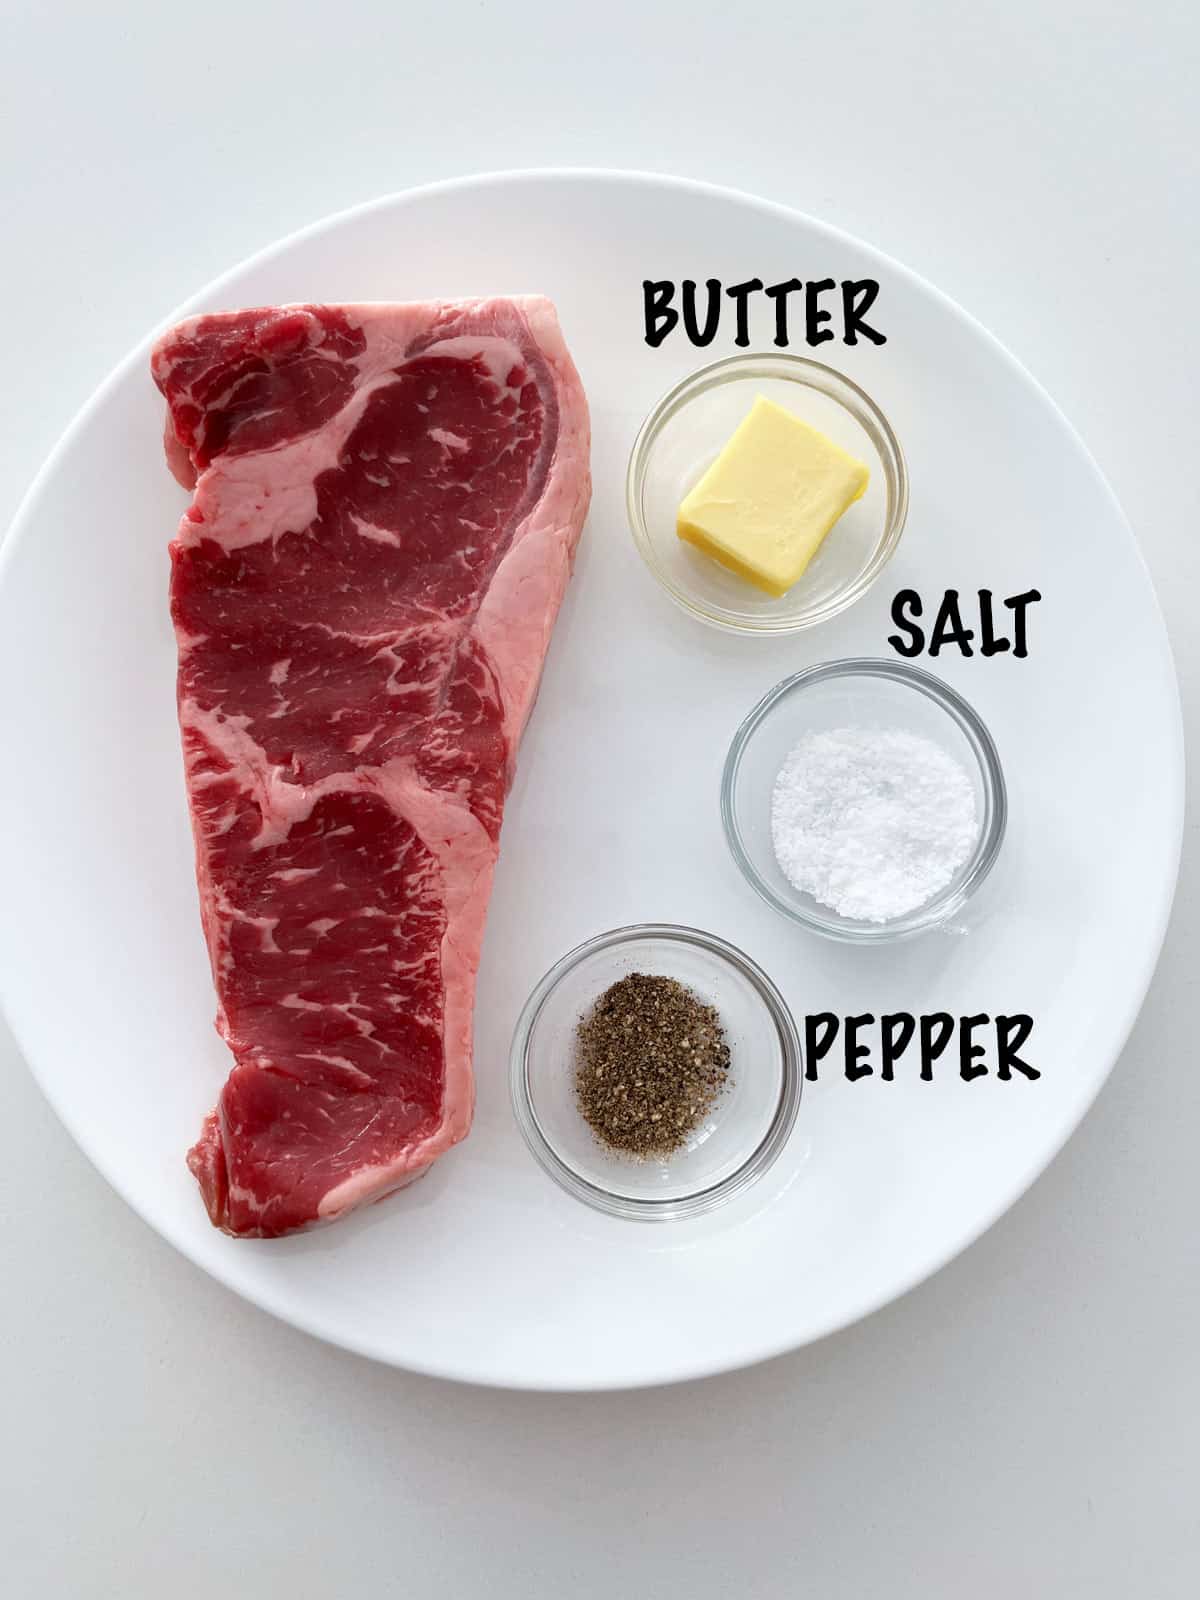
- Thick steaks: This technique does not work with thin steaks - those can simply be quickly pan-fried like I do in this steak and eggs recipe. So you'll want your steak to be at least 1 inch thick, preferably 1.5 inches.
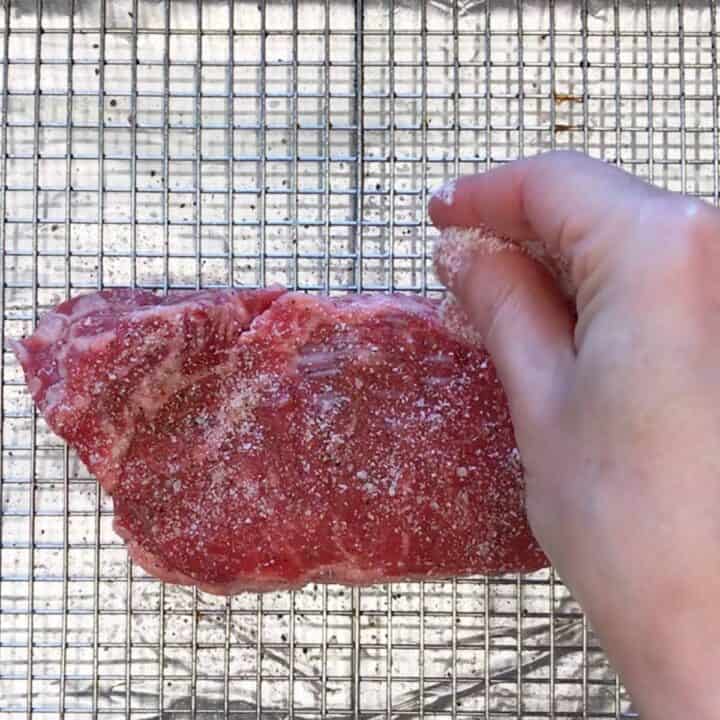
- Kosher salt and black pepper: These are the only seasonings a good steak needs. And although sea salt is very fashionable, I prefer cooking and salting my food with Diamond Crystal kosher salt.
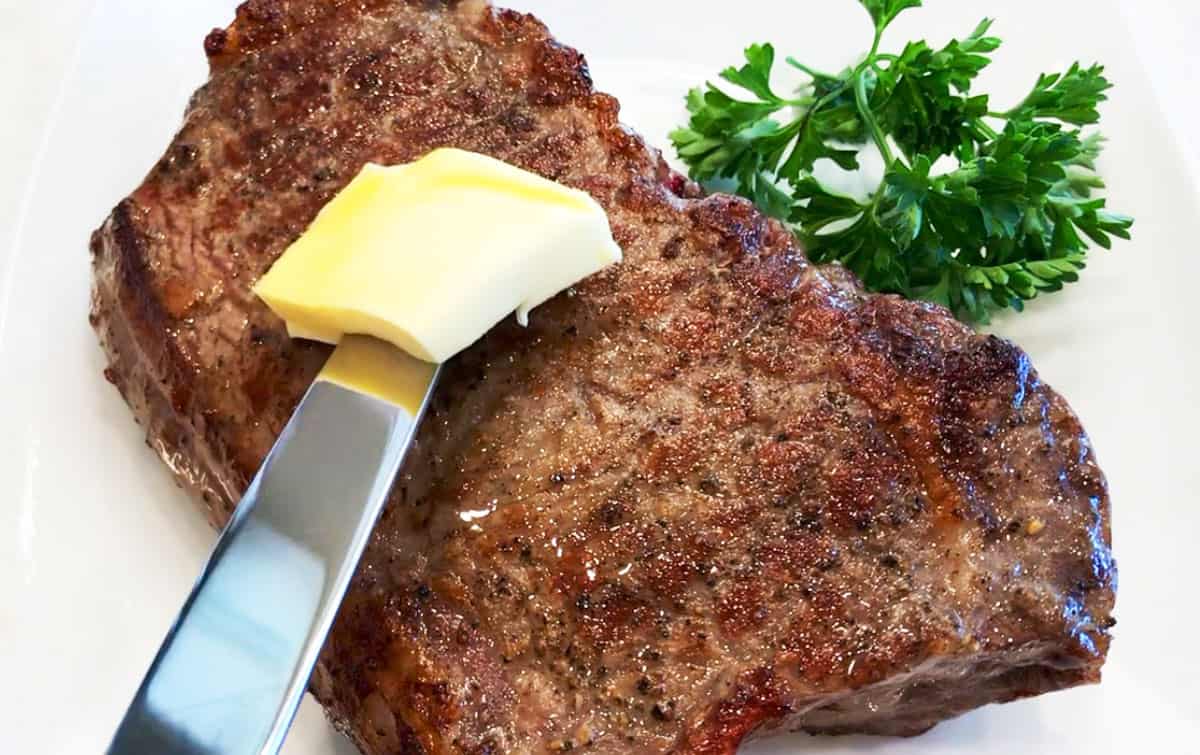
- Butter: For topping the cooked steak. This is optional, but delicious and highly recommended. Steakhouses always finish their steaks with a generous pat of butter.
Instructions
The detailed instructions and step-by-step photos are included in the recipe card. Here's a quick overview.
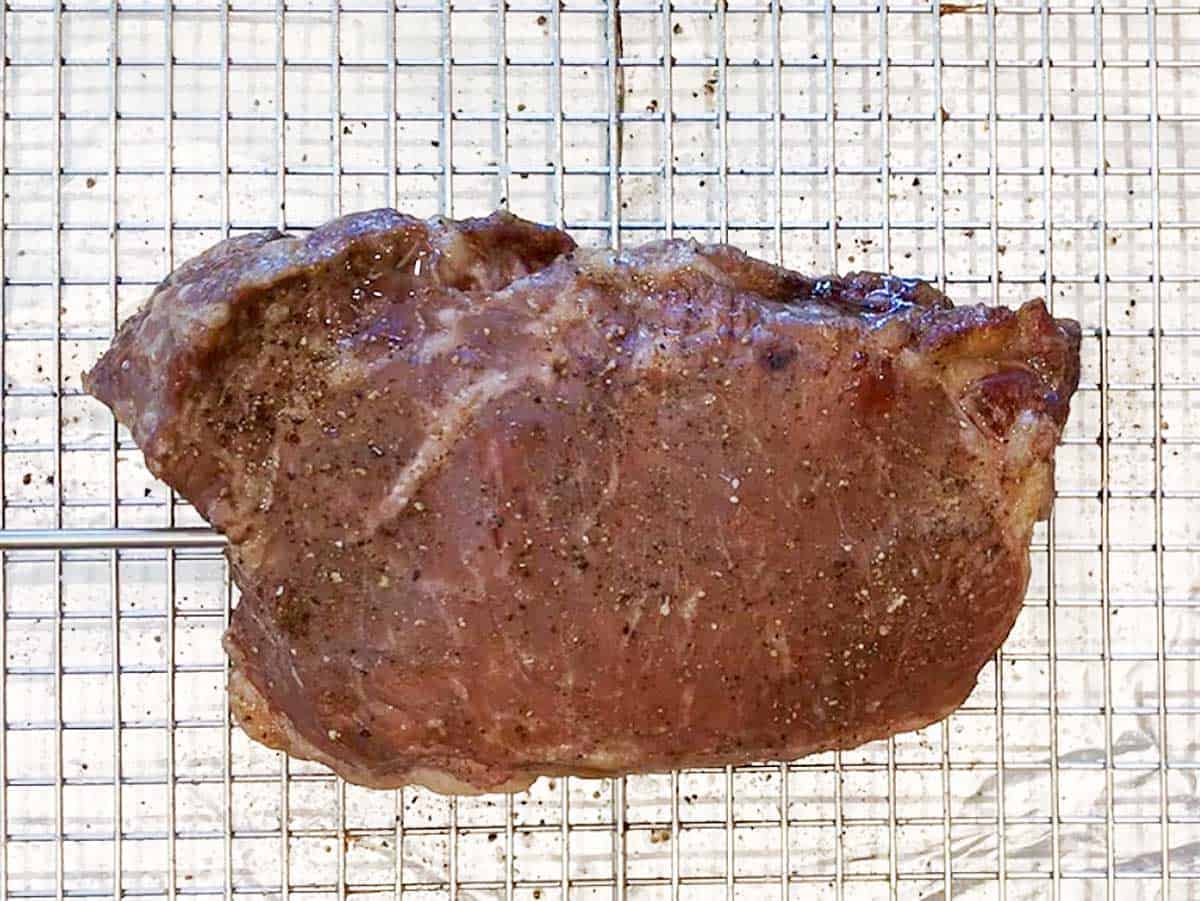
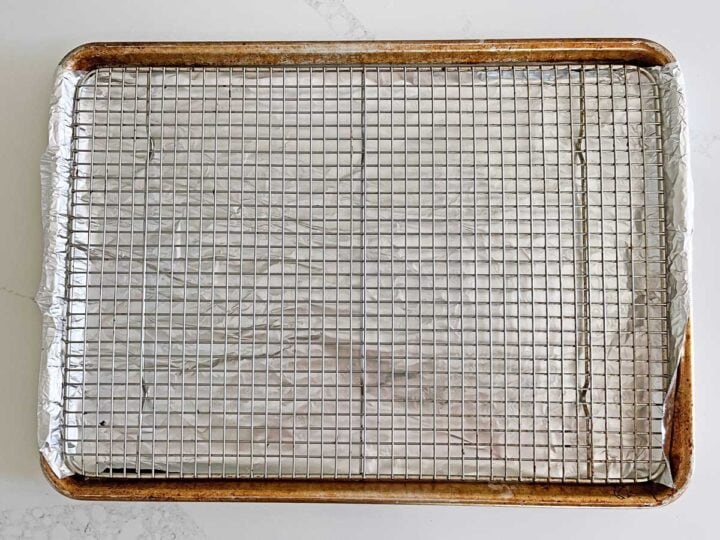
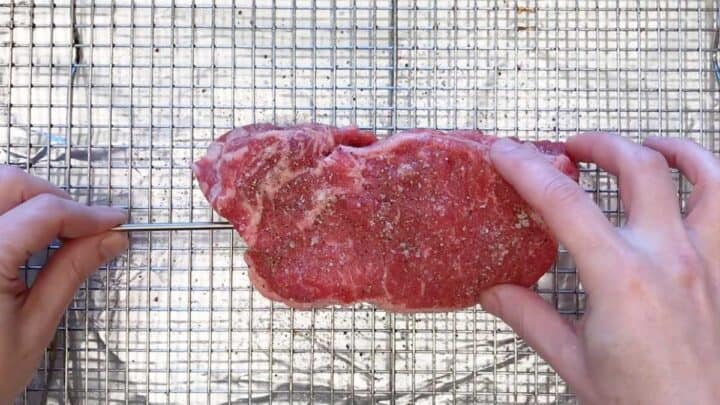
Preheat the oven to 275°F. Season the steak with salt and pepper. Place it on a rimmed baking sheet fitted with a rack and insert the probe of an oven-safe meat thermometer into the steak.
Bake the steak for 20-25 minutes, until it reaches an internal temperature of 110°F. Allow it to rest for 10 minutes. At this point, your steak won't look very appetizing. No worries! You'll soon sear it in a skillet, and then it will look great.
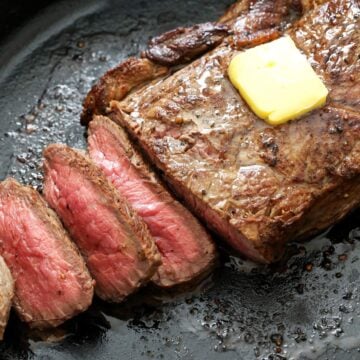
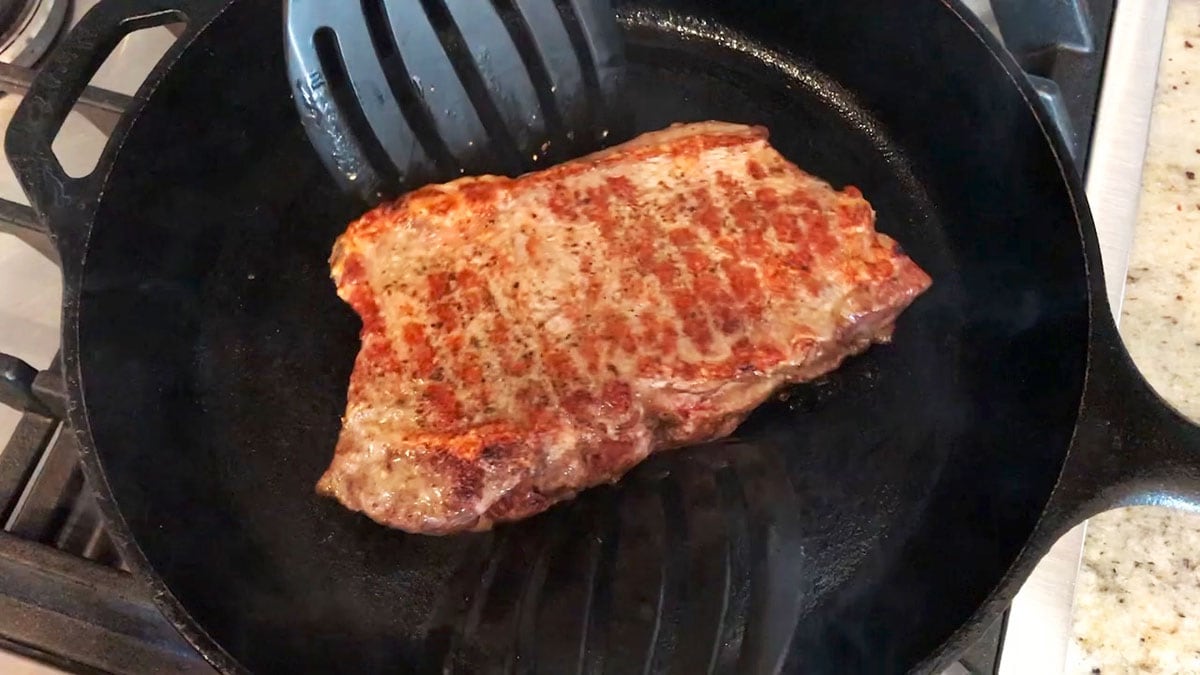
While the steak is resting, heat a cast-iron skillet over high heat. Sear the steak for one minute on each side and a few seconds on the edges.
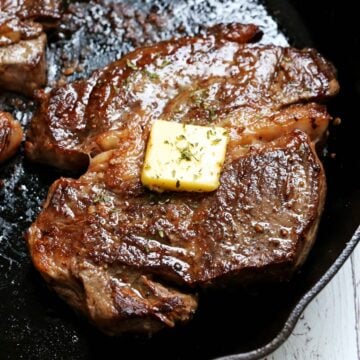
That's it! Your perfectly cooked steak is ready. Top it with butter and serve.
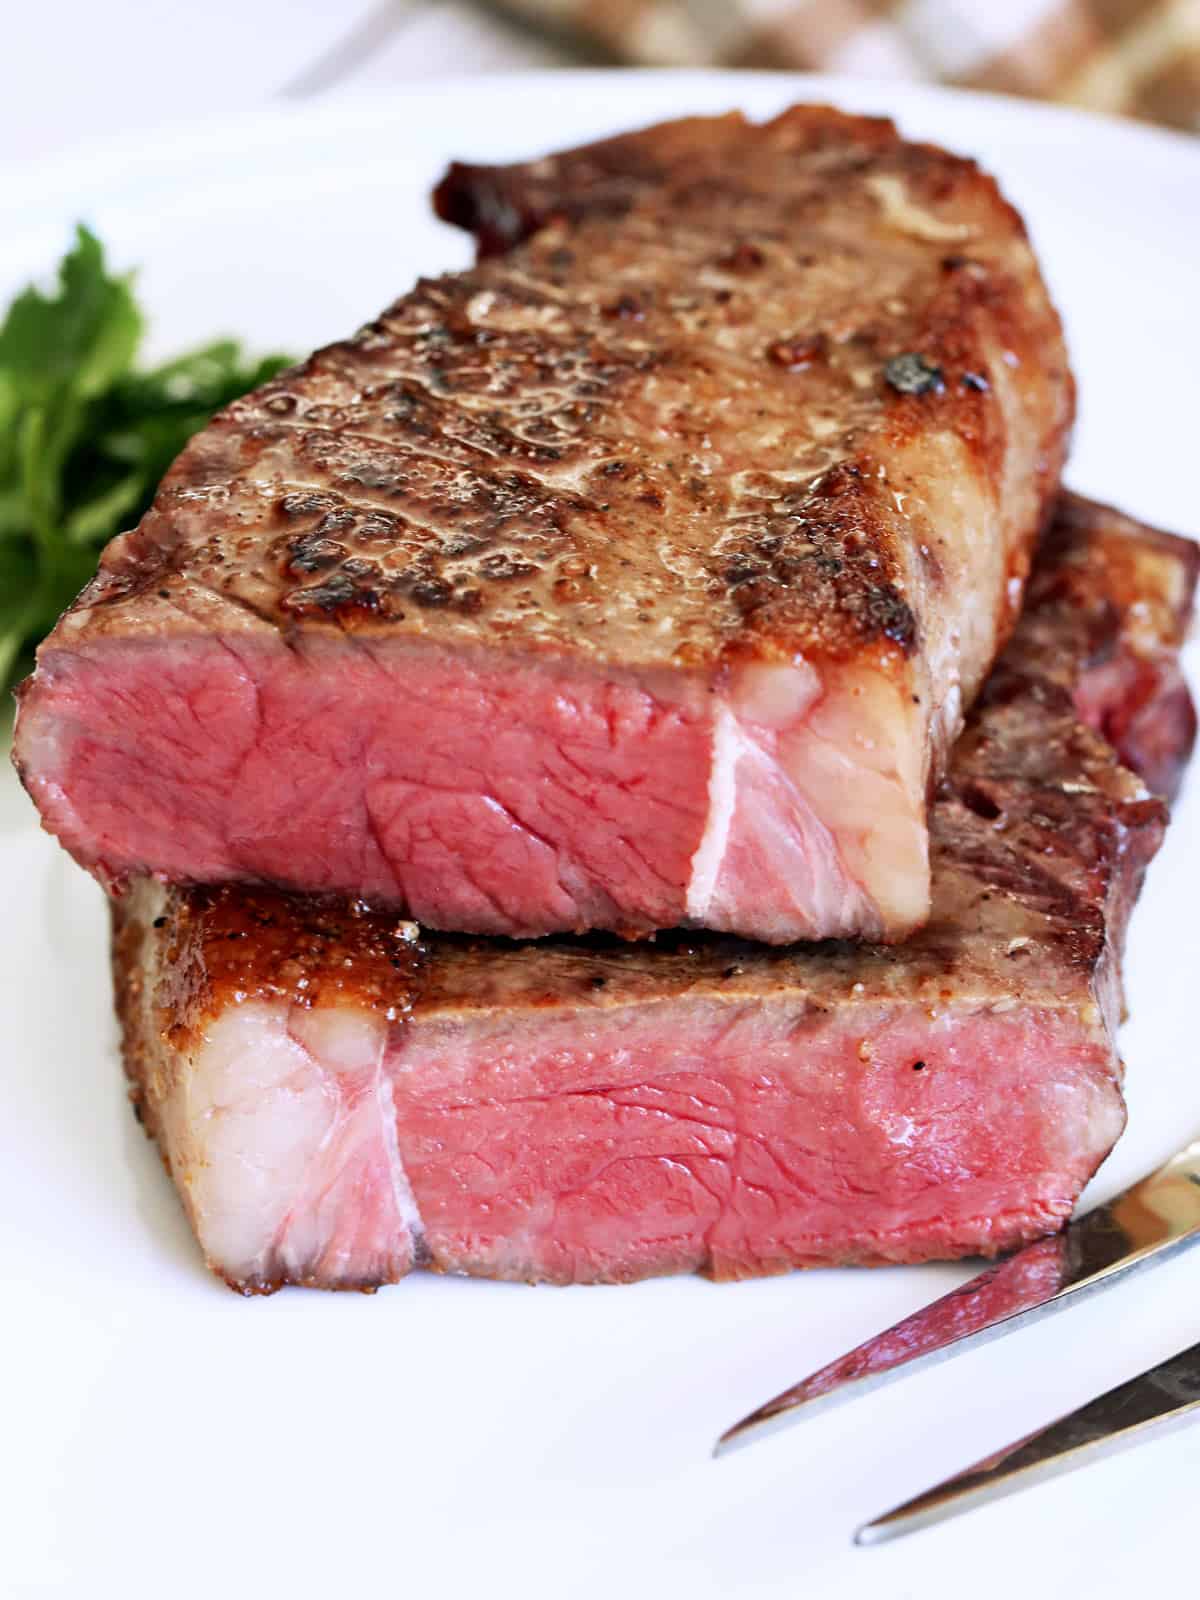
Comparison: Reverse Seared vs. Traditionally Cooked Steak
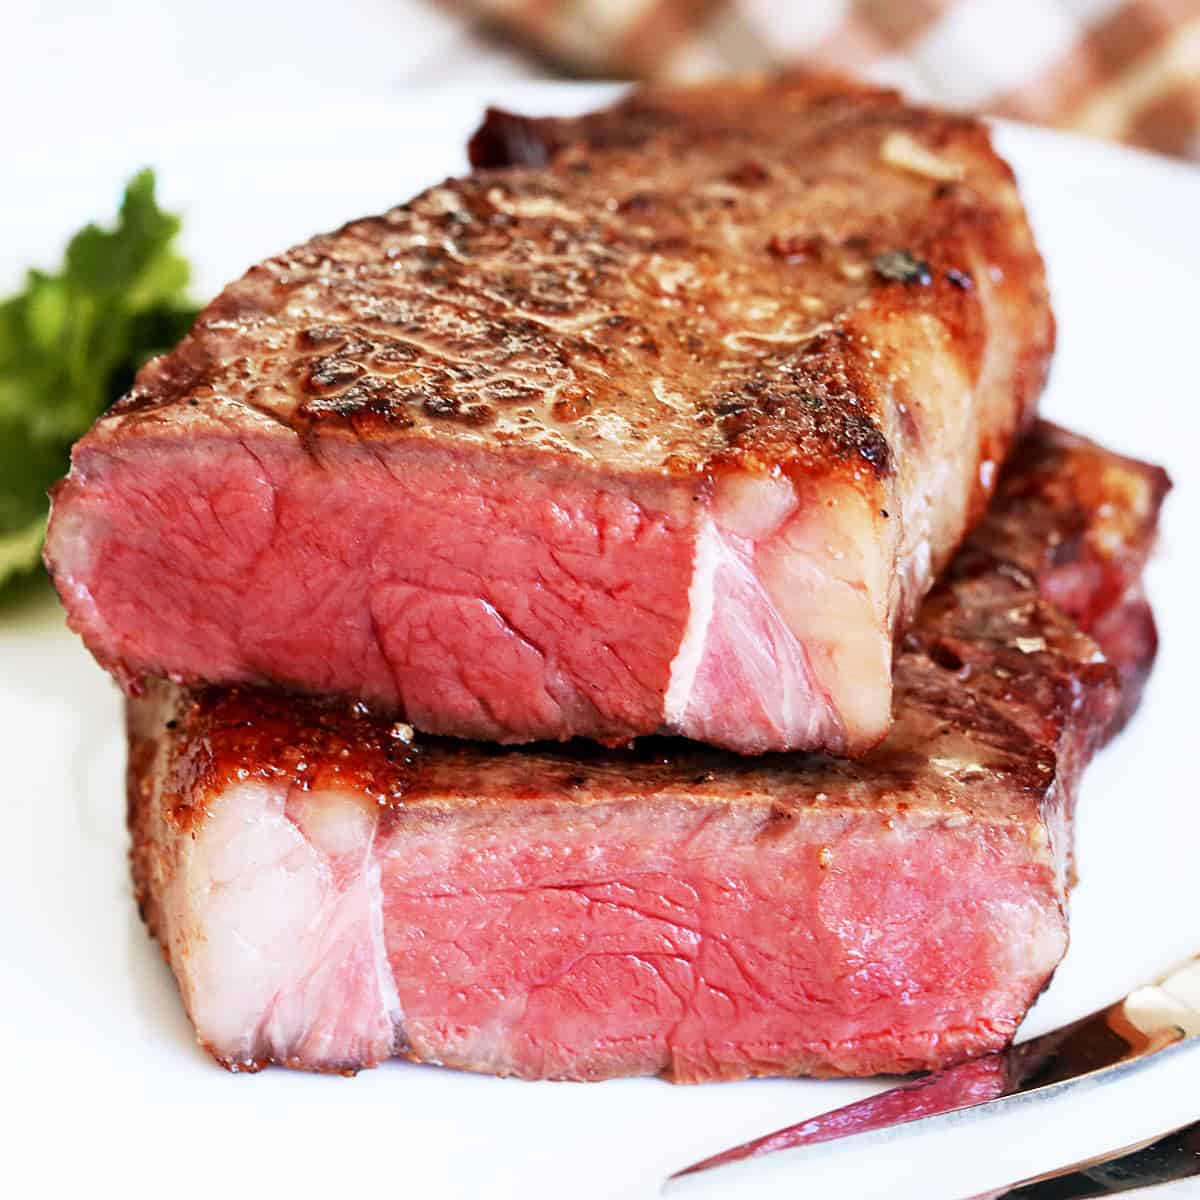
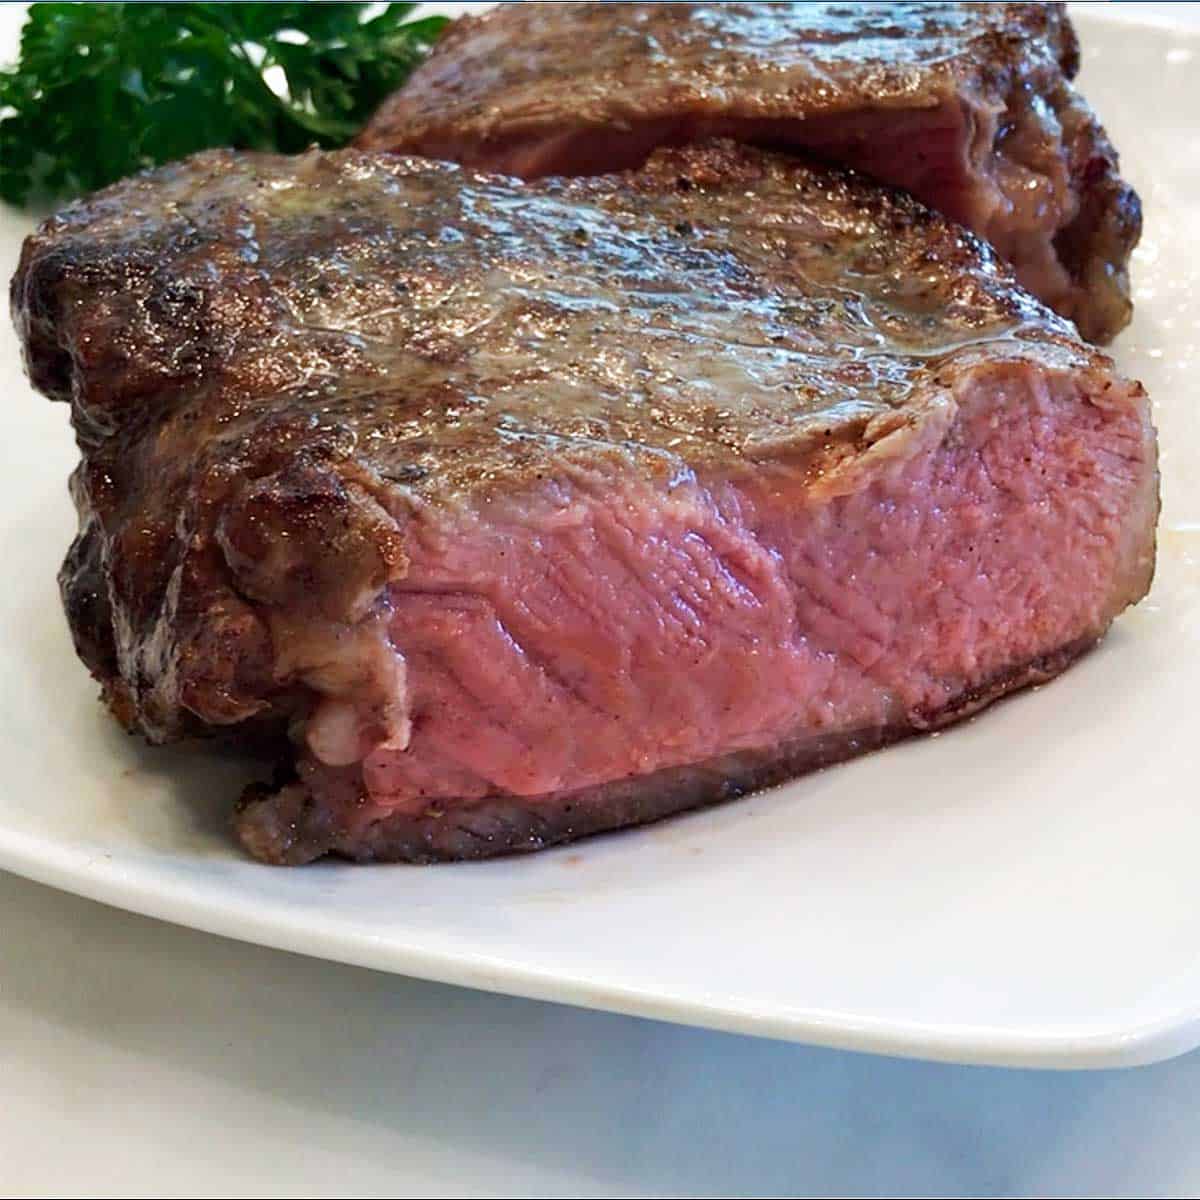
Take a look at the two steaks shown below. Both are New York steaks. The difference is clear: the one cooked the traditional way has a nice, deep, thick crust. The medium-rare inside is wrapped by a thin layer of gray band - meat that became overcooked because of the searing.

The steak that was reverse-seared is not as browned and crusty. However, the meat inside, also medium-rare, appears juicier and more uniform - it doesn't have a gray band surrounding it.
Recipe FAQs
This method changes the usual order for cooking a steak. Usually, you cook the steak in a hot skillet for about two minutes on each side. Then, you transfer the skillet to a hot oven to roast until the steak is done, 3-5 minutes, depending on how done you like it.
When reverse-searing, you change the order of these steps. First, you gently bake the steak in a slow oven, bringing it to an internal temperature of 110°F. You then rest it, allowing the juices to redistribute. Finally, a quick sear, 1 minute per side, and you get big, juicy, reliably medium-rare steaks.
The main advantage is that you get juicy, evenly cooked steaks. This method also prevents the gray band, a thin ring of overcooked meat beneath the crust that typically surrounds steaks cooked the traditional way. In addition, since you rest the steaks before the final searing, you can eat them hot, right off the skillet. There's no need to rest them after cooking.
The main disadvantages are that this method takes longer to cook and requires a meat thermometer. You also get less of a crust on your steaks because you only sear them for a minute or so.
I like New York strip steaks, so that's what I usually use. But you can use this cooking method with any thick-cut steak, including ribeye steak and filet mignon. The only steak I wouldn't cook using this method is picanha steak. The thick fat cap needs good searing, so it's best to use the traditional method when cooking this cut.
No. When it comes to cooking steaks, the best tool is a well-seasoned cast-iron skillet. It's superb in heat retention and distribution, and cooks steaks perfectly. It's the only type of skillet I use when cooking steaks.
Yes. You can keep them in an airtight container in the fridge for 3-4 days. Reheat them gently in the microwave, covered, at 50% power. You can also slice them and use them cold in a steak salad or lettuce sandwich.
Serving Suggestions
You can serve reverse-seared steak with any side dish you would typically serve with a steak, such as haricot verts, mashed cauliflower, arugula salad, steamed broccoli, or jicama fries.
For a more elaborate side dish, I recommend green beans almondine, green beans with bacon, or creamed spinach.
If you have sauteed onions or caramelized onions (or if you have the patience to make them), they make the perfect topping for steaks, as do these sauteed mushrooms.
Recipe Card

Juicy Reverse-Seared Steak
Video
Ingredients
- 1 New York strip steak - 10 ounces, 1 ½-inch thick
- ¼ teaspoon Diamond Crystal kosher salt
- ¼ teaspoon black pepper
- ½ tablespoon butter
Instructions
- Preheat the oven to 275°F. Season the steak on both sides with kosher salt and black pepper. You don't need to take the steak out of the fridge in advance.1 New York strip steak , ¼ teaspoon Diamond Crystal kosher salt, ¼ teaspoon black pepper

- Line a rimmed baking sheet with foil for easy cleanup. Fit the baking sheet with a metal rack. Grease the rack.

- Place the steak on the rack. Insert the probe of a meat thermometer into the steak. Bake the steak until it reaches an internal temperature of 110°F. For me, a fridge-temperature, 1 ½-inch thick steak usually takes about 20 minutes.

- Remove the steak from the oven. Transfer it to a plate, loosely cover it with foil, and allow it to rest for 10 minutes.

- While the steak is resting, heat a cast-iron skillet over high heat until smoking hot, 5-7 minutes. If the skillet is well-seasoned, you don't need to grease it.
- Gently pat the steak dry with paper towels, then place it in the hot skillet. Sear the steak for 1 minute on each side and a few more seconds on the edges, then top it with butter and serve.½ tablespoon butter


Notes
- Seasonings, especially salt, are guidelines. Adjust to taste.
- The USDA recommends cooking steaks to an internal temperature of 145°F.
- When it comes to searing, the best tool is a well-seasoned cast-iron skillet. It's superb in heat retention and distribution, and cooks steaks perfectly. It's the only type of skillet I use when cooking steaks.
- While this recipe was written for New York strip steaks, it also works with other thick cuts, including ribeye and filet mignon.
- You can keep the leftovers in an airtight container in the fridge for 3-4 days. Reheat them gently so as not to dry them out, in the microwave, covered, at 50% power. Or slice them and use them cold in a salad or a sandwich.
Nutrition per Serving
Save this Recipe!
We will also add you to our weekly newsletter. Unsubscribe anytime. See healthyrecipesblogs.com/privacy/ to learn how we use your email.
Disclaimers
Most recipes are low-carb and gluten-free, but some are not. Recommended products are not guaranteed to be gluten-free. Nutrition info is approximate - please verify it. The carb count excludes non-nutritive sweeteners. Please read these Terms of Use before using any of my recipes.