In this easy recipe, beef back ribs are slowly baked in the oven until tender and flavorful. The oven does most of the work! All you need is a few hours and the occasional basting.
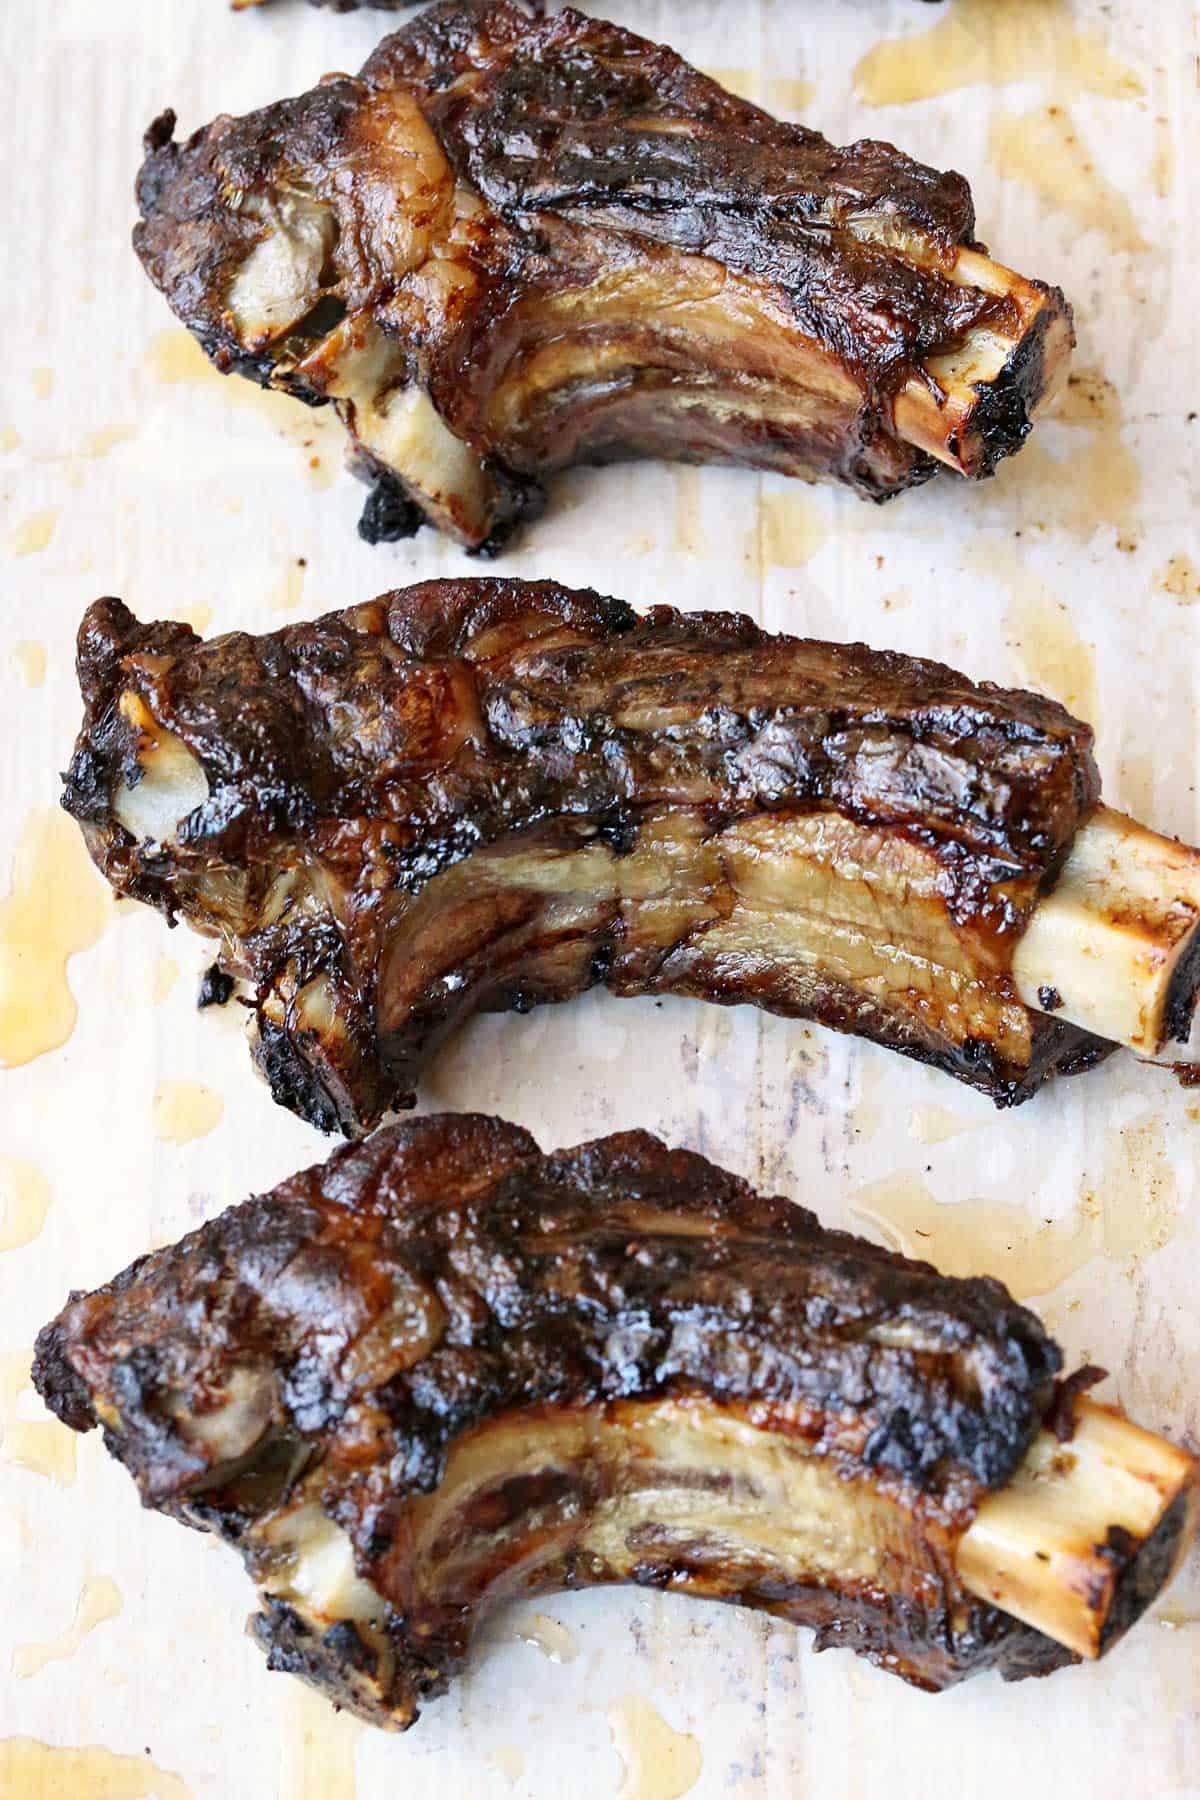
I love ribs in all forms, including country-style ribs and oven-baked ribs, but these beef back ribs are something special. The recipe is truly easy, and the ribs turn out incredibly tender. Even though they spend about five hours in the oven, the process is mostly hands-off, letting the oven do the work while you go about your day.
Ingredients
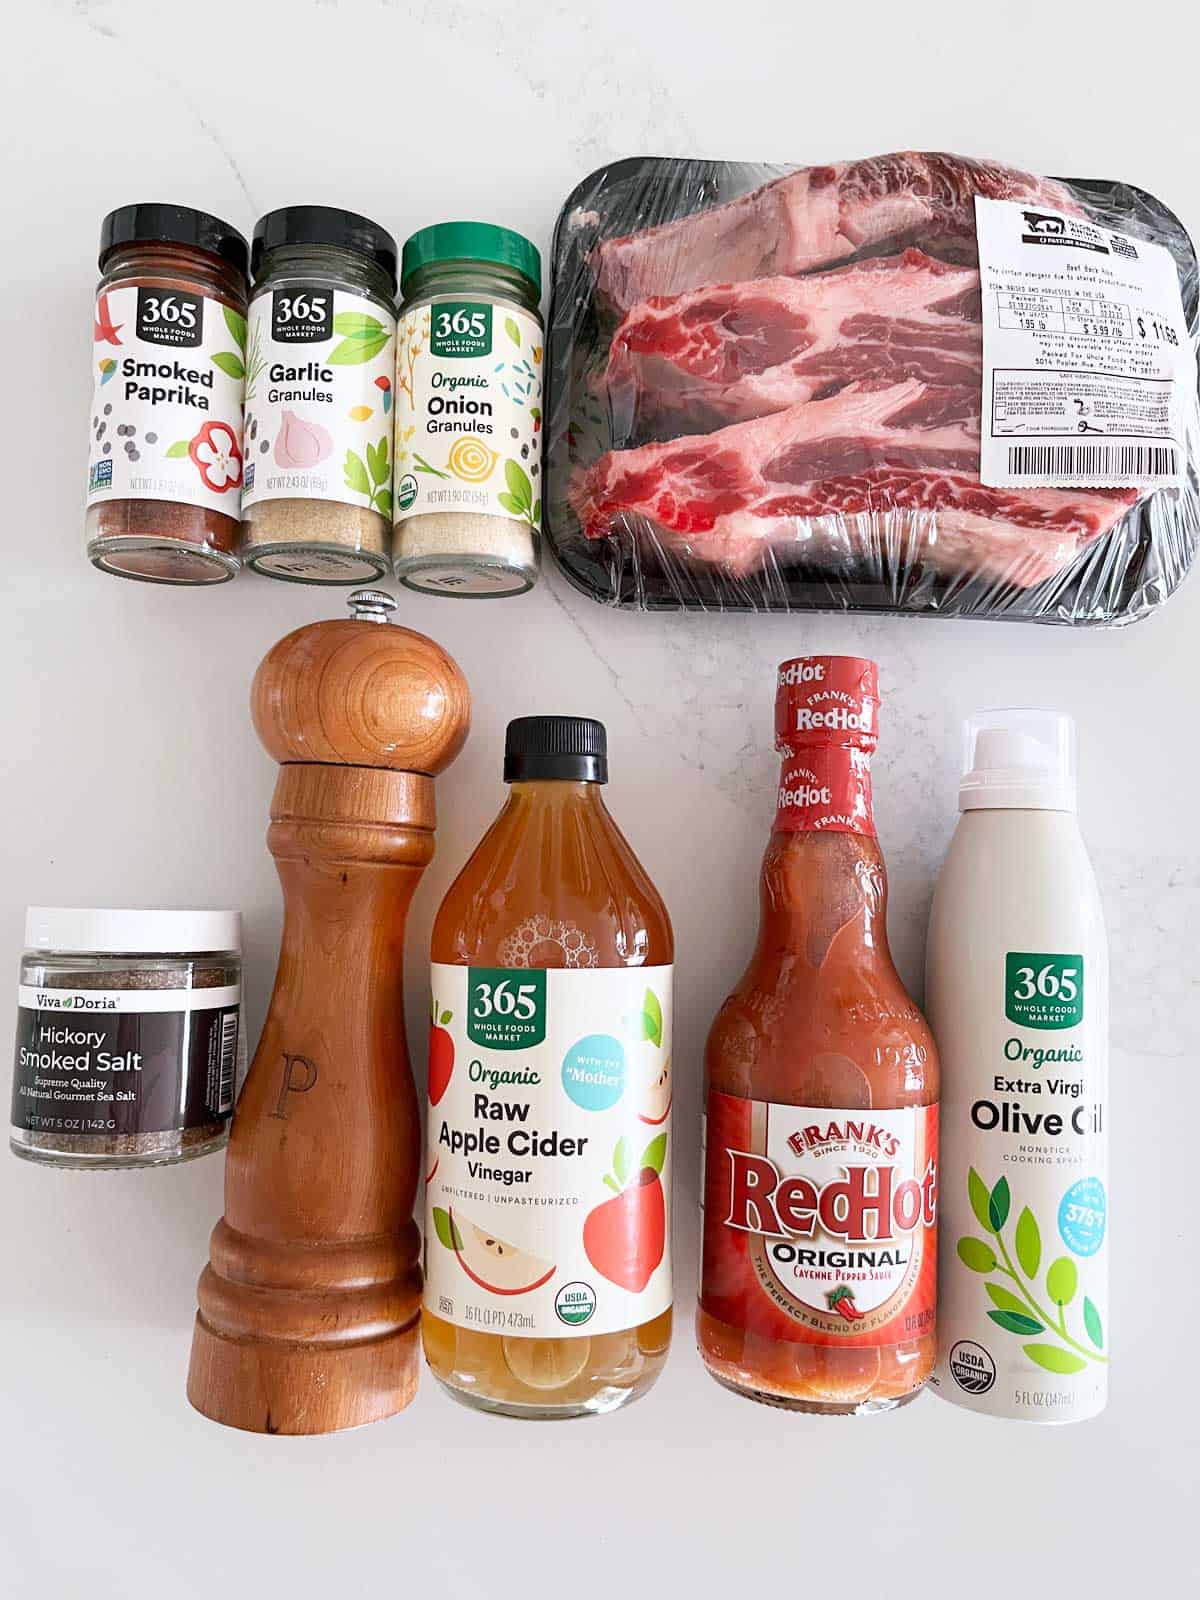
See the recipe card for exact measurements. Here are my comments on some of the ingredients.
- Apple cider vinegar: You can substitute white wine vinegar or red wine vinegar.
- Hot pepper sauce: It doesn't make the ribs spicy. It merely adds an interesting layer of flavor.
- Beef back ribs: I usually get them at Whole Foods, but they are also available in many supermarkets and, needless to say, at your butcher's.
- Olive oil: I use a spray for convenience, but you can drizzle the ribs with oil and rub it all over.
- Spices: Smoked salt, black pepper, smoked paprika, onion powder, and garlic powder. The smoked salt adds a nice smoky flavor to the dish.
Instructions
The detailed instructions and step-by-step photos are included in the recipe card. Here's a quick overview.
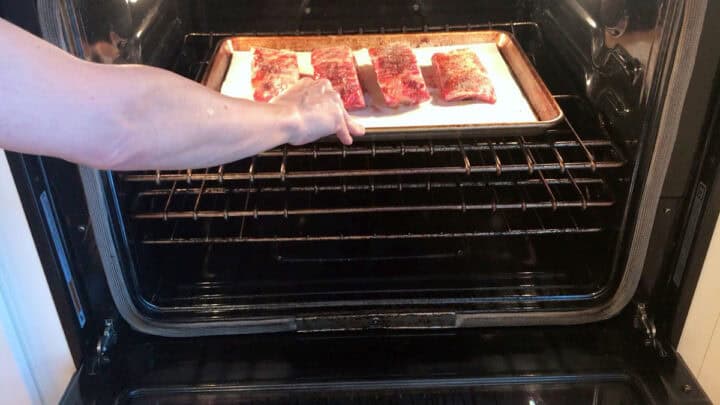
Coat the ribs with olive oil and spices, then bake them for 1 hour at 250°F.

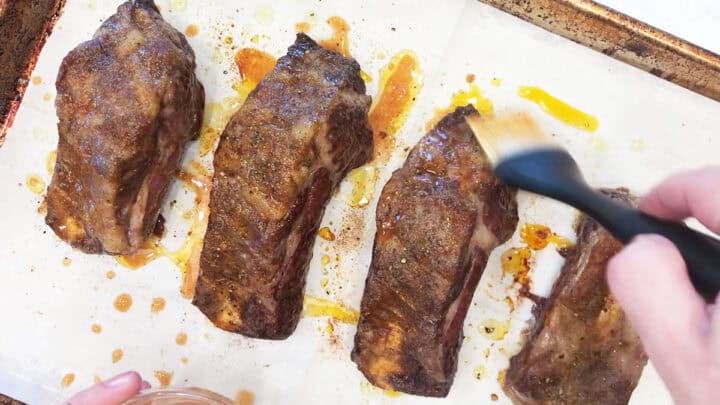
Meanwhile, mix the apple cider vinegar and hot pepper sauce, then divide the mixture among three small bowls. After the first hour, baste the ribs with a third of the vinegar-hot sauce marinade.

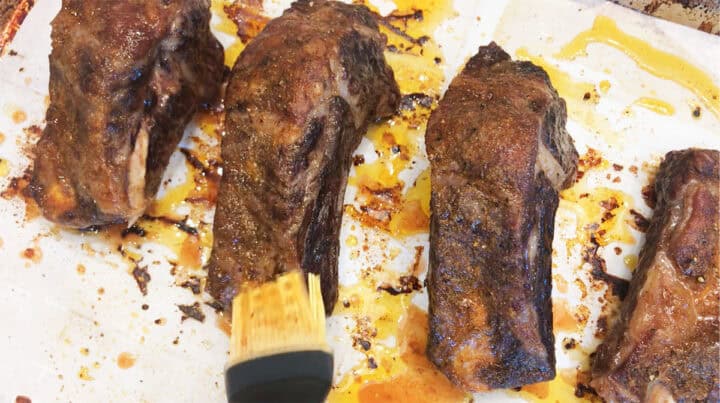
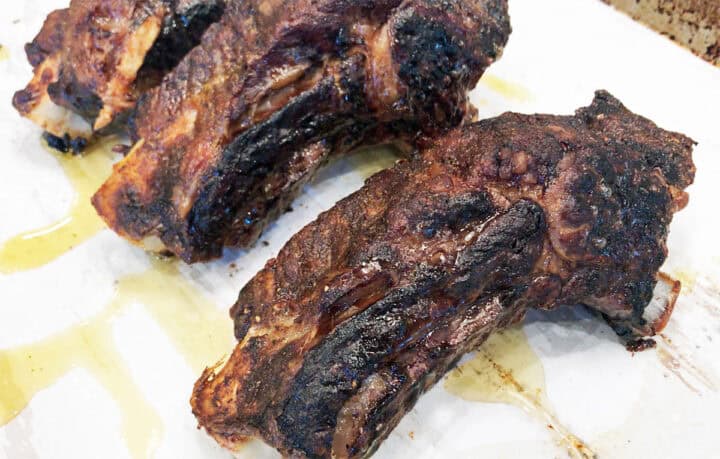
Continue baking the ribs for three more hours, basting them with the marinade. After four hours, the ribs are fully cooked and tender. But I like to reduce the oven temperature to 200°F and keep them in the oven for one more hour for extra-tender meat with a wonderfully caramelized exterior.
I thought I was a baby back rib guy, but after trying this, I don't know anymore. This was excellent. Now I can see why it gets 5 stars. I didn't have smoked paprika or smoked salt, just used regular, but now I have it on my list to get it. Thank you so much.
Dale
Read more comments
Recipe Tips
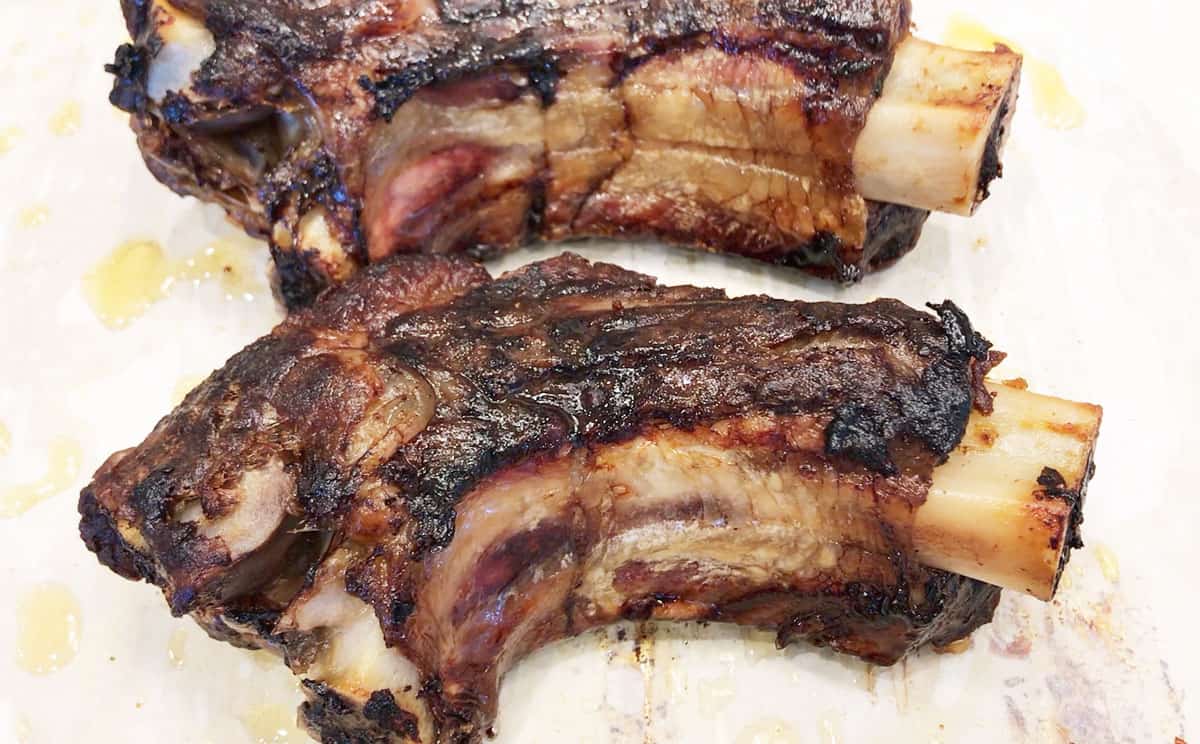
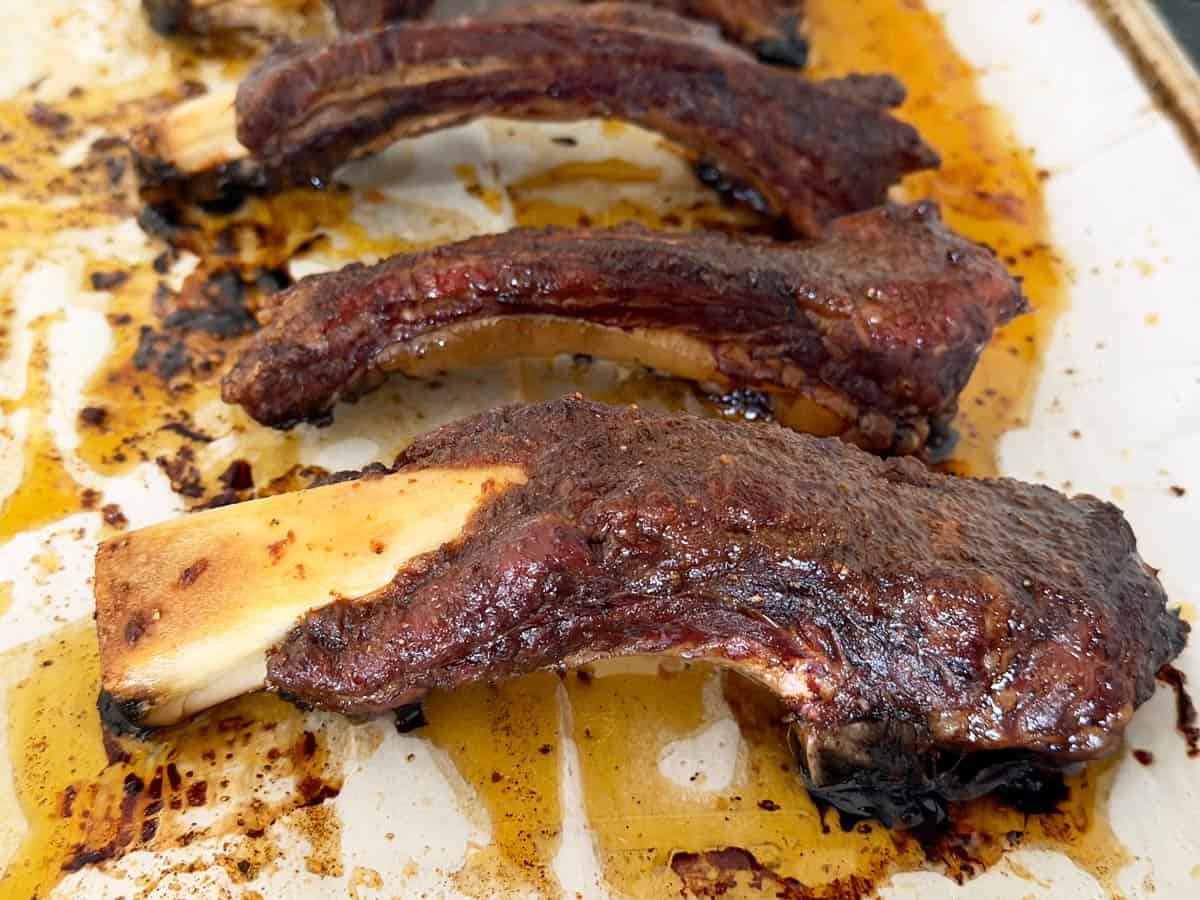
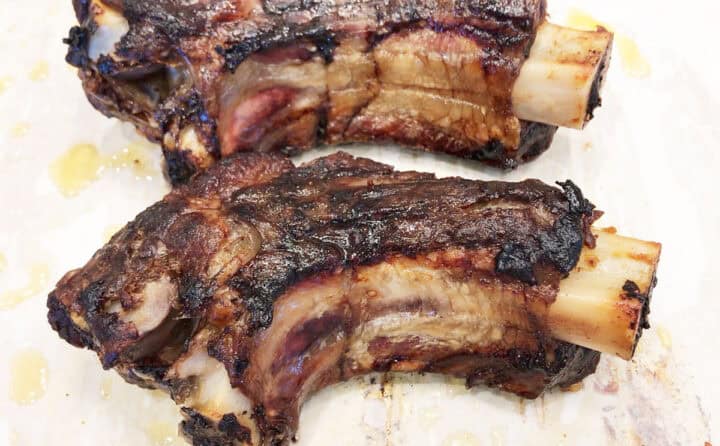
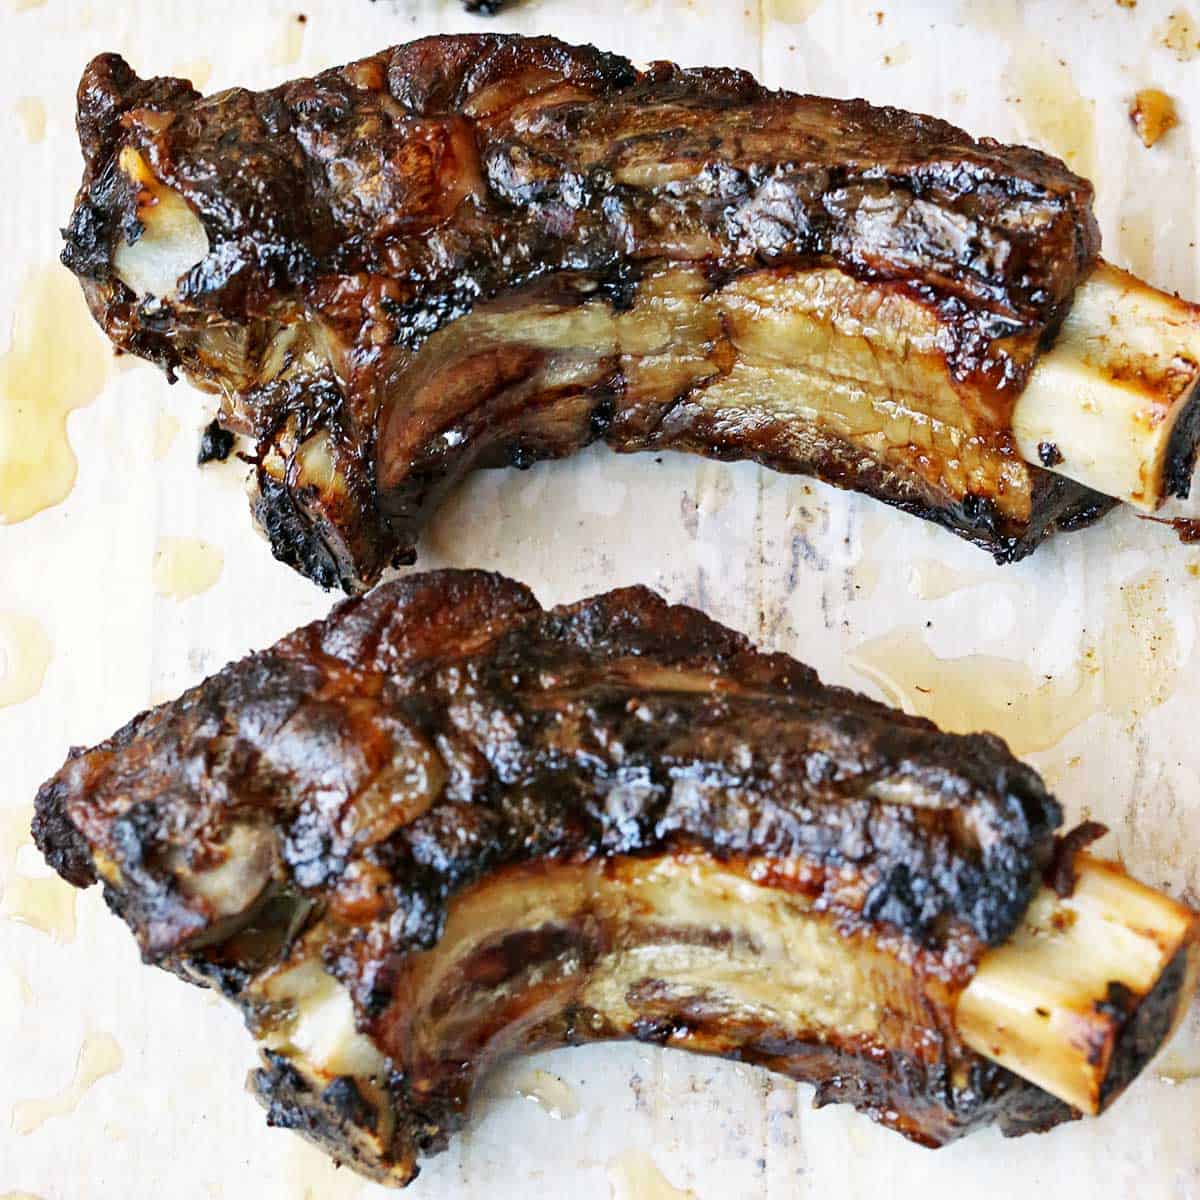
- Most of the muscle meat sitting on top of these ribs was taken off by the butcher to make ribeye roasts or ribeye steaks. That's why they don't have much meat on top, as shown in the image below.
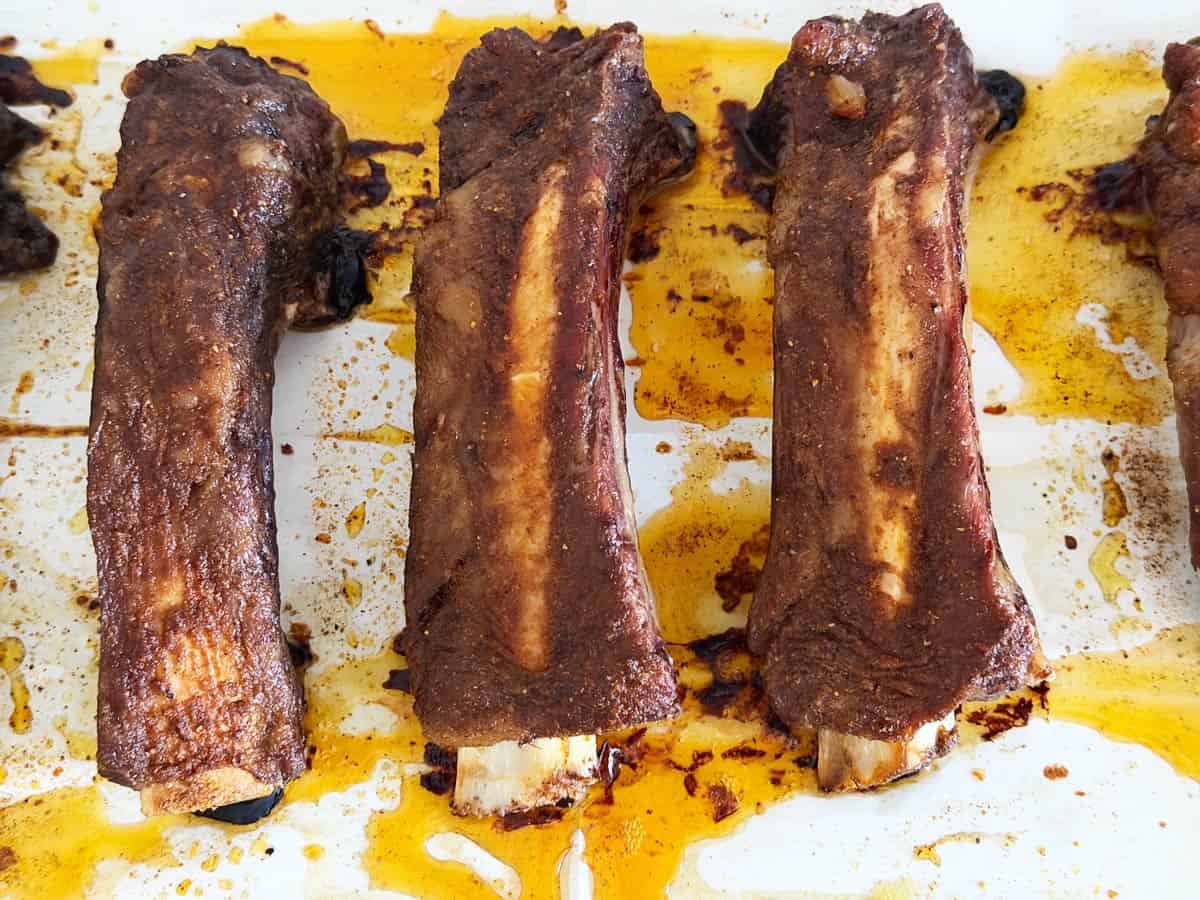
Most of what you eat is between the bones and along the sides, as the photo below demonstrates. But don't let that deter you! There are big chunks of delicious, fatty meat between the bones.
- Because most of the meat is between the bones and along the sides, and because there's a lot of connective tissue, these ribs need gentle heat over a long time to break down and become tender. So, just like other tough meats, such as brisket or spare ribs, this recipe takes time and patience. However, even though it takes a few hours, it's an easy, hands-off recipe, perfect for when you're home anyway and can baste the ribs occasionally.
Recipe FAQs
If you wish, remove the thin membrane from the bone side of the ribs. Use a blunt knife, sliding it gently between the membrane and the bones. Work the knife around to loosen the membrane, then use a paper towel to grab it and pull it away from the bones.
I don't bother doing this since the membrane softens during cooking, and I don't find it bothersome when eating the ribs.
I don't recommend using distilled white vinegar. It's too acidic.
If the slab of ribs you purchase comes already separated into individual ribs, they will cook more quickly, so you can bake them for a total of just four hours instead of five, skipping the last hour at 200°F.
You can keep the leftovers in an airtight container (like the one shown in the photo below) in the fridge for 3-4 days. Reheat them in the microwave, covered, at 50% power. You can also freeze the completely cooled leftovers in freezer bags for up to three months. Thaw them overnight in the fridge before reheating.
Like many slow-cooked meats, the leftovers are delicious - almost as good as the freshly prepared ribs.
Serving Suggestions
I like to serve these rich, meaty ribs with vegetables or salads to balance out their richness. So I often serve them with one of the following sides:
- Cauliflower mac and cheese
- Broccoli and cheese
- Sauteed mushrooms
- Sauteed sugar snap peas
- Spicy green beans
- Cauliflower potato salad
- Homemade coleslaw
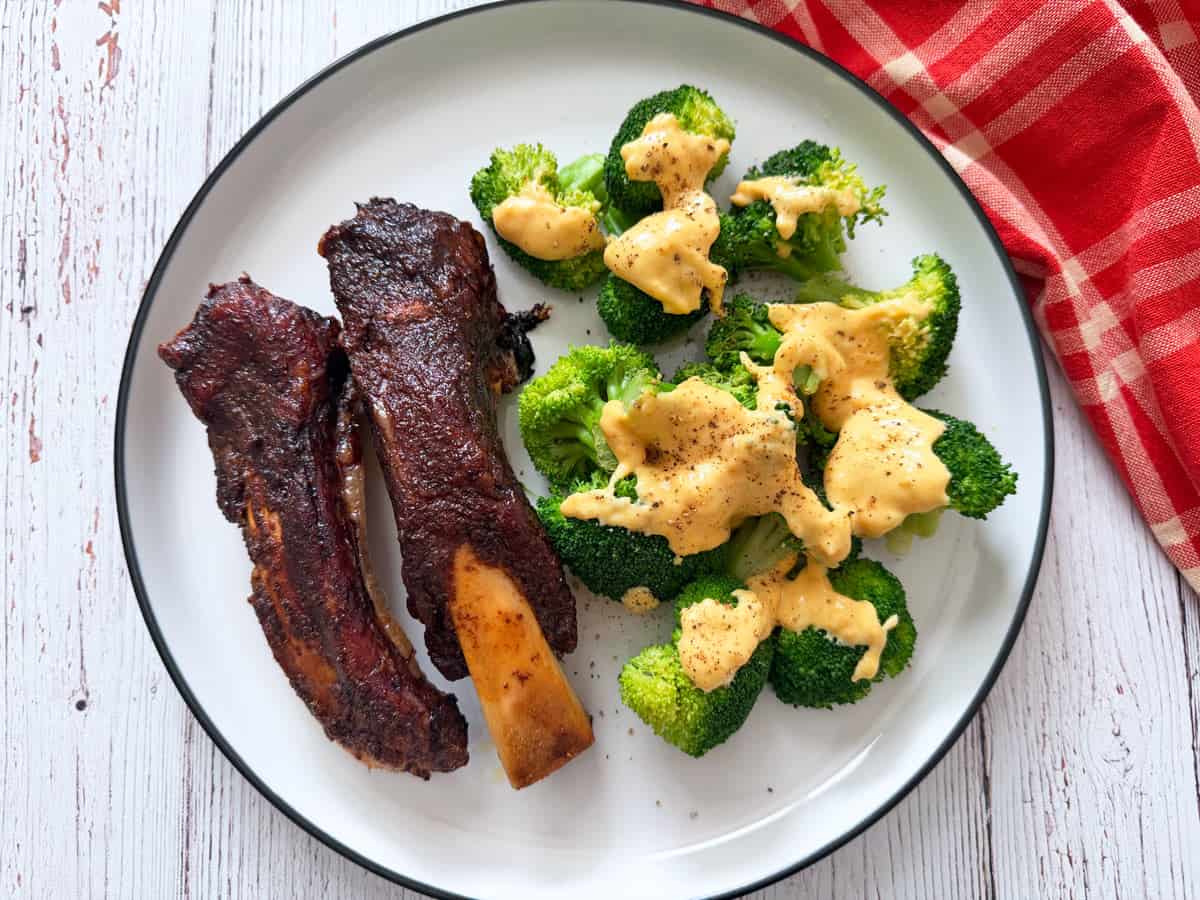
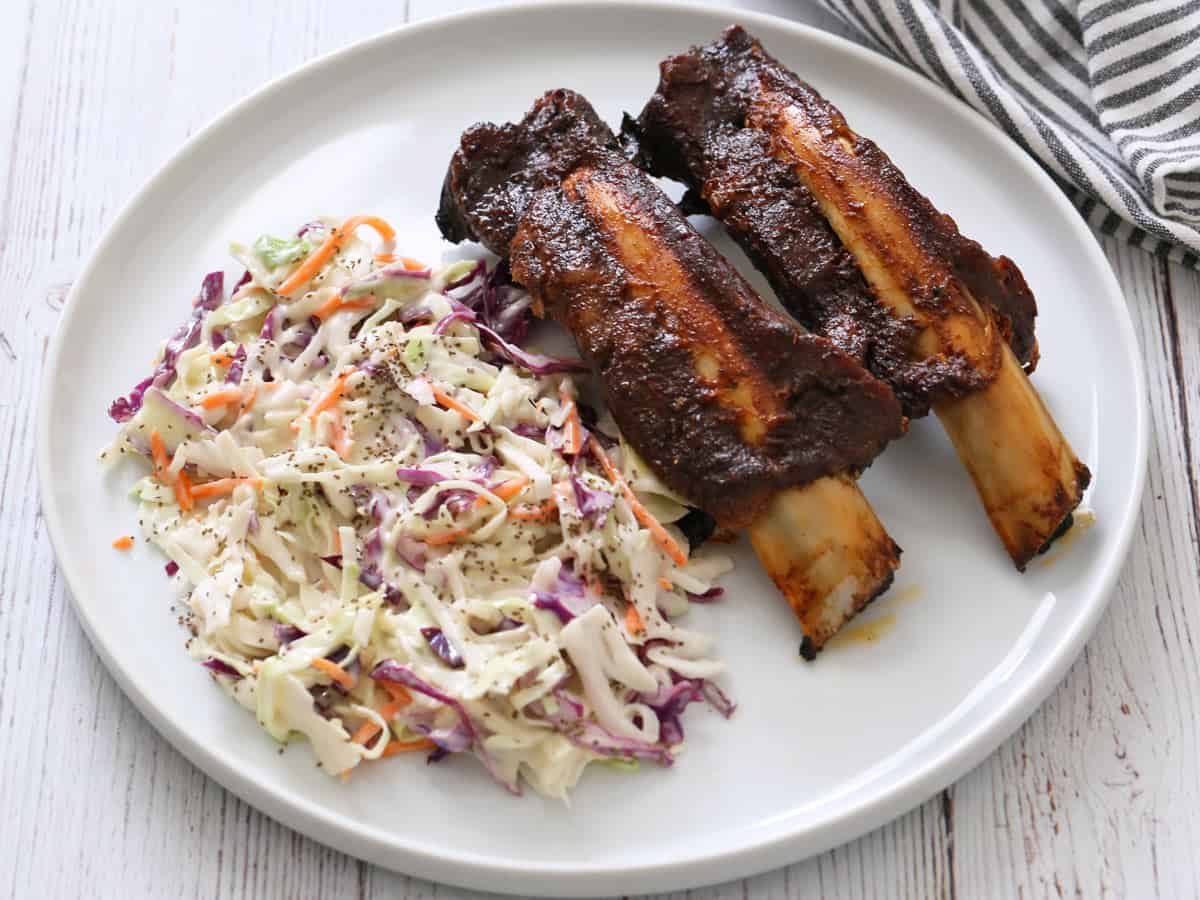
The two photos below show two recent meals. In the first one, I served the ribs with broccoli and cheese sauce. In the second, I served them with homemade coleslaw.
Recipe Card

Oven-Baked Beef Back Ribs
Video
Ingredients
- ½ cup apple cider vinegar
- 2 tablespoons hot pepper sauce - Such as Frank's RedHot
- 2 racks beef back ribs - 2 pounds each; see notes below
- Olive oil spray
- 2 teaspoons smoked salt
- ½ teaspoon black pepper
- 2 teaspoons smoked paprika
- 1 teaspoon onion powder
- 1 teaspoon garlic powder
Instructions
- Preheat the oven to 250°F. Line a rimmed baking sheet with parchment or foil (for easy cleanup).

- In a small jar or bowl, whisk together the apple cider vinegar and hot sauce. Divide it evenly among three small bowls and set aside.½ cup apple cider vinegar, 2 tablespoons hot pepper sauce
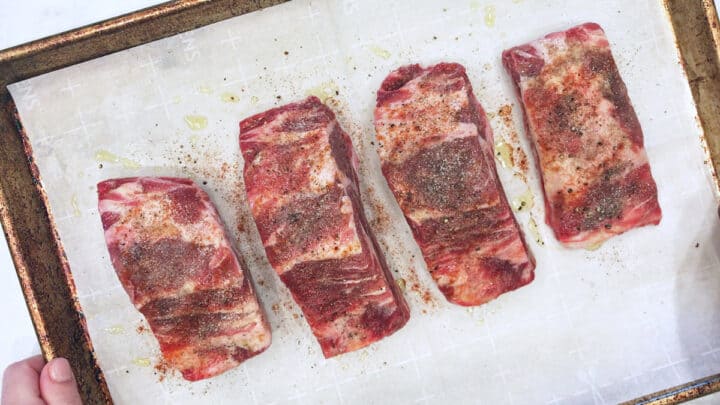
- Place the ribs on the prepared baking sheet, bone side down (use two baking sheets if they don't fit in one). Spray the tops of the ribs with olive oil and sprinkle them with smoked salt, black pepper, smoked paprika, onion powder, and garlic powder.2 racks beef back ribs, Olive oil spray, 2 teaspoons smoked salt, ½ teaspoon black pepper, 2 teaspoons smoked paprika, 1 teaspoon onion powder, 1 teaspoon garlic powder

- Bake the ribs, uncovered, for 1 hour.
- Baste the tops of the ribs with a third of the vinegar-hot sauce marinade.
- Return the ribs to the oven and bake them for three more hours, uncovered, basting the top with a third of the marinade every hour. You can also baste them with some of the pan juices (in addition to the marinade). Rinse the basting brush after each basting with hot, soapy water, then dry it.

- After 4 hours of baking, the ribs should be nicely browned and very tender. At this point, you can serve them. But to make them even better, reduce the oven temperature to 200°F and keep them in the oven for one more hour. This will result in extra tender ribs with a crispy, caramelized exterior.

- Remove the ribs from the oven, cut them into six portions, and serve.


Notes
- Seasonings, especially salt, are guidelines. Adjust to taste.
- One rack of these ribs typically contains about 7 bones. If you buy them already separated and packaged, you might find that your package contains 4 or 5 ribs, so please adjust the seasonings and marinade accordingly.
- If the slab of ribs you purchase is separated into individual ribs, they will cook more quickly, so you can bake them for a total of just four hours instead of five, skipping the last hour at 200°F.
- This is an oven-baked recipe. The flavor and texture will be different from ribs that were cooked in a smoker. This method is designed for home cooks who want tender, delicious ribs without any special equipment.
- If you wish, remove the thin membrane from the bone side of the ribs. Use a blunt knife, sliding it gently between the membrane and the bones. Work the knife around to loosen the membrane, then use a paper towel to grab it and pull it away from the bones. I don't bother doing this since the membrane softens during cooking, and I don't find it bothersome when eating the ribs.
- You can keep the leftovers in an airtight container in the fridge for 3-4 days. Reheat them in the microwave, covered, at 50% power. You can also freeze the completely cooled leftovers in freezer bags for up to three months. Thaw them overnight in the fridge. Like many slow-cooked meats, the leftovers are delicious - almost as good as the freshly prepared dish.
Nutrition per Serving
Save this Recipe!
We will also add you to our weekly newsletter. Unsubscribe anytime. See healthyrecipesblogs.com/privacy/ to learn how we use your email.
Disclaimers
Most recipes are low-carb and gluten-free, but some are not. Recommended products are not guaranteed to be gluten-free. Nutrition info is approximate - please verify it. The carb count excludes non-nutritive sweeteners. Please read these Terms of Use before using any of my recipes.


Julia Greer says
I'm wanting to cook beef back ribs in a covered Dutch oven -- is there any reason not to do that? Should I make any adjustments in temp or cook time? Thanks; can't wait to try this!
Vered DeLeeuw says
Hi Julia,
Thank you for your question! A covered Dutch oven creates a very different cooking environment from this recipe. This method is designed for uncovered, low oven roasting, and I haven't tested it as a Dutch oven.
Because cooking covered turns it into more of a braising method, I would recommend looking for a recipe that was specifically developed and tested for a Dutch oven. That way, you'll have temperature, timing, and liquid amounts that are tailored to that technique and you'll get the best possible results.
Bill says
I usually grill them, but with the weather today, we used your recipe. Wow. Incredible. So much flavor and so easy! Next time I'm doubling the recipe. We have no leftovers!
Vered DeLeeuw says
I'm so glad to hear, Bill! Thank you very much for taking the time to leave a review. Much appreciated.
Maryan says
Hi ! My ribs turned out tough and dry. Are you sure that I'm not supposed to cover them? Create a pouch that cooks with steam?
Vered DeLeeuw says
Hi Maryan,
I'm sorry they didn’t turn out well for you. I've made this recipe many times, and they consistently come out tender.
The ribs are intentionally cooked uncovered at a low temperature so the fat can render and the connective tissue can break down slowly. Covering the ribs with foil traps moisture and heat, which can help if the ribs are older or leaner than average or if your oven runs hot. I prefer cooking them uncovered because this results in more concentrated beef flavor, better fat rendering, and a superior texture. That said, you're absolutely welcome to use the foil method next time if that works better for you.
If you still have the ribs, you can try to rehydrate and soften them. Wrap them tightly in a double layer of heavy-duty foil, adding 1/4 cup of beef broth before sealing. Place them on a rimmed baking sheet and cook them in a 300°F oven for 1-2 hours. The steam and steady heat should break down the collagen into gelatin. After the steaming process, the exterior may be soggy. To fix this, unwrap the ribs, apply a fresh layer of marinade, and place them in a 250°F oven for 30 minutes.
I appreciate you taking the time to share your experience.
Vivian says
Consistently perfect!
Vered DeLeeuw says
I'm so glad to hear, Vivian! Thank you so much for taking the time to leave a review.
Dave says
Tried these for New year's eve as we love beefy dishes on that day. Followed the recipe as written (except did not have smoked salt...will be getting some). Really enjoyed it and was surprised how tender and tasty they were. We usually either smoke outside or do the foil wrap thing in the oven. Love the ease and taste of these. Thanks for the simple but great recipe!
Vered DeLeeuw says
You're very welcome, Dave! I just made some too - pure coincidence, but I might just declare it our New year's tradition!
Ann says
Fantastic! Top notch recipe!
Ribs were very juicy and flavorful.
Thank you for sharing it!
Vered DeLeeuw says
You're very welcome, Ann! I'm so glad you enjoyed the ribs. Many thanks for the review.
Irwin says
Love this recipe! I’ve made it several times. I just made a large batch ahead of time for a family gathering. How do you recommend heating the ribs back up? Other than microwave. Thanks!
Vered DeLeeuw says
Hi Irwin,
Glad you like this recipe! You can heat them covered in a 350°F oven until heated to an internal temperature of 165°F.