This keto coconut cake is incredibly moist and coconutty, with just the right amount of shredded coconut in each delicious bite. It's easy to make - simply drop the ingredients into the food processor and quickly mix.
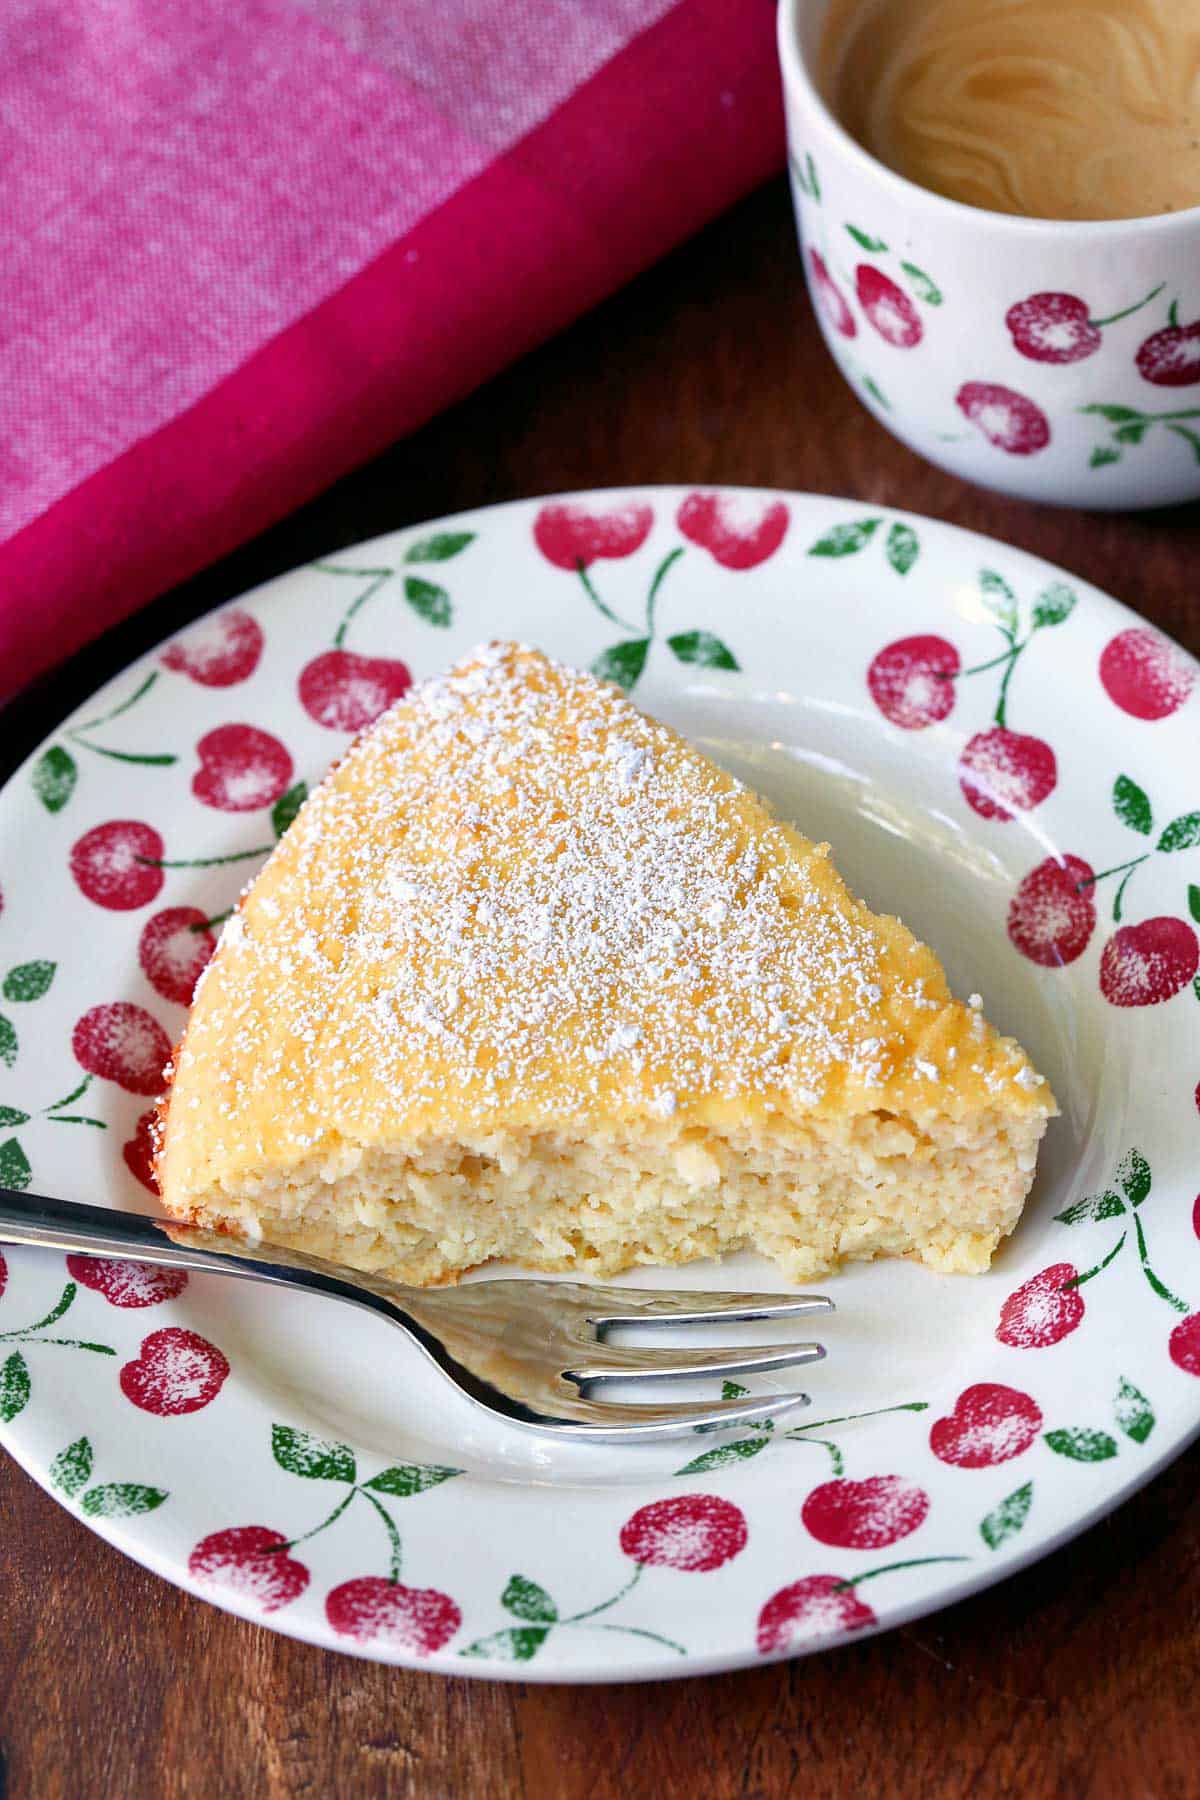
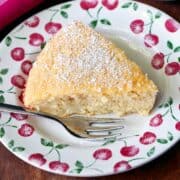
I love coconut and use it in many recipes, including coconut haystacks, coconut clusters, and coconut macaroons. I especially adore this coconut cake. It's moist, fluffy, and coconutty, and it's so easy to make! It's just perfect with a cup of coffee, and I'll go ahead and admit it - I sometimes have it for breakfast, especially on weekends.
Ingredients

See the recipe card for exact measurements. Here are my comments on some of the ingredients.
- Canned coconut milk: Please use full-fat coconut milk.
- Sweetener: I use stevia glycerite. I like the glycerite formulation that nearly eliminates the typical stevia aftertaste.
- Coconut extract: It's important here. It adds great flavor to the cake.
- Unsweetened shredded coconut: Please don't use reduced-fat coconut. It's too dry.
- Optional: After mixing the batter in the food processor, you can add ¼ cup of dark chocolate chips and stir them into the batter by hand.
Instructions
The detailed instructions and step-by-step photos are included in the recipe card. Here's a quick overview.
Simply place all the ingredients (except for the butter) in your food processor's bowl and process them until combined.

Transfer the thick batter to a buttered 9-inch glass or ceramic pie plate. Use a rubber spatula to smooth the top out.

Bake the cake until it's wonderfully fragrant and a toothpick inserted in the center comes out clean, about 30 minutes in a 325°F oven. Cool the cake for 15 minutes, then slice it into eight slices and serve.

Tips for Keeping the Cake Moist
- Unsweetened shredded coconut is drier than sweetened, but if you have a choice, please pick a brand that looks as moist as possible. And definitely avoid reduced-fat shredded coconut - it's way too dry.
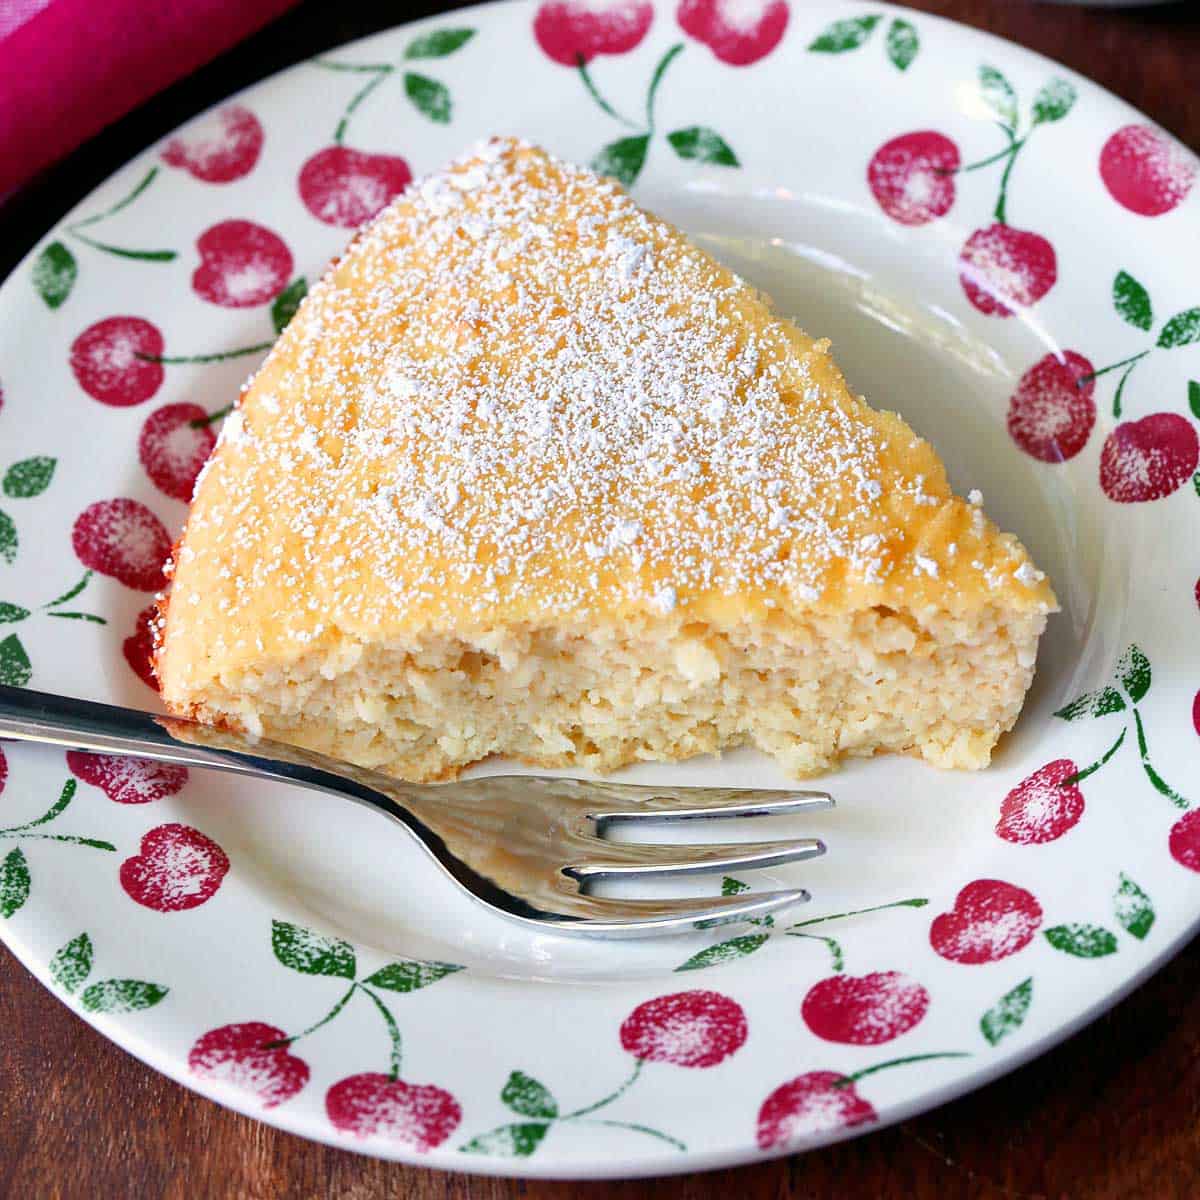
- Since coconut flour is extremely absorbent and can easily dry out baked goods, I highly recommend you measure it by weight and not by volume. Look at the photo below - the cake's crumb is wonderfully moist and tender. You don't want to mess it up by adding too much coconut flour.

Recipe FAQs
Unfortunately, you can't. Coconut flour behaves differently from any other flour. It requires more eggs and liquid. This recipe was written specifically for coconut flour, so it won't work with any other flour.
It's true that I don't frost this cake. I think it's unnecessary, as it's so very good just as it is. Plus, adding frosting would force me to reclassify it from "breakfast" to "dessert." 😀
Of course, you could add frosting if you wish. Simply mix together 8 ounces of softened cream cheese, 2 tablespoons of powdered sweetener (or the stevia equivalent), and 1 teaspoon of coconut extract. You can mix it by hand with a hand whisk, but be thorough and whisk until very fluffy.
Yes, you can. Its texture will be a bit coarser, but it should still be very good.
Yes. You can use any granulated sweetener to equal ½ cup of sugar (¾ cup if you like very sweet baked goods). You can simply add the sweetener to the food processor with the remaining ingredients. If the batter seems too thick (though it should be quite thick), add a tablespoon of water.
Once completely cool, you can keep the leftover slices in an airtight container in the fridge for up to 5 days. I briefly warm them in the microwave before enjoying, 5-10 seconds per slice. You can also freeze individual slices in freezer bags for up to three months.
Recipe Card
Keto Coconut Cake
Video
Ingredients
- 1 tablespoon unsalted butter - soft, for the pan
- 4 large eggs
- 1 cup canned coconut milk - unsweetened, full fat; mix well before using
- 1 ½ teaspoon stevia glycerite - equals ½ cup of sugar
- 1 teaspoon pure coconut extract
- 2 ounces unsweetened shredded coconut - not reduced-fat; 1 cup, packed; please measure by weight
- 2 ounces coconut flour - ½ cup; please measure by weight
- 2 teaspoons baking powder - fresh; gluten-free if needed
Instructions
- Preheat the oven to 325°F. Grease a 9-inch glass or ceramic pie plate with butter.1 tablespoon unsalted butter

- Add the eggs, coconut milk, stevia, coconut extract, shredded coconut, coconut flour, and baking powder to your food processor bowl. Process until smooth, for 30-60 seconds.4 large eggs, 1 cup canned coconut milk, 1 ½ teaspoon stevia glycerite, 1 teaspoon pure coconut extract, 2 ounces unsweetened shredded coconut, 2 ounces coconut flour, 2 teaspoons baking powder

- Pour the batter into the prepared pie plate. Use a rubber spatula to smooth the top out.
- Bake the cake until it smells amazing (it will smell like toasted coconut), and a toothpick inserted in its center comes out clean, about 30 minutes.

- Cool the cake in the pan on a cooling rack for 15 minutes, then slice it into eight slices and serve.


Notes
- Since coconut flour is extremely absorbent and can easily dry out baked goods, I highly recommend that you measure it by weight and not by volume.
- The same is true for the coconut. Shredded coconut brands greatly differ in their fluffiness and nutritional info, so it's best to go by weight, not volume.
- Please don't use reduced-fat shredded coconut. It's too dry.
- You can dust the cake with a powdered sweetener if you wish.
- The amount of stevia I use equals ½ cup of sugar, so you can use any granulated sweetener to equal ½ cup of sugar (¾ cup if you like your baked goods very sweet). If the batter seems too thick (though it should be quite thick), add 1-2 tablespoons of water.
- Sweetness is a personal preference. Use this recipe as a guide and adjust to taste.
- Once completely cool, you can keep the leftover slices in an airtight container in the fridge for up to 5 days. I briefly warm them up in the microwave before enjoying, 5-10 seconds per slice. You can also freeze individual slices in freezer bags.
Nutrition per Serving
Save this Recipe!
We will also add you to our weekly newsletter. Unsubscribe anytime. See healthyrecipesblogs.com/privacy/ to learn how we use your email.
Disclaimers
Most recipes are low-carb and gluten-free, but some are not. Recommended products are not guaranteed to be gluten-free. Nutrition info is approximate - please verify it. The carb count excludes non-nutritive sweeteners. Please read these Terms of Use before using any of my recipes.

Norma says
Super easy and truly amazing! Doubled the recipe. Cake disappeared same day!
Vered DeLeeuw says
Wow, Norma, that's the best compliment! Thank you so much for the review.
Constance Cox says
I just made the cake this afternoon. It’s amazing !!! So moist. I added 1/4 cup of chopped pecans to the batter.
And dusted with powdered sugar substitute. Awesome !!!
Vered DeLeeuw says
Wonderful, Constance! I'm so glad you enjoyed this cake. Thank you for taking the time to write a review.