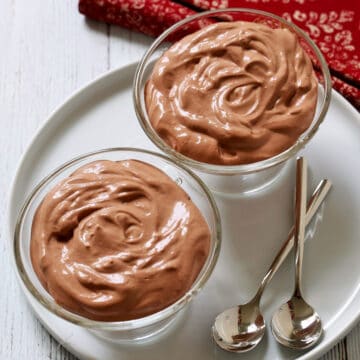
This chocolate custard is dark, rich, and decadent. Its texture is wonderfully smooth and silky, and it's surprisingly easy to make.
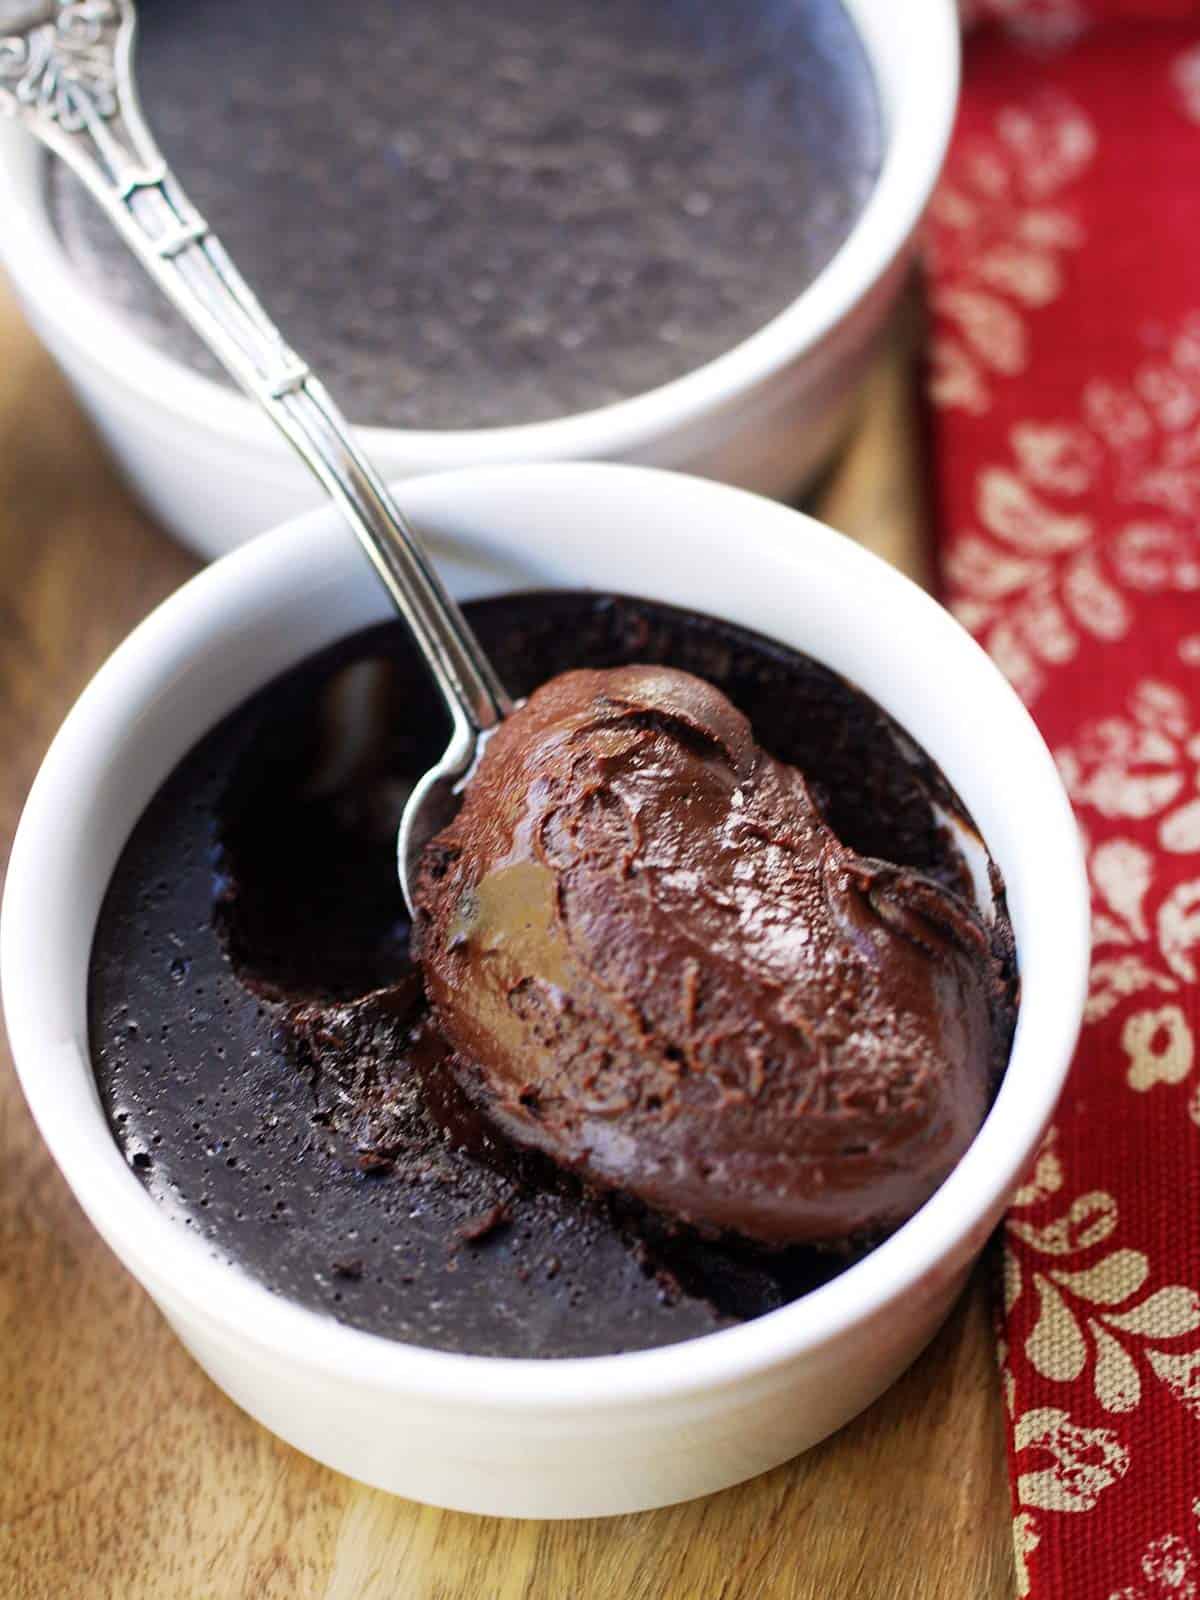
This chocolate custard is grown-up and sophisticated. It's perfect for hosting because it's so impressive - it's definitely a restaurant-level dessert - but I also make it for my family of four because I consider it an easy recipe. You just need a bit of patience while it's in the oven!
Ingredients
See the recipe card for exact measurements. Here are my comments on some of the ingredients.
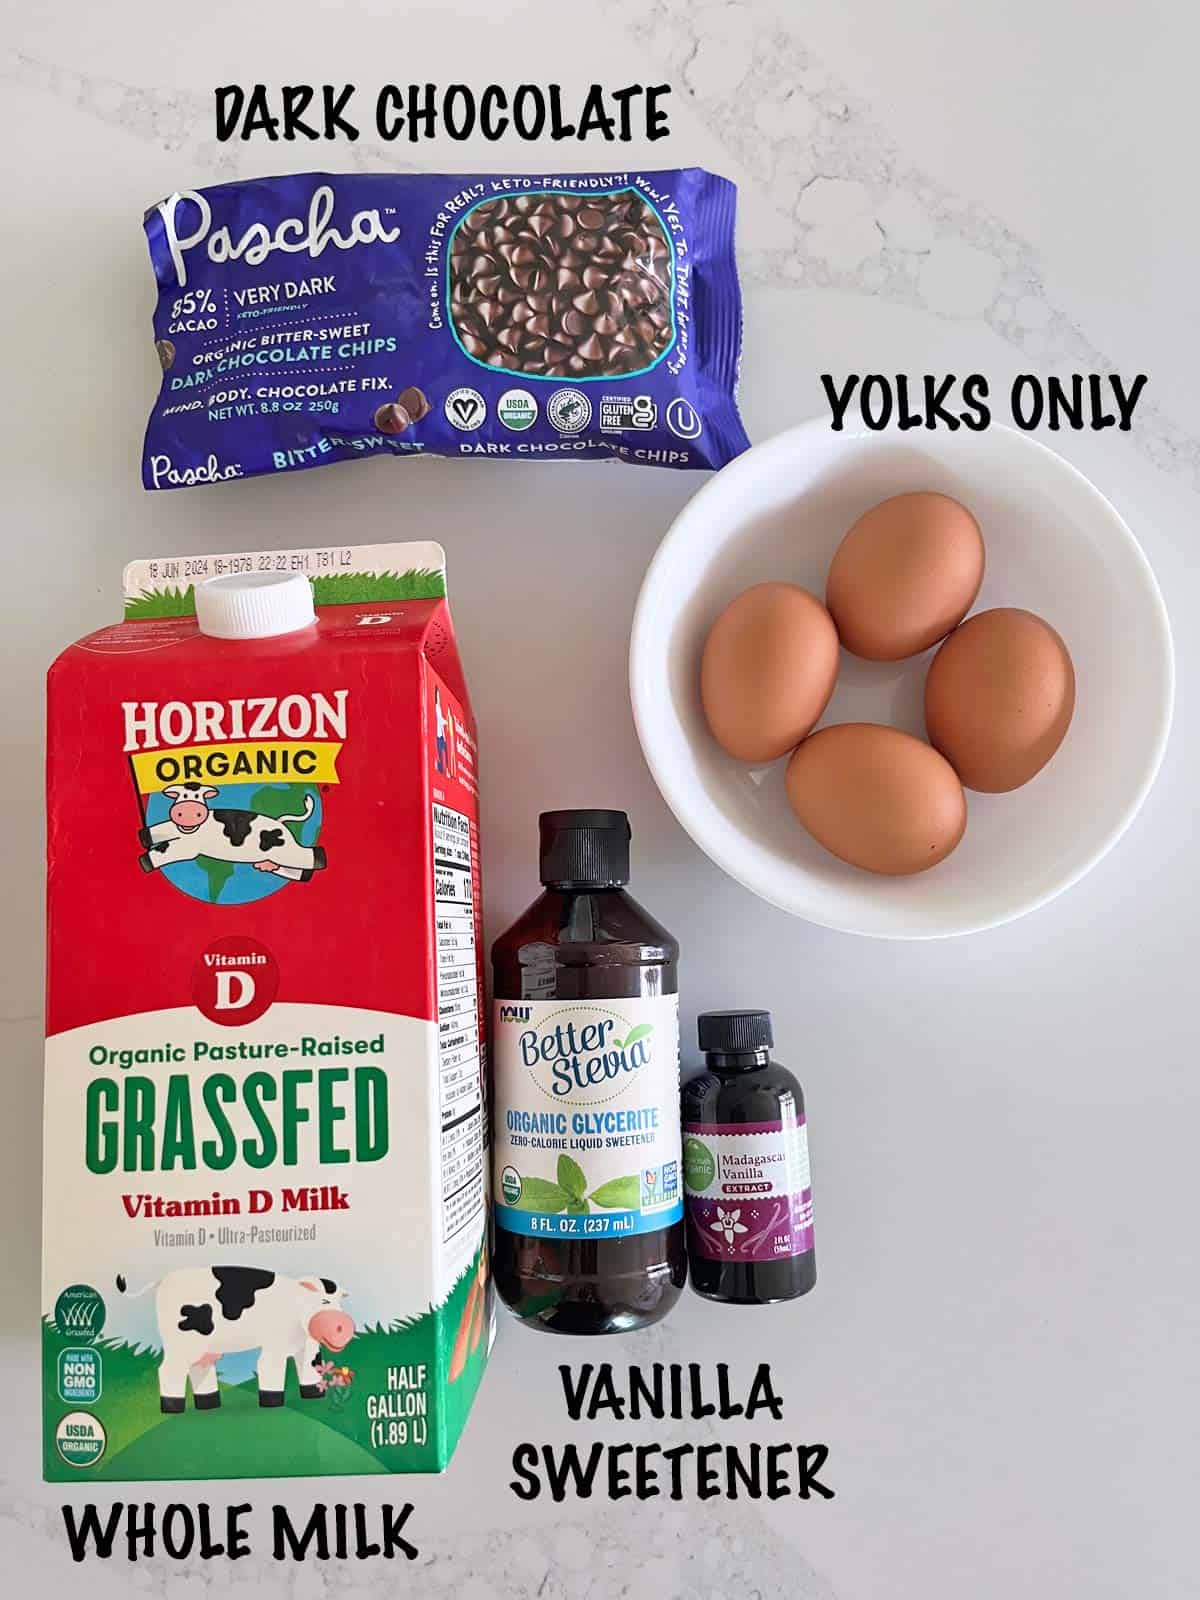
- Milk: Please use whole milk.
- Dark chocolate: The darker you can go and still enjoy it, the better. It's best to use a bar of chocolate and break it into small pieces, but chocolate chips can be used, too.
- Sweetener: I use stevia. You can use a granulated sweetener instead (such as erythritol), and you can also use sugar if you don't mind the carbs. The nutrition info below assumes stevia.
- Vanilla extract: Instead of vanilla extract, you could use almond extract, coconut extract, or orange extract. If you opt for any of these flavors, I recommend using just one teaspoon of them, not a tablespoon.
Instructions
The detailed instructions and step-by-step photos are included in the recipe card. Here's a quick overview.
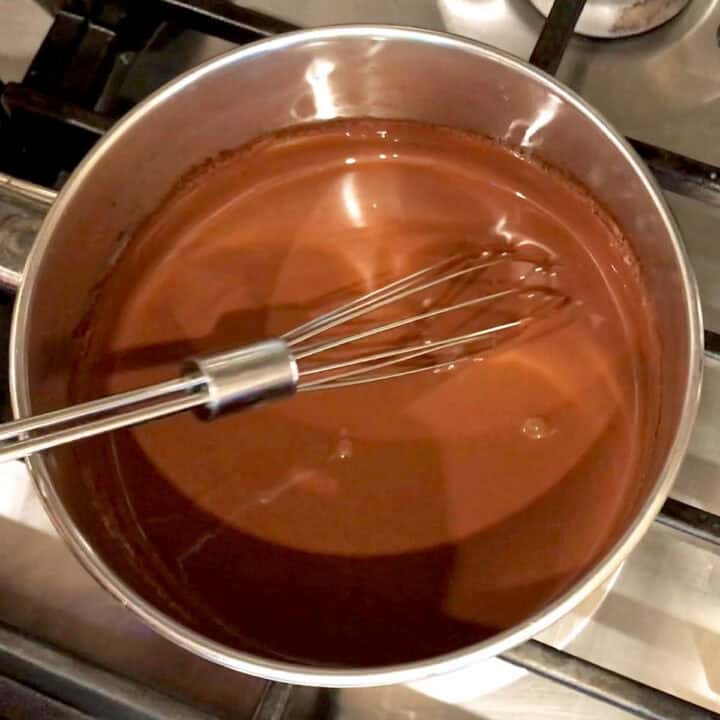
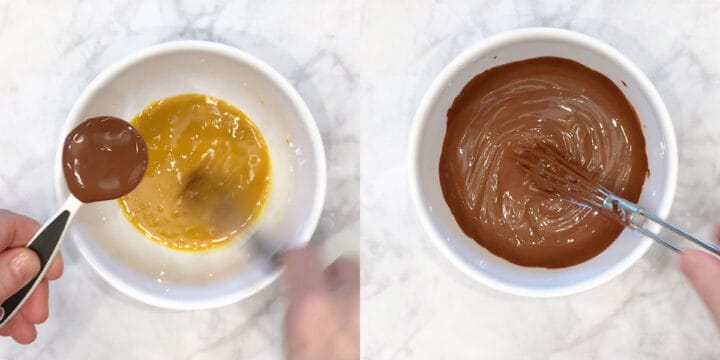
Bring the milk to a simmer, then add the chocolate and sweetener. Whisk the mixture until very smooth. Remove from the heat and allow to slightly cool. In a separate bowl, whisk the egg yolks and vanilla. Very slowly, whisking constantly, add the chocolate mixture to the egg mixture.

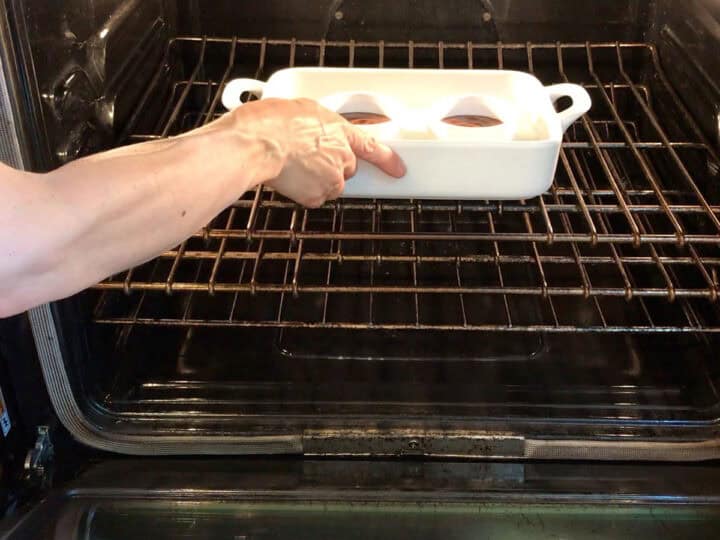
Pour the mixture into a measuring glass, then pour it into four ramekins that you've placed in a baking dish. Pour hot water into the pan to create a water bath for the custard.
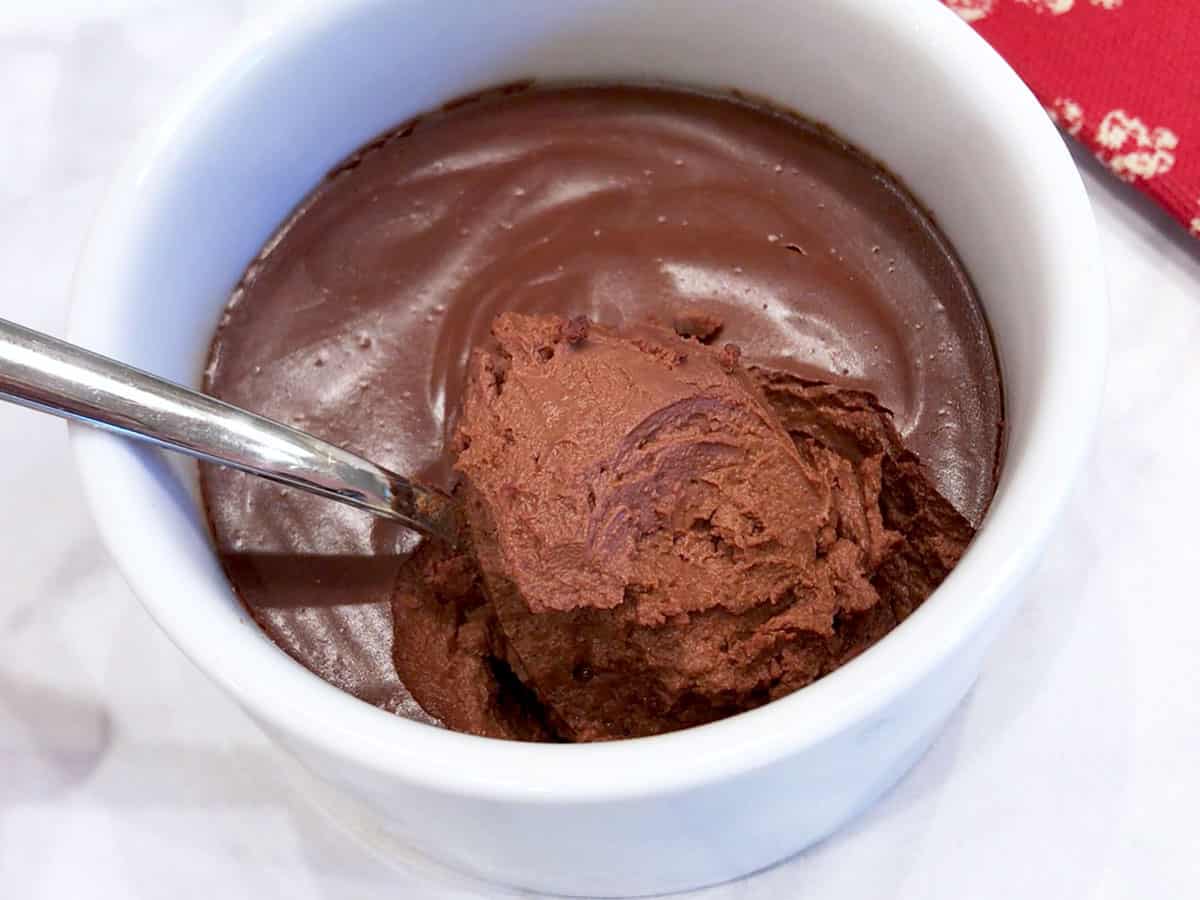
Bake until set, 25-30 minutes at 300°F. Let cool, then cover and refrigerate the custard for at least an hour before serving.
This was insanely good. I was expecting a cakey texture after baking it, but it came out velvety smooth. We used 2 tablespoons of raw sugar, which balanced the bitterness of the 85% cocoa perfectly.
Rochelle
Read more comments
Recipe Tip
The step of slowly whisking the warm chocolate mixture into the eggs is called tempering. The idea is to try to prevent the eggs from cooking in the warm liquid and turning into scrambled eggs.
Technically, you would first whisk some of the chocolate into the eggs and then whisk that mixture back into the chocolate mixture. I do it a little differently, but the idea is the same.
Still, it's not a bad idea to strain the mixture before pouring it into the ramekins, because tiny bits of cooked egg might be in there. If your mixture isn't too thick to strain, I highly recommend you do it.
Recipe FAQs
No. The water bath is important. When you pour hot water halfway up the sides of the ramekins, you create a water bath that insulates the custard from the direct heat of the oven and promotes even cooking, making sure the edges won't overcook before the center is done.
Use them in this delicious and fluffy egg white omelette.
Even though it's baked, this custard should be served chilled. It's perfect on its own, but you can top it with whipped cream or chocolate whipped cream and berries. It's also good with a drizzle of warm peanut butter.
You can keep the leftovers in an airtight container in the fridge for up to 3 days, but this custard is best when served fresh. I don't recommend freezing it.
Recipe Card

Baked Chocolate Custard
Video
Ingredients
- 1 cup whole milk
- 5 ounces dark chocolate - such as Lindt 85%, broken into pieces
- ½ cup granulated sweetener - or the equivalent in stevia
- 4 large egg yolks
- 1 tablespoon pure vanilla extract
Instructions
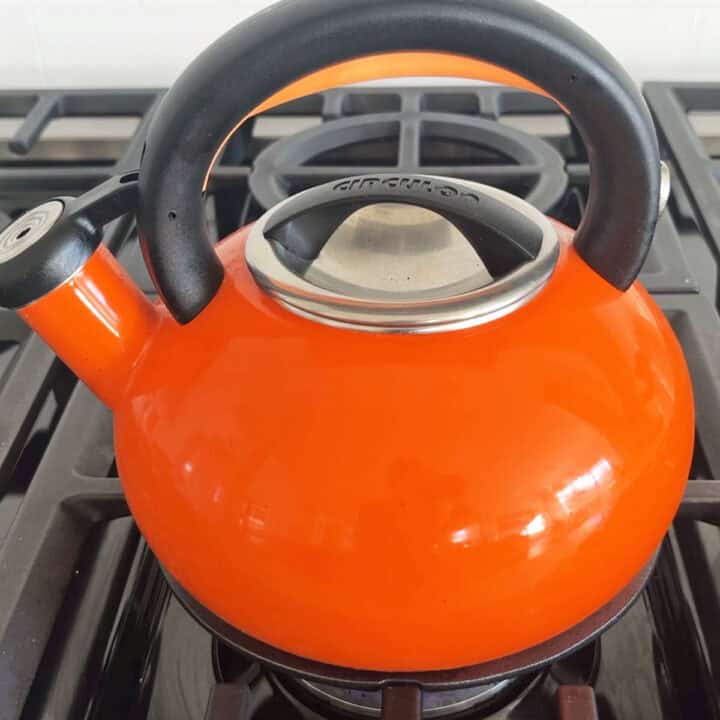
- Preheat the oven to 300°F. Fill a kettle with water and boil the water, turning the heat off when the water has boiled.

- In a small saucepan over medium heat, bring the milk to a simmer. Add the chocolate and sweetener. Reduce the heat to low. Whisk until the chocolate and sweetener melt completely and the mixture is smooth. Remove from the heat and allow to cool for a couple of minutes.1 cup whole milk, 5 ounces dark chocolate, ½ cup granulated sweetener
- In a medium bowl, whisk together the egg yolks and vanilla. Pour a tablespoon of the chocolate mixture into the egg mixture, whisking vigorously. Keep pouring the chocolate mixture into the egg mixture very slowly, constantly whisking.4 large egg yolks, 1 tablespoon pure vanilla extract

- Place four (4-ounce) ovenproof ramekins in a rimmed baking dish. Pour the custard mixture (ideally through a strainer) into a measuring glass (just in case you have a few bits of cooked eggs in there). Pour the mixture into the ramekins. Pour the still-hot water that you had previously boiled into the pan, so it comes halfway up the sides of the ramekins.

- Bake the custard, uncovered, until set, for 25-30 minutes.
- Carefully remove the ramekins from the pan (they'll be very hot), place them on a cooling rack, and allow them to cool to room temperature for about 30 minutes. Cover and refrigerate the custard for at least an hour before serving.


Notes
- The video above shows me making half the recipe.
- I use 1.5 teaspoons of stevia glycerite. You can use a granulated sweetener instead (such as erythritol) or sugar if you don't mind the carbs. The nutrition info assumes stevia was used.
- Sweetness is a personal preference. Use this recipe as a guide and adjust to taste.
- The hot water bath insulates the custard from the direct heat of the oven and promotes even cooking, ensuring the edges won't overcook before the center is done.
- The technique we use for combining the chocolate and egg mixtures is called tempering. It ensures the eggs won't turn into scrambled eggs!
- You can keep the leftovers in an airtight container in the fridge for up to three days. However, this custard is best when served fresh. I don't recommend freezing it.
Nutrition per Serving
Save this Recipe!
We will also add you to our weekly newsletter. Unsubscribe anytime. See healthyrecipesblogs.com/privacy/ to learn how we use your email.
Disclaimers
Most recipes are low-carb and gluten-free, but some are not. Recommended products are not guaranteed to be gluten-free. Nutrition info is approximate - please verify it. The carb count excludes non-nutritive sweeteners. Please read these Terms of Use before using any of my recipes.

Marje says
Best chocolate custard I've ever made OR eaten! Don't sub milk chocolate for the dark chocolate -- extraordinary flavor and texture.
Vered DeLeeuw says
Thank you so much for the review, Marje! I'm glad you enjoyed the custard and 100% agree that dark chocolate works best here.
Amber says
Mine are still liquid after 300°f for 30 min. The only substitute I used was 2% milk because that's all I had. Any idea why? Would the milk have done that?
Vered DeLeeuw says
Hi Amber,
While swapping whole milk for 2% milk reduces the fat content slightly, this substitution alone wouldn't leave your custards completely liquid. The most common issue is a water bath not hot enough. Alternatively, your oven may be running a bit low, your ramekins might be too deep, or your eggs may have been too small to provide enough protein to set the liquid.
If this happen again, you can replace the water in your baking pan with hot water, turn your oven up to 325°F, and put the ramekins back in. Monitor them every 5 to 10 minutes until the edges are set and only the center has a slight jiggle. Chilling them for several hours afterward also helps them firm up more.
Tori says
Easy! And soooo good! And I did take a shortcut. Microwaved the milk. whisked in the chocolate and sugar. Put in fridge for 10 - 15 min. Heat Water in microwave for pan. Put egg yolks and vanilla in a bowl. whisk. Slowly add yolks and vanilla to slightly cooled chocolate. Strain out egg strands (hardly any with this method) - FABULOUS recipe!
Vered DeLeeuw says
Thanks for sharing your method, Tori! Sounds like my recipe was a good starting point. 🙂
Rochelle says
This was insanely good. I was expecting a cakey texture after baking it but it came out velvet smooth. We used 2 tablespoons of raw sugar which balanced the bitterness of the 85% cocoa perfectly.
Vered DeLeeuw says
Yay! I'm so glad you enjoyed this custard, Rochelle! Many thanks for taking the time to write a comment.
Starlene says
Hi, what kind of stevia did you use and how much?
Vered DeLeeuw says
I use 1.5 teaspoons of stevia glycerite. Thank you for the question - I added the info to the recipe card.