This cake is amazing. It's ready in five minutes and makes the perfect breakfast or snack. Add chocolate chips or whipped cream, and it becomes an indulgent dessert!
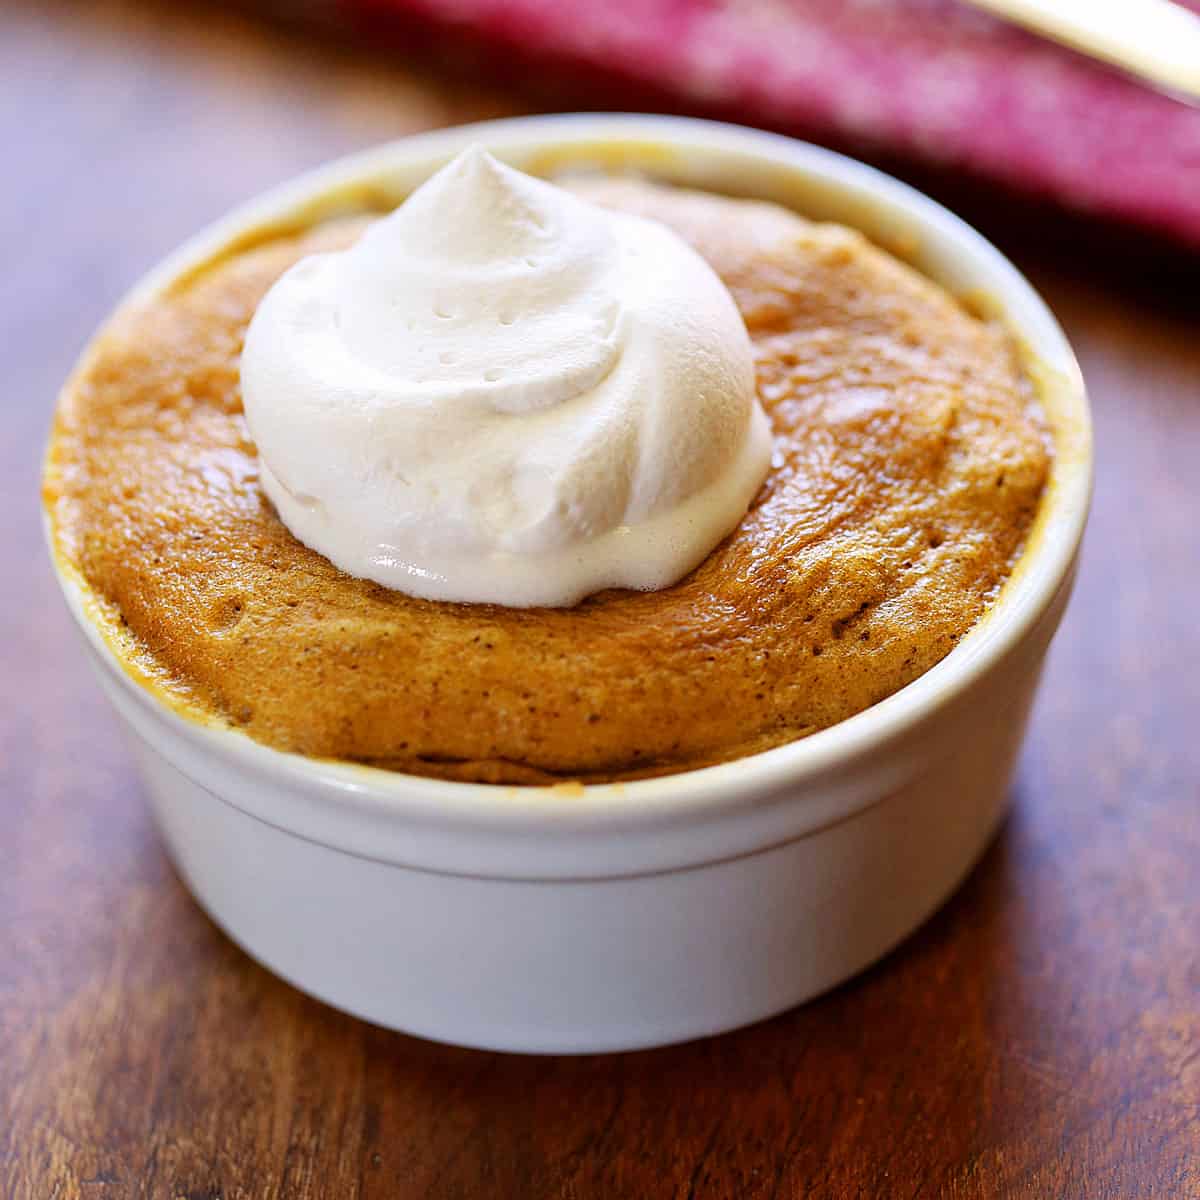
I've been working on this mug cake for a while now. It's a simple cake with four ingredients, but since nut butters vary in texture, it wasn't that easy to get the ratios right. It took several tries, but I eventually reached perfection - a delicious, gooey, and moist cake with just the right level of sweetness.
Ingredients
See the recipe card for exact measurements. Here are my comments on the ingredients.
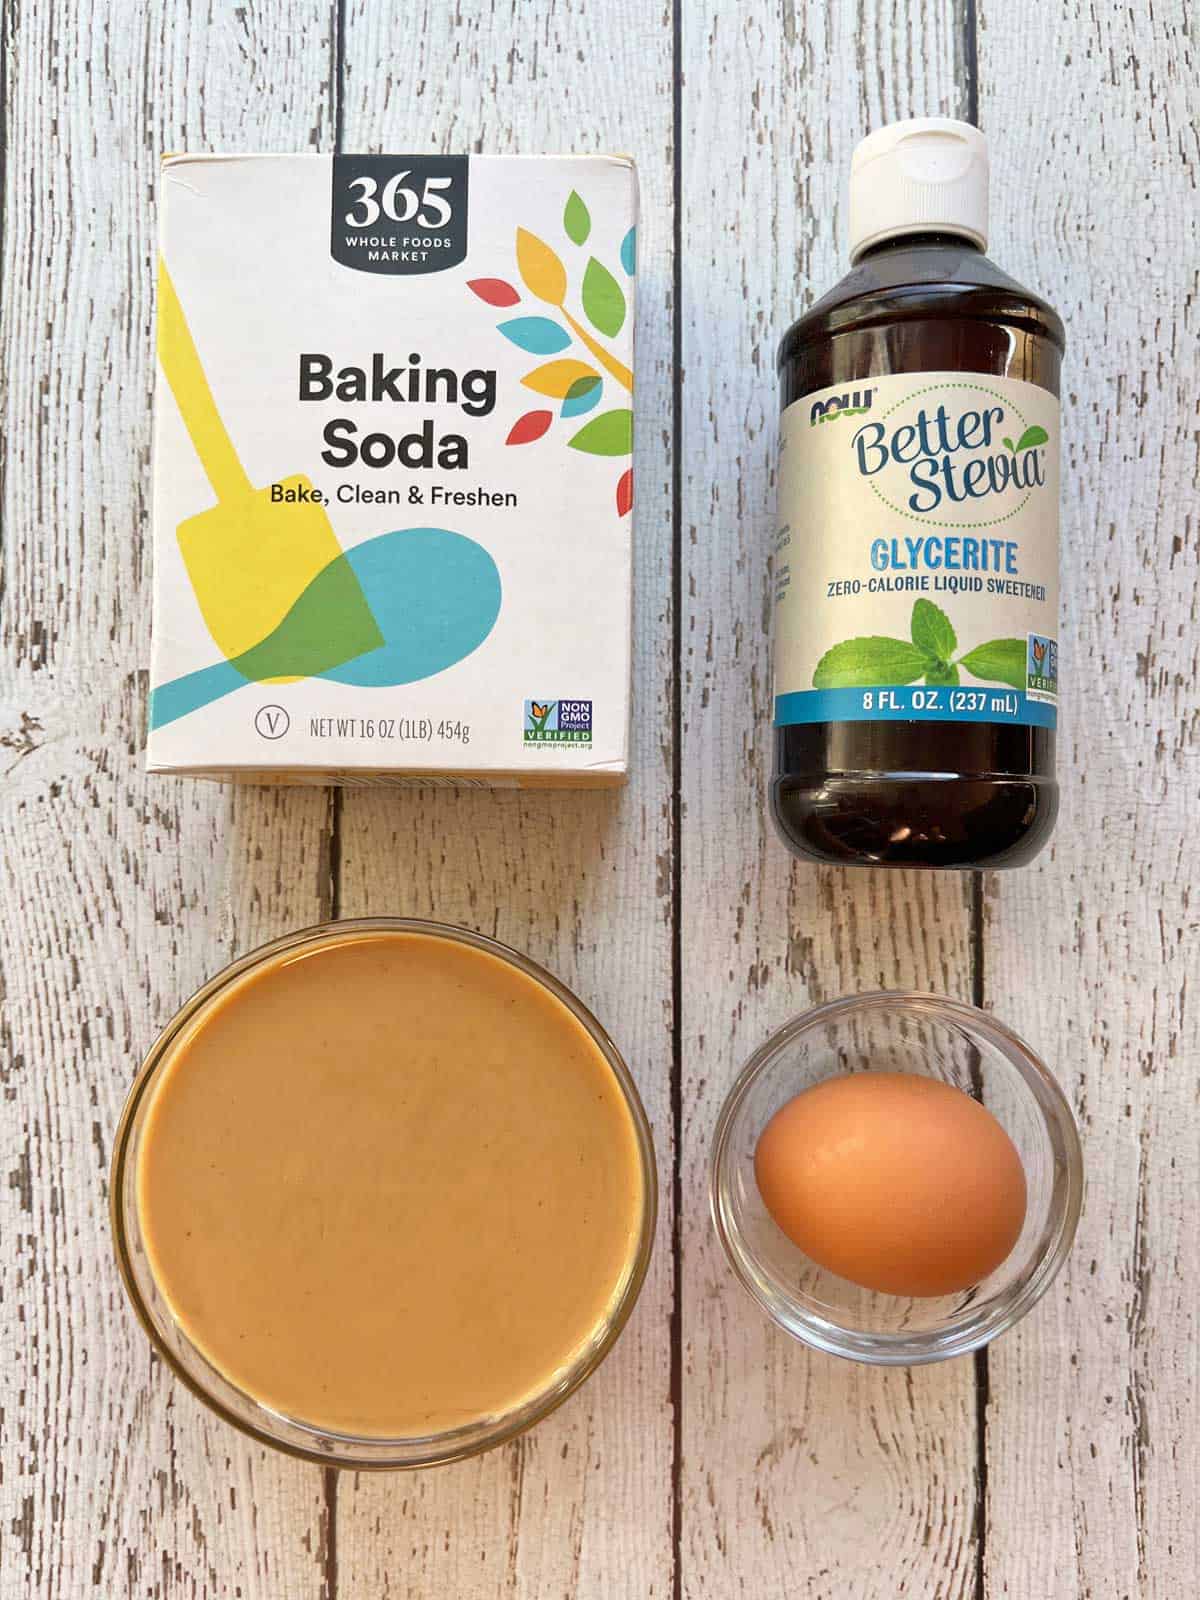
- Peanut butter: I use natural creamy peanut butter. I typically use Trader Joe's peanut butter, which contains peanuts and salt.
- Egg: I use one large egg.
- Sweetener: I use stevia. You can use a granulated sweetener instead, including sugar if you don't mind the extra carbs.
- Baking soda: You can replace it with baking powder (gluten-free if needed).
Instructions
The detailed instructions and step-by-step photos are included in the recipe card. Here's a quick overview.
Mix the peanut butter and egg in a mug or ramekin.

Mix in the sweetener and baking soda.

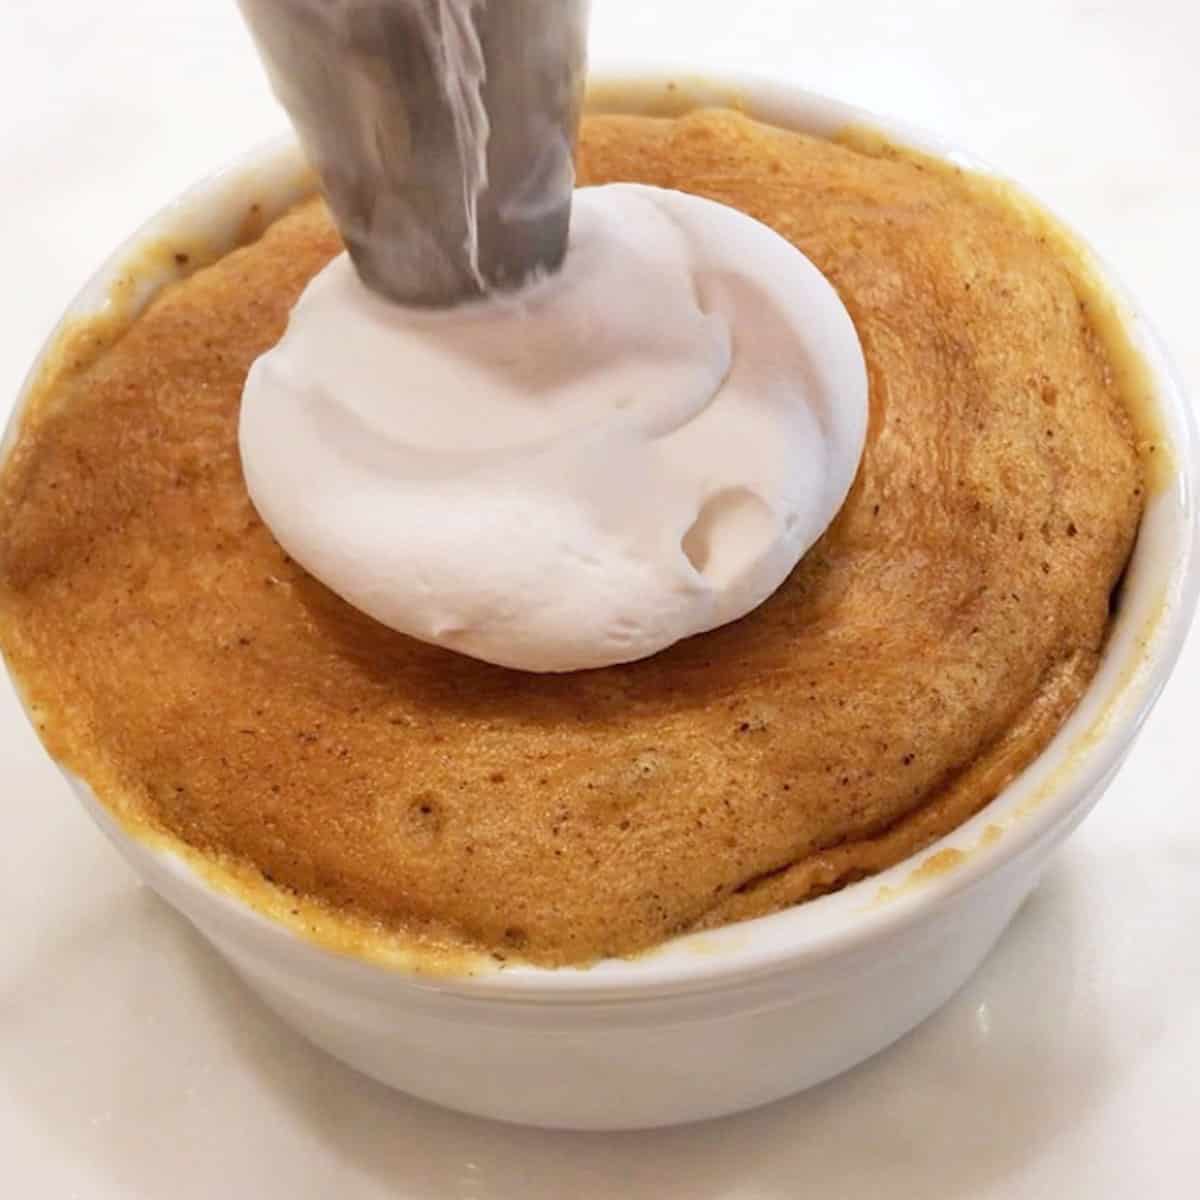
Microwave the cake for about 30 seconds. If you wish, top it with keto whipped cream or chocolate whipped cream before serving.
I just tried this and it turned out fantastic! It's so moist and tasty! I used 3 pumps of skinny girl pumpkin praline syrup instead of the liquid stevia. I'm definitely going to make this often!
Flkitten
Read more comments
Recipe Tips
Based on my attempts, I have a few pointers for you. The gist is that because this recipe relies on peanut butter and microwave baking, the results will vary depending on what peanut butter you use and your microwave.
- Use a freshly opened jar of natural peanut butter and stir it well. If you opt for a half-used jar, the peanut butter might be too dry.
- I don't add salt because my peanut butter is salted. If your peanut butter contains just peanuts, add a pinch of salt.
- Microwaves vary. If your microwave is a standard 1000-watt one, start with 30 seconds, check the cake, and decide if you'd like to add 10 more seconds. I like the edges puffed and the center gooey. In a powerful 1200-watt microwave, start with 20 seconds and add more as needed.
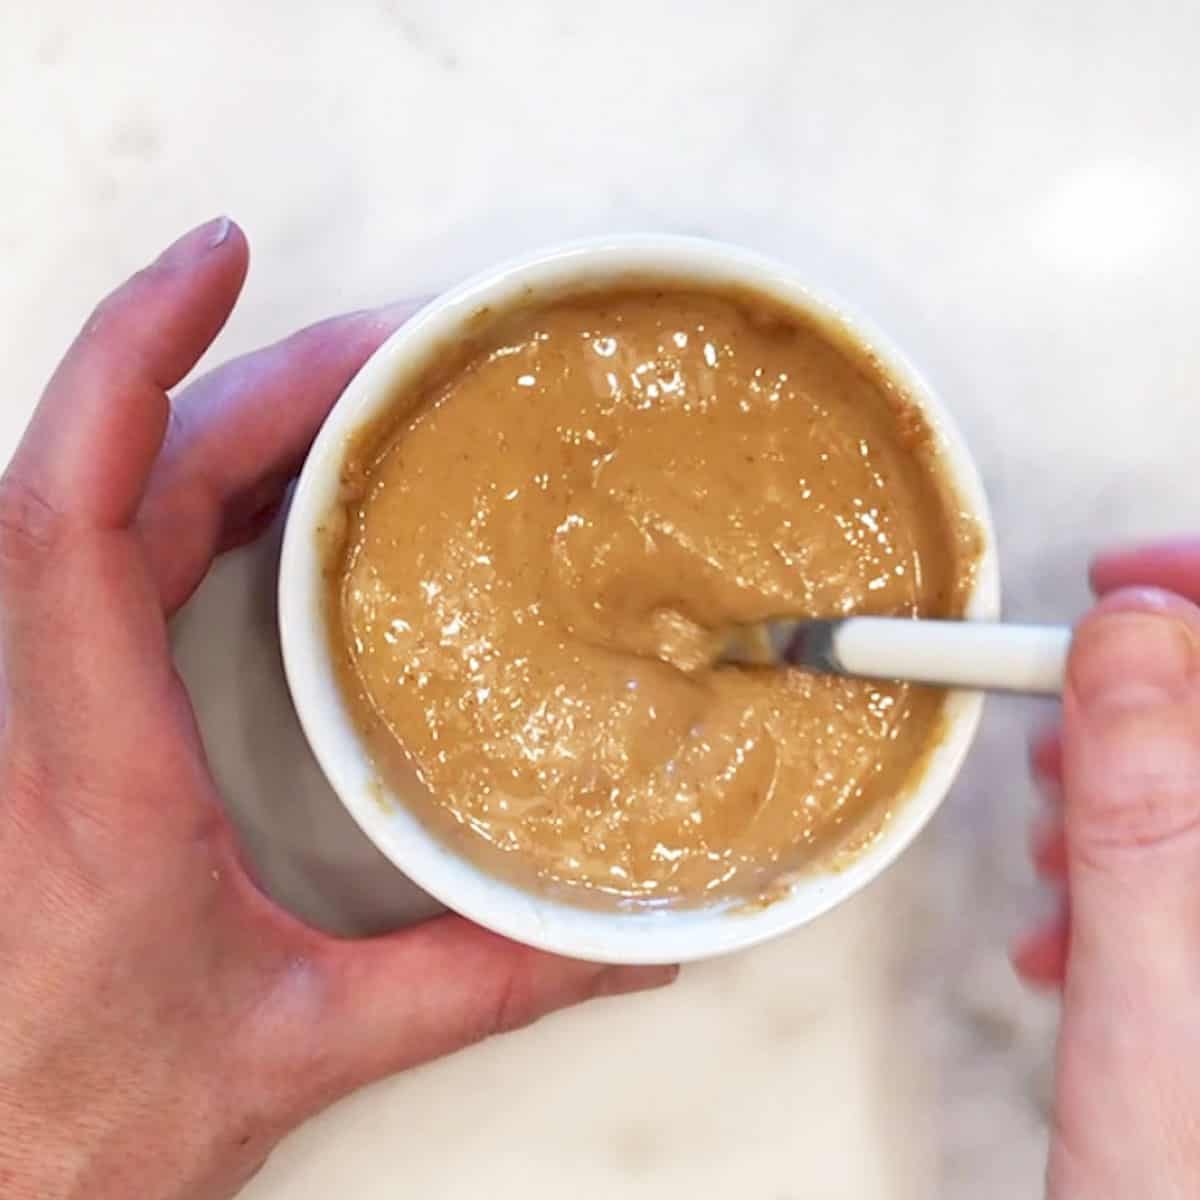
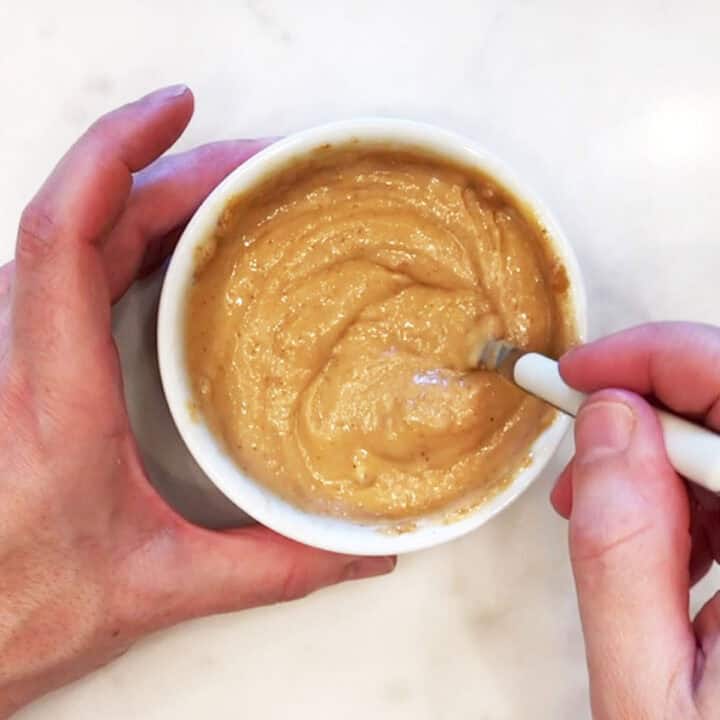
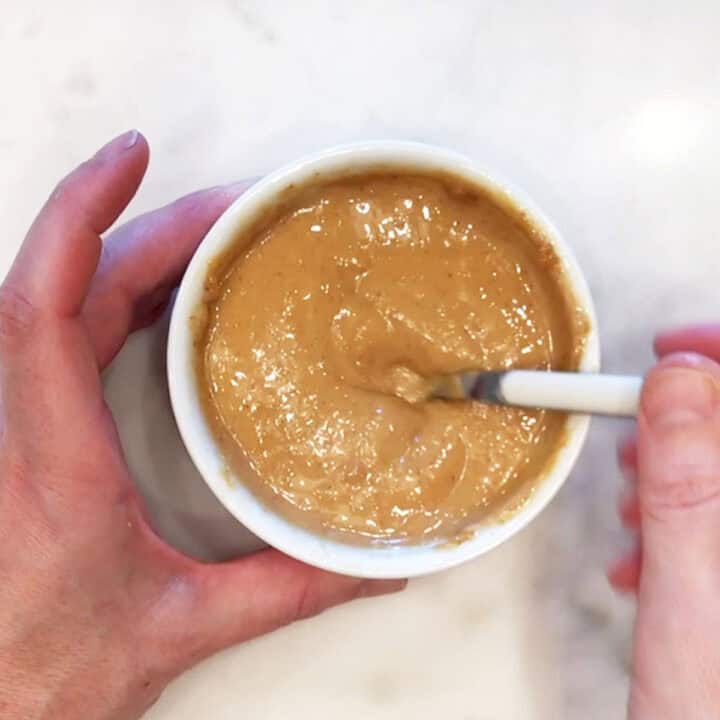
- Mix the peanut butter and egg thoroughly until the mixture is completely smooth and uniform. If the batter is very thick and sticky, add a tablespoon of water. This makes mixing much easier. The photo below shows you what the batter should look like - smooth, shiny, and not too sticky.
A Lighter Version
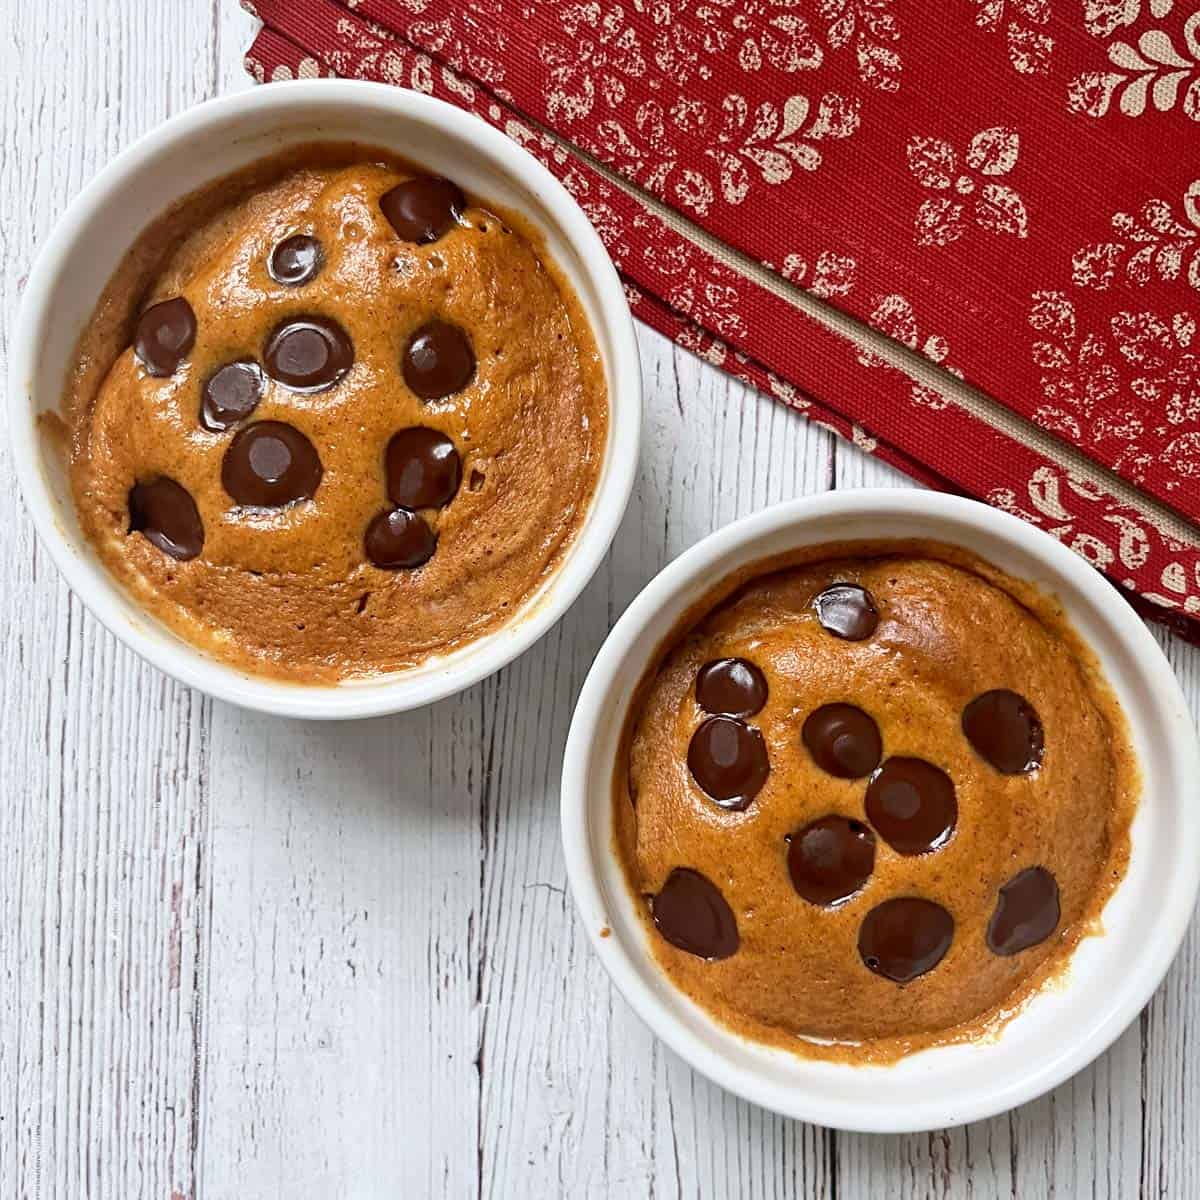
Over the years, I was asked several times to develop a lower-calorie version of this recipe. I finally did, and I love it! It's not as rich as the original version, but it still has that deep peanut butter taste, and it's incredibly satisfying for far fewer calories, so if calories are a concern, you might want to try this version. It is shown in the photo above, and yes, you can make two of them at a time and double the microwave time.
Ingredients
- 4 tablespoons PB2 (26 grams)
- 4 tablespoons liquid egg whites
- Sweetener to equal 1 tablespoon of sugar - I use ¼ teaspoon of stevia glycerite
- ¼ teaspoon baking powder
- ½ tablespoon dark chocolate chips
Instructions
- Add the PB2 to your mug. PB2 has lumps - mash them with a fork.
- Add the egg whites (shake them well first). Mix to combine. A mini hand whisk works better than a fork to achieve a smooth batter. Add a small amount of water if the batter is too thick.
- Mix in the sweetener and baking powder. Scatter the chocolate chips on top.
- Place the mug on a microwave-safe plate. Microwave the cake for 30 seconds (1000-watt microwave) or 20 seconds (1200-watt microwave).
Notes
You'll need to experiment to find out what works in your microwave. This version is low in fat, so it's important to keep it gooey and avoid a fully baked cake. I tried, and a fully baked cake is dry. The advantage of using egg whites from a carton in this version is that they are pasteurized, so it's ok to keep the cake gooey, like this:

Approximate nutrition info for this version (assuming the sweetener is sugar-free): 190 calories, 18 grams protein, 6 grams fat, 13 grams carbs, 3 grams fiber.
If you don't want the sugar from PB2, use sugar-free powdered peanut butter and increase the granulated sweetener to equal 2 tablespoons of sugar (or use ½ teaspoon of stevia glycerite). This version has approximately 170 calories, 20 grams of protein, 5 grams of fat, 9 grams of carbs, and 5 grams of fiber.
Recipe FAQs
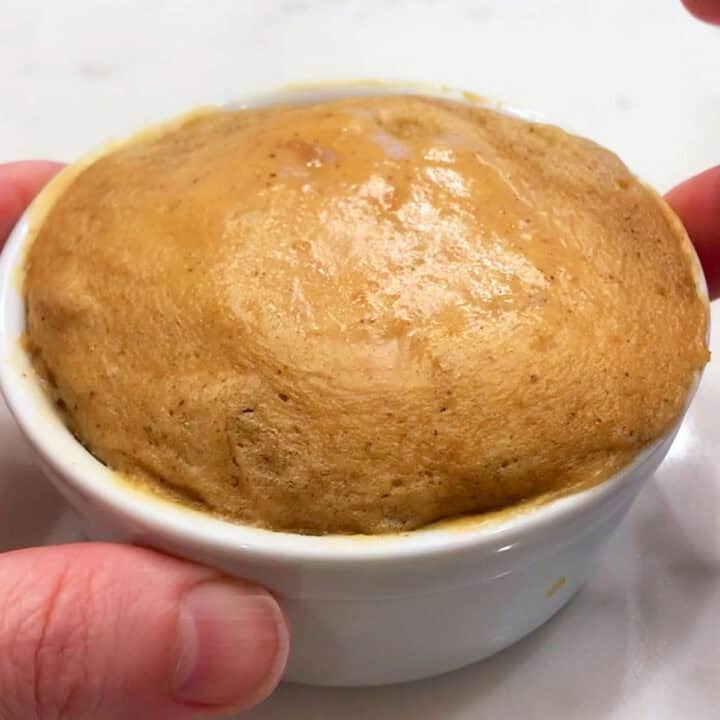
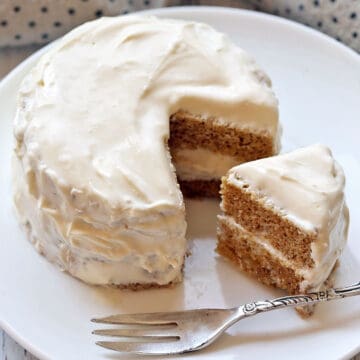
Yes! I was suspicious, too, when I first started making them. But they do work, and they produce results that are very close to a real cake crumb - tender, fluffy, and sweet. The photo below shows you the beautiful, tender crumb of this cake. 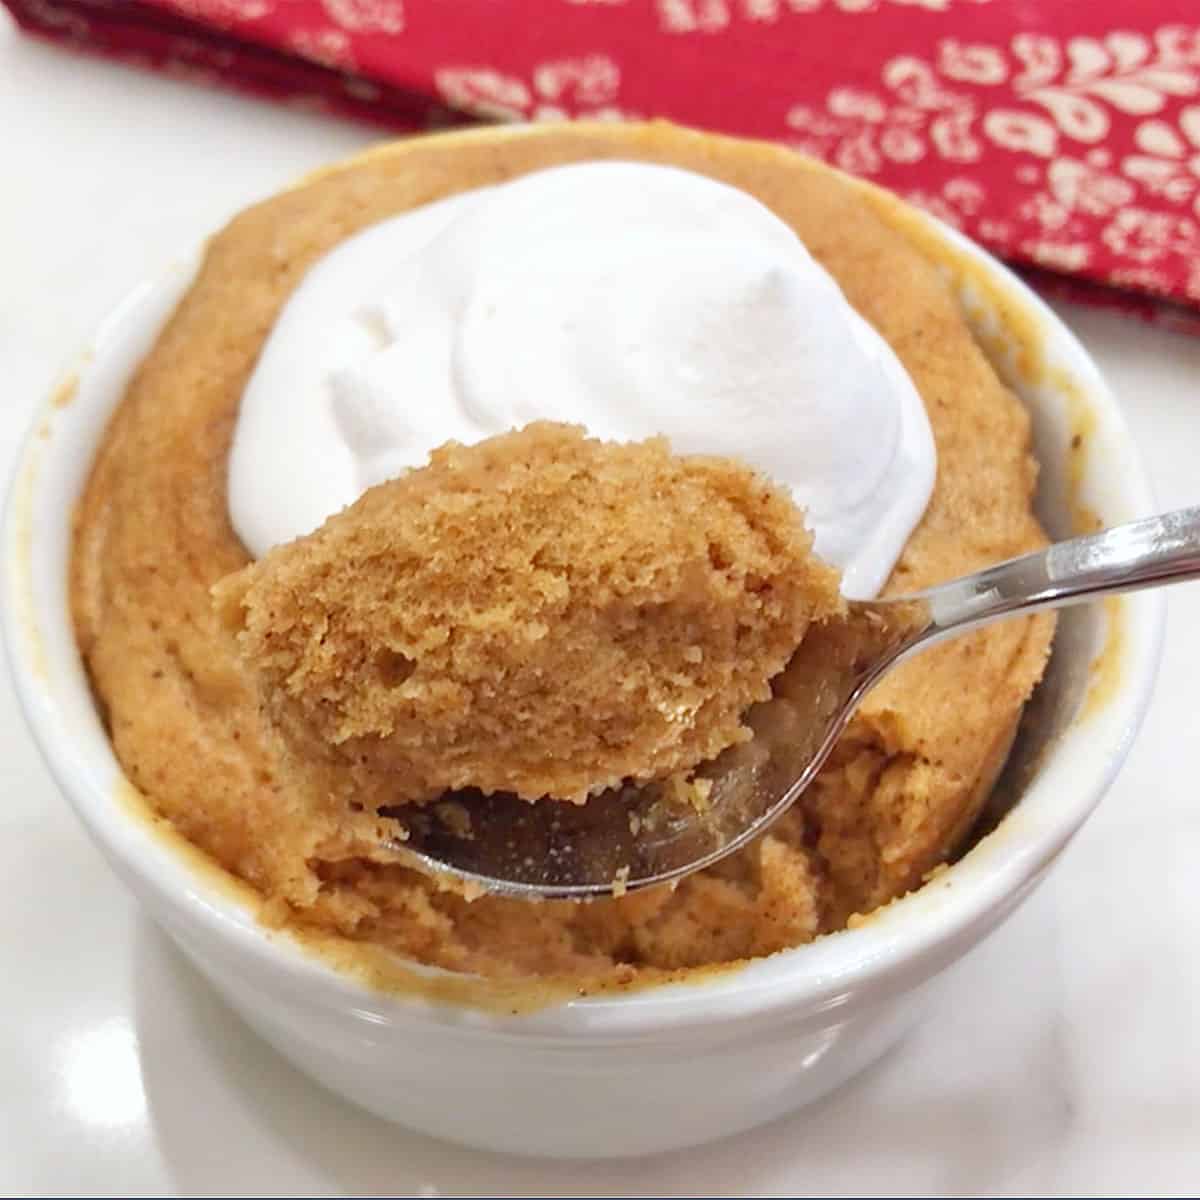
You have some flexibility here. I have made this cake in several dishes. A small and tall 10-ounce mug, a wide 15-ounce mug, and a 3.5-inch-wide ramekin (as shown in the video and the photos on this page).
They all worked, and there wasn't much of a difference. Except that with the ramekin, I was worried there for a moment that the batter might overflow! But it didn't. But it's a good idea to place the mug or ramekin on a microwave-safe plate to catch any spills.
Yes. You can use natural almond butter. If you do, I recommend adding ¼ teaspoon of almond extract to enhance the flavor.
You can store the cooled leftovers in the fridge for up to 4 days (provided you didn't top the cake with whipped cream). You can leave the cake in the mug and wrap the mug in two layers of cling wrap.
You can also freeze this cake. Let it cool completely on a cooling rack, then wrap the mug with plastic wrap, followed by a layer of foil. Freeze the cake for up to three months. You can defrost it in the microwave after removing the layers of foil and cling wrap.
Serving Suggestions
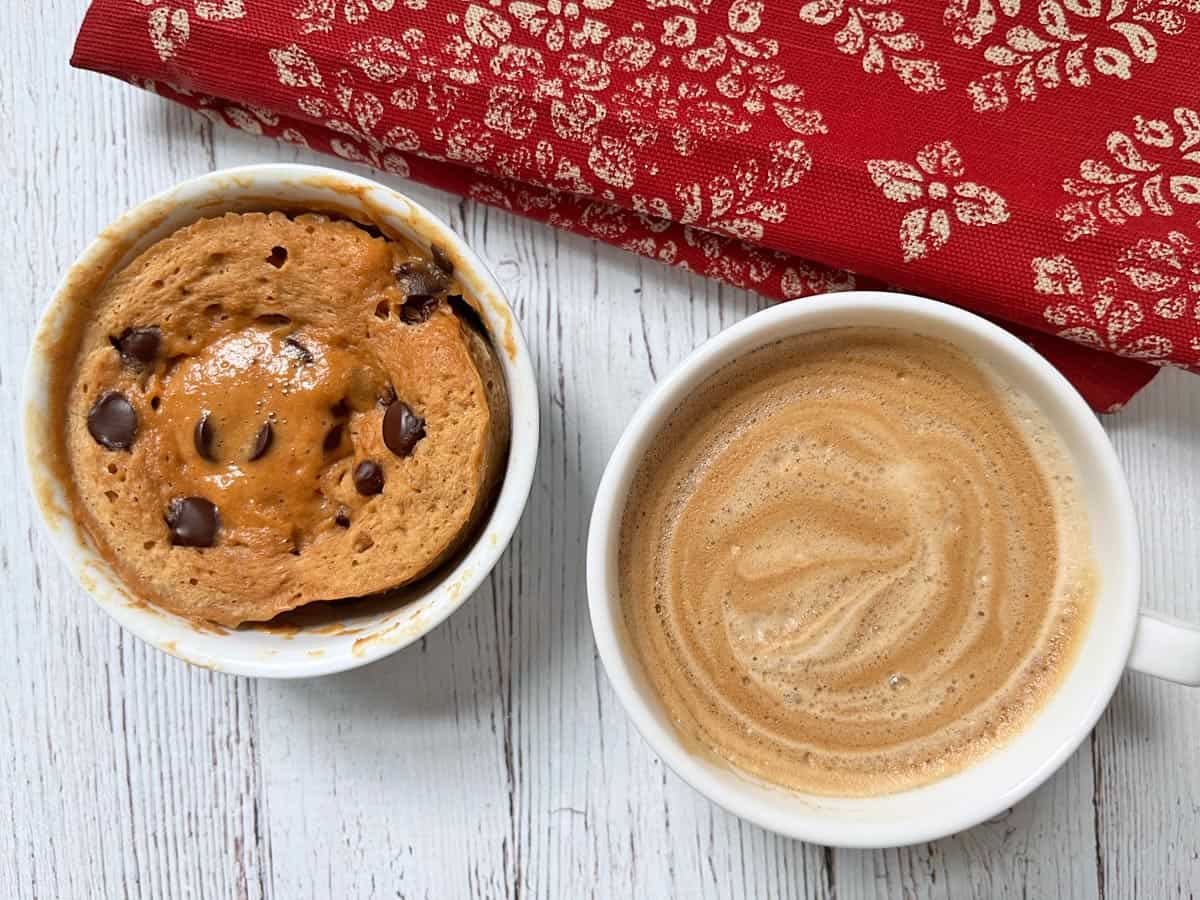
This cake is perfect with coffee. In the summer, I enjoy it with iced coffee or iced tea. Here's a photo of a recent indulgent breakfast that included the PB2 version and a cup of cappuccino.
Recipe Card
Peanut Butter Mug Cake
Video
Ingredients
- ¼ cup peanut butter - natural, creamy; only ground peanuts and salt
- 1 large egg
- Granulated sweetener of choice - to equal 2 tablespoons of sugar; I use ½ teaspoon of stevia glycerite
- ¼ teaspoon baking soda - or ½ teaspoon baking powder
Instructions
- In a medium mug or a large ramekin, mix the peanut butter and egg until completely incorporated. Check especially on the bottom to make sure there is no peanut butter residue.¼ cup peanut butter, 1 large egg

- If the batter seems very thick, sticky, and stubborn, add a tablespoon of water and keep mixing until completely smooth.
- Mix in the sweetener, then the baking soda. Mix well.Granulated sweetener of choice , ¼ teaspoon baking soda
- Place the mug on a microwave-safe plate to catch any spills. Microwave the cake for 30 seconds. Check it - if it looks very wet, add 10 more seconds. I usually stop at this point - the edges are puffed and done, but the center is still gooey. That's how I like it! See the notes section below for more tips about timing.
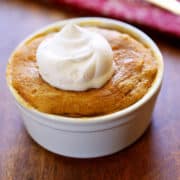
- Enjoy the cake as is, or top it with a dollop of whipped cream for a truly rich experience.


Notes
- Sweetness is a personal preference. Use these amounts as a guide and adjust to taste.
- Use a freshly opened jar of natural peanut butter and stir it well. If you use a half-used jar, the peanut butter might be too dry.
- I don't add salt because my peanut butter is salted. If your peanut butter contains just peanuts, add a pinch of salt.
- I have made this cake in several dishes. A small and tall 10-ounce mug, a wide 15-ounce mug, and a 4-inch-wide ramekin (as shown in the video and the photos on this page). They all worked.
- Make-ahead: You can mix the batter the night before, wrap the mug in cling wrap, and refrigerate. In the morning, remove the plastic wrap and microwave the cake.
- See the article above the recipe card for a lighter version of this cake, made with powdered peanut butter.
- You can store the cooled leftovers in the fridge for up to 4 days (provided you didn't top the cake with whipped cream). You can leave the cake in the mug and wrap the mug in two layers of cling wrap.
- You can also freeze this cake. Let it cool completely on a cooling rack, then wrap the mug with plastic wrap, followed by a layer of foil. Freeze the cake for up to three months. You can defrost it in the microwave after removing the layers of foil and cling wrap.
Nutrition per Serving
Save this Recipe!
We will also add you to our weekly newsletter. Unsubscribe anytime. See healthyrecipesblogs.com/privacy/ to learn how we use your email.
Disclaimers
Most recipes are low-carb and gluten-free, but some are not. Recommended products are not guaranteed to be gluten-free. Nutrition info is approximate - please verify it. The carb count excludes non-nutritive sweeteners. Please read these Terms of Use before using any of my recipes.
Sandy Gardner says
Best keto dessert I have had so far. Thank you!
Vered DeLeeuw says
Glad you tried another one of my recipes and liked it, Sandy! Many thanks for the review.
maria says
Surprised but really good. I used cashew, almond, peanut butter. Thank you!!
Vered DeLeeuw says
You're very welcome, Maria!
Flkitten says
I just tried this and it turned out fantastic! it's so moist and tasty! I used 3 pumps of skinny girl pumpkin praline syrup instead of the liquid stevia. I'm definitely going to make this often!
Vered DeLeeuw says
I'm so glad you enjoyed this mug cake! Thank you for leaving a comment.
MCC says
I use vanilla extract, allulose sweetener and a little swerve brown sugar, a tablespoon of heavy whipping cream for moisture, and mix in a few Reese’s peanut butter morsels.
Vered DeLeeuw says
Sounds great! Thanks for sharing your version.