Crispy, fatty, and flavorful, pork belly strips can be served as an appetizer, an indulgent main course, or for breakfast instead of bacon.
Pork belly is one of the most indulgent meats you can enjoy. The combination of crispy fat and juicy meat is incredible. You can cook it whole, but I like to slice it before baking. It's the same idea as oven-baked bacon, but pork belly slices need to cook longer because they are thicker.
Ingredients
See the recipe card for exact measurements. Here are my comments on the ingredients.
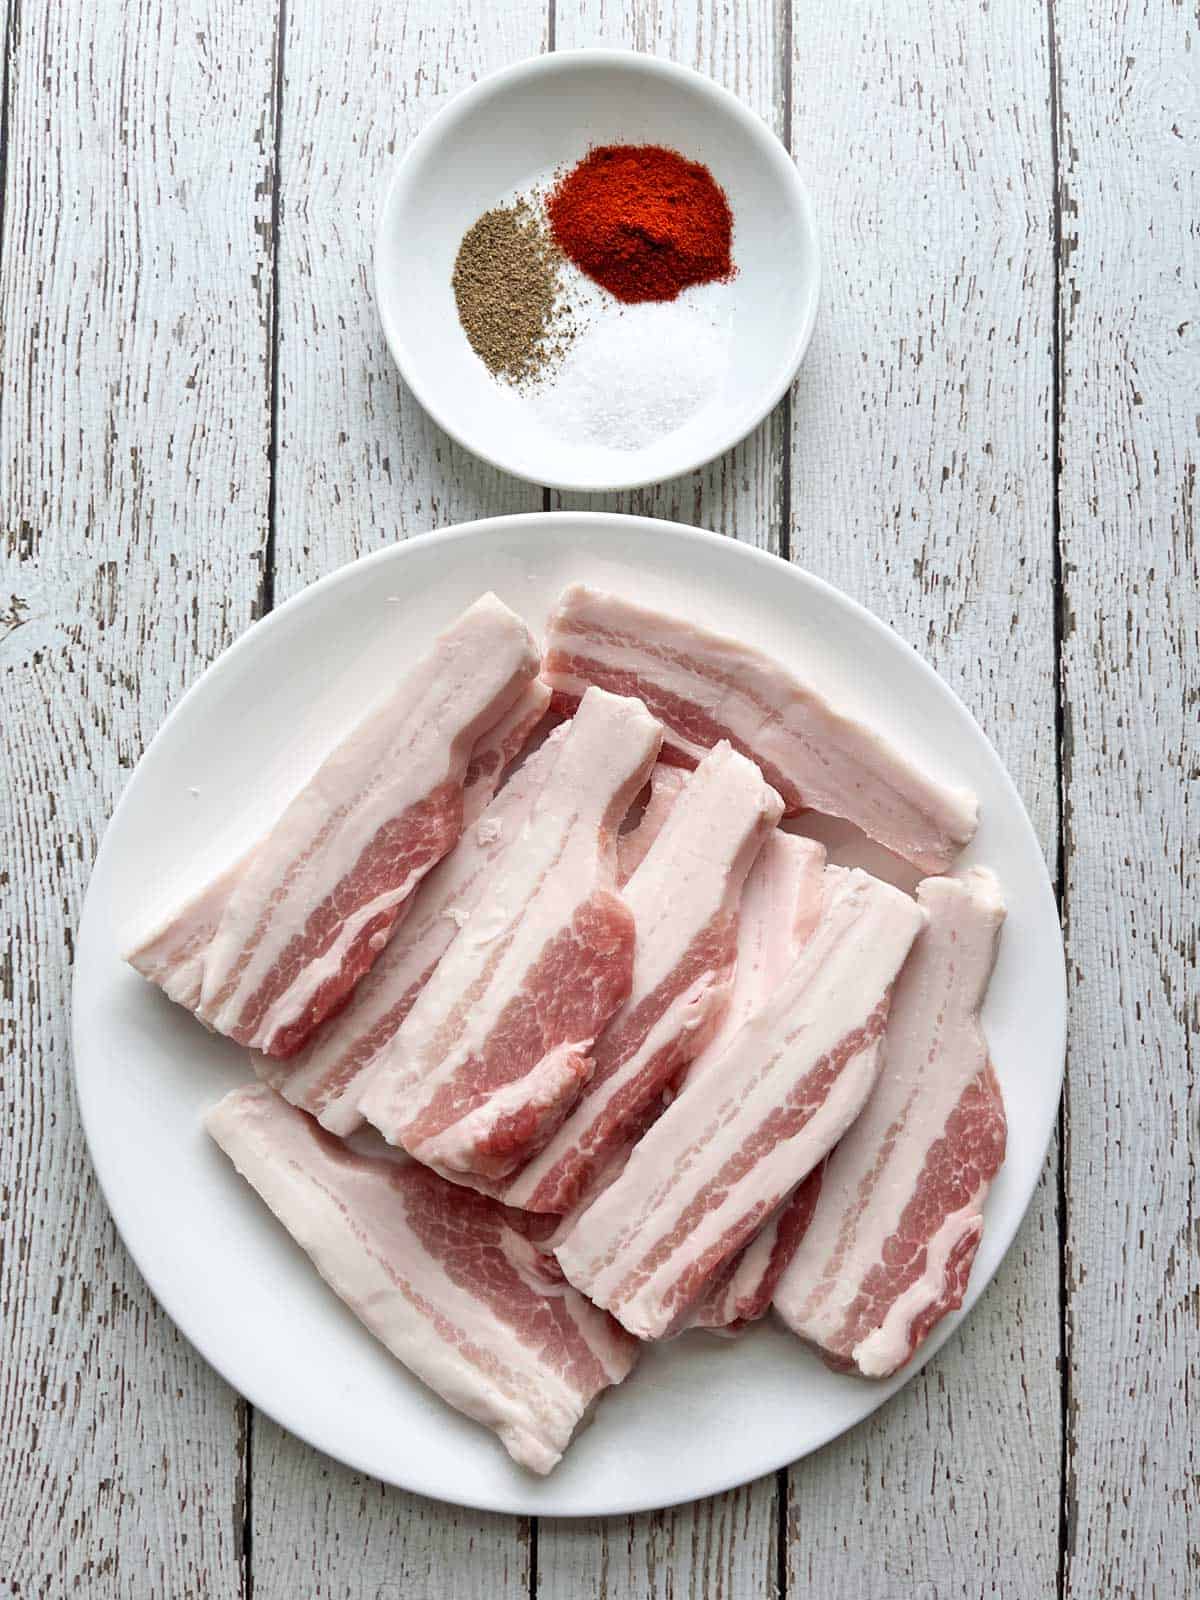
Pork belly strips: I get them at Costco or Wild Fork Foods. They are about ½-inch thick. They will vary in shape and weight depending on where you get them, but they should be about the same thickness. Sometimes, I buy a whole pork belly at Whole Foods Market and slice it at home.
To season: Kosher salt, black pepper, garlic powder, and smoked paprika.
Flavor Variations
These strips are delicious on their own, simply seasoned with salt and pepper. I like to add garlic powder because I love garlic and use it in most of my savory recipes. I also add smoked paprika for a delightful smoky flavor.
A nice variation is to brush them with a mixture of soy sauce or a gluten-free alternative (2 tablespoons), honey (1 tablespoon), and garlic powder (1 teaspoon) before baking for an Asian-style dish.
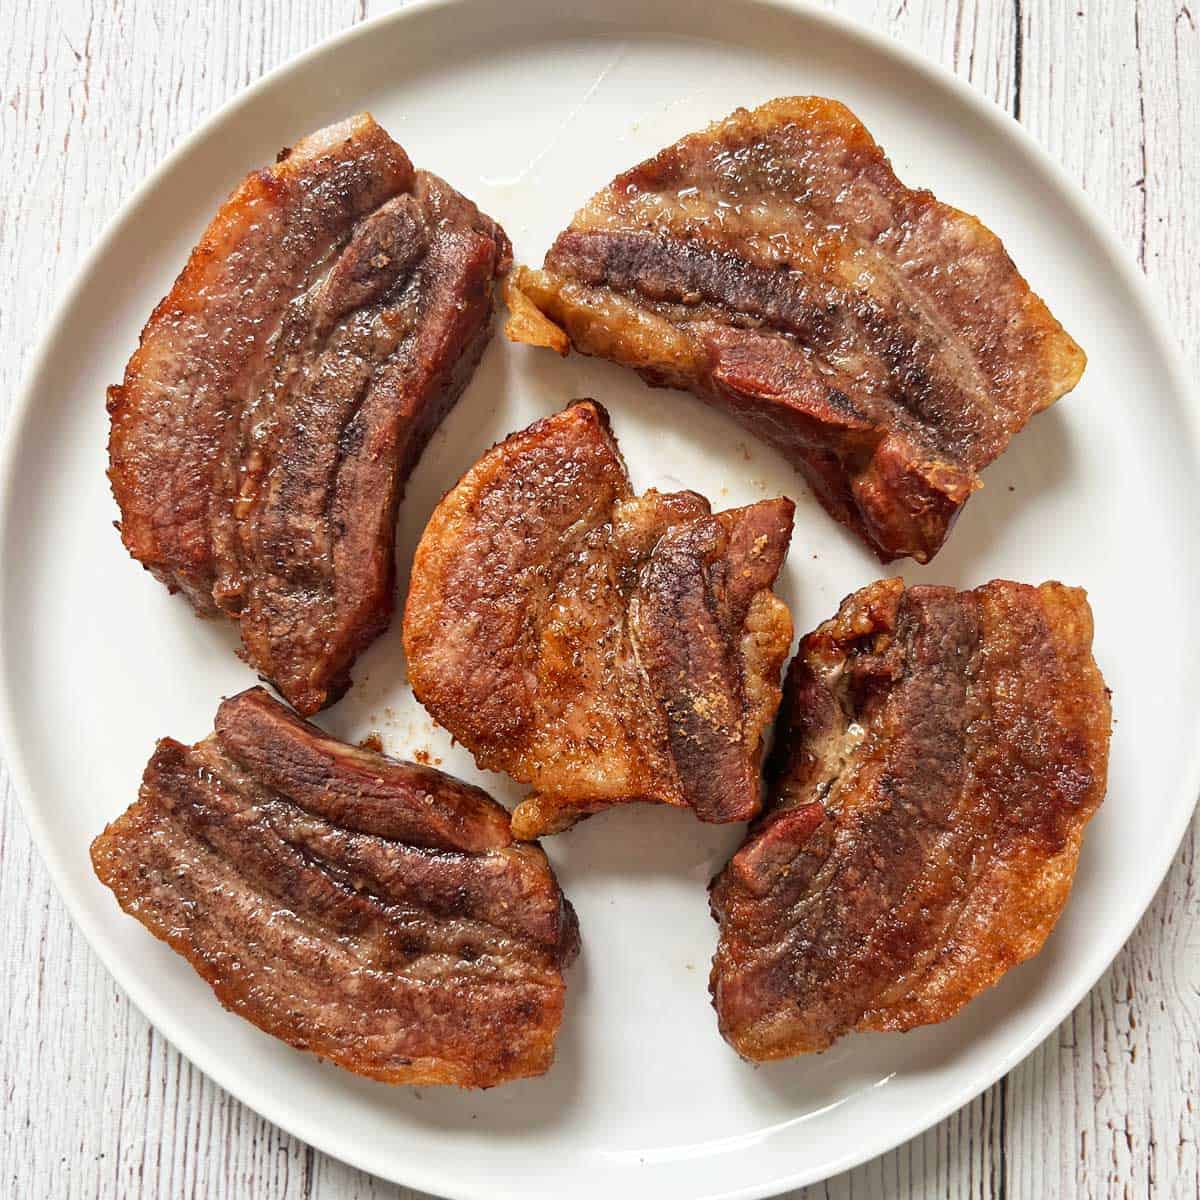
As shown in the photo below, a simpler variation is to season them with half a teaspoon of smoked salt and nothing else. I often do that, and it's delicious.

Instructions
Since they are thicker than bacon, you'll need to cook these strips in a 400°F oven for 40-50 minutes. In comparison, I cook bacon in the oven for around 20 minutes. The detailed instructions and step-by-step photos are included in the recipe card. Here's a quick overview.
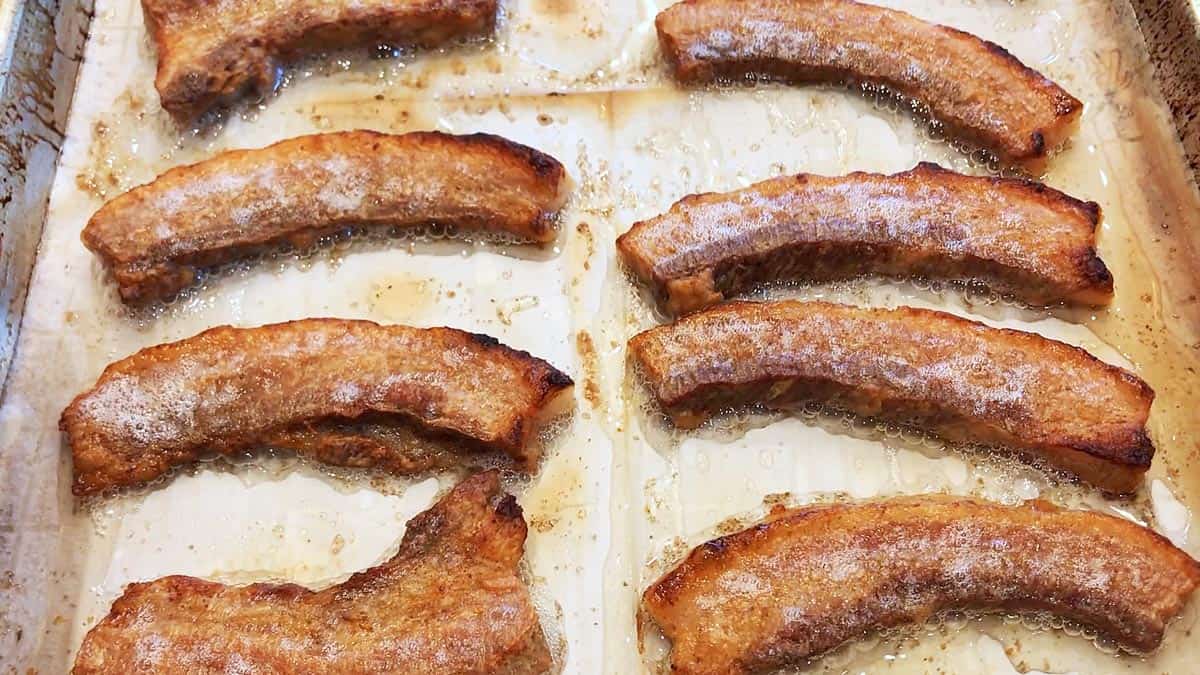
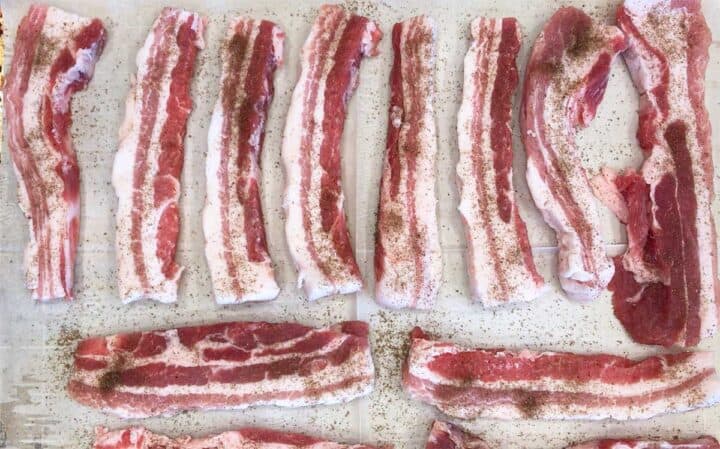
Arrange the pork belly slices on a rimmed, parchment-lined baking sheet in a single layer. Sprinkle them with the seasonings.
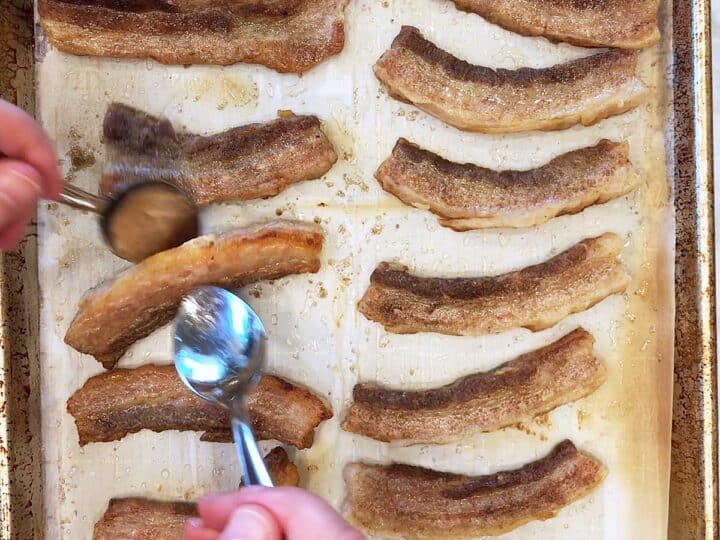
Bake until browned and crispy, about 20 minutes per side. Carefully drain the pan midway through baking.
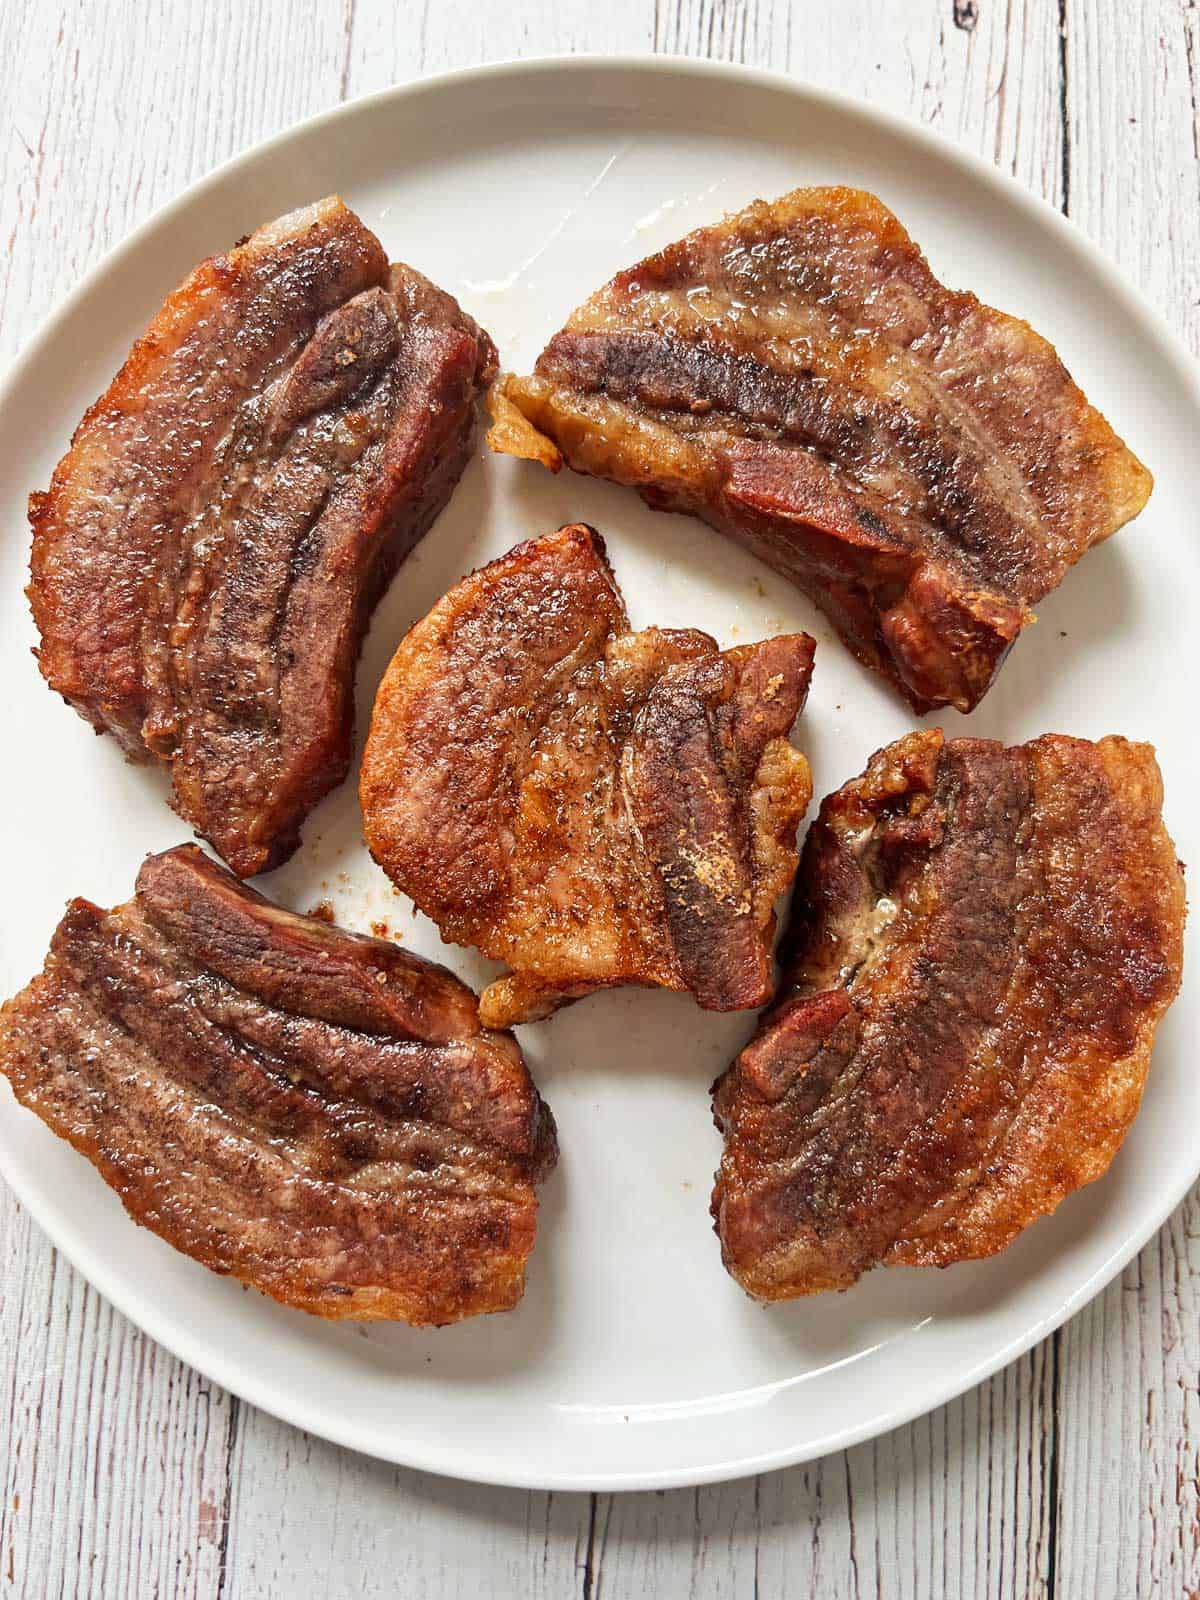
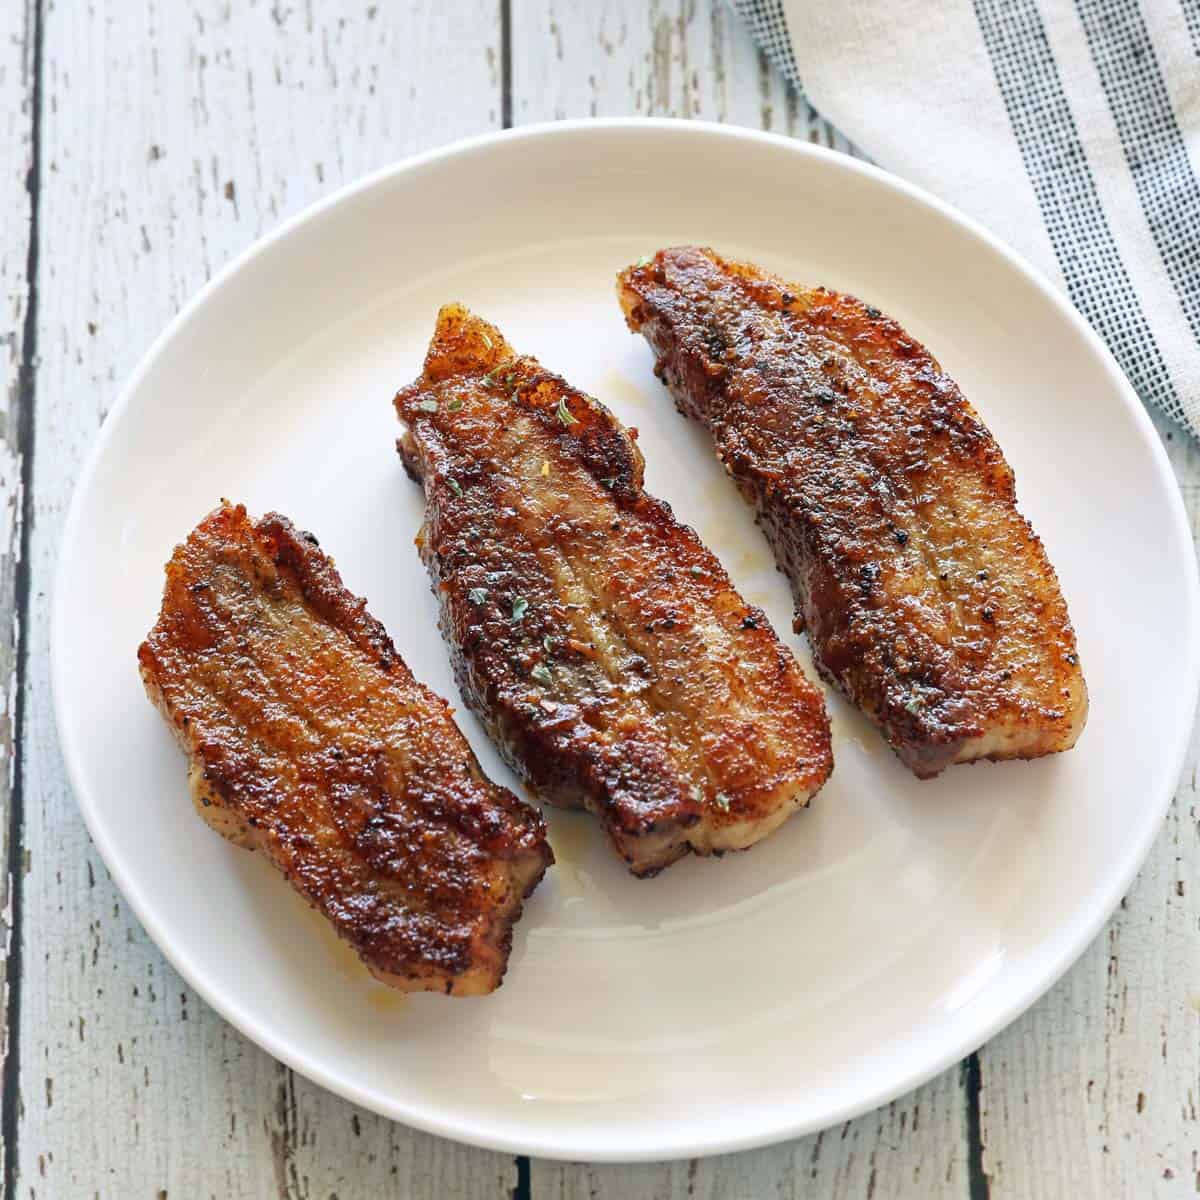
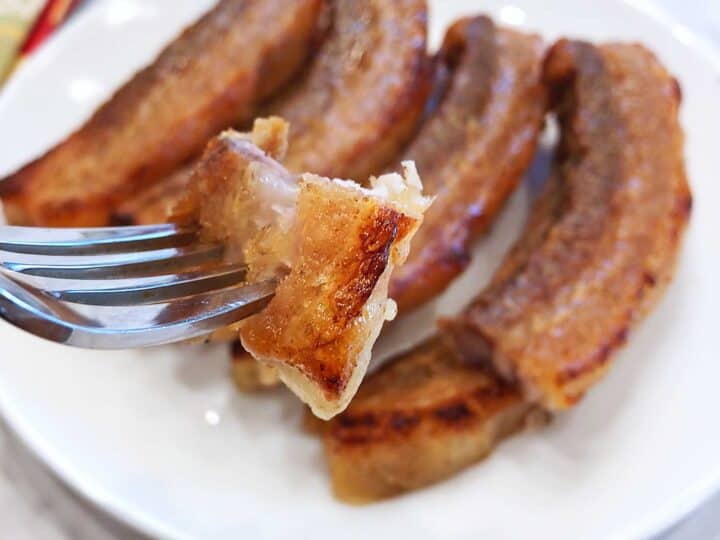
Serve immediately. See how gorgeous they are in this close-up photo:

Oh my gosh, I just made these and they are so so good! I normally don't like pork belly and I wanted to try something new. I just roasted these in the oven as you said, 20 minutes each side, and then I put them on the top rack to broil a bit for the remaining 10 minutes. I just used salt and pepper. My mother in law who does not like pork asked me for the recipe!
Seri
Read more comments
Recipe Tips
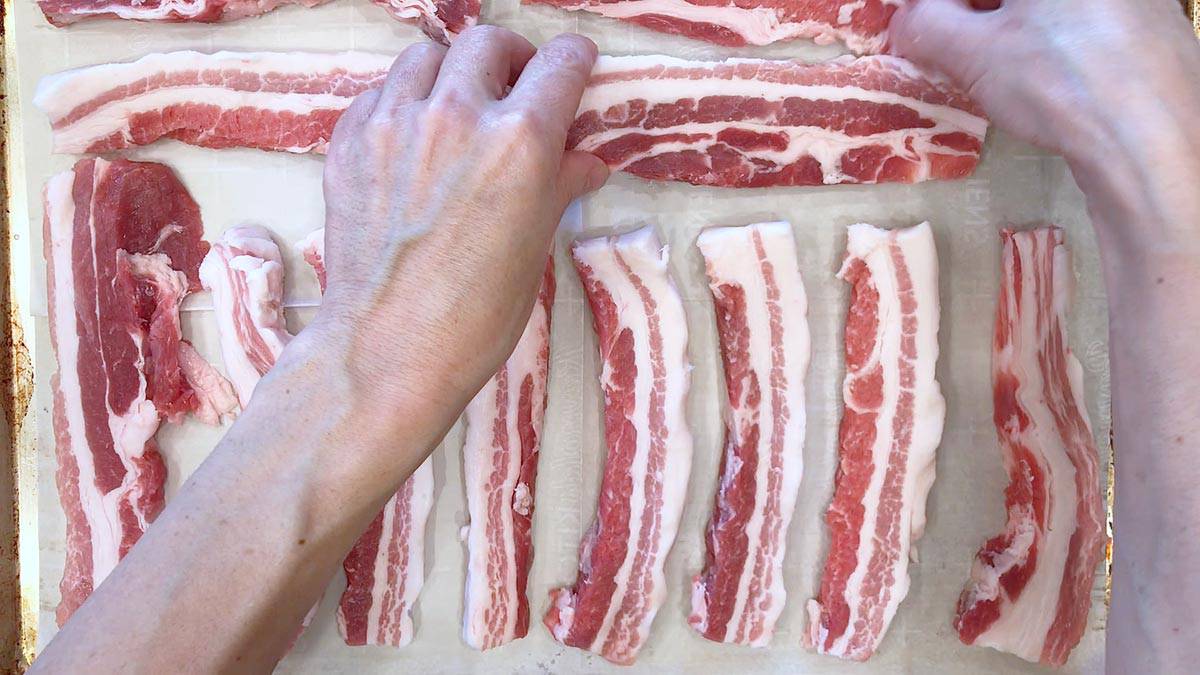
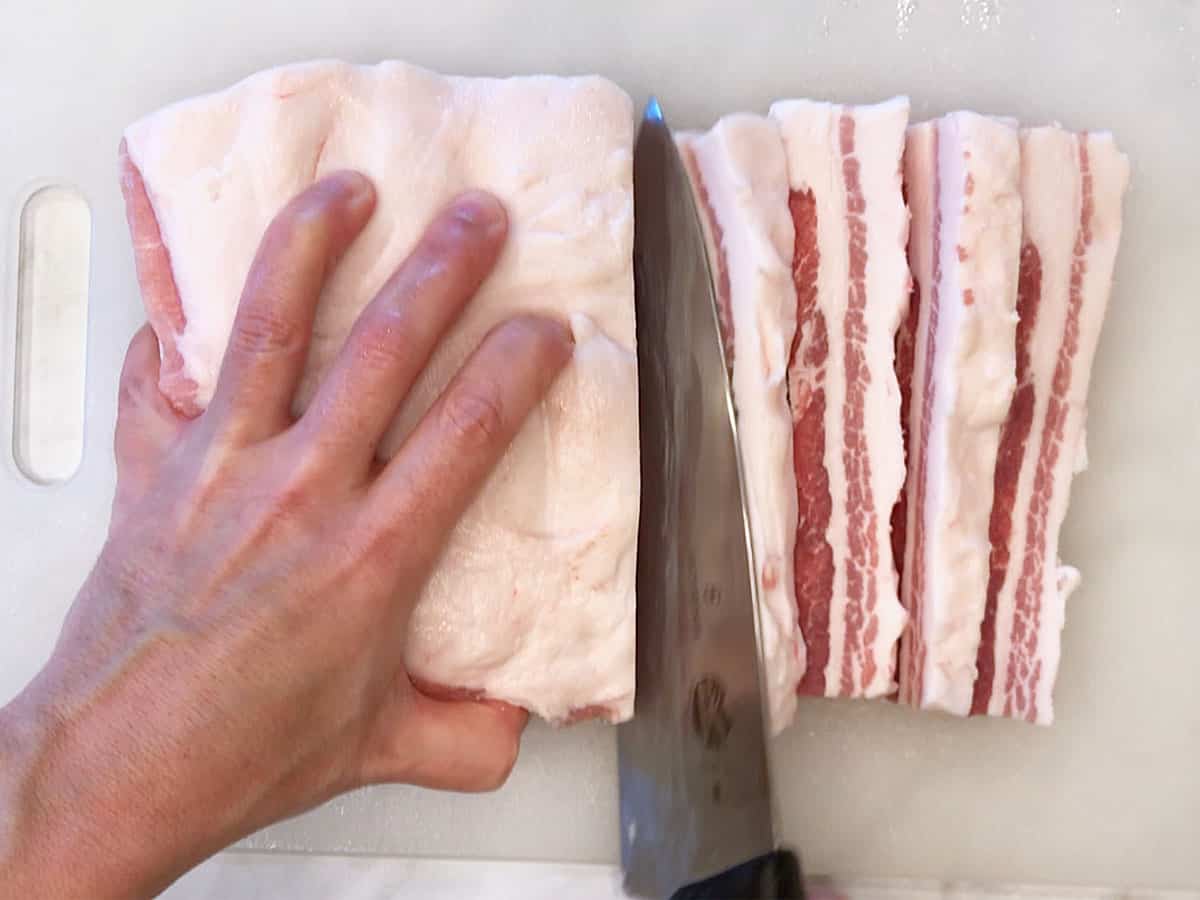
Slicing Pork Belly
As mentioned above, you can buy a whole pork belly and slice it yourself, as shown in the photo below.
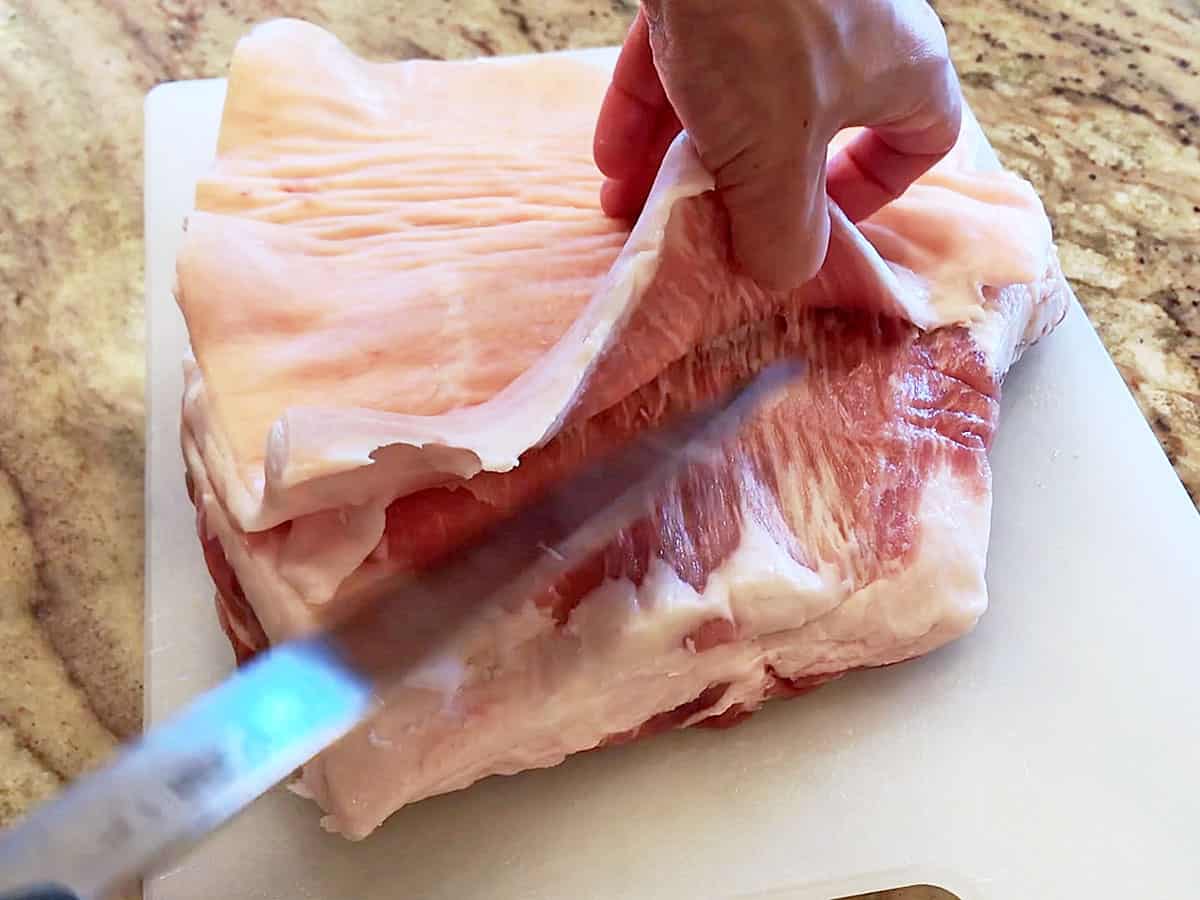
If you get a skin-on belly, you'll need to remove the skin first. That's a bit more challenging, but I've done that and used the skin to make pork rinds.
To remove the skin, place the pork belly on a sturdy cutting board. Pull back the skin at the edge, slide a sharp knife between the meat and the skin, and patiently slice the skin away from the meat until it is all removed. The image below demonstrates the process:
Adjusting the Baking Time
If the strips are not browned enough after baking on the second side, flip them again and continue baking until they are browned and crispy, 5-10 more minutes. Bake thinner strips, cut like thick-cut bacon, at 400°F for 10 minutes. Drain the fat, flip, and bake for 5-7 more minutes, until crispy.
Serving Suggestions
You can serve these strips as an appetizer or a main course. Here's a photo of them served as a first course on an appetizer plate:
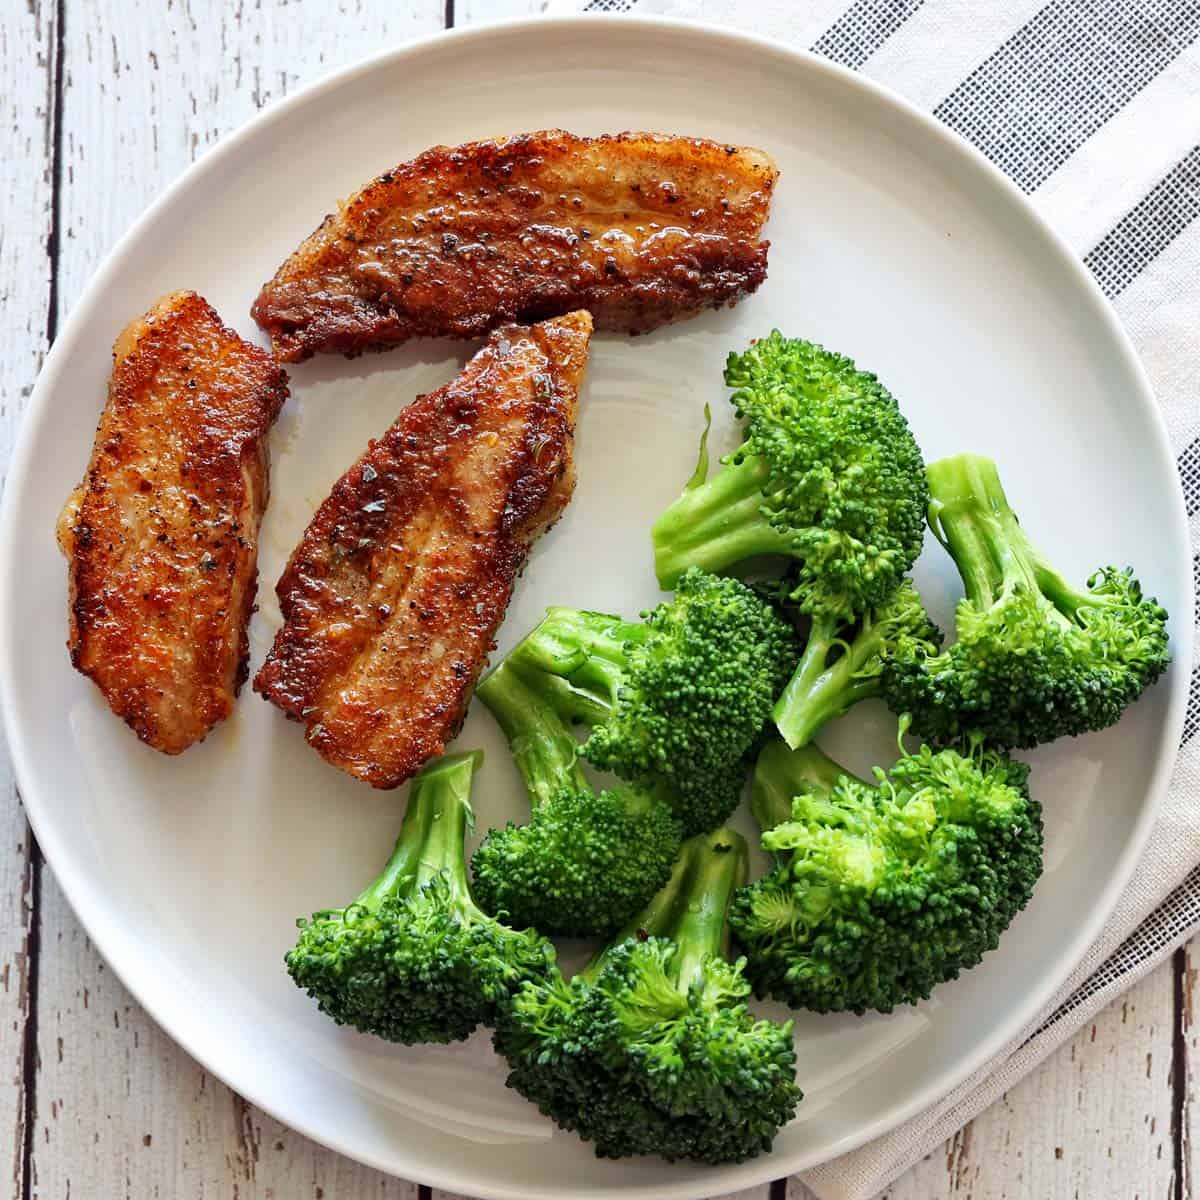
When I serve them as a main course, I add a light side dish such as arugula salad, steamed asparagus, microwave broccoli (as shown in the photo below), or sautéed spinach.
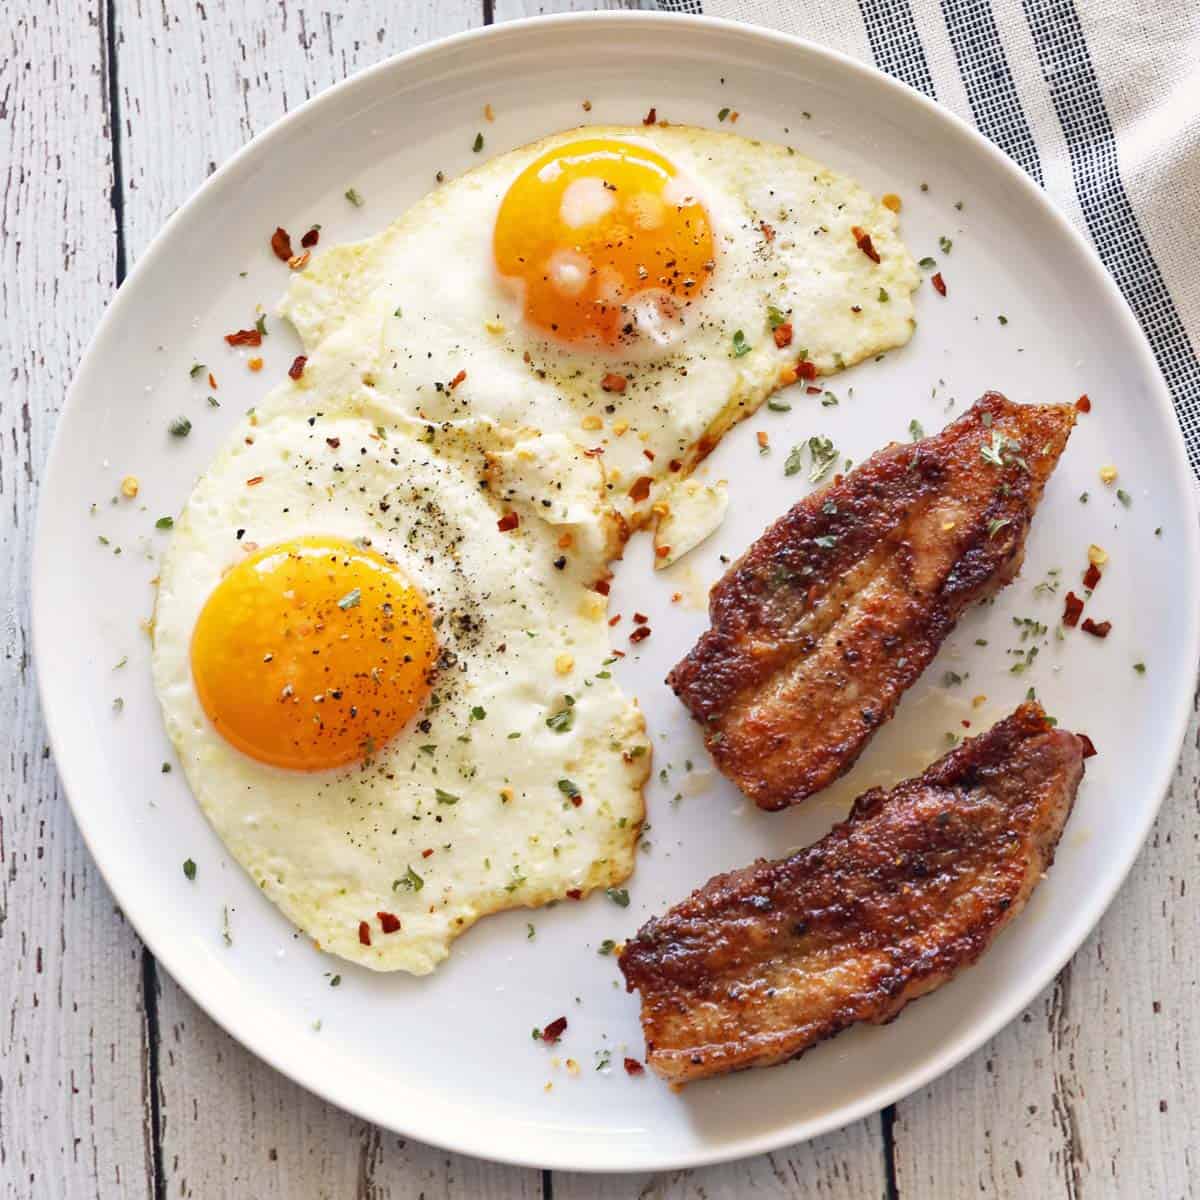
They are also perfect for breakfast or brunch. I serve them with eggs, fresh berries, and biscuits. Here's a photo of a recent breakfast of pork belly slices and fried eggs.
Storing and Using the Leftovers
This dish is best enjoyed fresh out of the oven, but you can keep the leftovers in an airtight container in the fridge for up to four days. Reheat them uncovered on a rimmed baking sheet in a 350°F oven.
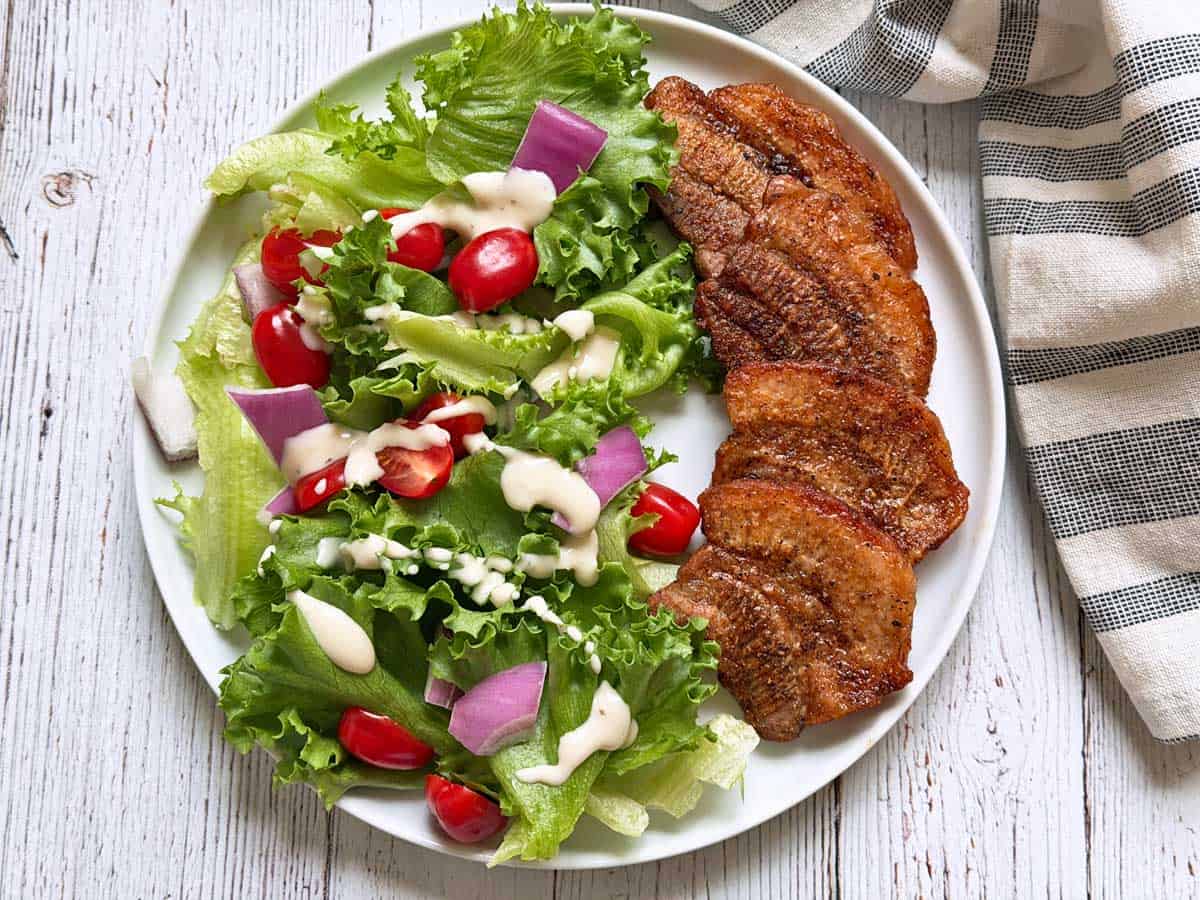
I make an easy meal of the leftovers by gently reheating them and serving them with a simple salad like the one shown below.
I also like chopping them and adding them to a bowl like the one shown below: on a bed of cauliflower rice (sautéed in olive oil and seasoned with garlic powder and smoked paprika), I arranged chopped pork belly, a fried egg topped with chile crunch, steamed broccoli, and kimchi. So much flavor!

Recipe Card

Oven-Baked Pork Belly Strips
Video
Ingredients
- 1.5 pound pork belly strips - skinless, ½-inch thick
- 1 teaspoon Diamond Crystal kosher salt - or ½ teaspoon of any other salt, including Morton kosher salt
- ¼ teaspoon black pepper
- ½ teaspoon garlic powder
- ½ teaspoon smoked paprika
Instructions
- Preheat the oven to 400°F. Line a large, rimmed baking sheet with high-heat-resistant parchment paper.

- Place the pork belly slices in the pan in a single layer. Sprinkle them with salt, pepper, garlic powder, and smoked paprika. Or simply season them with half a teaspoon of smoked salt.1.5 pound pork belly strips, 1 teaspoon Diamond Crystal kosher salt, ¼ teaspoon black pepper, ½ teaspoon garlic powder, ½ teaspoon smoked paprika

- Roast the strips for 20 minutes. Carefully drain the pan and flip the strips to the other side.
- Continue baking on the second side until the strips are browned and crispy, for about 20 more minutes. If they are not browned and crisp, flip them again and bake until browned, for 5-10 more minutes. See the notes below for the suggested cooking time for thinner slices.

- Drain on paper towels and serve.


Notes
- Seasonings, especially salt, are just guidelines. Please adjust to taste.
- The nutrition info is approximate. It's based on cooked bacon and adjusted for less sodium.
- When I use skinless strips from Wild Fork Foods, a 1.5-pound package yields about 12 ounces of cooked strips (a lot of fat is rendered during cooking, especially if you like them browned and crisp).
- Bake thinner strips, cut like thick-cut bacon, at 400°F for 10 minutes. Drain the fat, flip, and bake for 5-7 more minutes, until crispy.
- Wear long oven mitts when removing the pan from the oven.
- This dish is best when fresh out of the oven. But if you have leftovers, you can keep them in an airtight container in the fridge for up to 4 days. Reheat them uncovered on a rimmed baking sheet in a 350°F oven.
Nutrition per Serving
Save this Recipe!
We will also add you to our weekly newsletter. Unsubscribe anytime. See healthyrecipesblogs.com/privacy/ to learn how we use your email.
Disclaimers
Most recipes are low-carb and gluten-free, but some are not. Recommended products are not guaranteed to be gluten-free. Nutrition info is approximate - please verify it. The carb count excludes non-nutritive sweeteners. Please read these Terms of Use before using any of my recipes.


Robin Quinn says
This recipe was just what I was looking for - simple and easy. I used the Wild Fork slices also which were about an inch thick and didn't think to slice them until they were already fully thawed. So I pounded them instead to get a thinner slice. Perfect!
Vered DeLeeuw says
I'm so glad you enjoyed the recipe, Robin, and really appreciate the review!
Carolyn says
These were perfect! Thank you.
Vered DeLeeuw says
You're very welcome, Carolyn! Many thanks for the review.
Jim Lampe says
An EXCELLENT recipe! I had a nice 3 pound skinless slab that I normally would cure and smoke into bacon but decided to change course.
Very happy I found your recipe!
Vered DeLeeuw says
I'm so happy you enjoyed this recipe, Jim! Thank you very much for taking the time to leave a review.
Sue Dettman says
This is the best recipe for pork belly I have found so far! And trust me, I have been experimenting.
Vered DeLeeuw says
I'm so glad to hear, Sue! Thank you very much for the review.
Miss B says
I’ve gotten addicted! Sooo good!
Vered DeLeeuw says
Haha I know what you mean! Thank you for the review. 🙂
Suzanne says
These were so delicious!
Vered DeLeeuw says
Glad you enjoyed them, Suzanne! Thanks for the review.
CMO_3 says
Excellent! Made exactly as written and served with a homemade chow mein. Yum!
Vered DeLeeuw says
Your meal sounds amazing! Thank you very much for the review.
Joanna says
I can't believe how good these are! The only thing stopping me from eating the entire thing is that they are so fatty and you just can't overeat fatty foods. Thank you so much for this amazing treat, Vered! Love your recipes.
Vered DeLeeuw says
That's so true about fatty foods, Joanna! I'm glad you like this recipe. Thank you very much for the review.