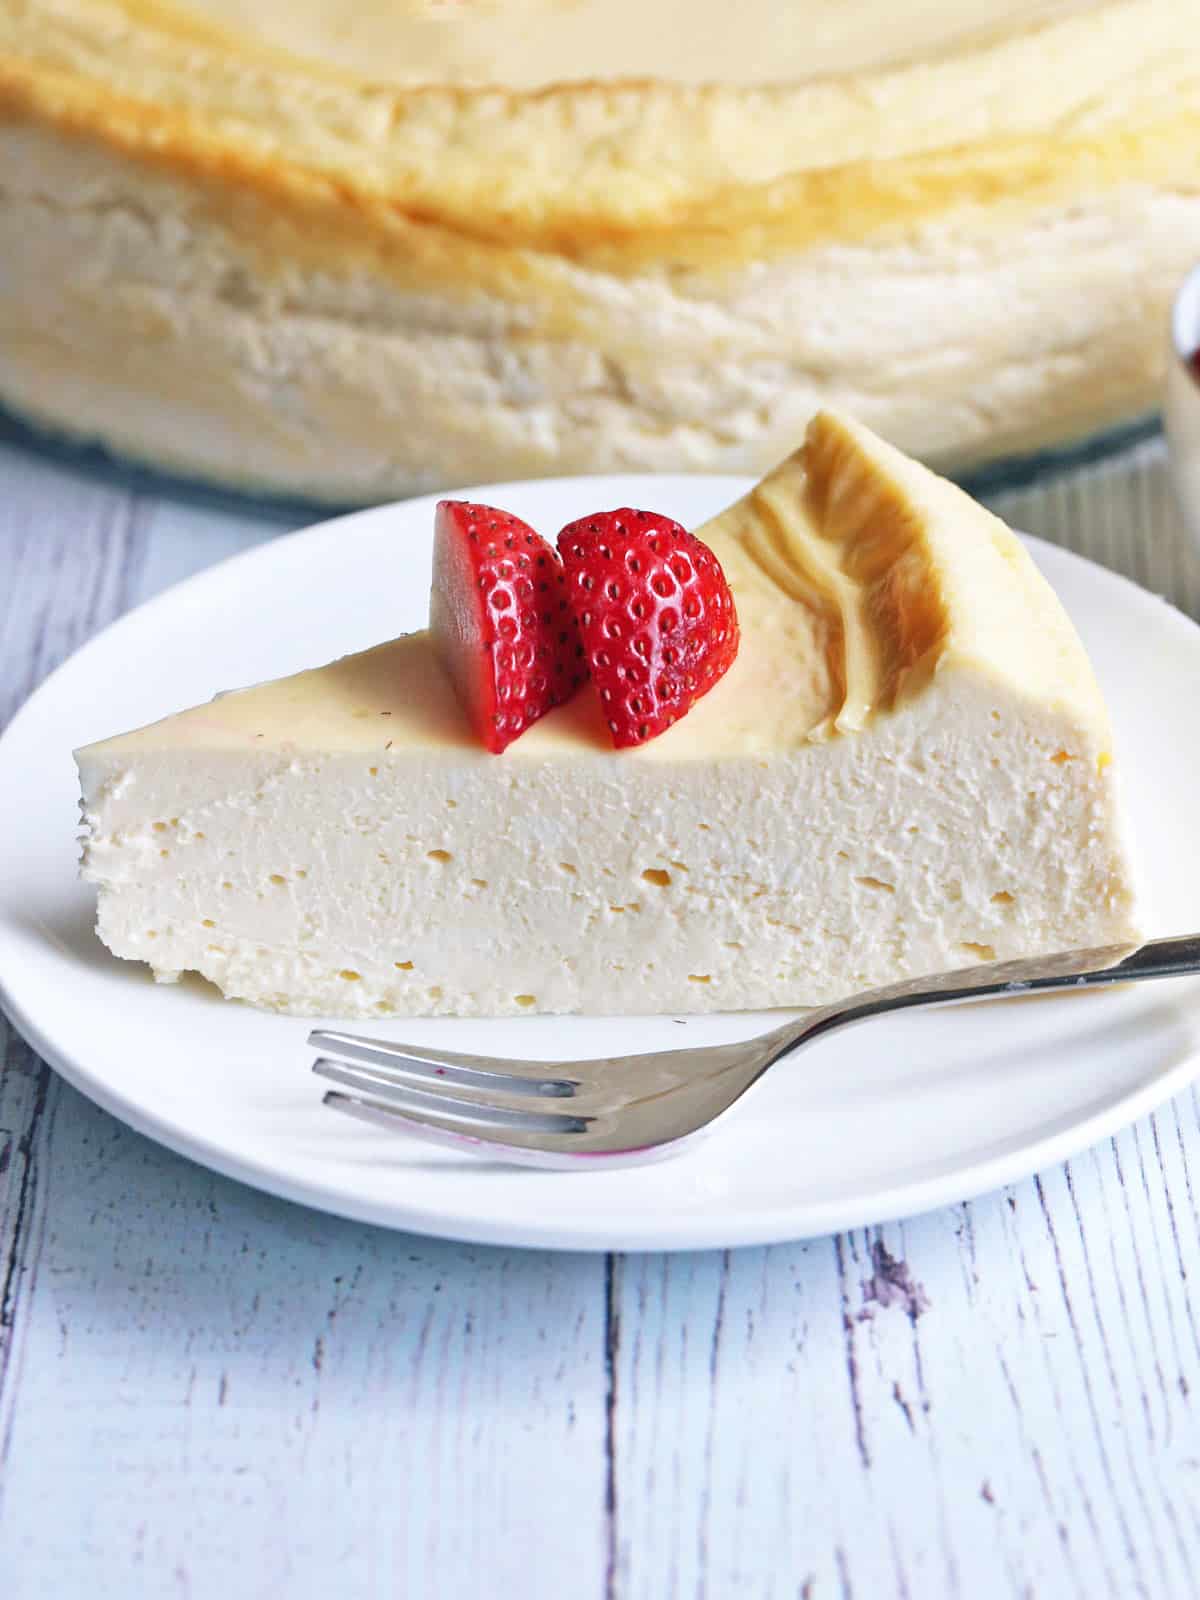
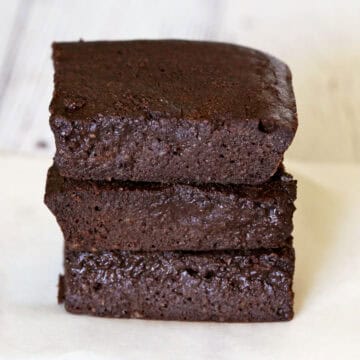
This incredibly creamy and flavorful keto cheesecake is one of those desserts where the low-carb version is just as good as the original.
Cheesecake is a dessert where the keto version is almost identical to the traditional one. Specialty flours often give keto baked goods a distinct texture and flavor. But cheesecake, at least the filling, doesn't typically contain flour. So, adapting it to a keto diet is easy. Follow the detailed instructions and tips outlined below, and you'll be rewarded with the best cheesecake you've ever made - keto or otherwise.
Ingredients
See the recipe card for exact measurements. Here are my comments on some of the ingredients.
- Unsalted butter: Use it to grease the pan. You want to grease it well to ensure the cake doesn't stick. This is important not just for ease of releasing the cake from the pan but also to prevent cracks. You don't want the cake to stick to the edges of the pan while it cools down.
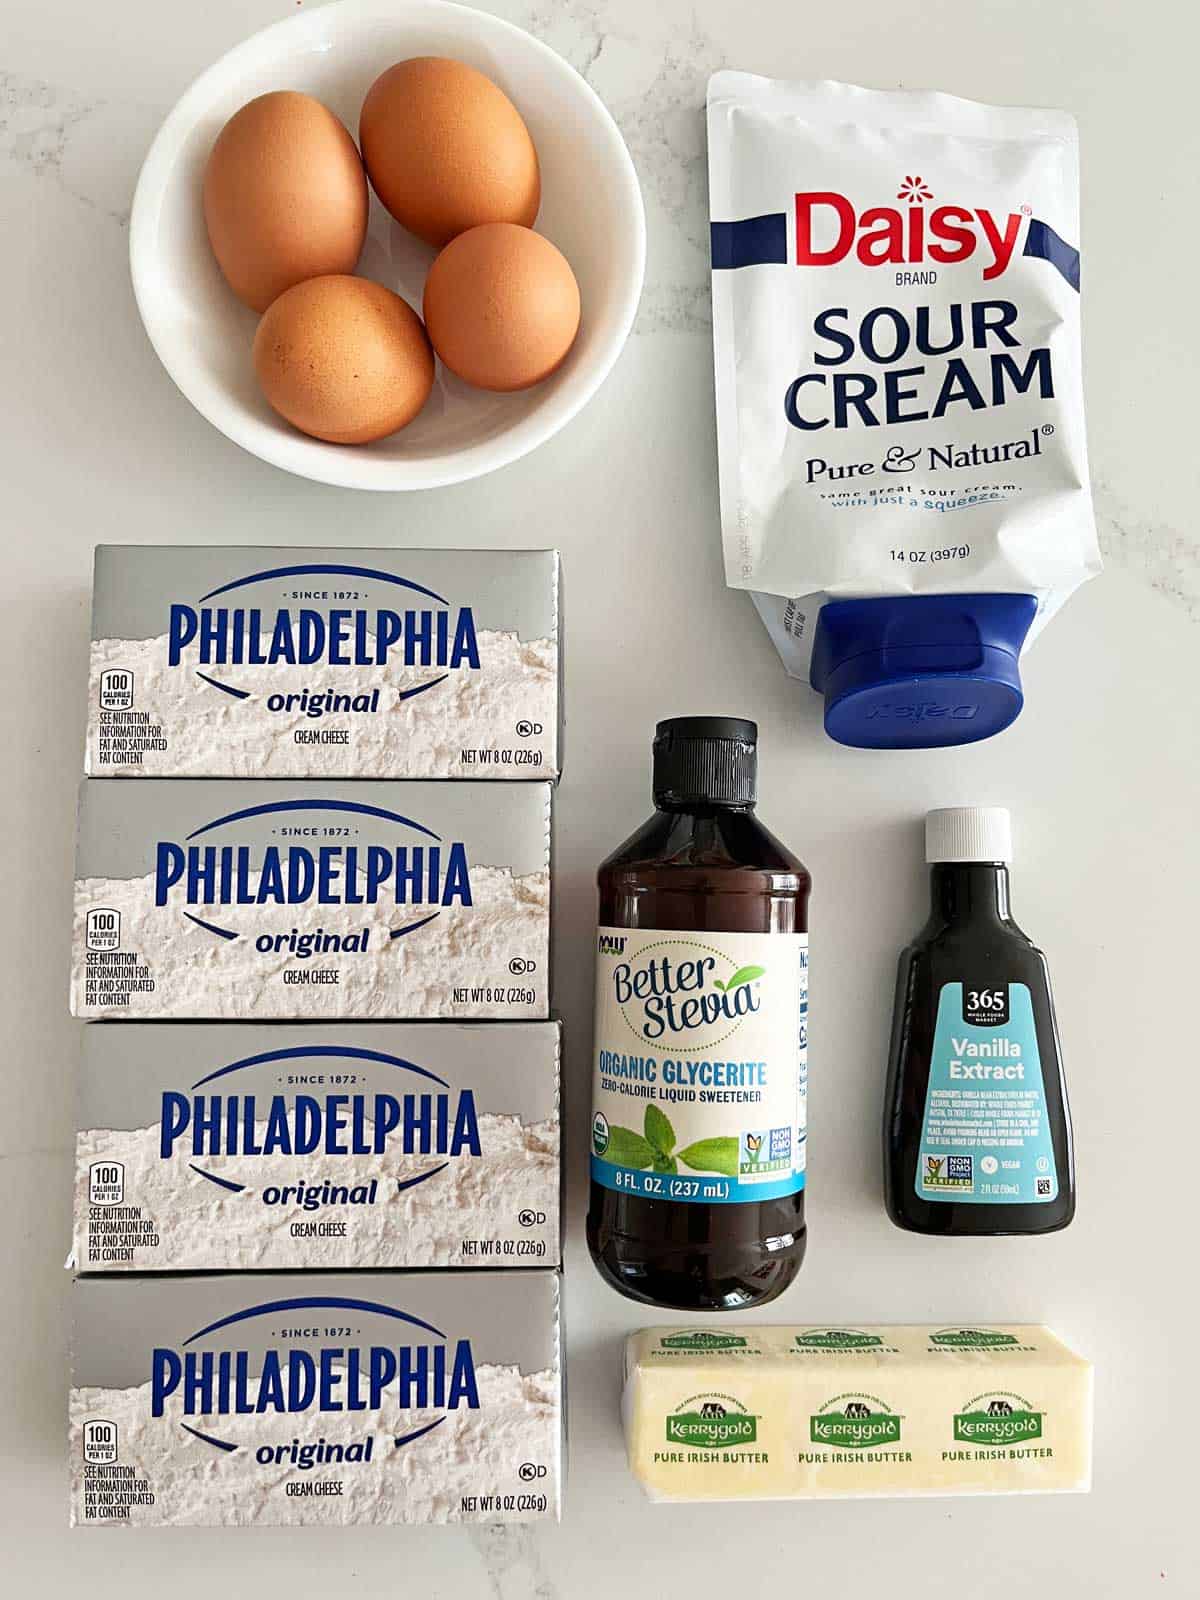
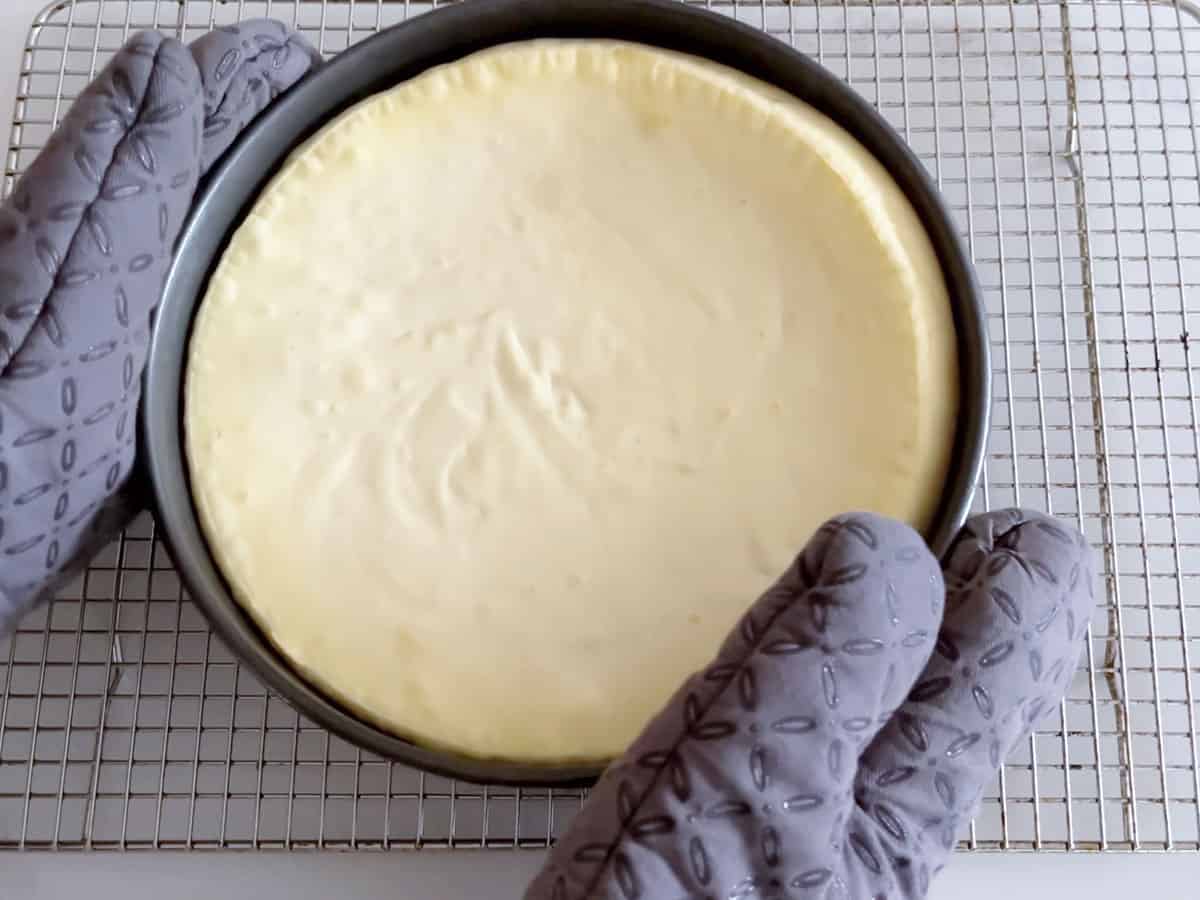
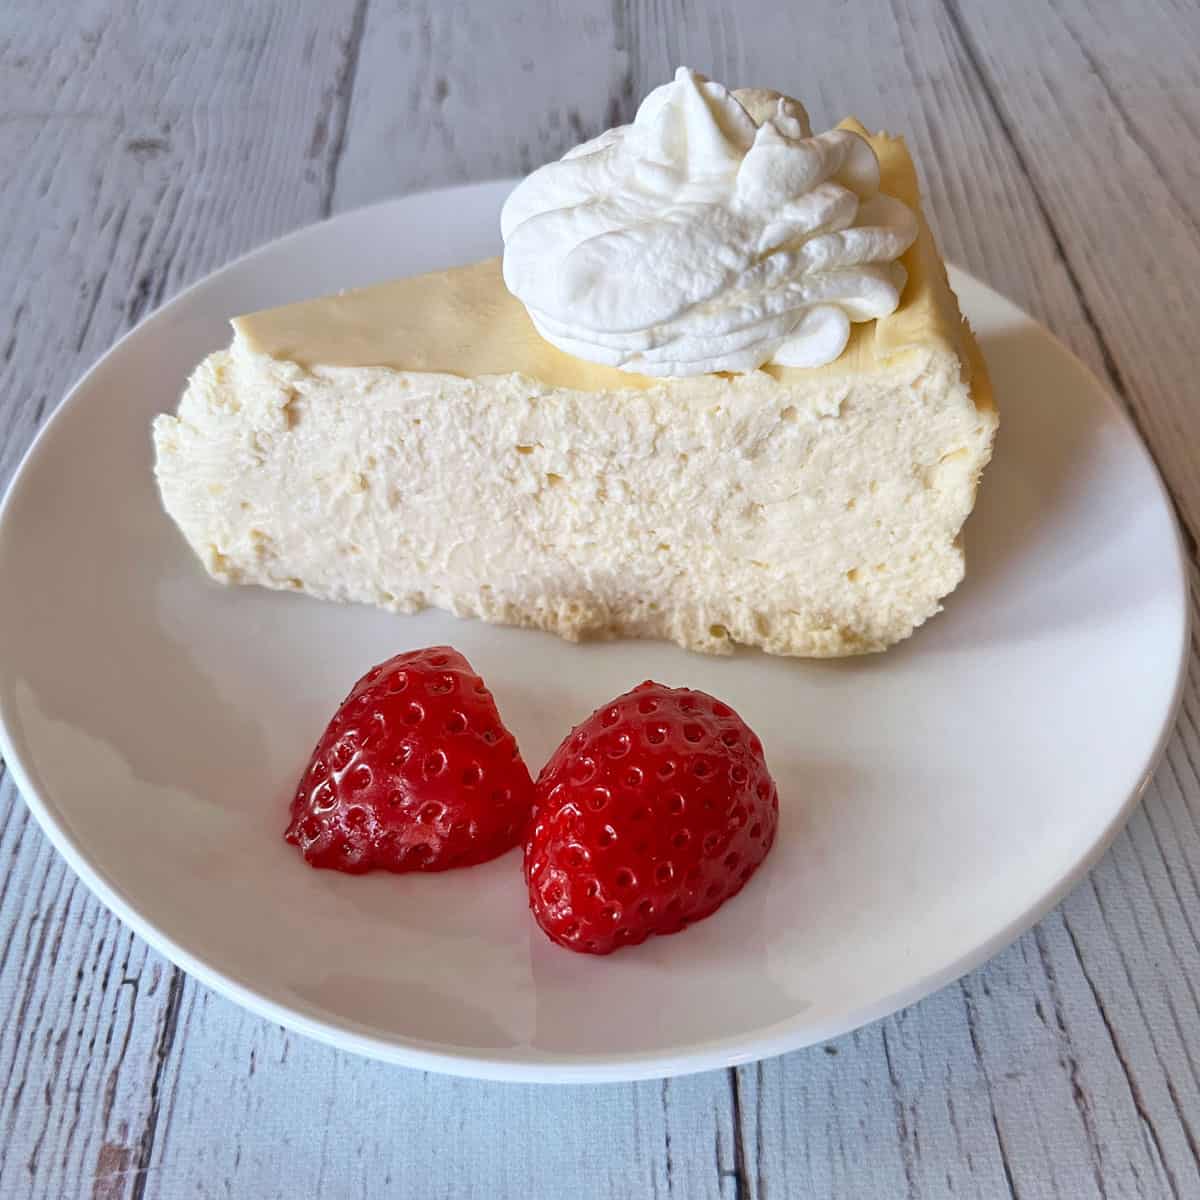
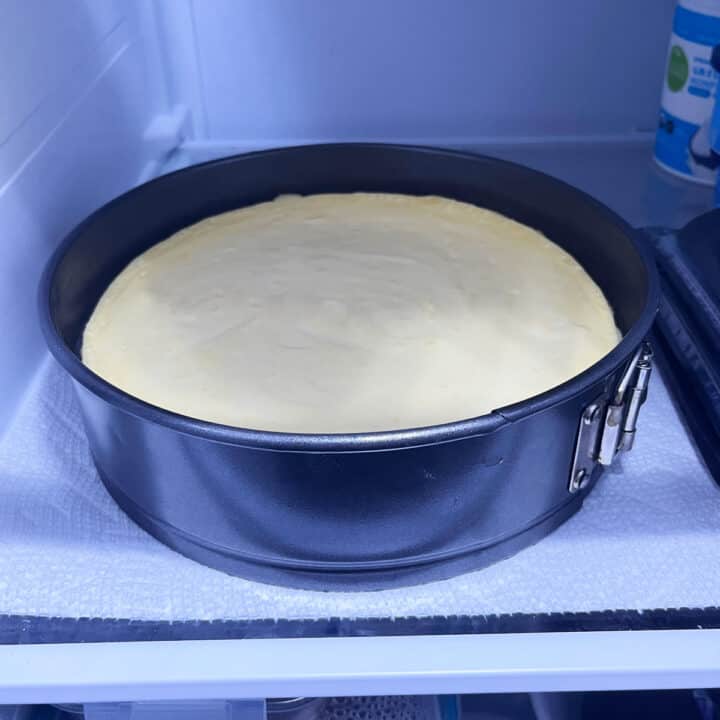
- Cream cheese: Use blocks, not tubs of cream cheese spread. The cream cheese should be at room temperature. I use full-fat cream cheese, but my dad, who bakes this cake often, uses reduced-fat cream cheese and says it works great. His cake is shown in the photo below.
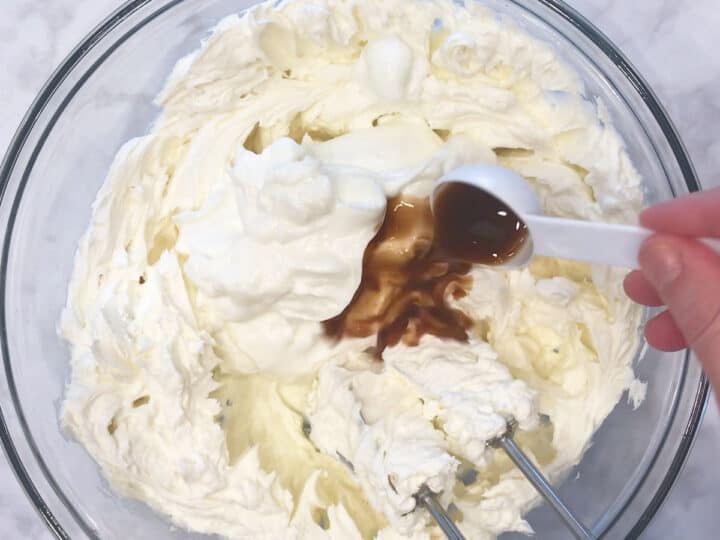
- Vanilla extract: I add quite a bit-a full tablespoon. So, it's a good idea to use a high-quality pure vanilla extract. If you like coconut, you can substitute coconut extract for vanilla extract. Use just one teaspoon, not a full tablespoon. It's more potent than vanilla extract. Another good flavor variation is adding a tablespoon of lemon or orange zest
- Sweetener: I use stevia glycerite. The amount I use equals 1 cup of sugar, which is the perfect level of sweetness. It's important not to over-sweeten a cheesecake. You want the tanginess of the cream cheese and sour cream to shine through.
Instructions
The detailed instructions and step-by-step photos are included in the recipe card. Here's a quick overview.
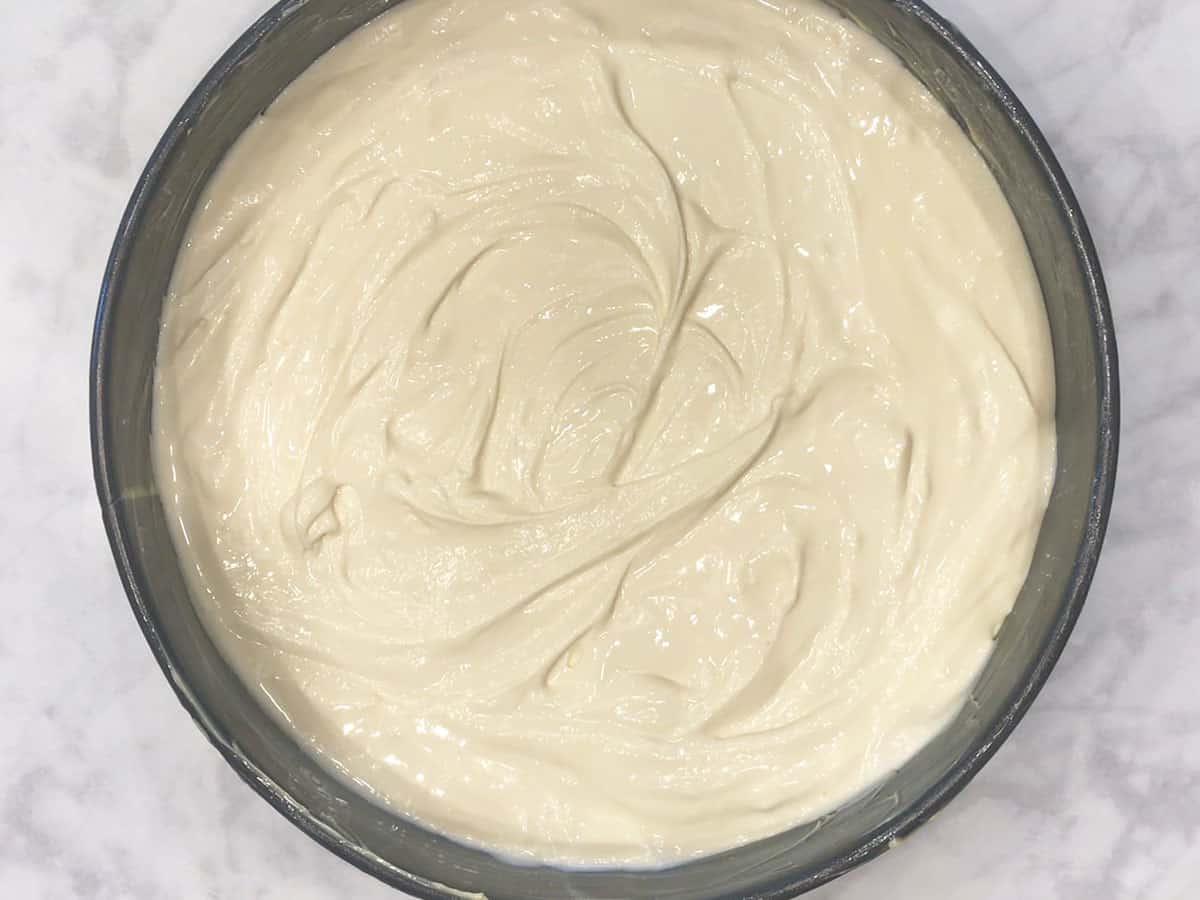
Mix the cake ingredients in a large bowl. Pour the batter into a well-greased pan and smooth the top with a spatula. Bake the cake for 50-60 minutes in a 300°F oven. It's important not to over-bake to prevent cracks.
Cool the cake for an hour in the oven (leave the door ajar), then for 2 hours on the counter, and finally in the fridge for at least 8 hours and preferably 24 hours.
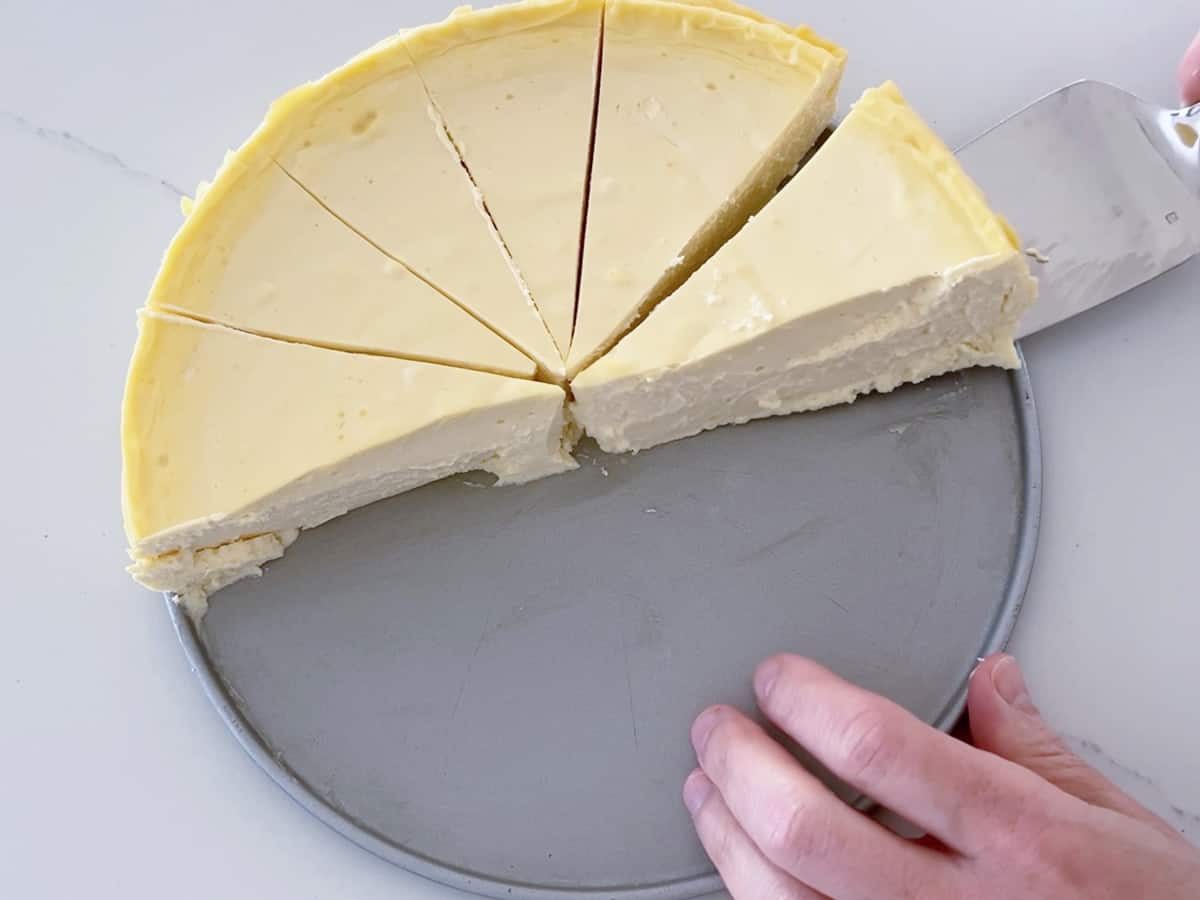
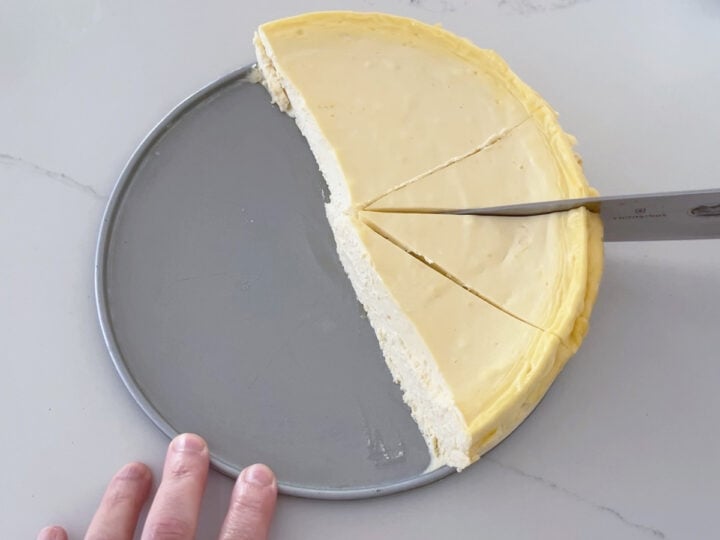
To slice the cake neatly, use a sharp, non-serrated knife. Dip the knife in hot water and wipe it before each slice. To lift each slice from the pan, slide a cake server underneath the slice and gently lift it up.
Variation: Mini Cheesecakes
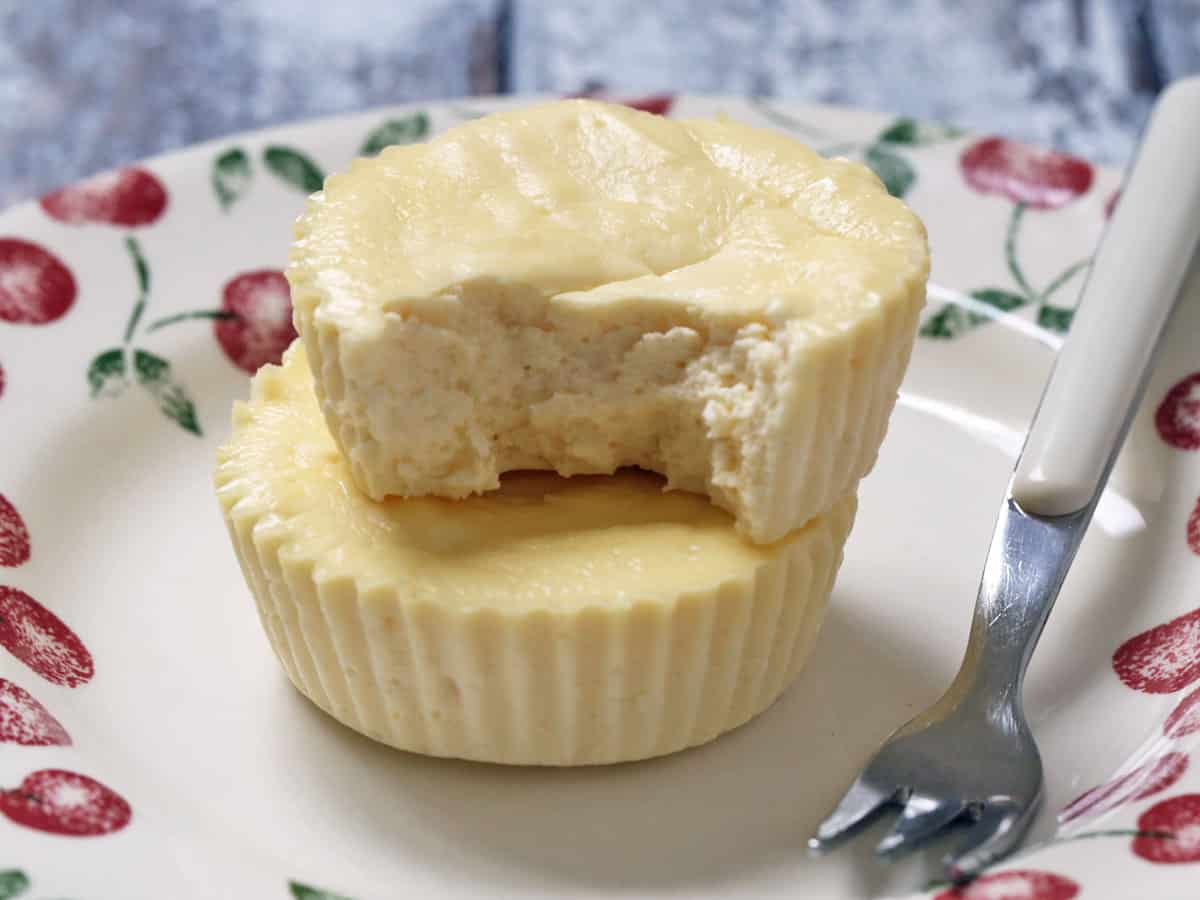
This recipe's ingredients can be used to make 24 mini cheesecakes, but I usually halve it to make 12. Bake them for about 15 minutes at 350°F and use lightly greased foil or silicone liners to prevent sticking. They stick to standard paper liners. Cool the cakes on the counter for 30 minutes and in the fridge for an hour before removing the liners and serving.

Another delicious variation is mini chocolate cheesecakes. To make them, whisk together 8 ounces of soft cream cheese, 1 teaspoon of vanilla, 1 heaping teaspoon of stevia (equals ⅓ cup of sugar), and 3 ounces of melted Lindt Excellence 70% chocolate. Whisk in one large room-temperature egg.
Divide the mixture among six greased foil or silicone cupcake liners (not standard paper liners) and bake at 300° for about 15 minutes, until the centers are just slightly jiggly. Let the cakes cool completely on the counter for about 2 hours before removing the liners and serving.
Recipe Tips
Take your time
Bake the cheesecake the day before you plan to serve it, and consider it an all-day affair: two hours to bring the ingredients to room temperature, an hour to bake, one more hour to cool the cake in the oven, and two hours to cool it outside the oven. So, six hours have passed before you can put the cake in the fridge! Then, you need to refrigerate it overnight, preferably for 24 hours. Cheesecakes are not quick recipes. Well, except for this microwave cheesecake. 🙂
Room temperature ingredients
This is a must! Some people leave the cold ingredients (eggs, cream cheese, and sour cream) out of the fridge overnight in a cool kitchen. I usually take them out of the fridge in the morning, two hours before I start mixing the cake.
Don't overmix
Overmixing aerates the batter, which can cause cracks later as the cake cools and shrinks. Beat the ingredients on the lowest speed, and add the eggs last, as they can add the most air to the batter.
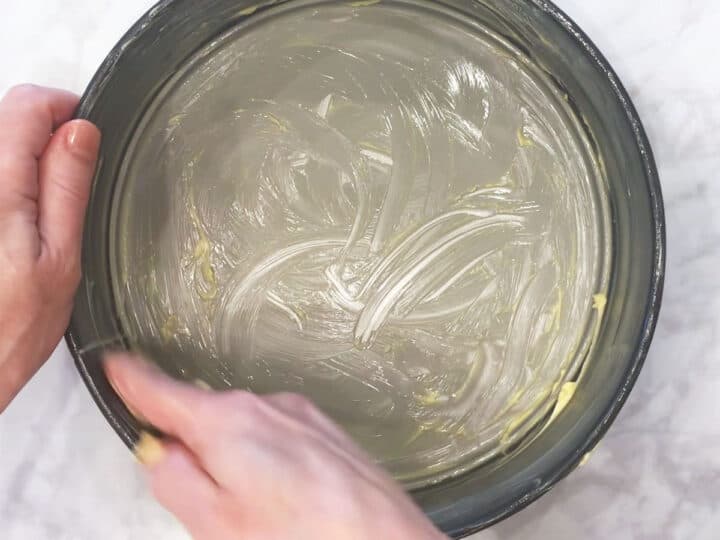
Grease the pan well
This will allow the cake's edges to pull away from the pan as the cake cools and shrinks. The image below shows the generous amount of butter I use when greasing the pan.

Don't open the oven door
Use the oven light to peek and judge, as best you can, whether the cake is ready. It's better to slightly underbake than to overbake. An overbaked cheesecake will definitely crack and will be dry and mealy instead of creamy. If your oven is accurate, as a general rule, you can turn it off after 50 minutes. However, if the center of the cake appears to be liquid, add 10 more minutes.
Recipe FAQs
A water pan, placed on the bottom oven rack, is better than a water bath (placing the springform pan in a larger pan with hot water) because it eliminates the risk of water seeping into the cake while still keeping the oven moist, helping prevent the cake from drying out and cracking.
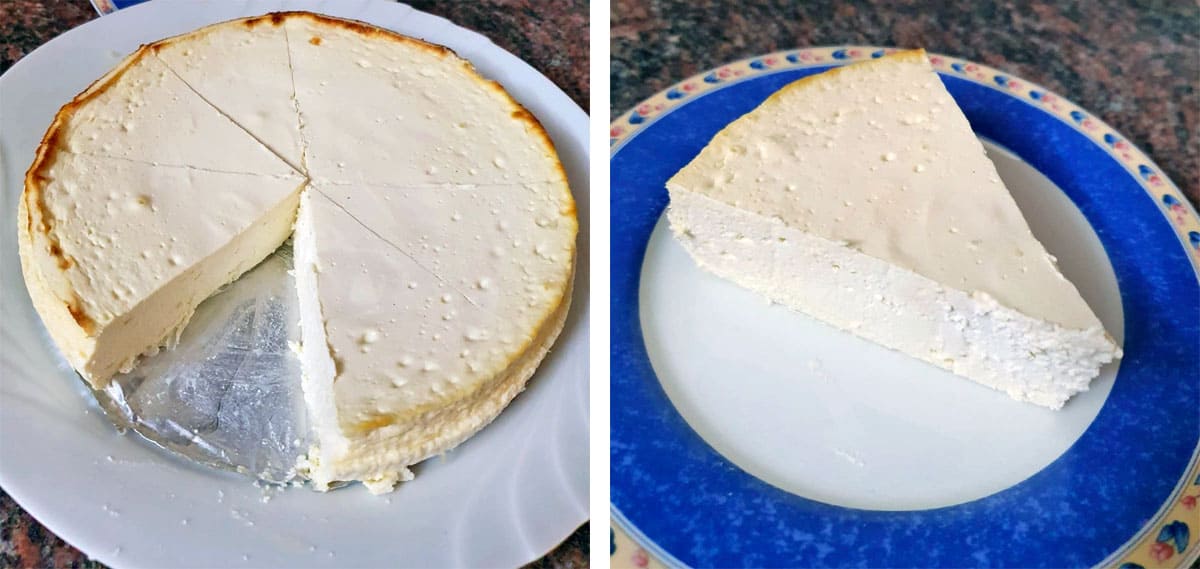
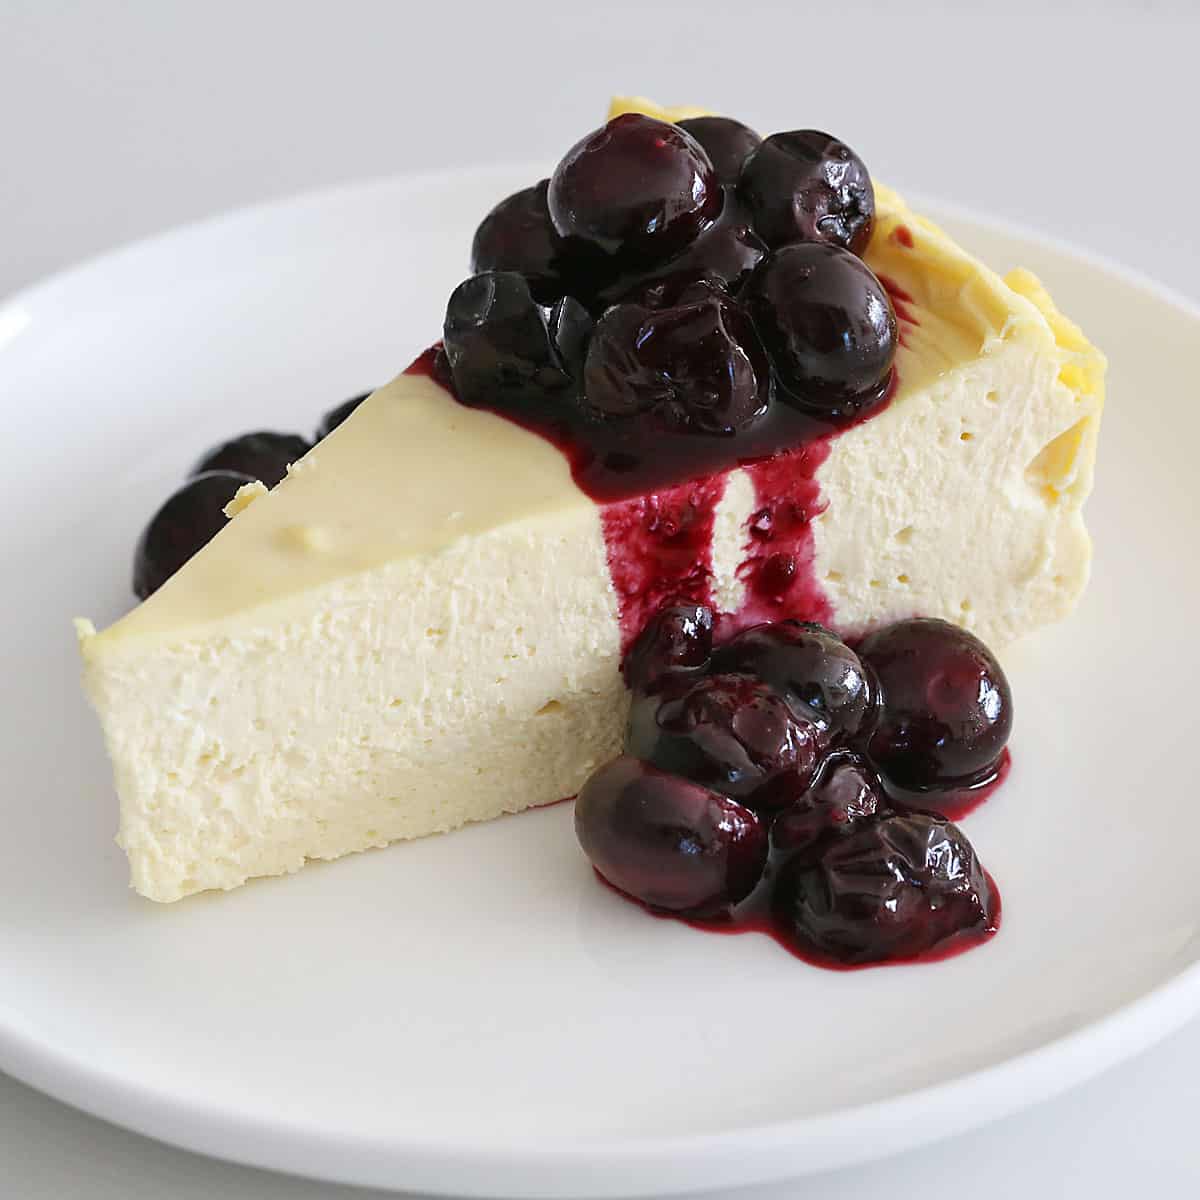
Cracks in cheesecakes are common. Despite my best efforts, sometimes my cakes end up with cracks like the one shown in the image below, with a deep crack in the middle. The best way to deal with cracks in a keto cheesecake is to disguise them with a topping. You can use sliced berries or go for more elaborate toppings such as strawberry compote or blueberry compote.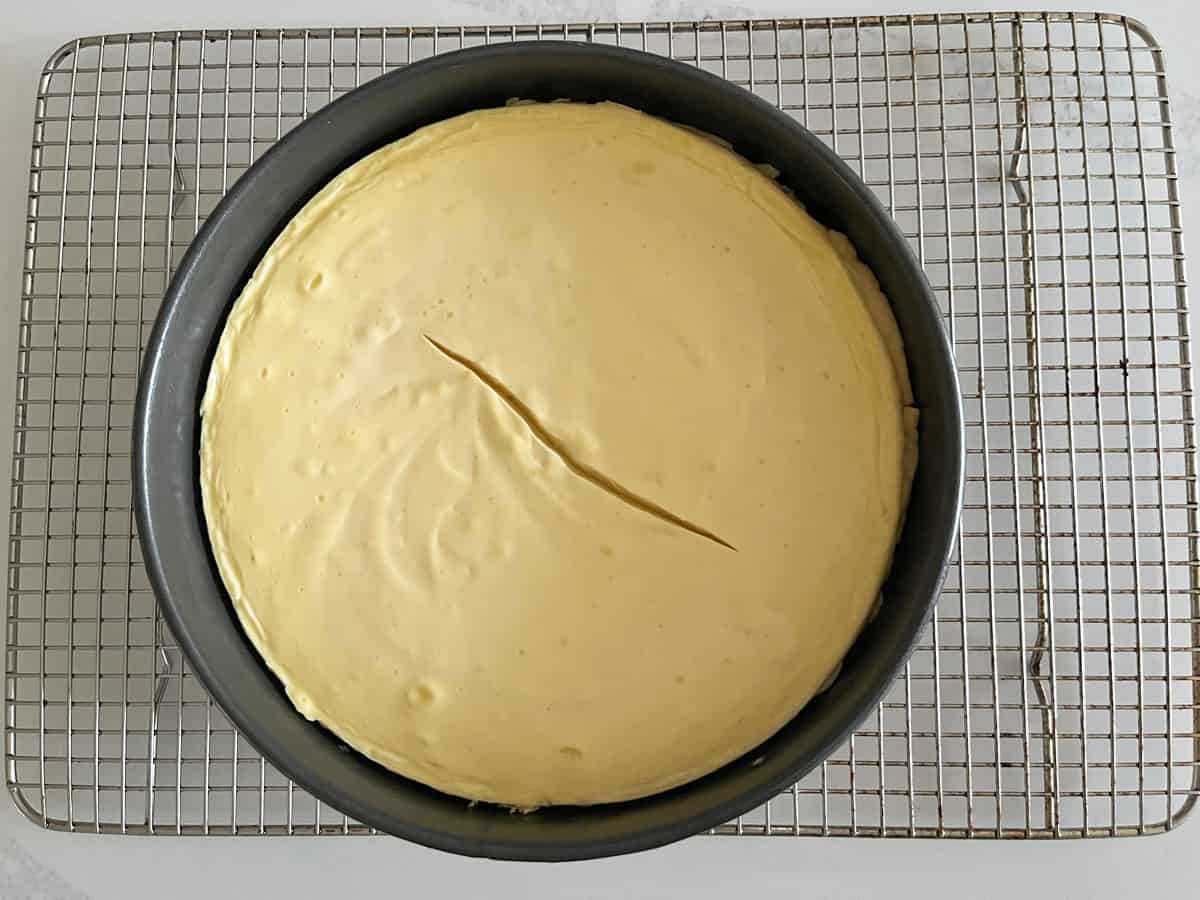
Bake it low and slow, at 300°F. Turn the oven off as soon as the cake is done: the edges should be slightly puffed, but the center should still be sunken, though not liquid. If you wait until the center is fully baked, the cake will end up overbaked and will crack.
No. A cheesecake must cool and settle for quite a while before it can be enjoyed. Let it cool in the oven with its door ajar for a full hour. Then, on a cooling rack out of the oven for two more hours. After the cake has cooled to room temperature, refrigerate it overnight, ideally for 24 hours.
Serving Suggestions
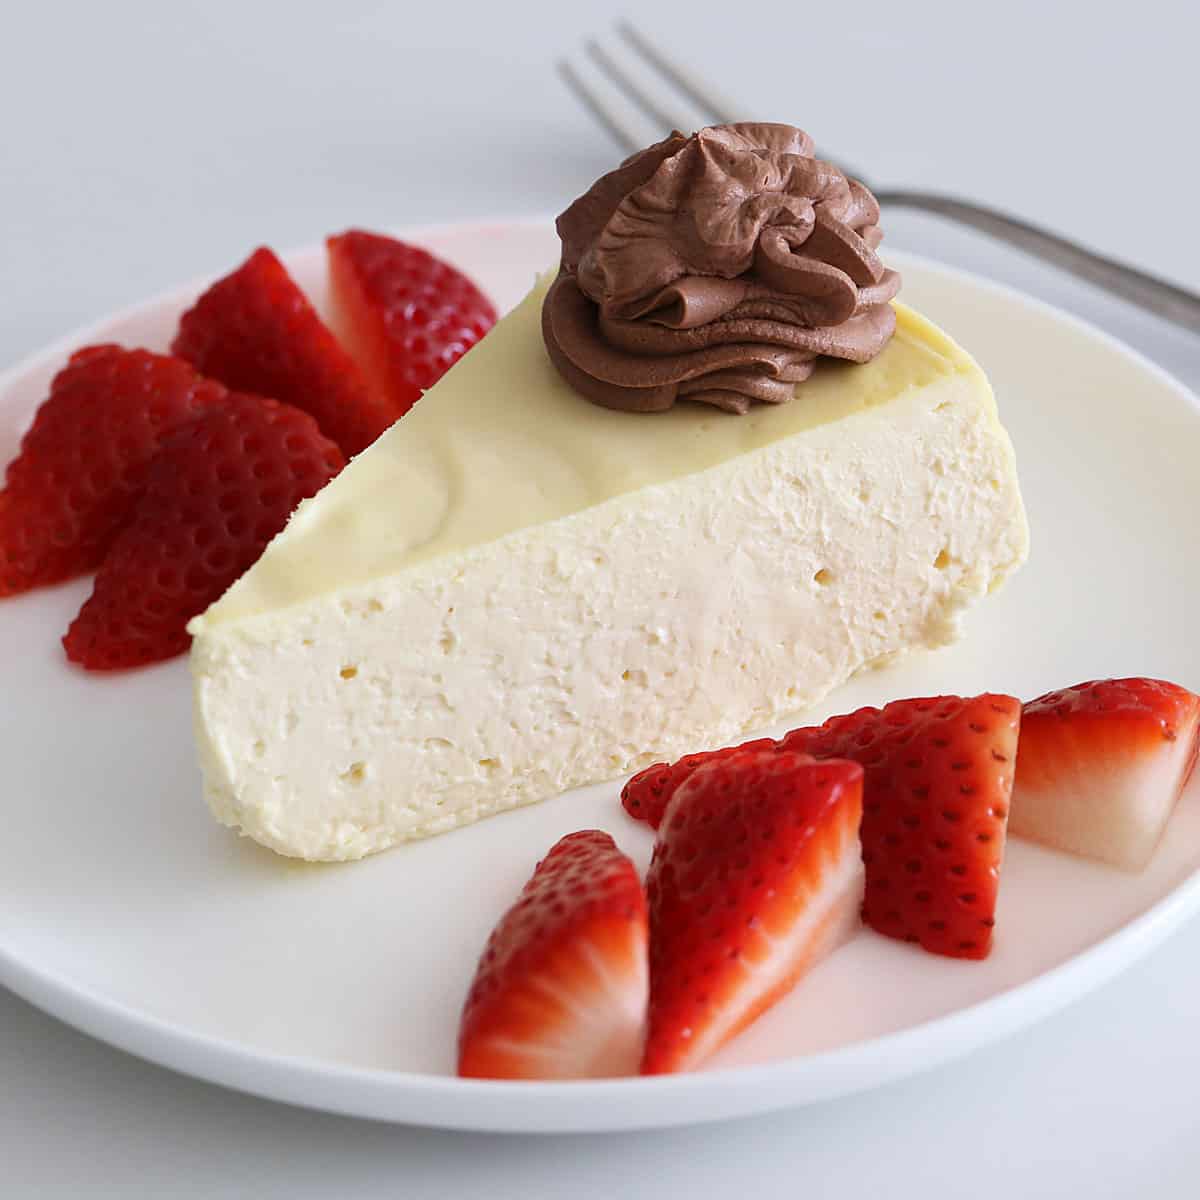
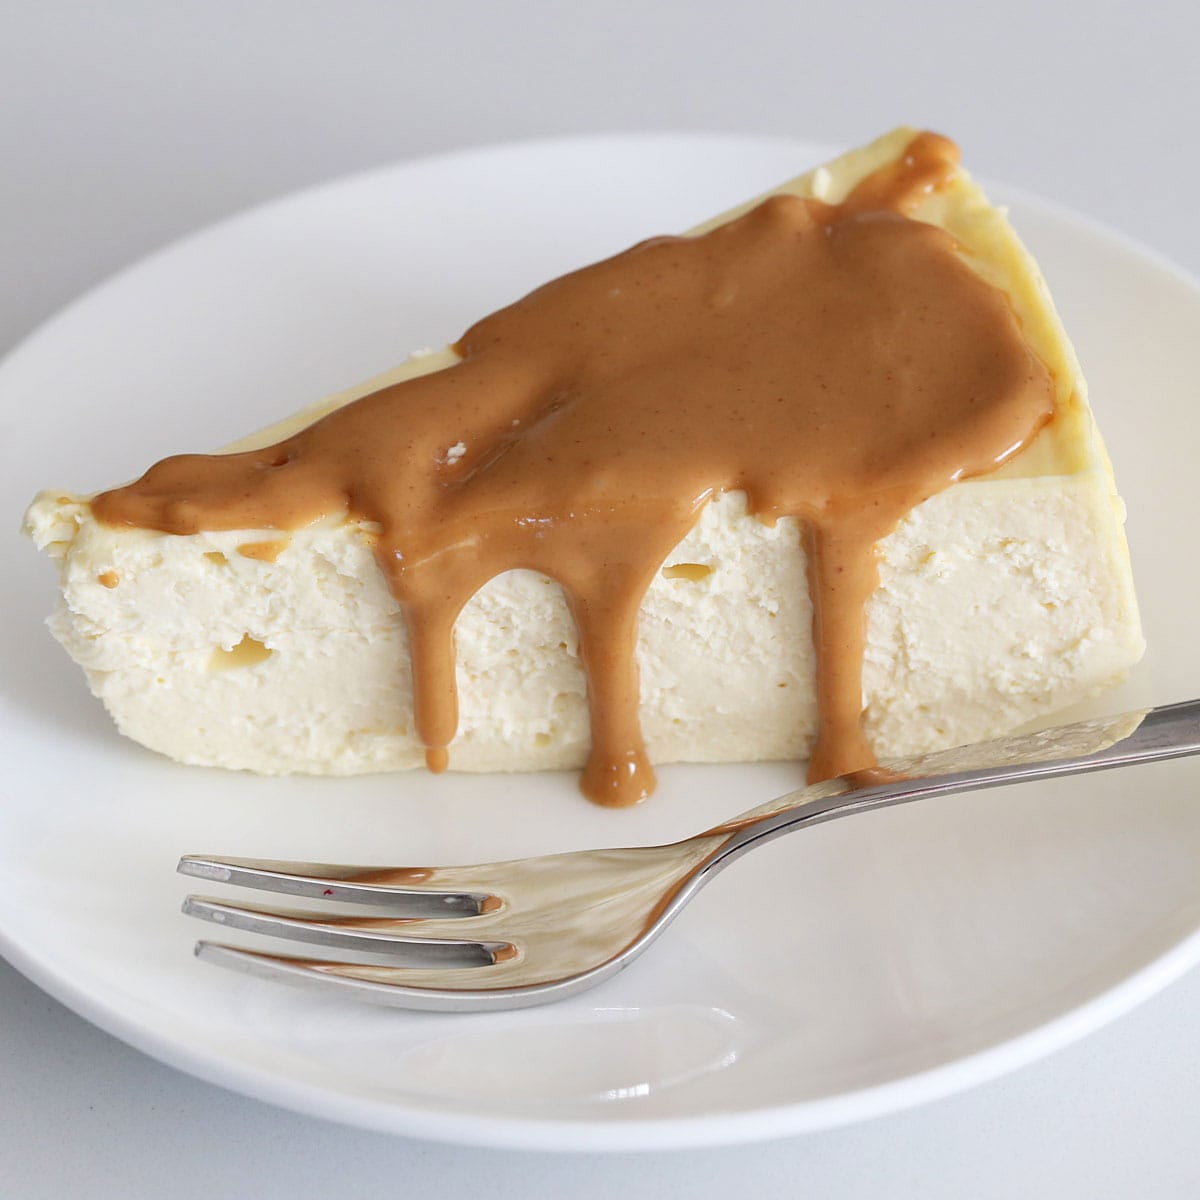
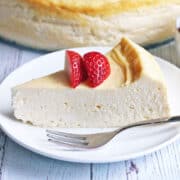
I love this cake just as it is and don't usually bother with toppings. But if you'd like, you can top it with several different toppings, as shown in the images below.
Storage Instructions
I usually slice the entire cake once it's been refrigerated overnight and store the slices in airtight containers in the fridge, as shown in the image below.
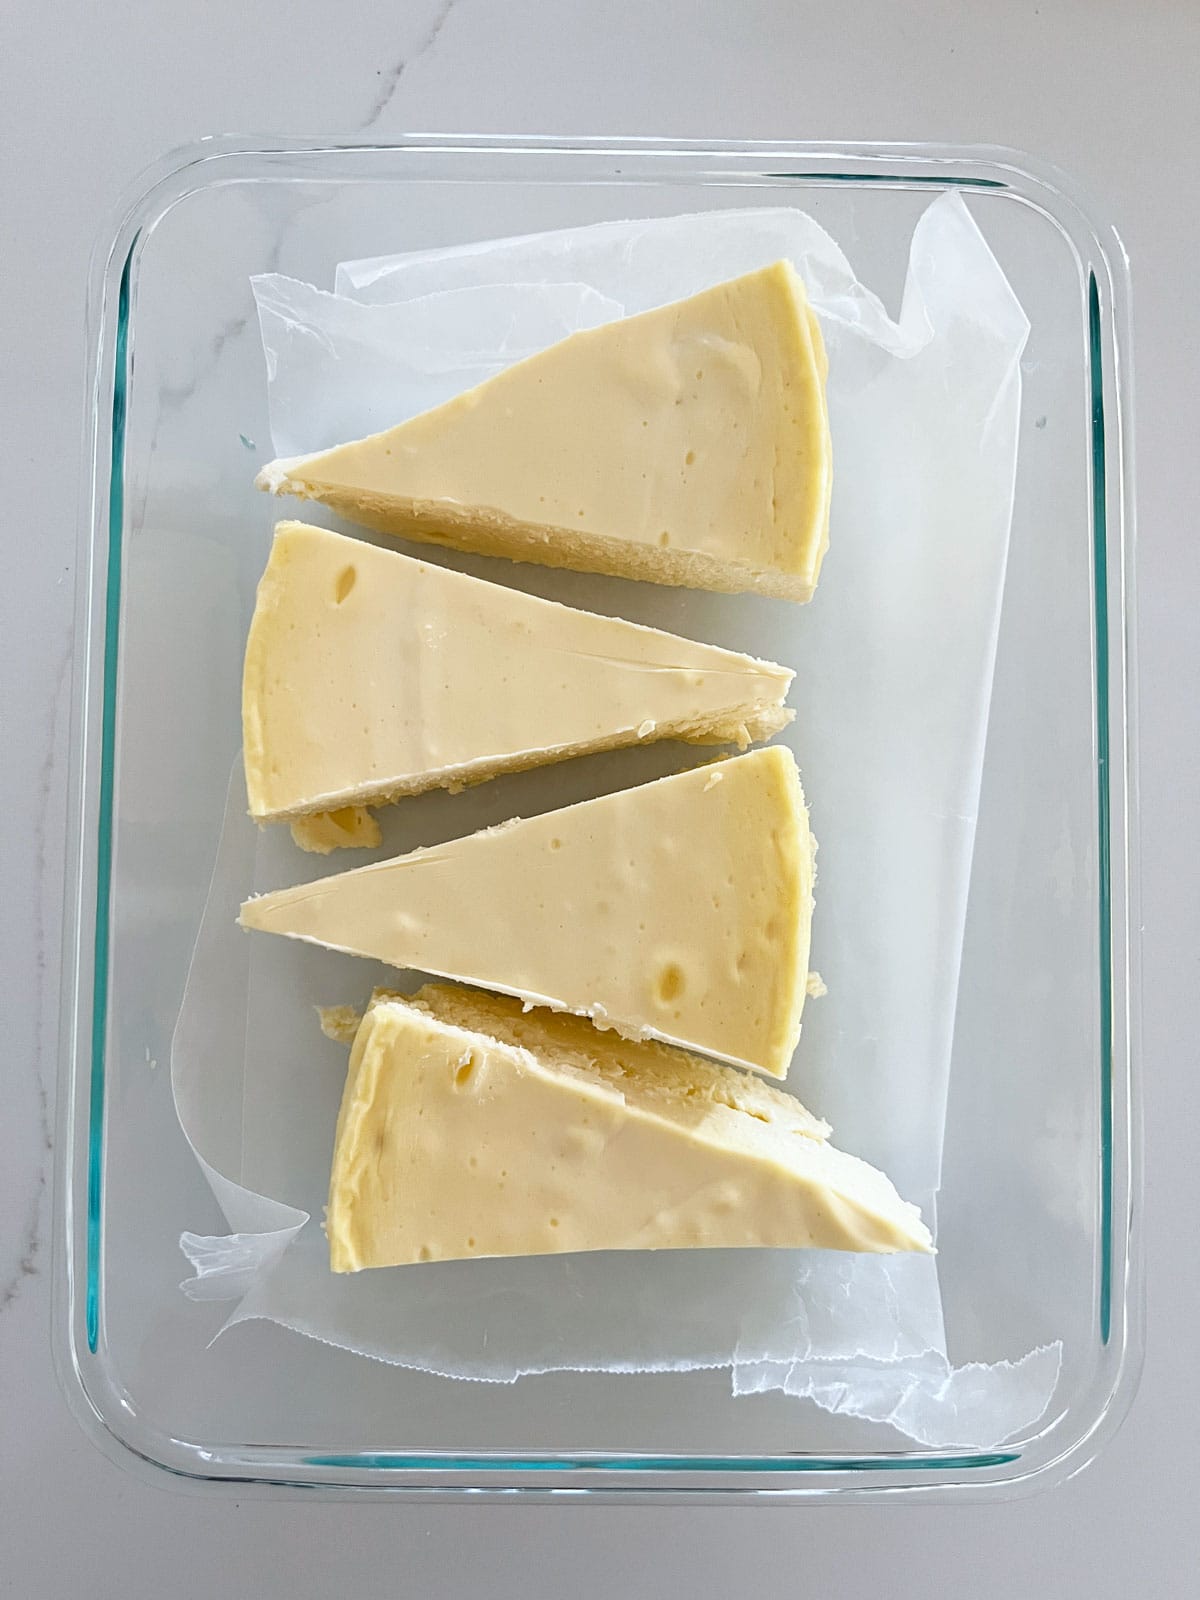
We're a family of four, and this cake is incredible, so we go through the slices quickly. But it should last in the fridge for up to 5 days.
You can also freeze this cake. It should be completely cool before you freeze it. Remove the springform pan's outer rim, leaving the cake on the bottom of the pan. Wrap the cake in two layers of plastic wrap, then add a layer of foil.
You can keep the cake in the freezer for up to three months. Thaw it in the fridge overnight. Remove it to the counter 30 minutes before slicing, and carefully remove the foil and plastic wrap.
Recipe Card
Creamy Keto Cheesecake
Video
Ingredients
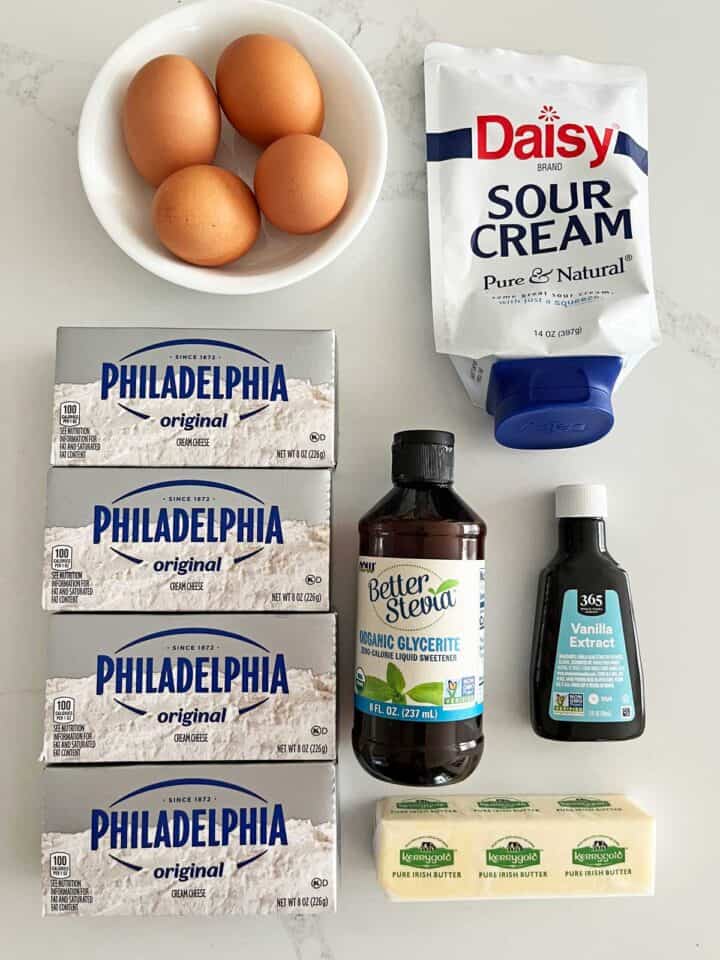
- 32 ounces cream cheese - at room temperature
- 1 ½ cups sour cream - 12 ounces, at room temperature
- 4 large eggs - at room temperature
- 1 tablespoon soft unsalted butter - for the pan
- 1 tablespoon pure vanilla extract
- 1 tablespoon stevia glycerite - equals 1 cup of sugar
Instructions
Prepare the ingredients and pan:
- Remove the refrigerated ingredients (cream cheese, sour cream, and eggs) from the fridge at least 2 hours before you start mixing. They must be at room temperature.32 ounces cream cheese, 1 ½ cups sour cream, 4 large eggs

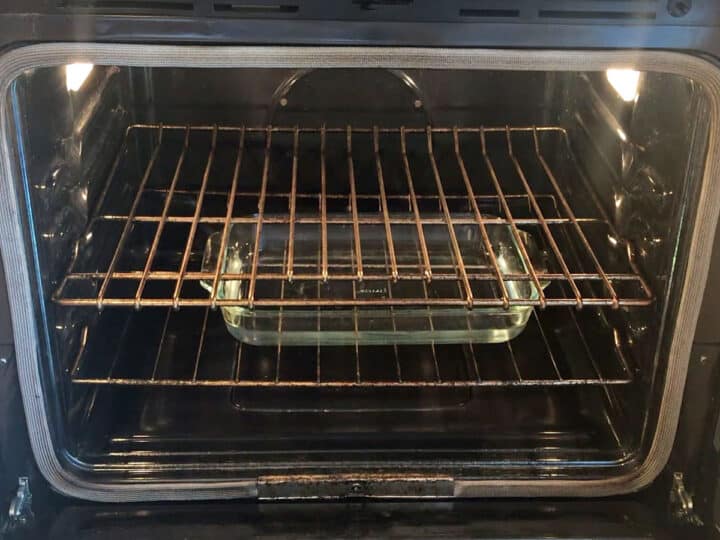
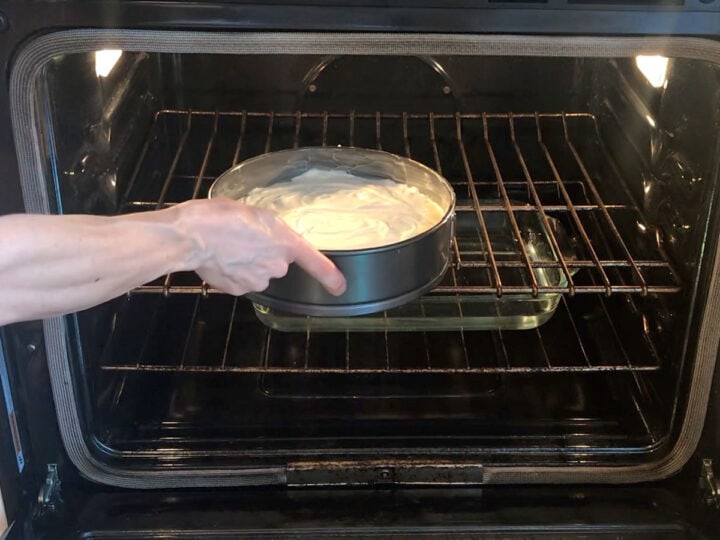
- Preheat your oven to 300°F. Boil a kettle of water, let the water slightly cool, then carefully pour it into a 9 X 13-inch pan. Place the pan with the water on the lowest oven rack.

- Generously butter the sides and bottom of a 9-inch nonstick springform pan.1 tablespoon soft unsalted butter
Mix the batter:
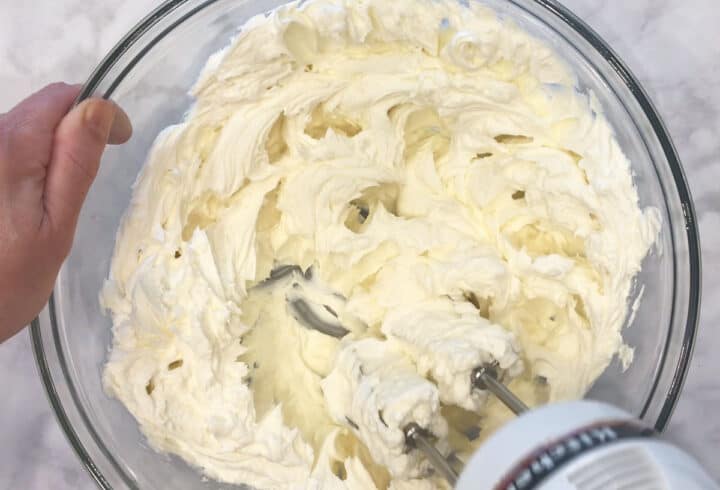
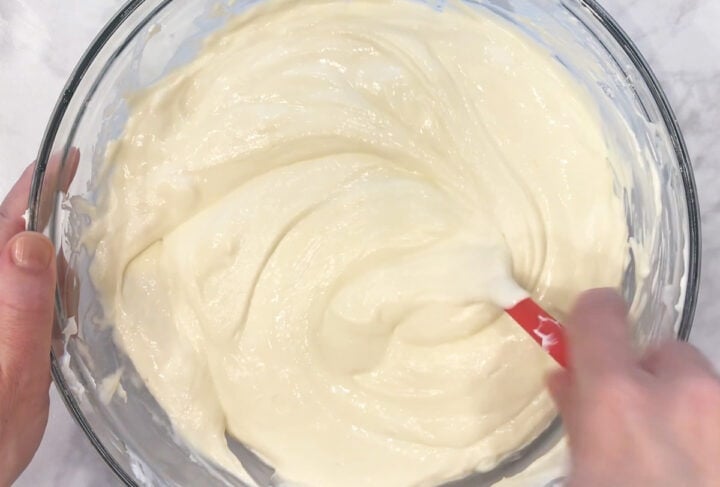
- Place the cream cheese in a large bowl. Using a handheld mixer set to the lowest speed, lightly beat the cream cheese until smooth.

- Add the sour cream (if it's at room temperature, there will be some liquid separation - add the liquid, too), vanilla, and stevia. Mix just until incorporated. Don't over-mix.1 tablespoon pure vanilla extract, 1 tablespoon stevia glycerite
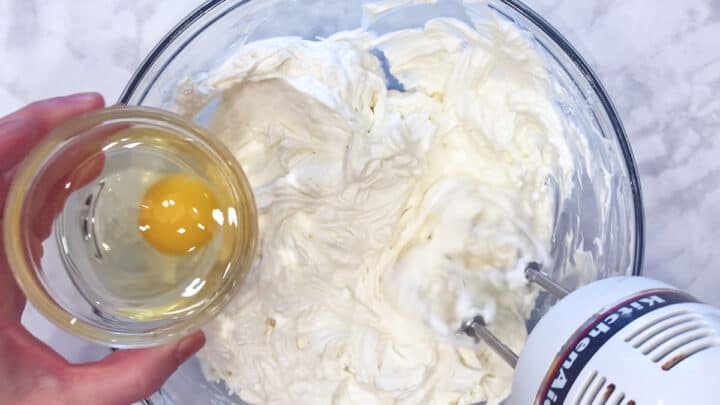
- Add the eggs one by one, beating after each addition. Only beat for as long as it takes to get a smooth batter, then stop. Don't over-mix.

- Give the batter a final stir using a rubber spatula to ensure the ingredients are well incorporated.

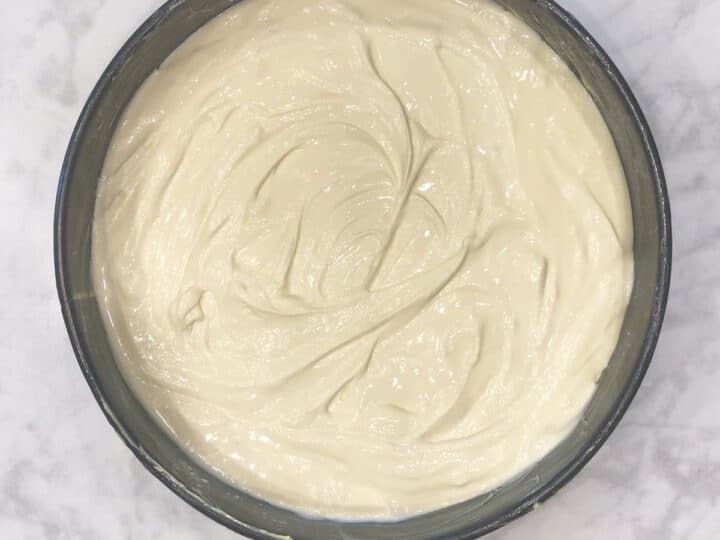
- Pour the batter into the prepared pan. Smooth the top out with a spatula. Gently tap the pan on the counter to remove air.
Bake the cake:
- Place the pan in the oven, on the middle rack, above the water pan. Bake without opening the oven door until the edges are slightly puffed and the center is still sunken but not liquid, 50-60 minutes. If you shake the pan gently, the center will jiggle at this point.
Cool the cake:
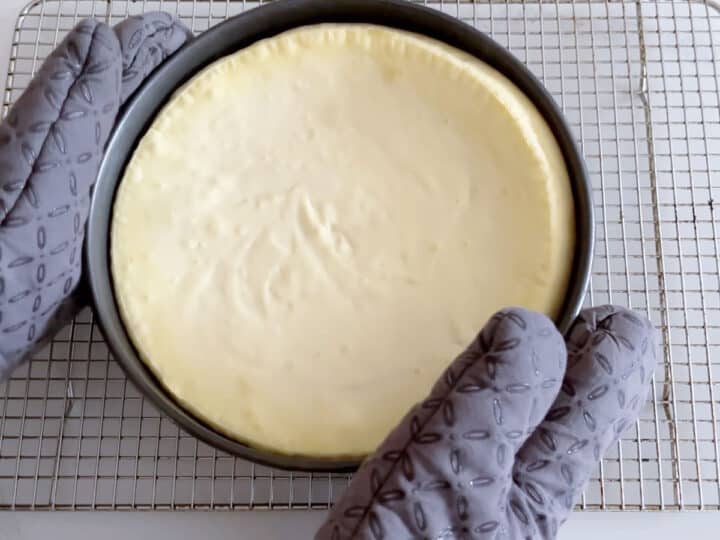
- Turn the oven off and leave the cake in the oven with the oven door ajar for one hour. Remove the cake from the oven and place the pan on a cooling rack. If the cake's edges haven't pulled away from the pan, gently run a knife around the rim to loosen the cake's edges from the pan. This helps prevent cracks from forming as the cake cools. Let the cake cool completely in the pan on the counter for about 2 more hours.
- When the cake is completely cool, transfer it, still in the pan, to the fridge. Refrigerate the cake uncovered (to prevent condensation) for at least 8 hours, preferably 24 hours, before slicing and serving.

Slice the cake:
- Remove the cheesecake from the fridge 30 minutes before serving it. Gently remove the springform pan's outer rim. Use a very sharp, non-serrated knife for cutting the cake. To prevent messy slices, dip your knife in hot water and wipe it clean before each cut. Use a cake server to gently lift the slices from the pan.
Top the cake:
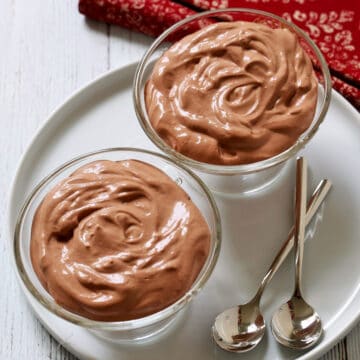
- This is optional, but you can top the cake with several toppings, including blueberry compote (as shown in the photo), strawberry compote, and keto chocolate mousse.

Notes
- Please use blocks of cream cheese, not tubs of cream cheese spread.
- Cracks are common. You can use toppings such as blueberry compote or keto whipped cream to hide them.
- Sweetness is a personal preference. Use these amounts as a guide and adjust to taste.
- Storage instructions: Place the leftover slices in sealed containers in the fridge for up to 5 days. Line the containers with wax or parchment paper. Remove the leftovers from the fridge one hour before serving them (30 minutes if your house is warm). Cheesecake is best at room temperature.
- Freezing instructions: The cake should be completely cool before you freeze it. Remove the springform pan's outer rim, leaving the cake on the bottom of the pan. Wrap the cake in two layers of plastic wrap, then add a layer of foil. You can keep the cake in the freezer for up to three months. Thaw it in the fridge overnight. Remove it to the counter an hour before slicing it, and carefully remove the foil and plastic wrap.
Nutrition per Serving
Save this Recipe!
We will also add you to our weekly newsletter. Unsubscribe anytime. See healthyrecipesblogs.com/privacy/ to learn how we use your email.
Disclaimers
Most recipes are low-carb and gluten-free, but some are not. Recommended products are not guaranteed to be gluten-free. Nutrition info is approximate - please verify it. The carb count excludes non-nutritive sweeteners. Please read these Terms of Use before using any of my recipes.

Haley says
So creamy and good. Thank you!
Vered DeLeeuw says
You're very welcome, Haley! Glad you liked it and appreciate the review.
Lisa Green says
The texture is good but it's not sweet enough.
Vered DeLeeuw says
Hey Lisa,
Glad you liked the texture! It's easy to increase the sweetener. If one likes their baked goods very sweet, they can add an additional teaspoon of stevia, which would equal about 1/3 cup of sugar.
Lee Watt says
This works perfectly and I like it even more than traditional cheesecake. Not over sweet and perfect texture. I added lemon rind if one lemon. It’s delicious. Thank you so much. Lee
Vered DeLeeuw says
You're very welcome, Lee! I'm so glad you enjoyed this cake. Lemon rind is a wonderful addition.
Joleen says
what about a peppermint cheesecake? how much peppermint extract would you recommend?!
Vered DeLeeuw says
Hi Joleen,
Yum! I would add a teaspoon of peppermint extract.
Tim Traurig says
I’m a cheesecake lover. Never made one myself, and this was probably one of the best cheesecakes I’ve ever eaten. And I’m not just saying that cause I made it. Used Monk Fruit granulated sugar and Greek yogurt and sour cream 50/50. So so good! I also made a crust out of pork rind crumbles, butter, cinnamon and Monk Fruit granulated sugar.
Vered DeLeeuw says
I'm so glad you enjoyed this cheesecake, Tim! Thank you for sharing your delicious tweaks.
Manette says
That is an incredible idea for an easy churro crust for the cheesecake. Thank you.