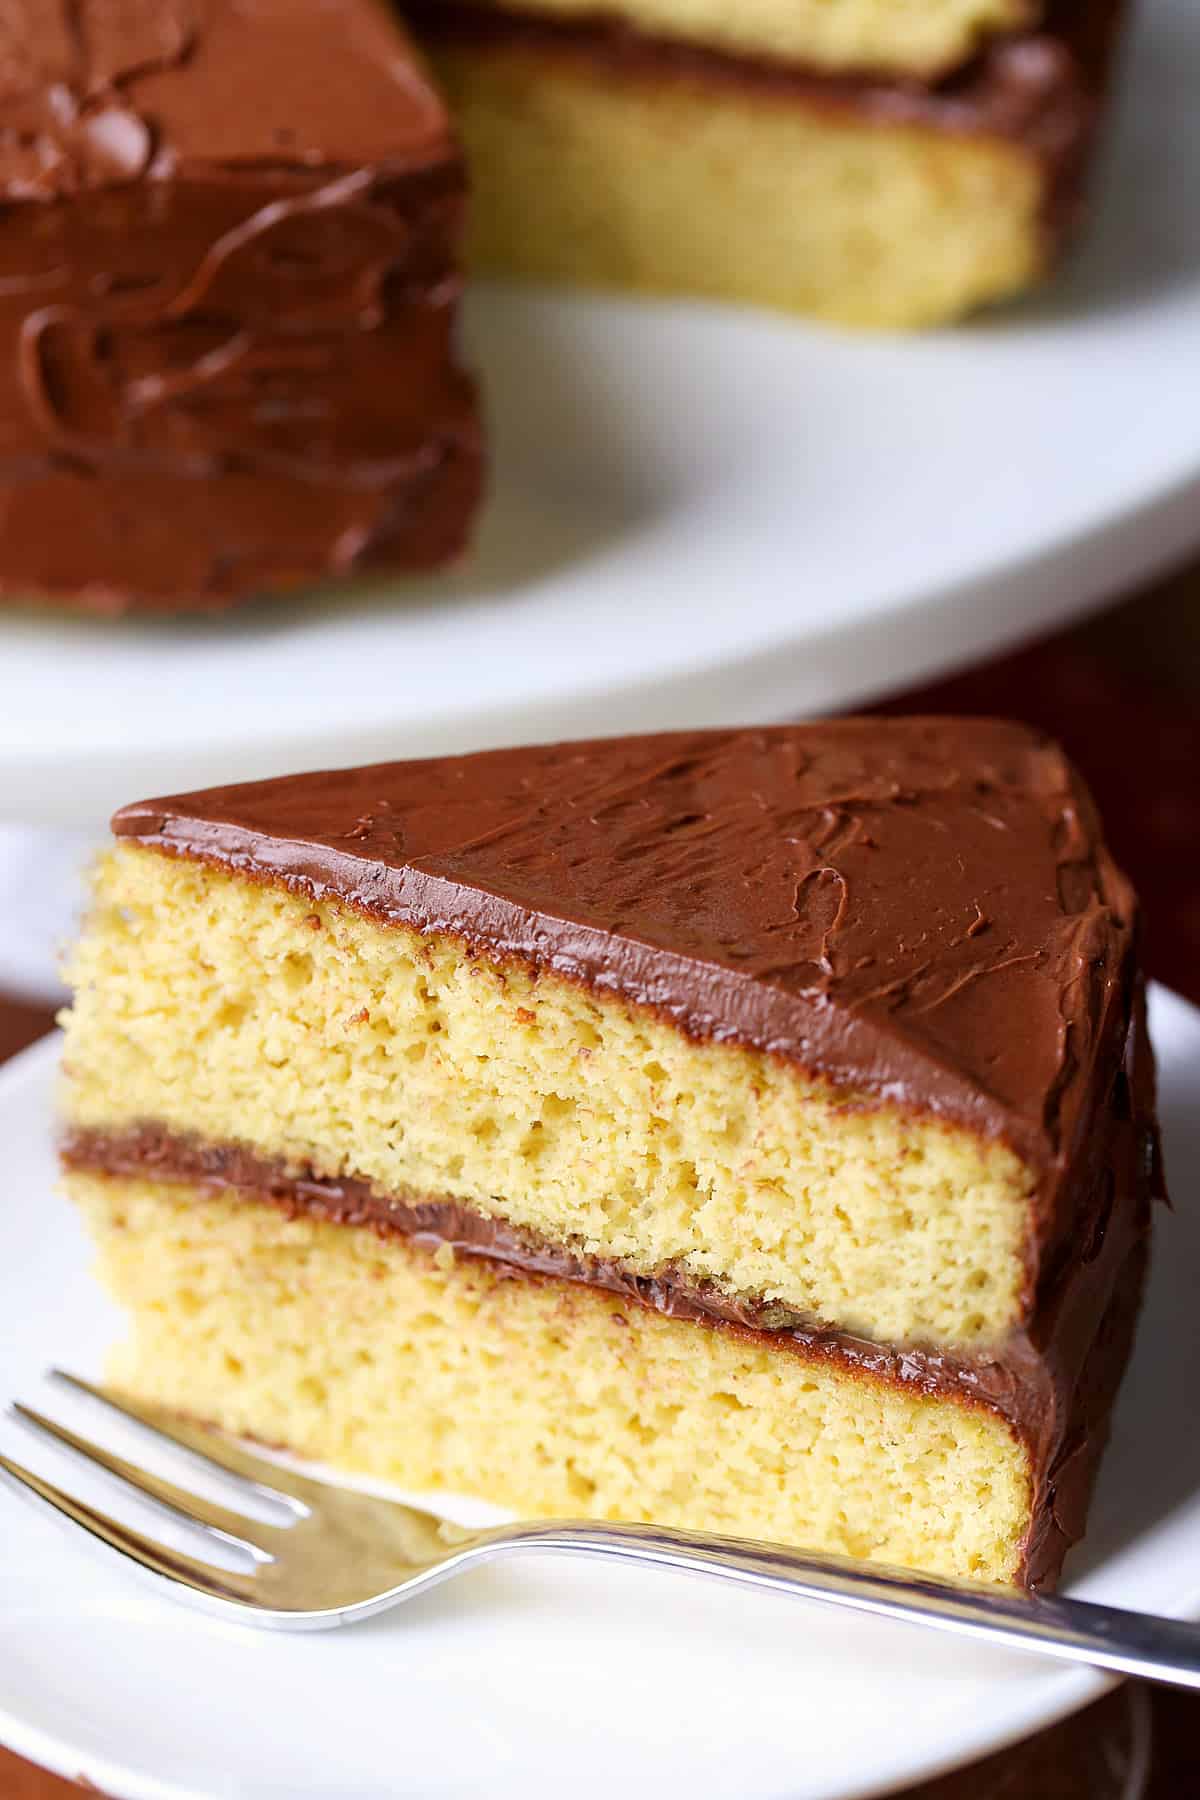
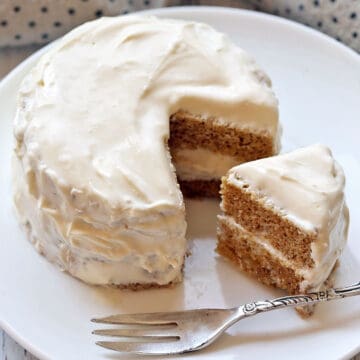
This keto birthday cake is made with almond flour. The fluffy yellow cake is frosted with a rich chocolate frosting. A keto version of a beloved childhood cake, it's incredibly close to the real thing!
I made this keto birthday cake for my husband after he told me about one of his fondest childhood memories, a yellow layer cake with chocolate frosting his grandma used to make. It's a sweet victory for low-carb baking that you can use almond flour and a sugar-free sweetener to produce a cake that is so fluffy, flavorful, and festive!
Ingredients
See the recipe card for exact measurements. Here are my comments on the ingredients.
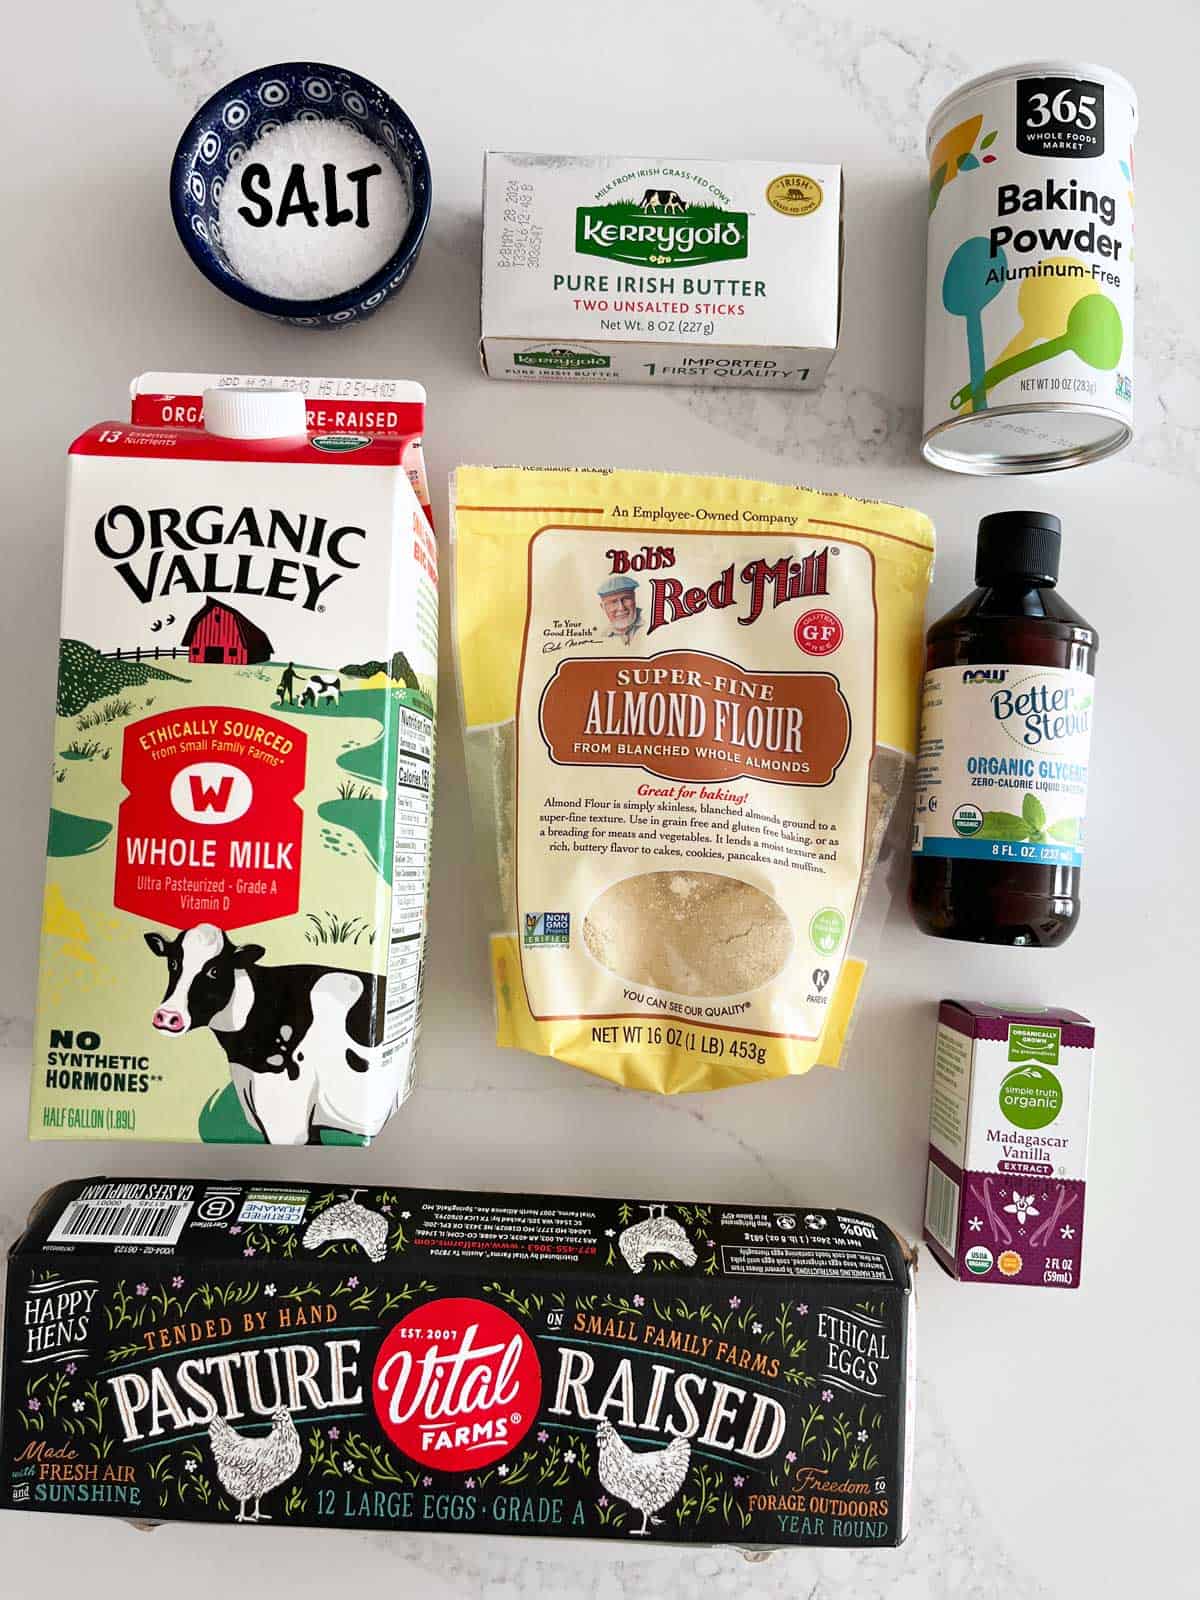
For the Cake
- Whole milk: You can substitute heavy cream for the milk.
- Sweetener: I use stevia glycerite. I like this formulation because it nearly eliminates the typical stevia aftertaste.
- Almond flour: I use superfine almond flour. I don't recommend using a coarse almond meal.
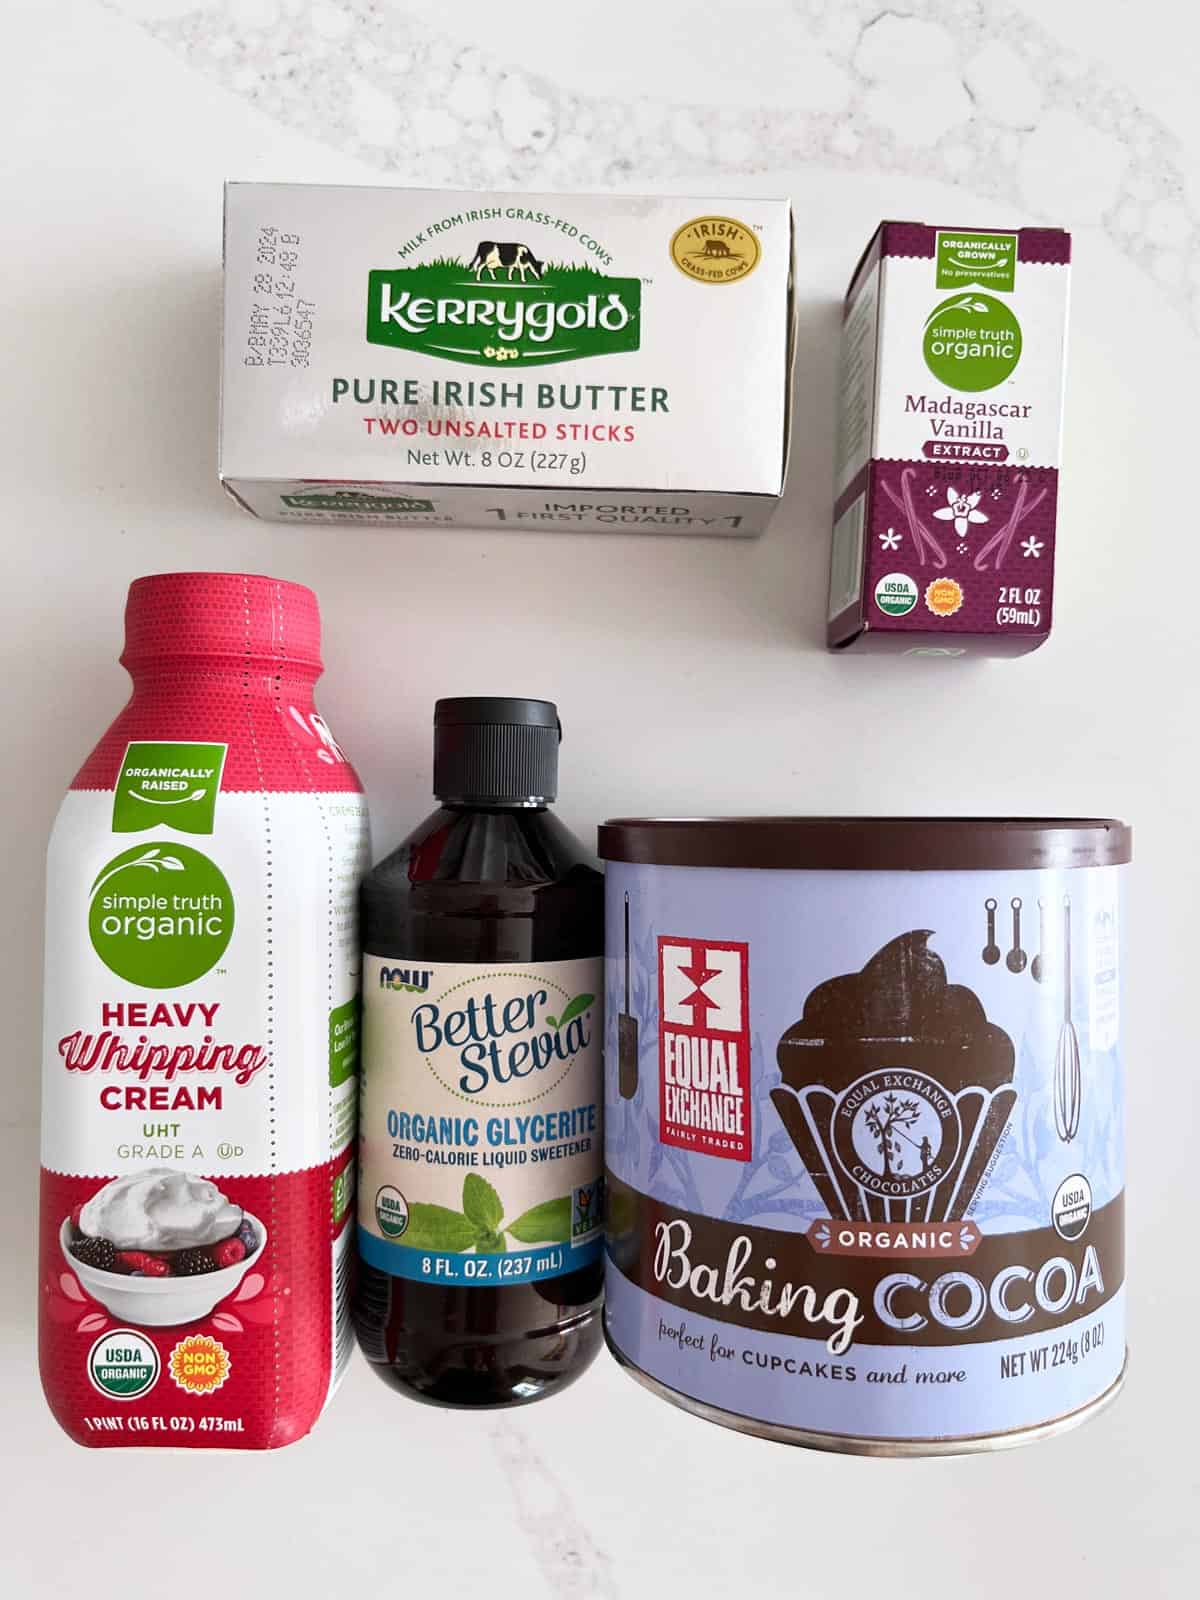
For the Frosting
- Butter: Please use unsalted butter.
- Heavy cream: The frosting should be made with cream. Milk won't work here.
- Cocoa powder: I recommend using Dutch-processed cocoa powder (cocoa treated with alkali). It's milder and less acidic than natural cacao powder.
Variations
- When I make this cake for my husband, I use rum extract instead of vanilla extract because his grandma used to add rum to her cake. Another good option is almond extract.
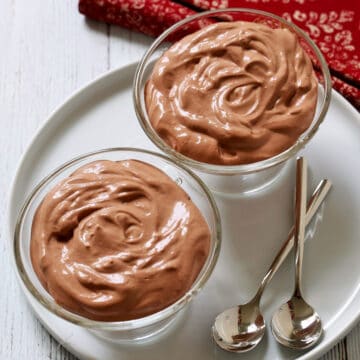
- If you'd like to try lighter frosting, this keto chocolate whipped cream is amazing.
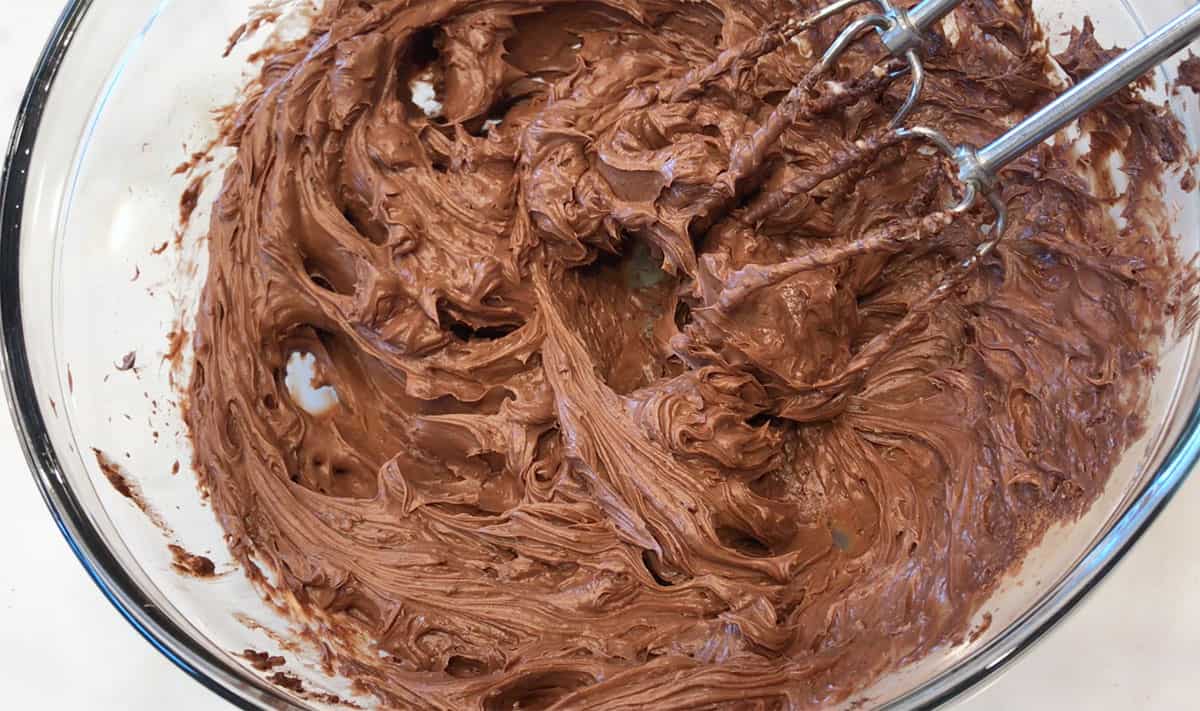
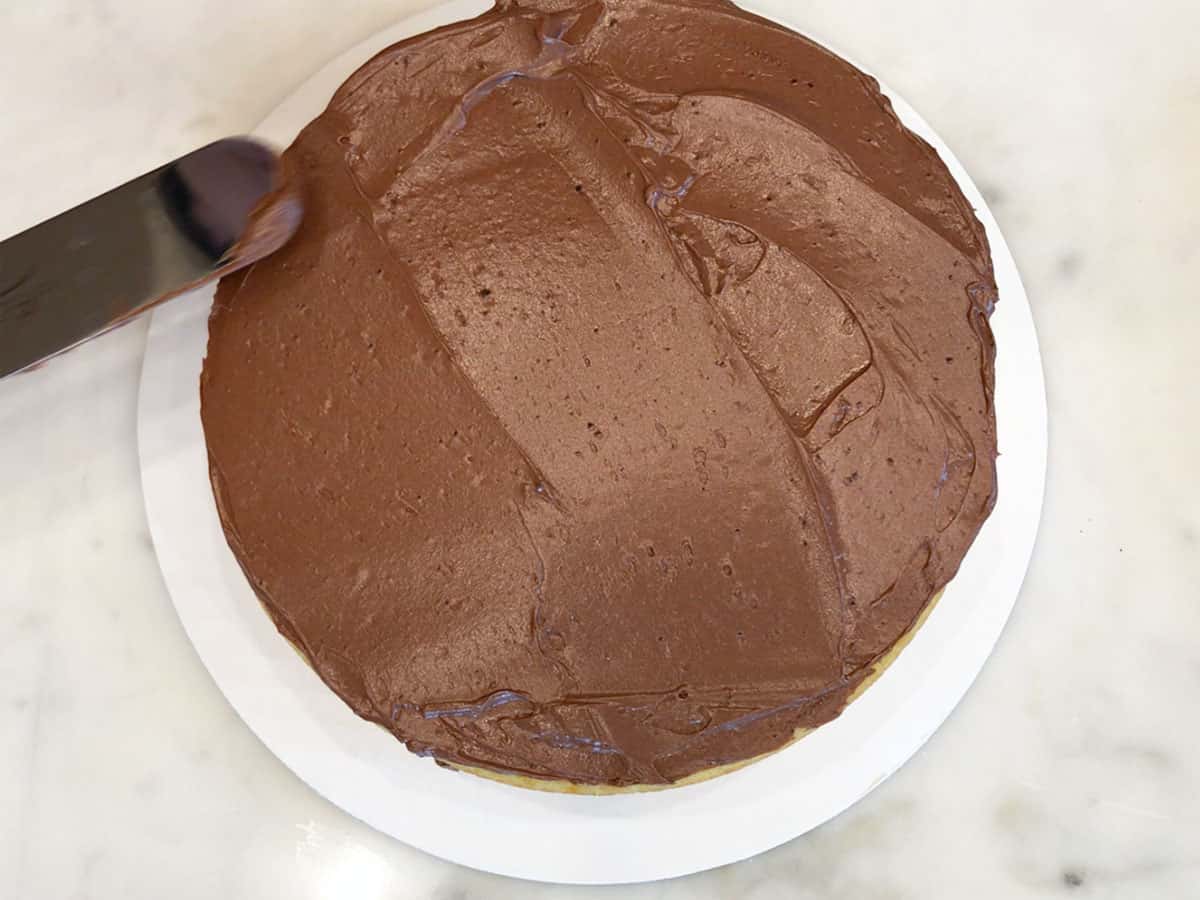
- You can use a granulated sweetener in the cake batter, adding 1-2 tablespoons of milk or cream if the batter seems too thick. For the frosting, you can use one cup of powdered sweetener instead of the stevia and increase the heavy cream until you achieve a good frosting consistency. Start by adding ¼ cup of heavy cream. The photo below shows what the frosting should look like.
Instructions
The detailed instructions and step-by-step photos are included in the recipe card. Here's a quick overview.
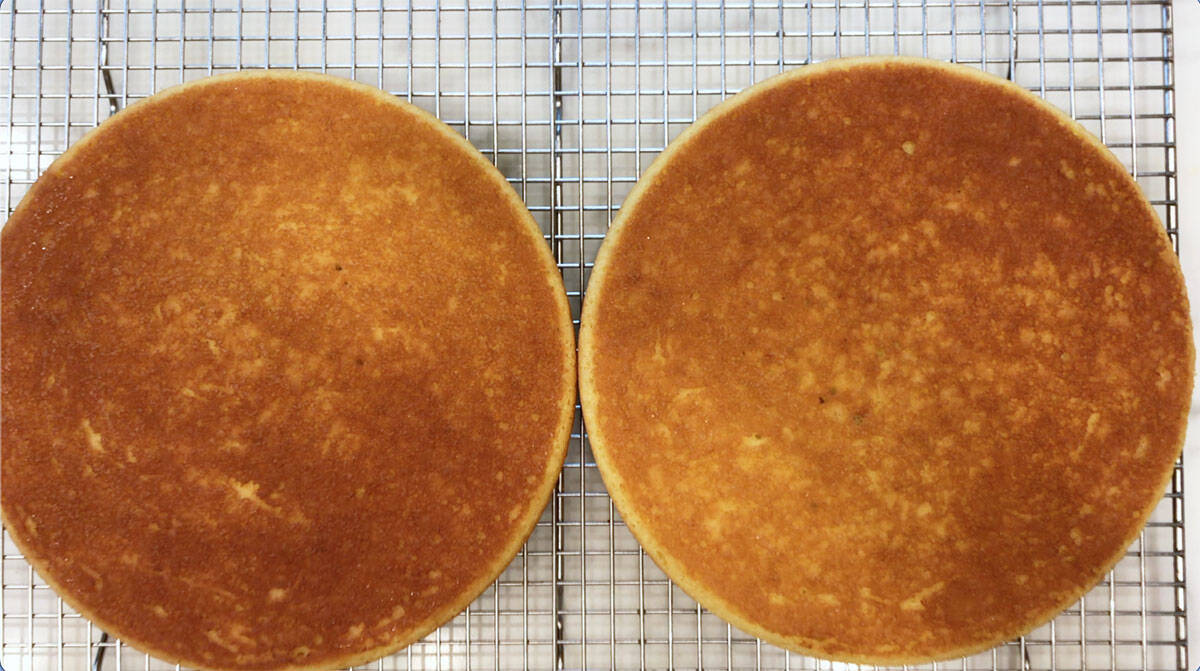
Mix the cake ingredients by hand in one bowl (easy!). Divide the mixture evenly between two nonstick cake pans and bake it into two cakes. These will be the layers of your birthday cake.
Allow the cakes to cool completely. Quickly whip up the chocolate frosting. When the cake layers are cool, assemble the cake: Place one cake on a platter and frost the top. Place the second cake on top of the first one and frost its top as well. Then, frost the sides.
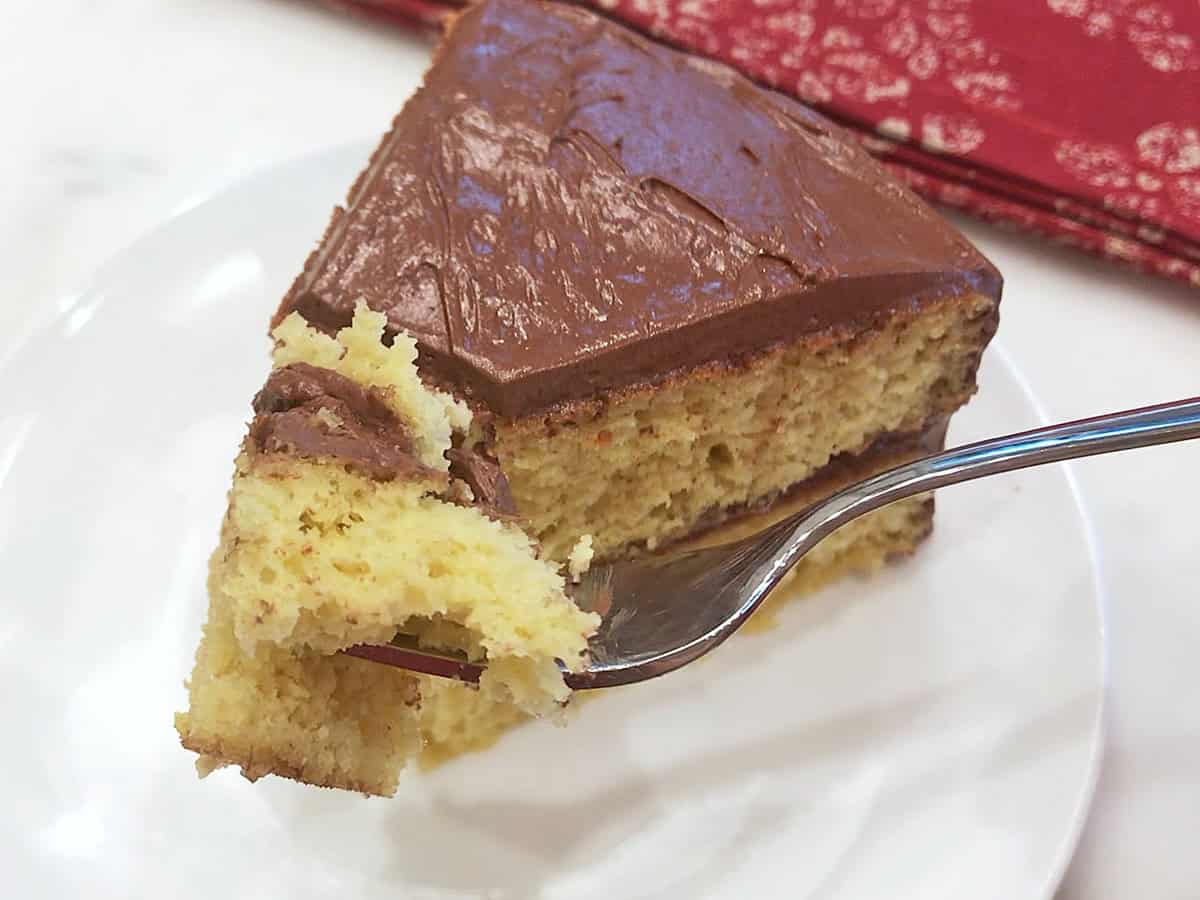
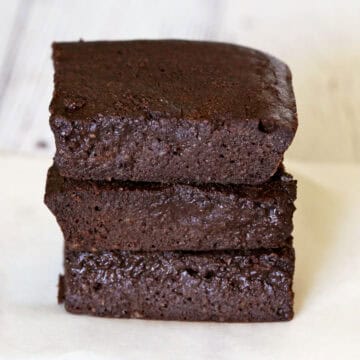
Slice and serve! Look at the cake's beautiful crumb - you can see in the photo how fluffy and tender it is.
Recipe Tips
- It's important to use nonstick cake pans and grease them well. Butter works better than nonstick spray. I replace my baking pans once a year, so they are always brand new and truly nonstick. These are the pans I use. If your pans are older, line their bottoms with a circle of parchment paper after greasing them and grease the parchment, too.
- Note that the tops of the cakes won't brown, even though they should be fully baked after about 15 minutes. This is fine, and the lack of browning is not an issue because we will frost the cake.
- Make sure the cake layers are completely cool before adding the frosting to prevent it from melting. You can speed up the process by placing the cakes, still on the cooling rack, in the fridge.
Recipe FAQs
Don't worry about the frosting too much. Homemade cakes are not supposed to be perfect.
The Internet is filled with tutorials on how to frost a cake, including shaving off the slight dome on top of the layers, brushing away crumbs, and applying a thin layer of frosting (a crumb coat) before frosting your cake. I don't do any of these.
The only specialty tool I use is an offset spatula, simply because it makes the task of spreading the frosting easier.
A granulated sweetener could cause the frosting to have a grainy mouthfeel. A powdered sweetener (or stevia) ensures smooth, velvety frosting.
No, because those will introduce too much liquid into the batter. But you can use your favorite granulated sweetener (powdered in the frosting).
You can store this cake in the fridge, covered, for up to five days. I don't own a cake dome, so I cover the cake plate with an inverted salad bowl. Remember to take the cake out of the fridge at least an hour, and preferably two hours, before you plan on enjoying it. Cake frosting is best at room temperature.
Recipe Card
Keto Birthday Cake
Video
Ingredients
Cake:
- 6 large eggs
- ¼ cup whole milk
- 6 tablespoons unsalted butter - melted; 3 ounces
- 2 teaspoons vanilla extract
- 2 teaspoons stevia glycerite - heaping; equals about ¾ cup of sugar
- 2 ¼ cups almond flour - blanched,superfine; 9 ounces
- ¼ teaspoon salt
- 2 teaspoons baking powder - fresh; gluten-free if needed
Chocolate Frosting:
- 1 cup unsalted butter - softened; 8 ounces
- ½ cup heavy cream
- ½ cup unsweetened cocoa powder - Dutch-processed; 1.5 ounces
- 1 teaspoon vanilla extract
- 1 tablespoon stevia glycerite - equals 1 cup of powdered sugar
Instructions
Bake the cake layers:
- Preheat the oven to 325°F. Generously butter two round 8-inch nonstick cake pans.

- In a large bowl, whisk together the eggs, milk, melted butter, vanilla, and stevia.6 large eggs, ¼ cup whole milk, 6 tablespoons unsalted butter, 2 teaspoons vanilla extract, 2 teaspoons stevia glycerite

- Add the almond flour, mixing it in with a rubber spatula and then whisking until the batter is smooth. Whisk in the salt and baking powder.2 ¼ cups almond flour, ¼ teaspoon salt, 2 teaspoons baking powder
- Divide the batter evenly between the two pans. To ensure the cake layers are the same size, it's best to use your kitchen scales and weigh the batter as you pour it into the pans. I weighed each cake at 360 grams.
- Bake the cakes in the middle of the oven until it is slightly puffed and set, and a toothpick inserted in their center comes out clean, 15-18 minutes. The tops of the cakes won't brown even when they are fully baked.

- Remove the cakes from the oven and place them on a wire rack. Let them cool for 10 minutes in the pans, then invert them directly onto the wire rack. Let them cool completely for at least 30 more minutes.


While the cakes are cooling, prepare the frosting:
- Place the softened unsalted butter, heavy cream, cocoa powder, vanilla, and stevia in a medium bowl. Using a handheld electric mixer, beat on low to incorporate, then beat on medium for about 1 minute until the frosting is light and fluffy. You can also mix the frosting by hand until it's light and fluffy.1 cup unsalted butter, ½ cup heavy cream, ½ cup unsweetened cocoa powder, 1 teaspoon vanilla extract, 1 tablespoon stevia glycerite


Assemble and frost the cake:
- Place one of the cake layers on a cake plate, flat side up. To keep the plate clean, you can line the plate with strips of wax paper to protect the plate (let them overhang), then pull them from underneath the cake once you're done frosting it. Alternatively, use a cake board.
- Place ⅓ cup of frosting in the middle of the cake and use an offset spatula to spread the frosting over the top of the cake.
- Gently place the second cake layer on top of the first one, flat side up. There's no need to press on it. Place another ⅓ cup of frosting on top of this second cake, and use the spatula to spread it all over the top of the cake.
- Use the remaining frosting to frost the sides of the cake.
- Once frosted, you can cut the cake and serve it. You can also refrigerate it, covered, until ready to serve. Take it out of the fridge 2 hours before you plan on serving it.


Notes
- Sweetness is a personal preference. Use these amounts as a guide and adjust to taste.
- It's important to use nonstick cake pans and grease them well. Butter works better than nonstick spray. I replace my baking pans once a year, so they are always brand new and truly nonstick.
- If your pans are not brand new and super nonstick, line their bottoms with a parchment circle after greasing them and grease the parchment too.
- A granulated sweetener in the frosting instead of stevia will feel grainy, so please use a powdered sweetener and add a bit more heavy cream (start with ¼ cup) to get the right consistency.
- I recommend using Dutch-processed cocoa powder (cocoa treated with alkali) in the frosting. It's milder and less acidic than natural cocoa powder. This is not mandatory, but I tried both options, and I like the frosting better with the Dutched cocoa.
- Make sure the cake layers are completely cool before frosting the cake, or the frosting will melt as you spread it on the warm layers. You can speed up the process by placing the cakes, still on the cooling rack, in the fridge.
- You can store this cake in the fridge, covered, for up to five days. I don't own a cake dome, so I cover the cake plate with an inverted salad bowl. Do remember to take the cake out of the fridge at least an hour, and preferably two hours, before you plan on enjoying it. Frosting is always best at room temperature.
Nutrition per Serving
Save this Recipe!
We will also add you to our weekly newsletter. Unsubscribe anytime. See healthyrecipesblogs.com/privacy/ to learn how we use your email.
Disclaimers
Most recipes are low-carb and gluten-free, but some are not. Recommended products are not guaranteed to be gluten-free. Nutrition info is approximate - please verify it. The carb count excludes non-nutritive sweeteners. Please read these Terms of Use before using any of my recipes.


Allyson says
I don’t have the stevia glycerite on hand, would I be able to substitute regular liquid stevia?
Vered DeLeeuw says
Hi Allyson,
Sure! You can use any stevia product to equal about 3/4 cup of sugar in the cake and 1 cup of sugar in the frosting, following the conversion instructions on the package. Just a quick heads-up that regular liquid stevia can have a more noticeable bitter aftertaste, so if you're not already used to it, the bitter flavor might be quite noticeable.
Janet B says
Can this be made in a 13x9 pan using the same instructions?
Vered DeLeeuw says
Hi Janet,
Yes, but you might have extra batter. Fill the 13x9 pan no more then 2/3 full.
It will likely take longer to bake. Test with a toothpick in the center — it should come out clean or with a few moist crumbs.
BobT says
Was getting ready to make this Keto Birthday cake based on the full recipe and just realized I have a Question I didn't realize before: recipe card states Almond flour, FINELY ground, but the flour link and picture both indicate Super Fine ground. My research says ratio for substituting between the two is Fine 1 Cup: 1 1/4 Cup superfine.
When I last made this recipe, I used fine ground without any adjustment and it seemed to come out fine. Should I be adjusting quantity to use the fine ground flour?
Vered DeLeeuw says
Hi Bob,
Both work - no need to make adjustments. It's mostly important to avoid using natural almond meal.
However, since I typically use Bob's Red Mill superfine almond flour, I went ahead and edited the recipe to reflect that. Thank you for pointing it out.
BobT says
I love this cake! Simple to make and very tasty. I did substitute granular allulose/monk sweetener and added 1 TBsp of milk as suggested.
Relatively new to baking, let alone low carb but not strict keto. So this simple recipe has become my GOTO recipe for a basic cake and am now using it with variations to make other cakes, like a spice cake.
I did modify it for and 8"x8" by simply scaling the recipe back to 8 slices (67%) to match the surface area difference from two 8" rounds. Happens to make the egg quantity of 4 whole eggs as well. With only 2 in our household, I try to scale back any recipes to fit a smaller pan using the quantity of whole eggs as a gauge.
Now a question - Any reason I couldn't use this cake recipe in making a Boston Creme Pie?
Vered DeLeeuw says
Hey Bob,
Thank you very much for yet another detailed review!
I think this would work for Boston cream pie. However, I haven't tried it myself. I would love to hear your thoughts if you give it a try!
Janet says
If I were to halve the recipe, would I bake it in an 8 inch glass square like your chocolate cake recipe?
Vered DeLeeuw says
Hi Janet,
I assume you're going for a 1-layer cake topped with one layer of frosting.
An 8-inch square pan holds 8 cups while an 8-inch round pan holds 6 cups. So, you would need to use an 8-inch round pan.
If you don't own an 8-inch round pan and would like to use an 8-inch square pan, you would need to halve the ingredients and then increase them by about a third. Try these amounts:
4 large eggs, 3 tablespoons milk, 4 tablespoons butter, 1 teaspoon vanilla, 1 heaping teaspoon stevia glycerite, 6 ounces almond flour, pinch salt, 1 teaspoon baking powder.
For the frosting: 10 tablespoons unsalted butter, 1/3 cup heavy cream, 1/3 cup cocoa powder, 1/2 teaspoon vanilla, 1/2 heaping tablespoon stevia glycerite.
I hope it works!
Marilyn says
Can this be used for cupcakes? If so how long would you bake them?
Vered DeLeeuw says
Hi Marilyn,
I think so. Please use greased foil or parchment liners - they will stick to standard paper ones. Bake for 15 minutes and check with a toothpick.
Elaine says
This recipe was spectacular!!! so easy to make and create, and my family inhaled it!
Vered DeLeeuw says
Yay! I'm so glad this was a success, Elaine! Thank you for taking the time to share your experience.