When I want an easy chicken recipe that feels satisfying, this is the one I come back to. Minimal prep, dependable results, and leftovers that reheat beautifully.
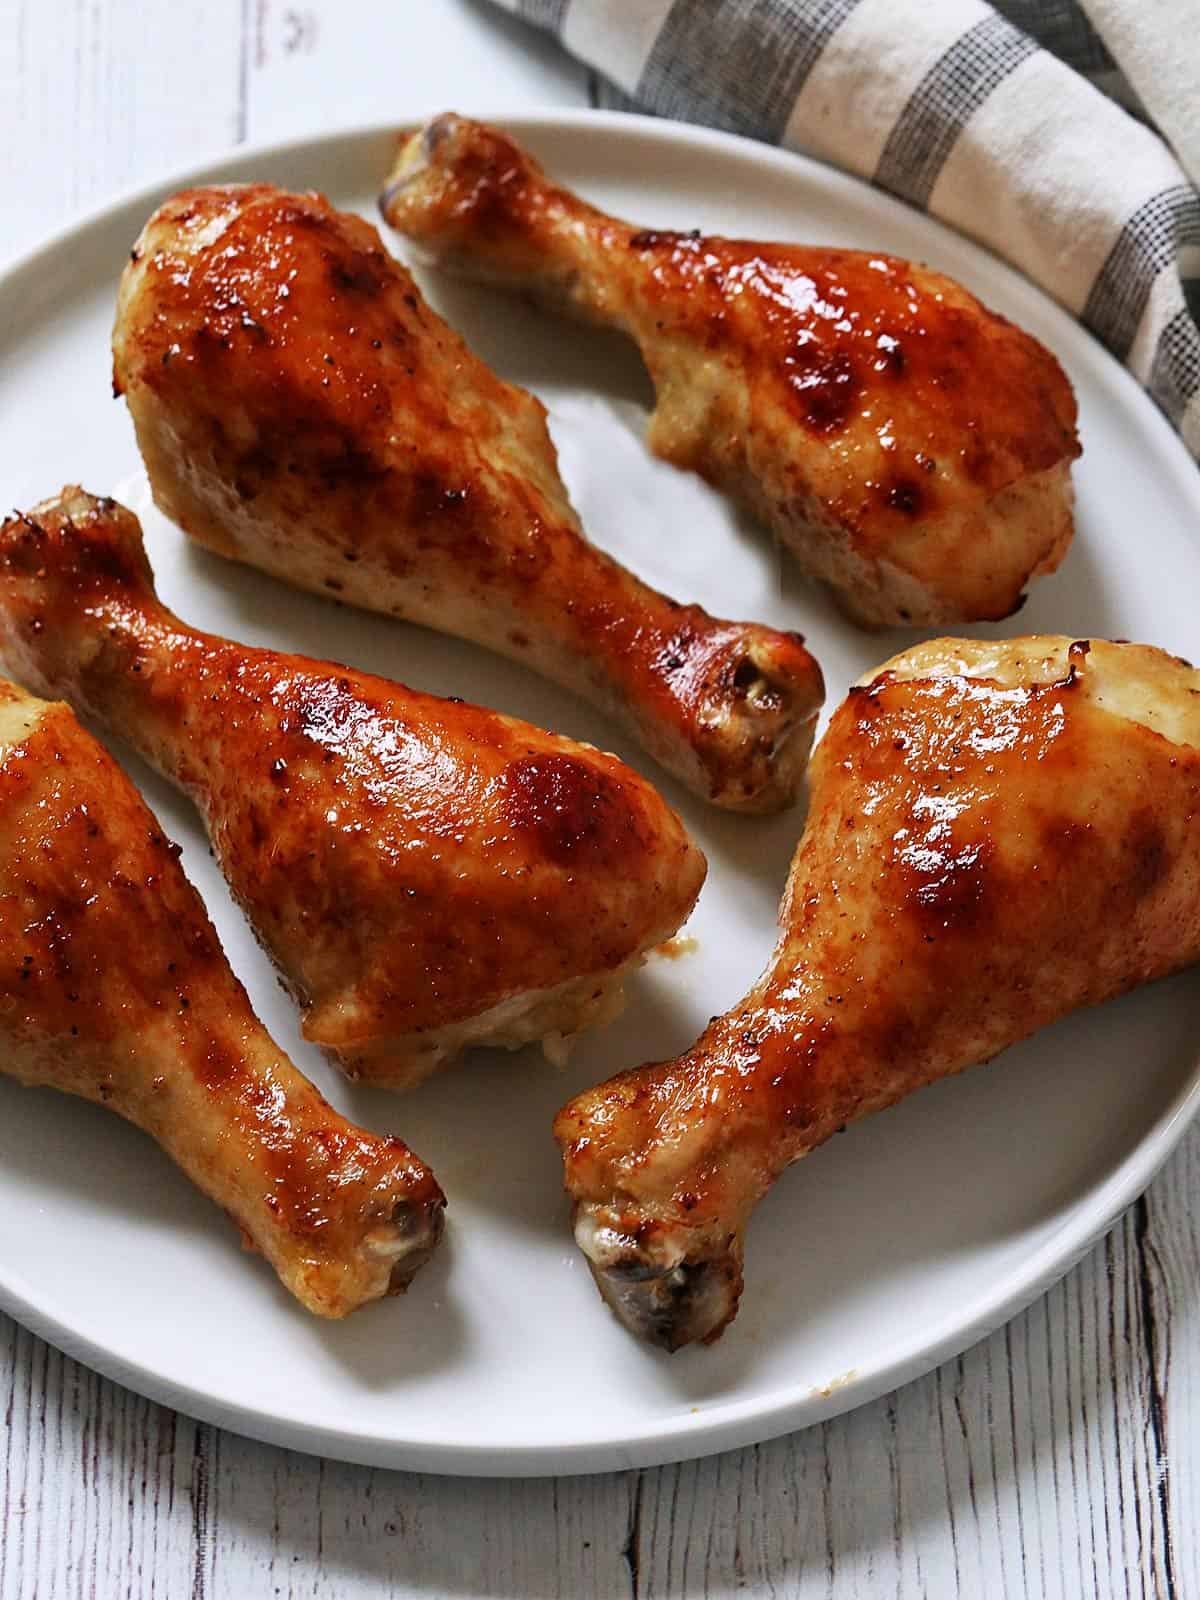
This honey garlic chicken is one of those recipes that proves simple ingredients really are enough. The chicken bakes gently in a mixture of honey, butter, garlic, and Dijon, turning tender and flavorful without much effort. It's the kind of dinner that works just as well for a busy weeknight as it does for a relaxed weekend meal.
Ingredients and Substitutions
See the recipe card for exact measurements. Here are my comments on some of the ingredients.
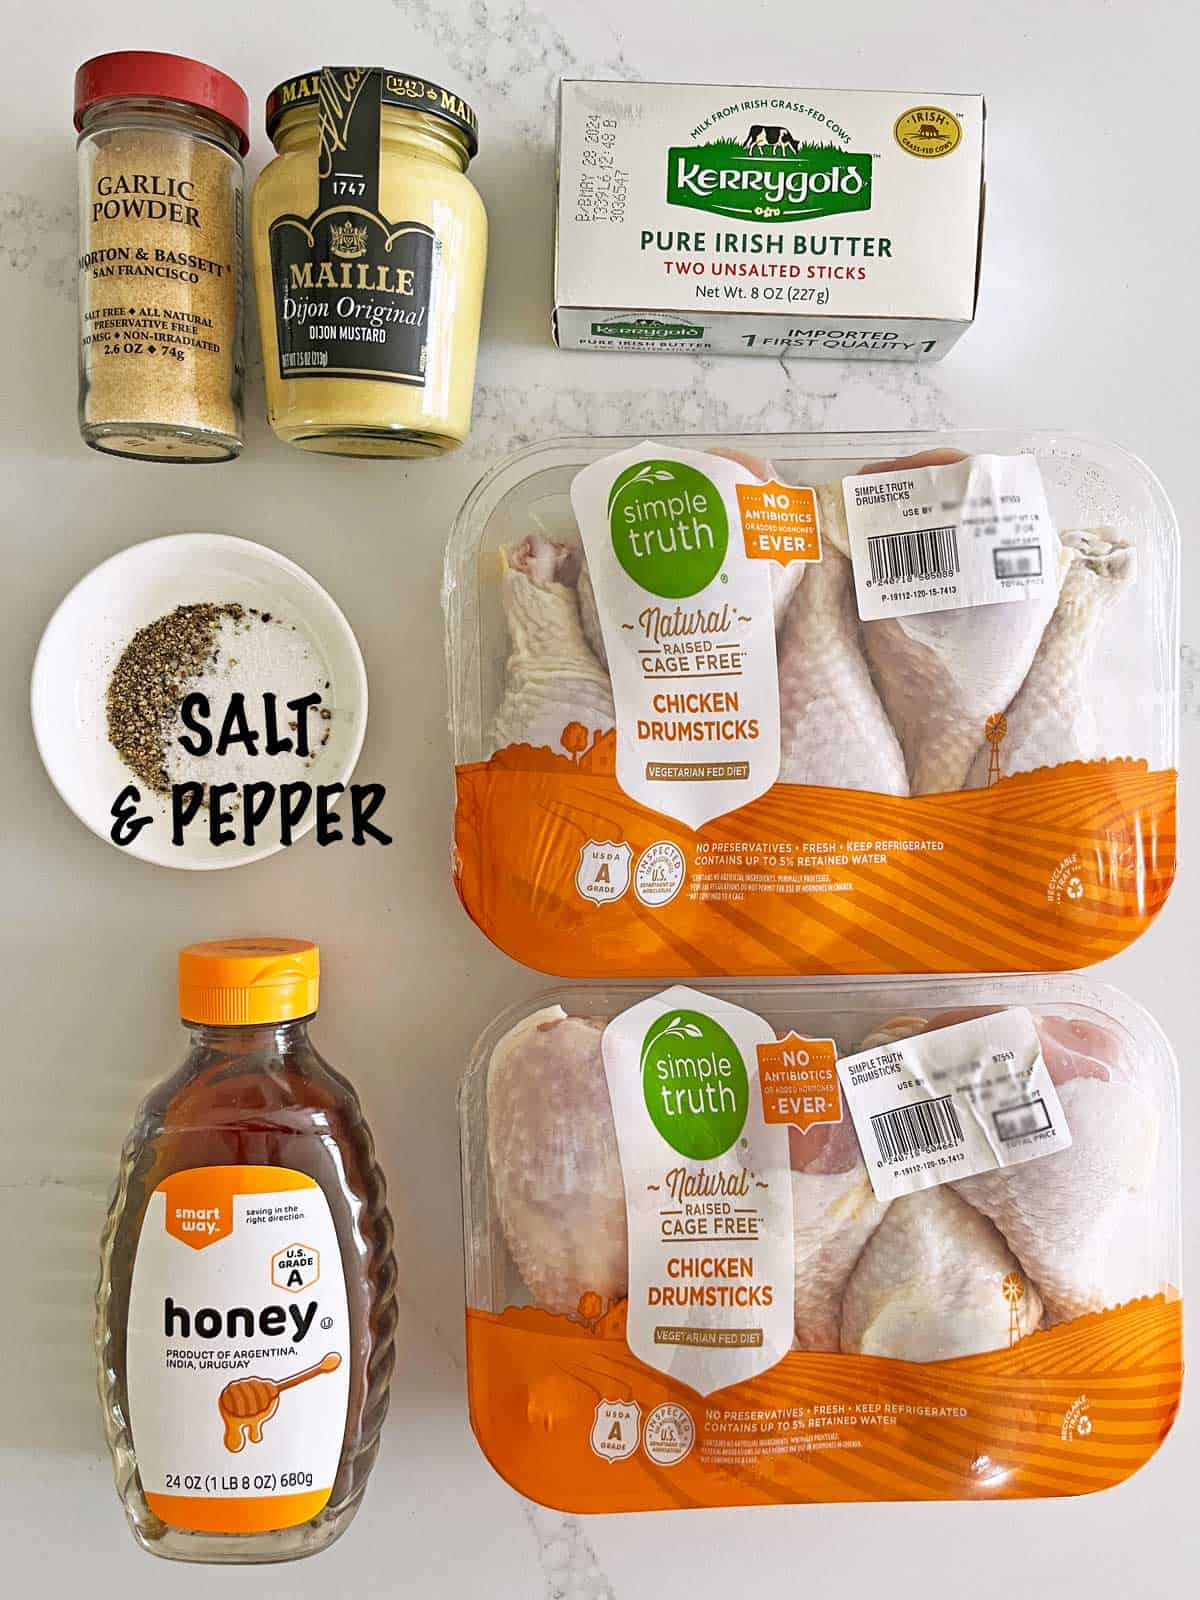
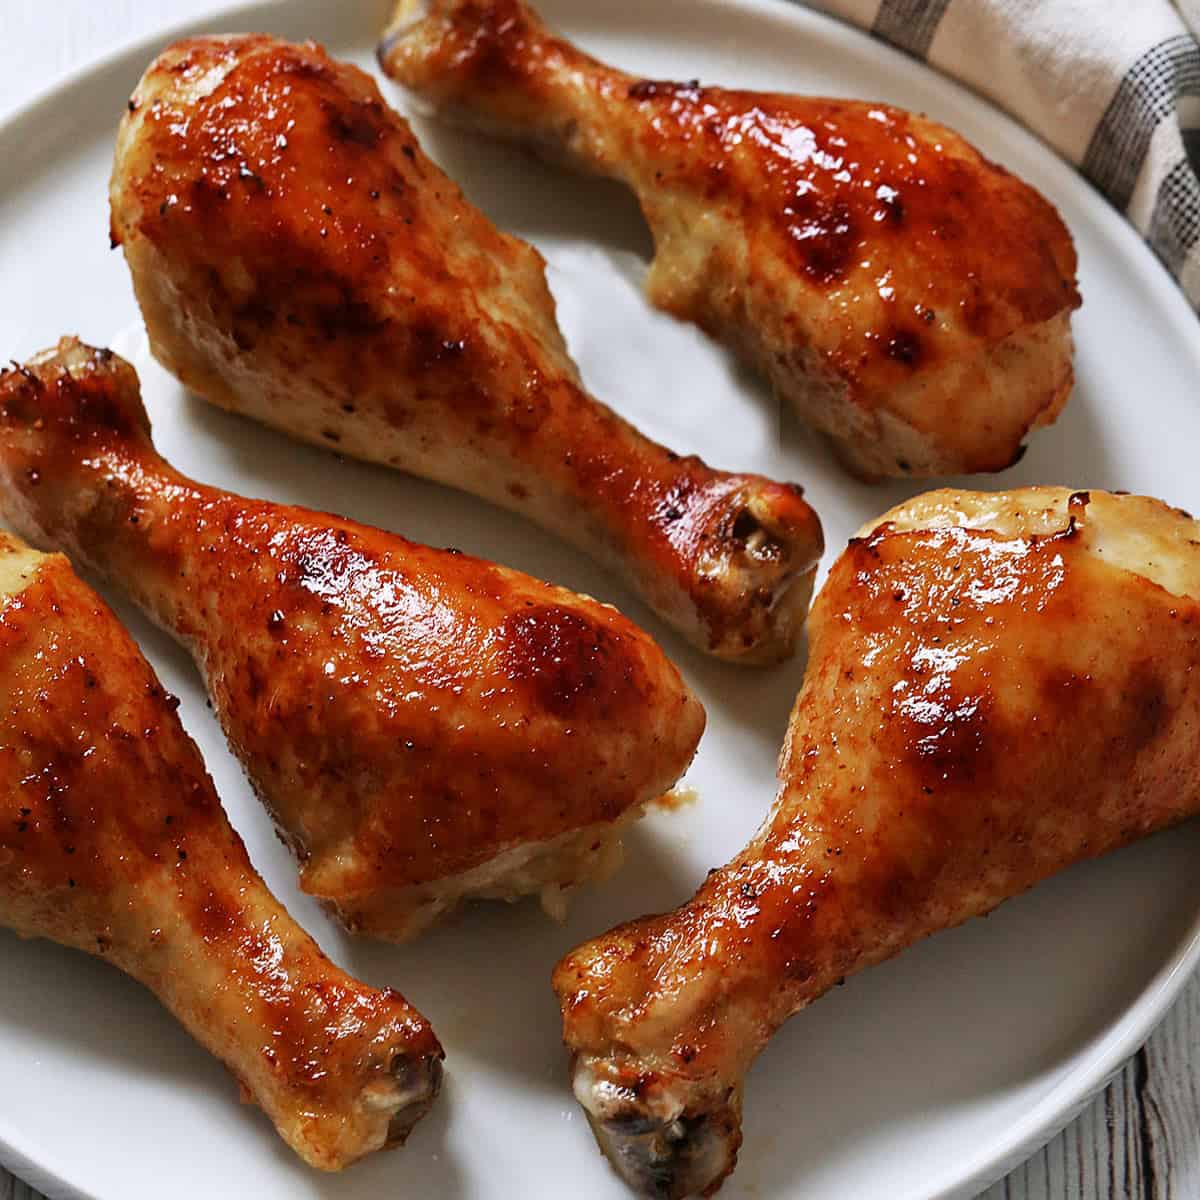
- Chicken: I typically use chicken drumsticks, but you can use other parts and adjust the cooking time. If using bone-in chicken thighs or chicken leg quarters, add 10-15 minutes to the cooking time. Always aim for an internal temperature of 165°F when cooking chicken, and check the internal temperature with an instant-read thermometer, not touching the bone.
- Honey: It has two roles in this recipe. It adds great flavor and promotes caramelizing.
- To season: Kosher salt, black pepper, and garlic powder. I prefer garlic powder to fresh garlic because it coats the chicken pieces uniformly.
Instructions
The detailed instructions and step-by-step photos are included in the recipe card. Here's a quick overview.
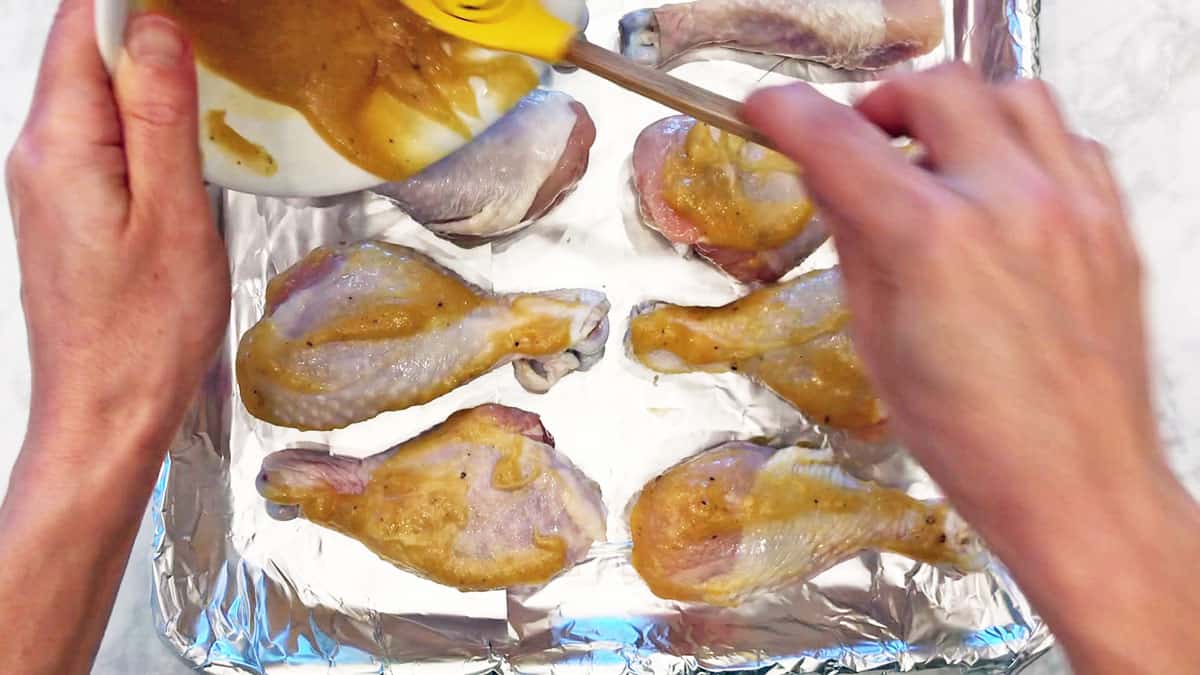
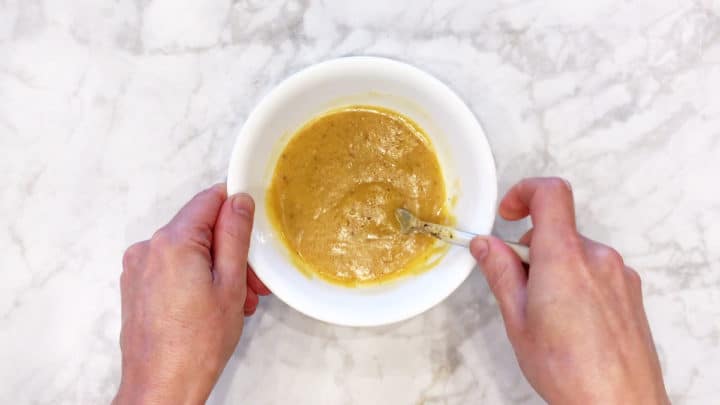
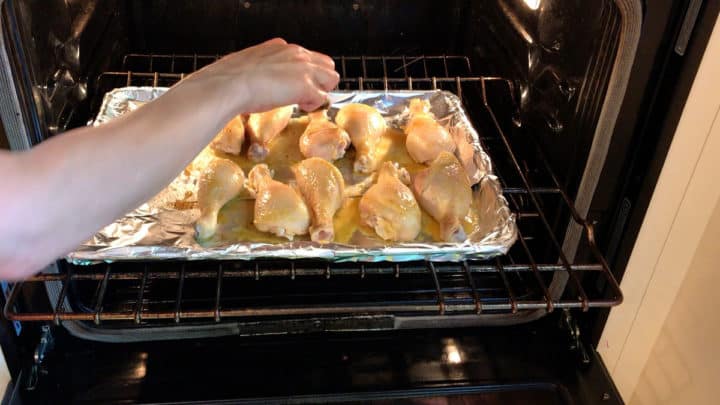
Make a quick sauce of melted butter, honey, Dijon mustard, and garlic powder. Coat the chicken pieces with the sauce.
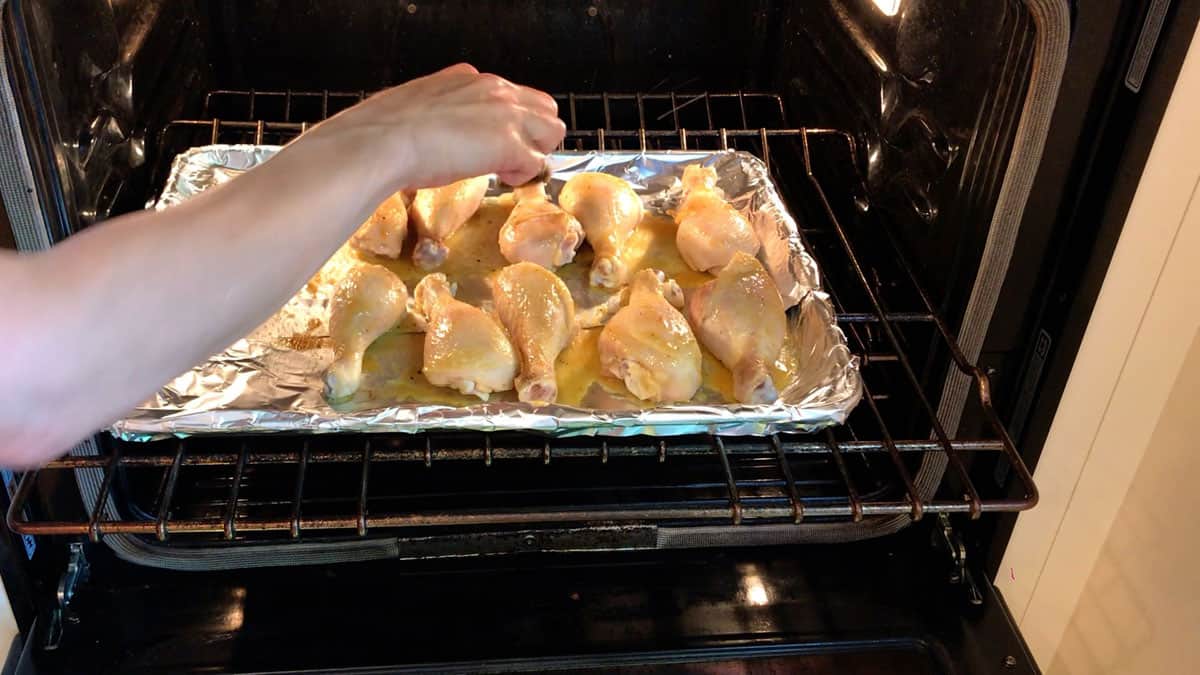
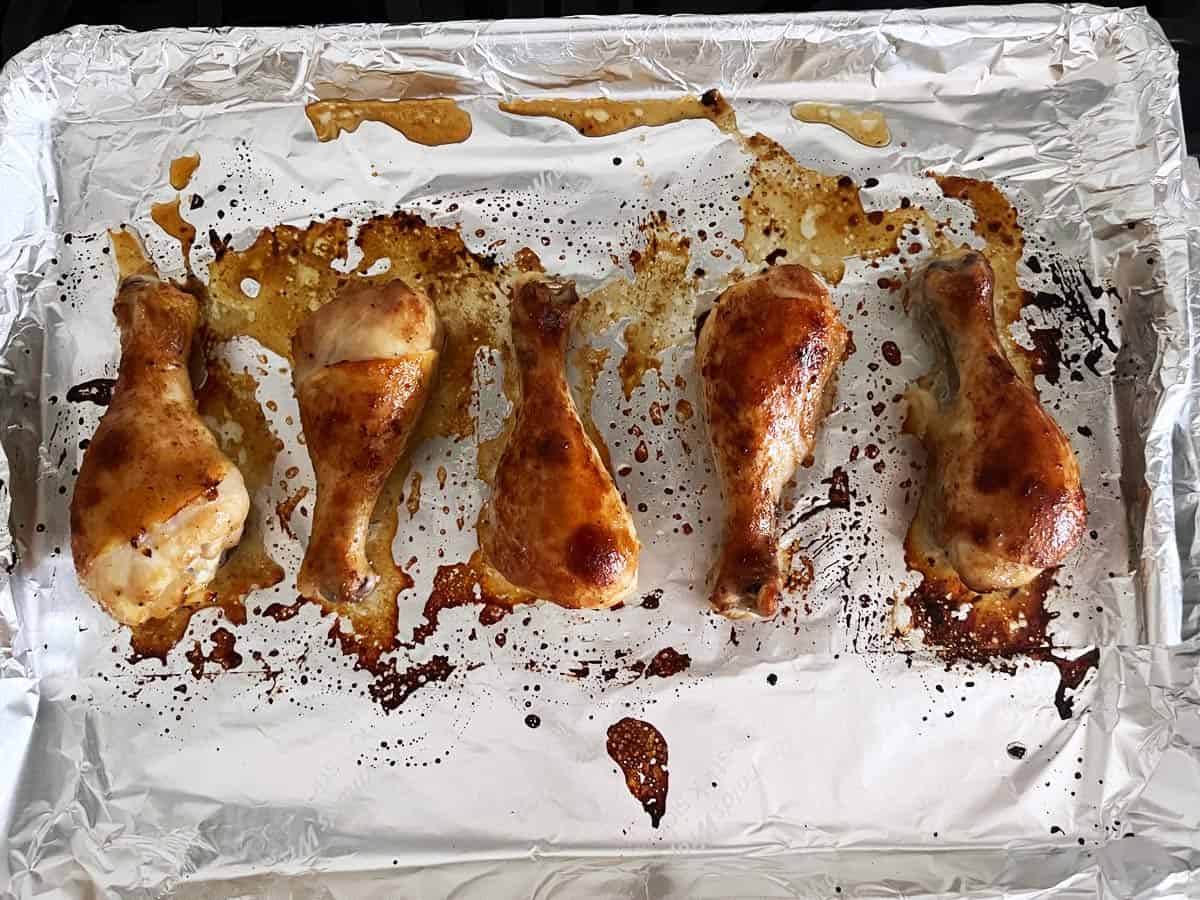
Bake the chicken for 60 minutes at 350°F, basting every 15 minutes with a clean brush.
Serve immediately.
Thank you, delicious!
I especially loved that it did not include soy sauce. So many honey/garlic recipes include soy, but there was so much flavor in these without it. I did top with sesame seeds when I took it out of the oven. Yum!
Seth
Read more comments
Recipe Tips
- I normally cook chicken at a relatively high temperature, at least 400°F (this jerk chicken recipe is a good example), and for a relatively short time. This method produces juicy chicken. But in this recipe, if the temperature is too high, the honey will burn. So I keep the temperature at 350°F and bake for a little longer.
- Basting the chicken is important. Not just to help keep it juicy, but also because the sauce tends to stick to the bottom of the pan, so mixing it up every 15 minutes prevents it from burning.
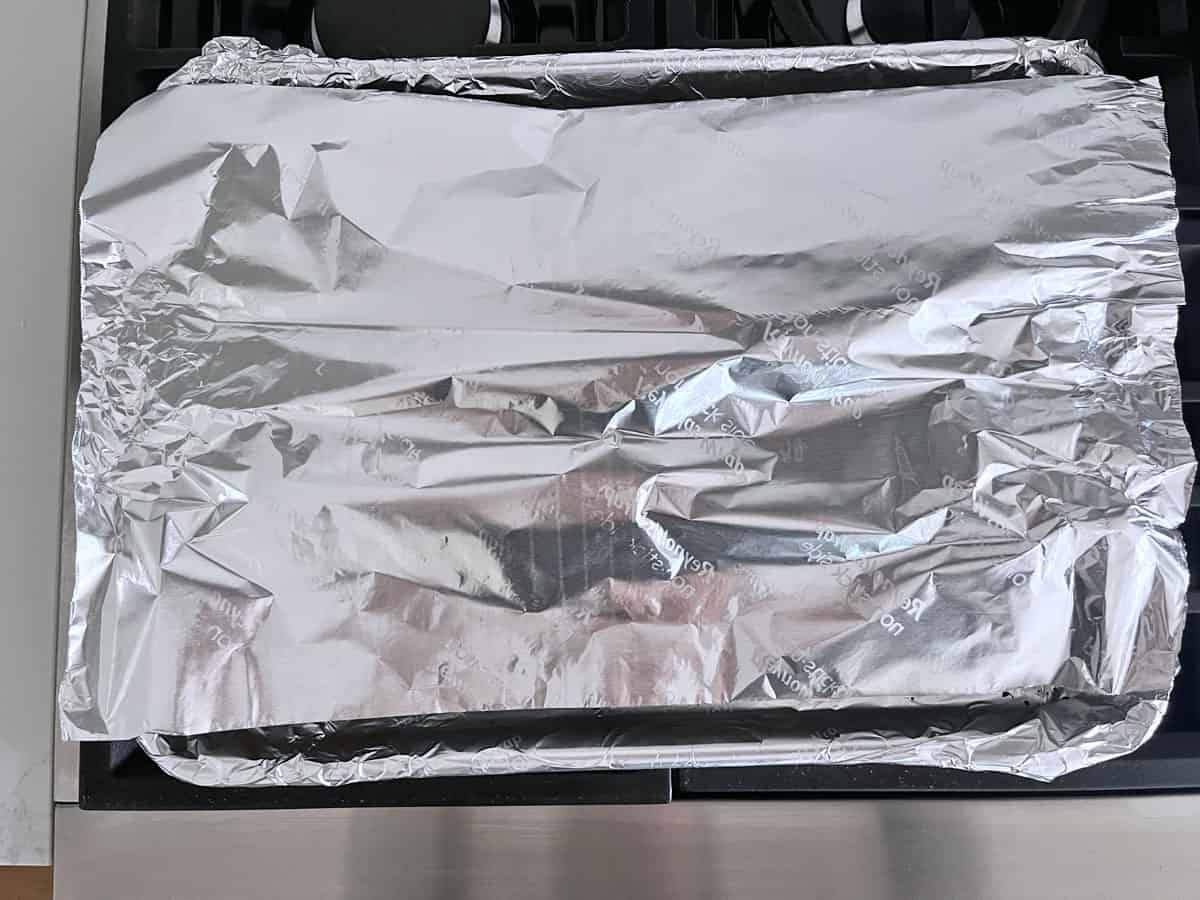
- If the tops are darkening too much, loosely cover the chicken with foil (as shown in the photo below) and continue baking until it's cooked through. Its internal temperature should reach 165°F.
Recipe FAQs
I use skin-on chicken. You can remove the skin if you wish, but the crispy skin greatly enhances this dish.
Yes. You can use real maple syrup instead of honey. Sugar-free syrups work, too, if you're on a low-carb diet.
Yes, but Dijon mustard is better. It's creamier and less vinegary than yellow mustard.
Easy! Replace the butter with olive oil.
Serving Suggestions
Honey garlic chicken pairs well with lightly sweet side dishes. You can see two examples in the photos below - in the first, it's served with mashed sweet potatoes and sauteed spinach:

In the second, it's shown with a side of honey-glazed carrots:

Storing and Using the Leftovers
You can keep the leftovers in an airtight container (as shown in the image below) in the fridge for 3-4 days. Reheat them in the microwave, covered, at 50% power, or in a 350°F oven for about 10 minutes or until heated through.
The cooled leftovers can also be frozen in freezer bags for up to three months. Thaw them overnight in the fridge and then reheat them in the microwave or oven.

Instead of reheating them, you can enjoy the leftovers cold. The image below shows the cold leftovers served with a side of spinach salad for a truly easy meal. I did remove them from the fridge 30 minutes before our meal to take some of the chill off.

Recipe Card

Honey Garlic Chicken Recipe
Video
Ingredients
- 10 chicken drumsticks - 4 ounces each, skin-on
- 2 tablespoons butter - melted
- 2 tablespoons honey
- 2 tablespoons Dijon mustard
- 1 teaspoon Diamond Crystal kosher salt - or ½ teaspoon of any other salt, including Morton kosher salt
- ¼ teaspoon black pepper
- 1 teaspoon garlic powder
Instructions
- Preheat the oven to 350°F. Line a large, rimmed baking sheet with foil (to save you some serious cleanup later as the honey caramelizes) and grease the foil.

- Arrange the drumsticks in the pan. Whisk together the melted butter, honey, mustard, salt, black pepper, and garlic powder.10 chicken drumsticks, 2 tablespoons butter, 2 tablespoons honey, 2 tablespoons Dijon mustard, 1 teaspoon Diamond Crystal kosher salt, ¼ teaspoon black pepper, 1 teaspoon garlic powder

- Evenly pour the mixture over the chicken, brushing all over to coat.
- Bake, basting with a clean pastry brush every 15 minutes, until the chicken is browned and cooked through and the juices run clear. In my old oven, it took 75 minutes. In the new one, which I believe is more accurate, it takes 60 minutes. The chicken should reach an internal temperature of 165°F as measured by an instant-read thermometer, not touching the bone.
- Baste the chicken one last time and serve.


Notes
- Saltiness and sweetness preferences are highly personal. Adjust to taste.
- I use skin-on chicken. You can remove the skin if you wish, but the crispy skin greatly enhances this dish.
- I typically use chicken drumsticks, but you can use other parts and adjust the cooking time. If using bone-in chicken thighs or chicken leg quarters, add 10-15 minutes to the cooking time and cover the chicken with foil if it gets too dark on top. Always aim for an internal temperature of 165°F when cooking chicken, and check the internal temperature with an instant-read thermometer, not touching the bone.
- Basting the chicken is important. Not just to help keep it juicy, but also because the sauce tends to stick to the bottom of the pan, so mixing it up every 15 minutes prevents it from burning.
- If the tops are getting too dark before the chicken is done, loosely cover the pan with foil and keep baking. Sometimes, just a few of them are browning too fast - if this happens, I move those to one side of the pan and cover just them with foil.
- You can keep the leftovers in an airtight container in the fridge for 3-4 days. Reheat them in the microwave, covered, at 50% power, or in a 350°F oven for about ten minutes or until heated through. You can also enjoy them cold.
- The cooled leftovers can be frozen in freezer bags for up to three months. Thaw them overnight in the fridge and then reheat them in the microwave or oven.
Nutrition per Serving
Save this Recipe!
We will also add you to our weekly newsletter. Unsubscribe anytime. See healthyrecipesblogs.com/privacy/ to learn how we use your email.
Disclaimers
Most recipes are low-carb and gluten-free, but some are not. Recommended products are not guaranteed to be gluten-free. Nutrition info is approximate - please verify it. The carb count excludes non-nutritive sweeteners. Please read these Terms of Use before using any of my recipes.


Annette Guarino says
My family absolutely loved this recipe. It is extremely easy to make and deeeeelicious. I will be making it again and again.
Vered DeLeeuw says
Wonderful, Annette! Many thanks for the review.